How to Resize Partition with AOMEI Partition Assistant?
What is partition resizing? How to resize a partition? Resizing partition includes extending partition and shrinking partition. With the help of AOMEI Partition Assistant you could resize partition accurately and easily.
Overview of Resize Partition
Here are several situations in which you would like to resize partition
For example, once when I was downloading a player online, following the installation steps without setting the destination, a message came saying that my C disk does not have enough space to install the application. Thus, I have to either reset the destination or give up my intention. Therefore, later, I set the D or F partition as the destination to avoid such a problem, following the advice of my friends.
I know I can extend my C drive with Windows' self-contained function, but I didn’t know how because it seems very difficult. Being neither a computer professional nor a computer lover, I’ve usually been caught by problems. It is extremely annoying! But now, I’m not troubled by such problems anymore with AOMEI Partition Assistant. It helps me manage my disks very well with its intuitive interface and simple steps. By the way, it is compatible with Windows 11, Windows 10, Windows 8/8.1, and Windows 7.
How to resize partition with Partition Assistant
Before you do
- Download and install AOMEI Partition Assistant on a Windows computer.
- Check the partitions you want to resize and make sure there is no error.
- To resize a partition, there must be enough free space on the same drive.
- Do not forcibly terminate the tasks or cut off the power; otherwise, you might lose your data.
- Close all running applications on the partitions you want to resize.
- For more detailed information, you could view the tutorial "How to Safely Partition?"
Case 1: Extend Partition
Step 1: Select a partition to Resize/Move Partition

Step 2: Manually extend the partition
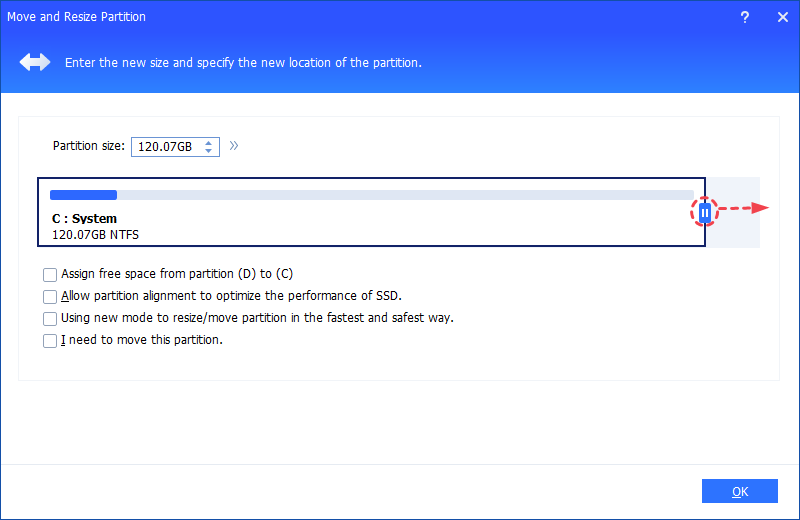
- There is an option "Using new mode to resize/move partition in the fastest and safest way.". If you tick this option, it will be safer and faster to resize your partitions, especially for NTFS partitions. Once this option is checked, the data will be intact even if the software ends abruptly or is cancelled during the operation.
- If there is no enough space on the C drive, you can use the "App Mover" tool to move programs and folders to another external drive to free up your drive space.
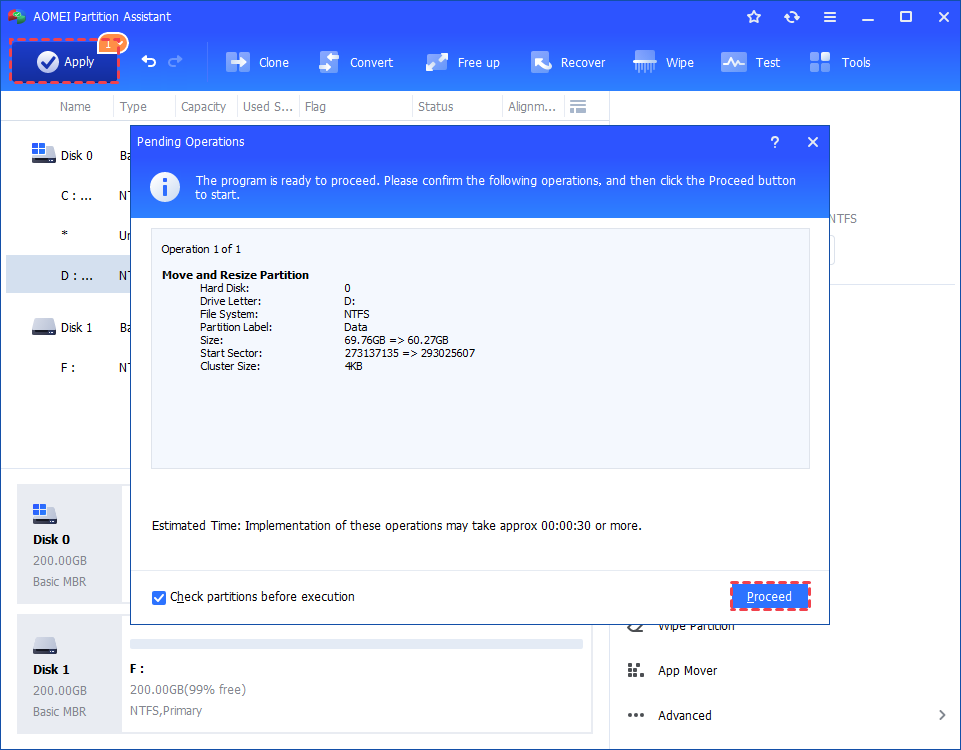
Step 3: Apply to proceed

- AOMEI Partition Assistant also allows you to extend a partition even without unallocated space or contiguous unallocated space. Please refer to how to allocate free space, how to use extend partition wizard or how to merge partitions.
- If you want to extend the system reserved partition, you can move the unallocated space to the right side of the system reserved partition and then use the feature Resize Partition.
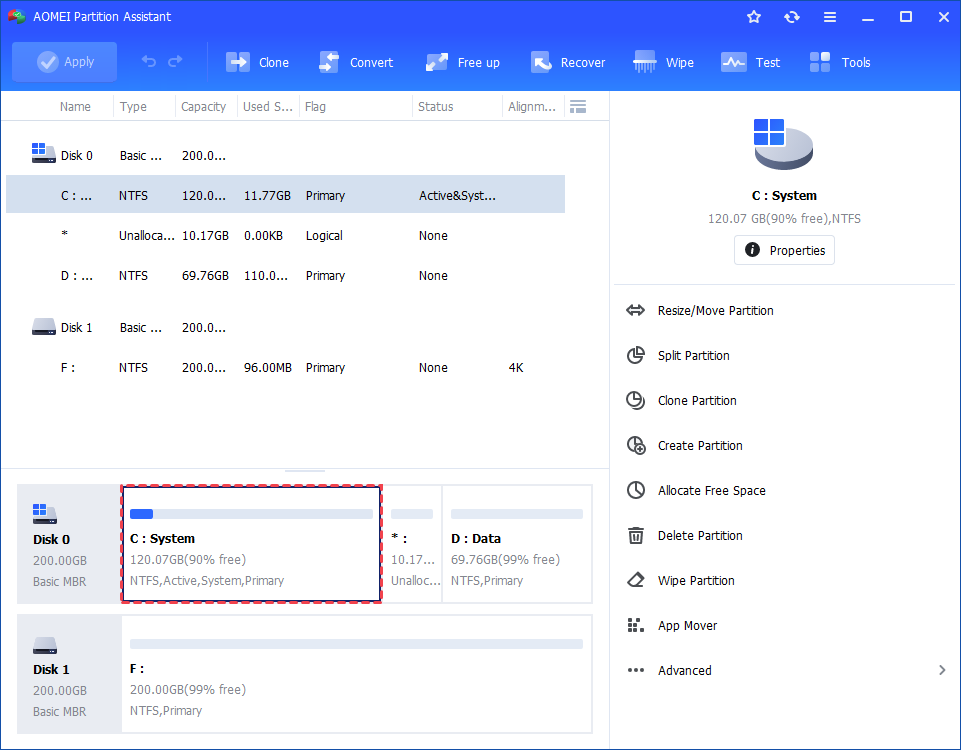
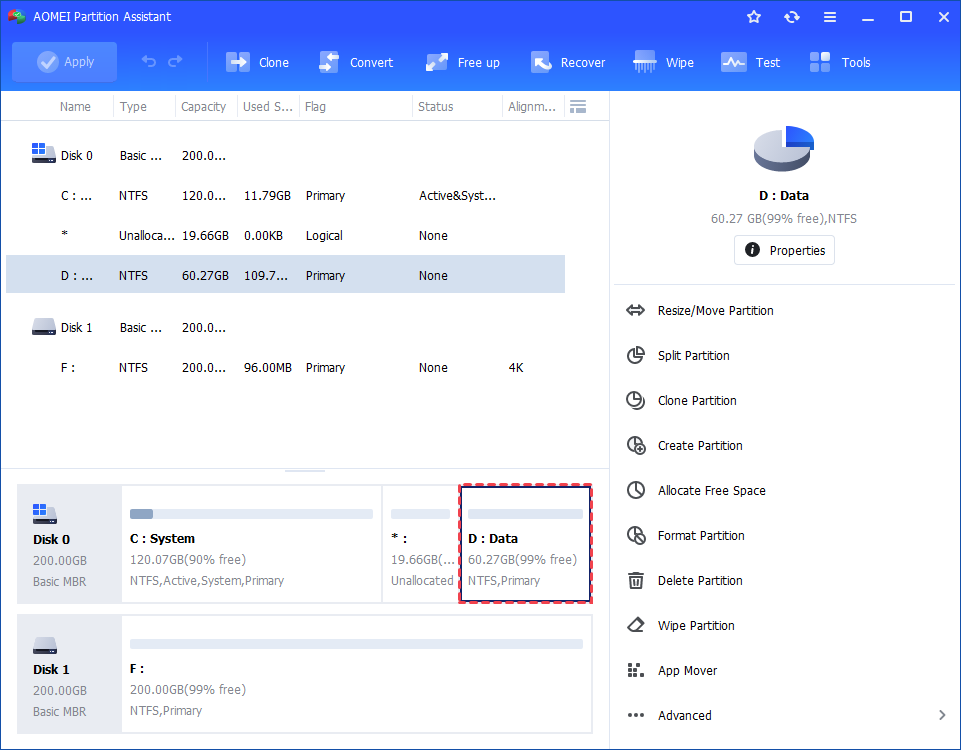
Step 4: Extend successfully
Wait for the operation to be finished. After it is completed successfully, you will find the C: partition has been expanded.
Case 2: Shrink Partition
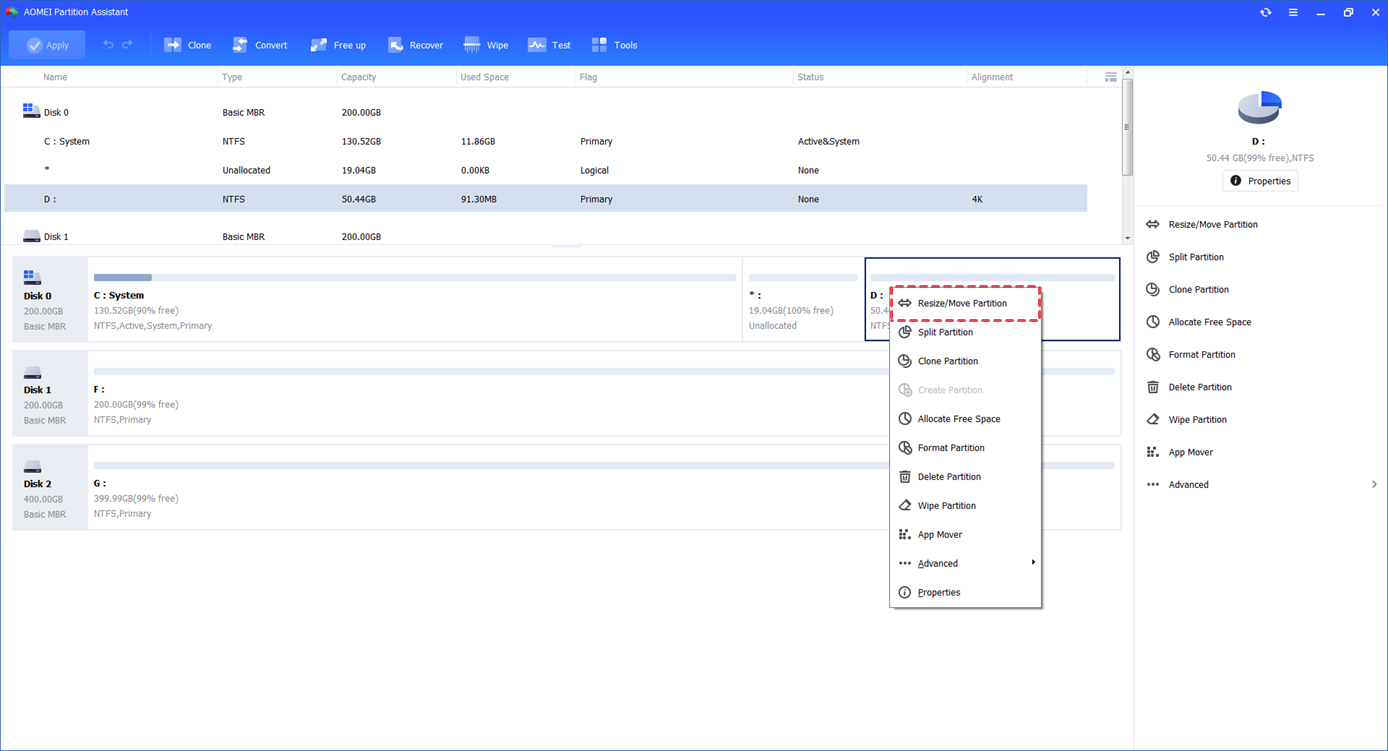
Step 1: Select a partition to Resize/Move Partition
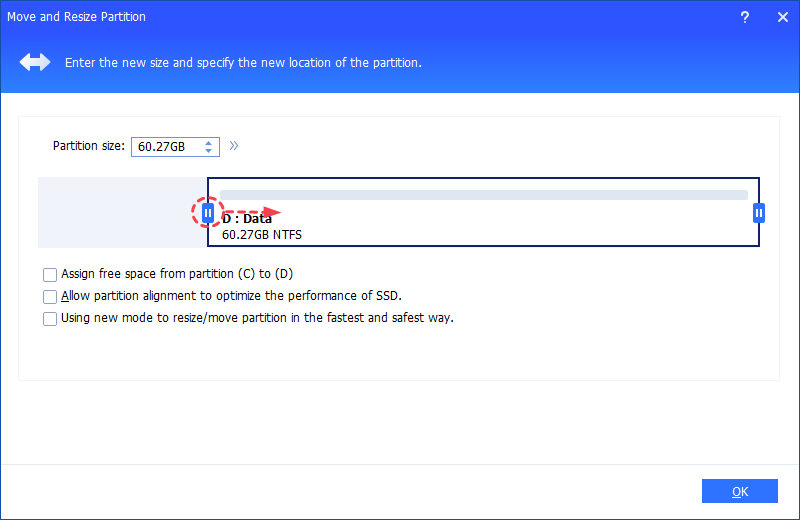
Step 2: Manually shrink the partition
Step 3: Apply to proceed
Step 4: Shrink successfully
Conclusion
Following the above steps, your partitions will be expanded or shrunk successfully. It is a very useful tool to help you manage your disk space in an easier and faster way.
This feature is usually used to expand partitions if one partition has run out of space while there is more free space on other partitions or unallocated space on the drive. For instance, this feature helps you extend your system partition if your computer gets a message of insufficient space.
Furthermore, Partition Assistant also provides more wizards to help you quickly adjust partitions, such as allocate free space, or expand partition wizard, etc.
-
The partition shrinking operation will be performed under PreOS Mode, and your computer will reboot when:
- For a BitLocker BitLocker-encrypted partition, Partition Assistant will first decrypt the BitLocker encryption in advance.
FAQs
Q: Why is the option "Resize Partition" greyed out?
A: For ReFS, ExT2/3, ExFAT file systems, and other unknown file systems, it is unable to resize. AOMEI Partition Assistant only supports the format, delete, and wipe operations.
Q: Is it possible to resize the exFAT partition?
A: Currently, it is unable to resize the exFAT partition.
Q: How long will it take to resize a partition?
A: It depends on the amount of data. The program will also prompt for an estimated time after clicking the "Apply" button.
Q: Is it possible to use the feature "Resize Partition" to extend a partition with space from another hard disk?
A: No, currently, you can only use the feature to extend a partition with space on the same disk.