Full Guide: Migrate Windows/Mac OS from Slow HDD to Fast SSD Drives
Want to speed up your Windows/Mac computer and enjoy better performance? You can start a fresh installation onto SSD drive or directly migrate OS to SSD drive.
By Emily / Updated on May 12, 2023
Necessary to migrate OS from HDD to SSD
In today’s era, most desktops, laptops and other computer devices come with traditional Hard Disk Drive (HDD) which are kind of outdated and slow. Meanwhile, along with more applications, programs, files being downloaded and stored on the Hard Disk Drive, the computer’s running and responding speed will be affected significantly.
When the slow computer does not support some basic operations like surfing, emailing, media consumption, many users are more likely to upgrade either RAM or HDD, or upgrade both of them. But in fact, RAM is not the actual cause for computer running slowly, so this won’t make much visible difference. Instead, it is the (HDD) with slow spindle speed (around 5400 revolutions per minute) that leads to the slowness of computing devices.

Therefore, upgrading the old, slow HDD to a new and extremely fast Solid State Drive (SSD) is the most recommended way to speed up an old computer. Since SSD is much faster in reading and writing data than HDD, you can enjoy a speedy boot process and the applications/Webpage will load very quickly (for more difference between SSD and HDD, refer to “SSD vs HDD: Which One is Better for You to Select?”). A big day and night difference!!
How to Move OS to SSD drive?
To migrate OS to SSD drive or another HDD, you can perform a clean reinstallation, which always requires an operating system installation disc. Moreover, all your precious data on the original system drive will be erased, so you need to set up OS, download and install some programs again. Quite time-consuming and troublesome! Luckily, there is another better choice: directly migrate OS from HDD to SSD drive, which will directly transfer all data (original OS, programs, applications) on the system drive/partition to another SSD/HDD.
But the real problem is how to realize such OS migration from HDD to SSD drive? here comes this tutorial to help you.
Part 1. Getting everything prepared
Basically, you will have to prepare something for this OS migration to work. Here is what we recommend:
> A good-condition SSD drive. Its free space should be large enough to store all data on your original system drive. If not, you can try to delete unnecessary files from your current SSD drive to free up more disk space.
> Make a data backup. It is never a good idea, at any time, to start messing around with your hard drive without a backup. To avoid data loss during the migration, please make a full backup of your important data before starting.
> OS migration tools. For moving Windows operating system, you can try AOMEI Partition Assistant. For transferring Mac operating system, SuperDuper is a good choice.
Part 2. Start the process
>> First of all, we will show you how to migrate Windows OS from HDD to SSD drive via AOMEI Partition Assistant.
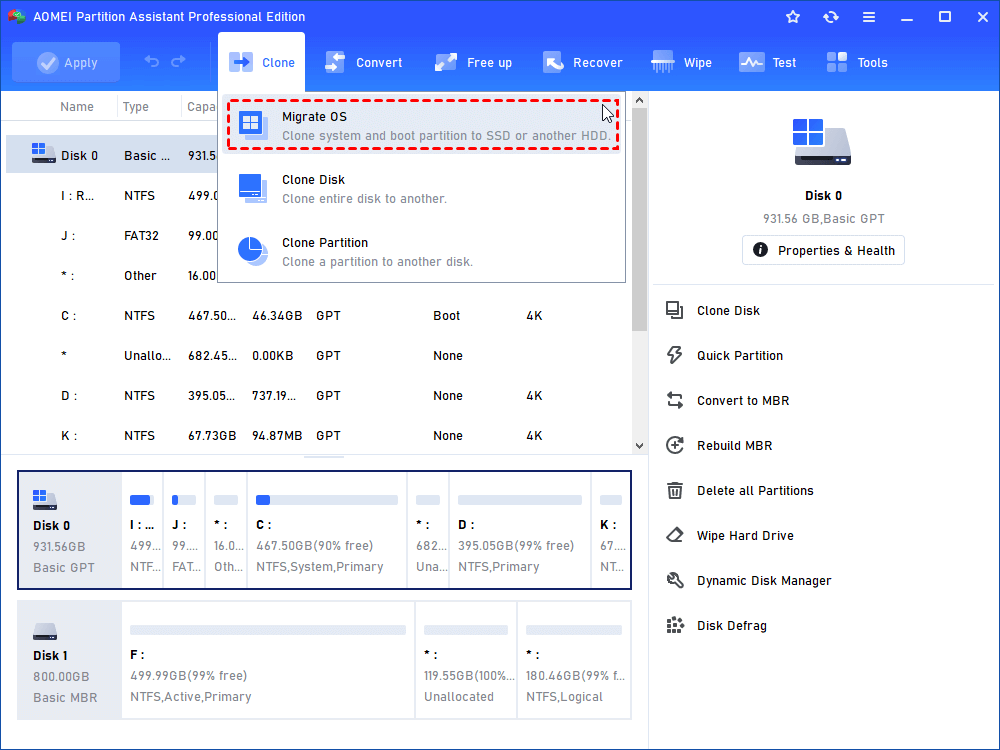
Step 1. Double click AOMEI Partition Assistant icon and open it. In its main interface, you can get all disk/partition information. Click “Migrate OS” under the “Clone” column on the top pane.
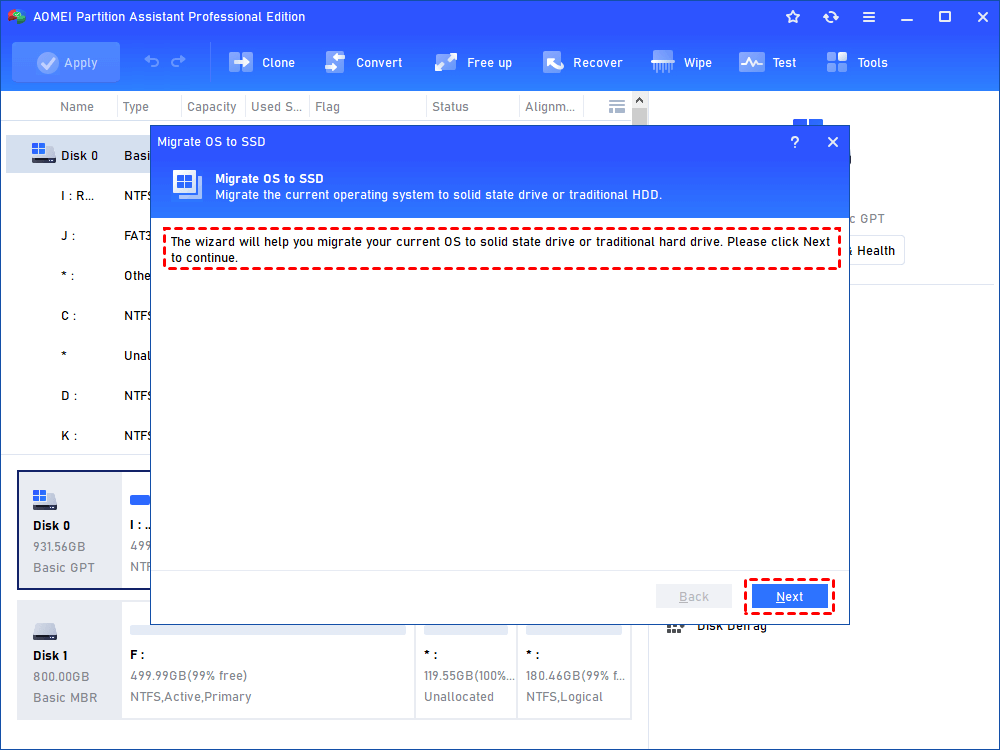
Step 2. Then you will receive a note about this operation. You can click “Next” to continue.
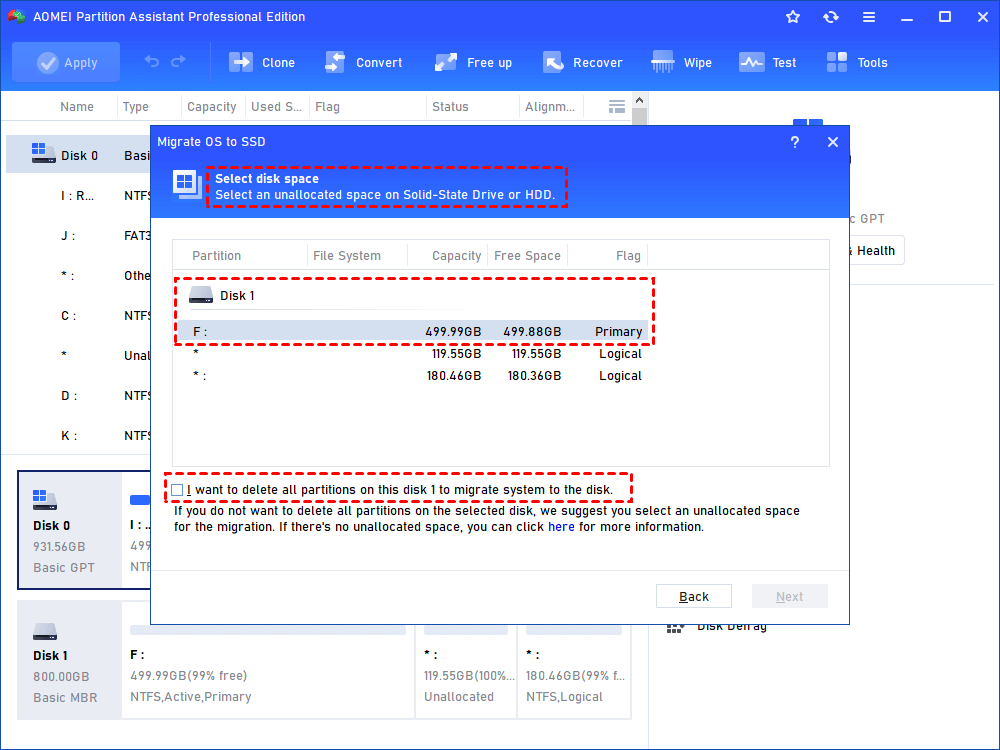
Step 3. In this window, you need to choose an unallocated space on Solid State Drive or HDD. Only when the unallocated space is selected, then the “Next” button clickable, or it will grey out. So if it is without unallocated space, you need to first create unallocated space.
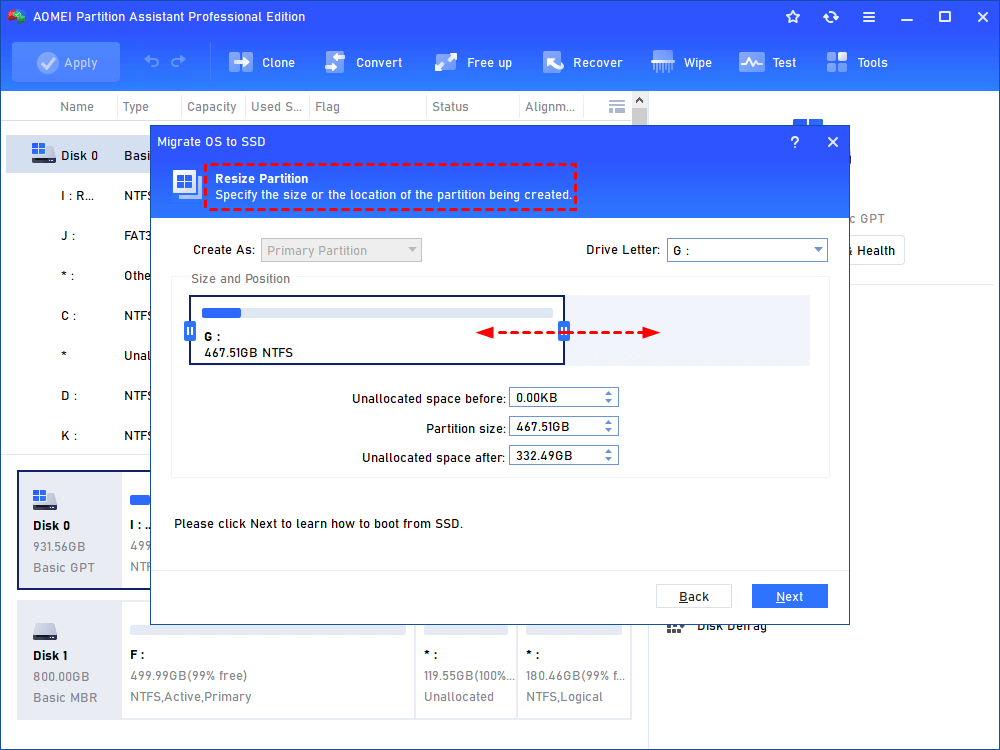
Step 4. Here, you can resize partition and decide the location of this (system) partition being created. Then hit on “Next”.
Step 5. Then, a brief note will appear, teaching you how to deal with possible Windows failing to boot problem after migration.
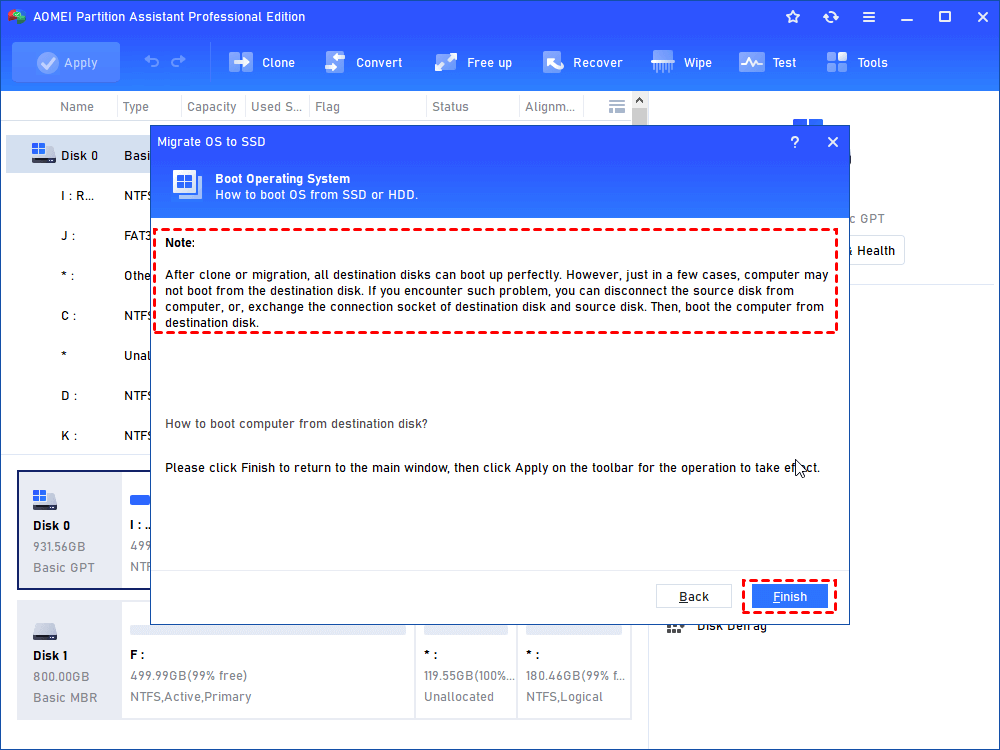
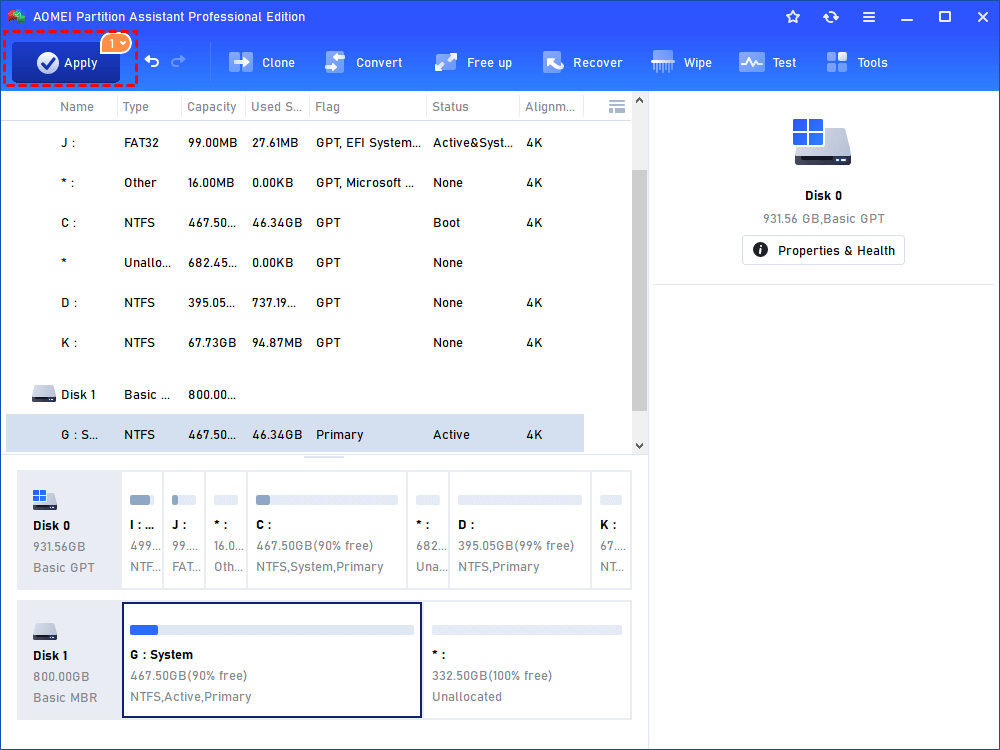
Step 6. Now, you will return to the main window now, click “Apply” on the top left and then “Proceed” to make this OS migration operation to take effect.
To move Windows Server, try its Server edition.
>> In order to migrate Mac OS to SSD, you will need to connect your SSD drive to Mac computer and take the following steps to get this job done.
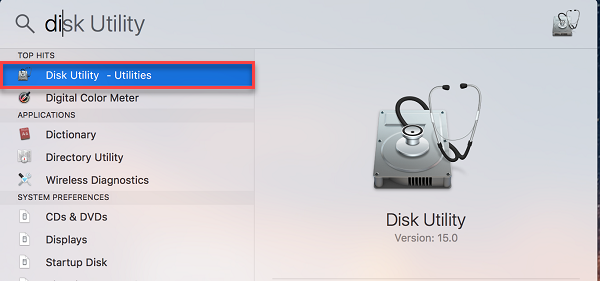
Step 1. Access “Disk Utility” (Apple’s own free software) on Mac computer: Click on the “Spotlight” icon on the menu bar. Type “Disk Utility” in the search field. Then double-click on “Disk Utility – Utilities”.
Step 2. Choose the connected SSD. Generally, it will be listed in the sidebar to the left under “External”. And click “Erase” option to erase SSD drive.
Step 3. Now, you can go to “https://www.shirt-pocket.com/SuperDuper/SuperDuperDescription.html”. Click “Download” on the right side of the webpage to download it onto your Mac computer.
Step 4. Install and launch SuperDuper. Usually, Super Duper will open automatically as long as the installation is finished. If not, you can open it manually in the “Applications” folder in the Finder.
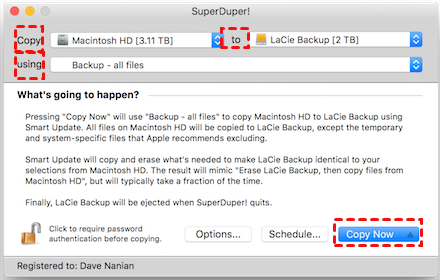
Step 5. Select your Mac current operating system hard drive under “Copy” column, select the target SSD drive under “To” column and select “Back up-all files” in the “using” column. When everything is done, click “Copy Now”.
Step 6. Then, you will need to type your user password to allow the disk copying.
Step 7. Click “Copy” to confirm that you want to clone the Mac hard drive to SSD. When the process is completed, click “OK”.
Part 3. You’re almost finished…
To make Windows operating system boot from new SSD drive, do as following:
Step 1. Restart your computer and enter “BIOS” setup.
Step 2. Use the arrow keys to go to the BOOT tab. System devices appear in order of priority.
Step 3. To give an SSD drive boot sequence priority over the hard drive, you can move the SSD drive device to the top of the boot sequence list.
Step 4. Save and exit the BIOS setup utility.
To make Mac operating system boot from SSD drive, do as below:
Step 1. Keep both old and new SSD drives connected to your Mac computer;
Step 2. Go to “System Preference” > Click on “Startup Disk” > Select new SSD drive as the new boot drive;
Step 3. Replace the old boot drive with new SSD: Right-click on the old SSD drive in “Finder” > Select “Eject Only Macintosh HD”;
Step 4. Shut down the Mac computer, install new SSD drive to it, and then reboot computer again.
Now, enjoy a faster boot time or apps loading time on your new SSD drive. I sincerely hope this guide help you to migrate OS to SSD successfully.

