How to Install Windows 7 on USB Drive with Ease?
Installing Windows 7 on USB allows you to use the familiar Windows environment on multiple computers; here is a simple way to achieve this.
By Dervish / Updated on May 12, 2023
Is it possible to install Windows 7 onto a USB drive?
You probably have heard of Windows 8 to Go, which allows you install a portable version of Windows 8 on a Microsoft certified USB flash drive. If you are addicted to the old operating system (OS) Windows 7, you may wonder is there a way to install Windows 7 on USB removable storage device?
With Windows 7 on a USB flash drive or external hard drive, you can take it with you wherever you go and run Windows7 on any PC.
Windows Setup can detect USB hard drive, but when you select the external drive as the target location to install Windows 10/8/7, you will get the error “Windows cannot be installed to this disk”. Luckily, there is a workaround for this, and it is quite simple. Even those who does not know how to install Windows from a USB drive can follow this guide to get it done,
Installing Windows 7 on USB via AOMEI Partition Assistant
You may have read some other tutorials or guides talking about installing Windows 7 on external hard drive, but the process is cumbersome and not easy to follow. Here, I will recommend you a free tool AOMEI Partition Assistant Standard. This is a professional third-party disk partition management tool, it only takes a few steps to create a portable Windows 7 USB drive.
It provides Windows to Go feature that allow you to run Windows 11/10/8/7 from USB stick. And it does not require a USB certified by Microsoft.
Things you need to prepare:
1. You need to prepare a USB larger than 13 GB (Recommend you to use USB 3.0 drive because of its faster read and write speed). All data on this USB will be erased, please make a backup in advance.
2. If you plan to create a brand-new system, you need to download Windows 7 ISO file.
How to install Windows 7 to USB external drive?
When you prepare the things listed above, you can follow the steps below to create bootable Windows 7 USB.
Step 1. After download the AOMEI Partition Assistant. Plug the USB drive into a USB computer and make sure it is detected by your machine.
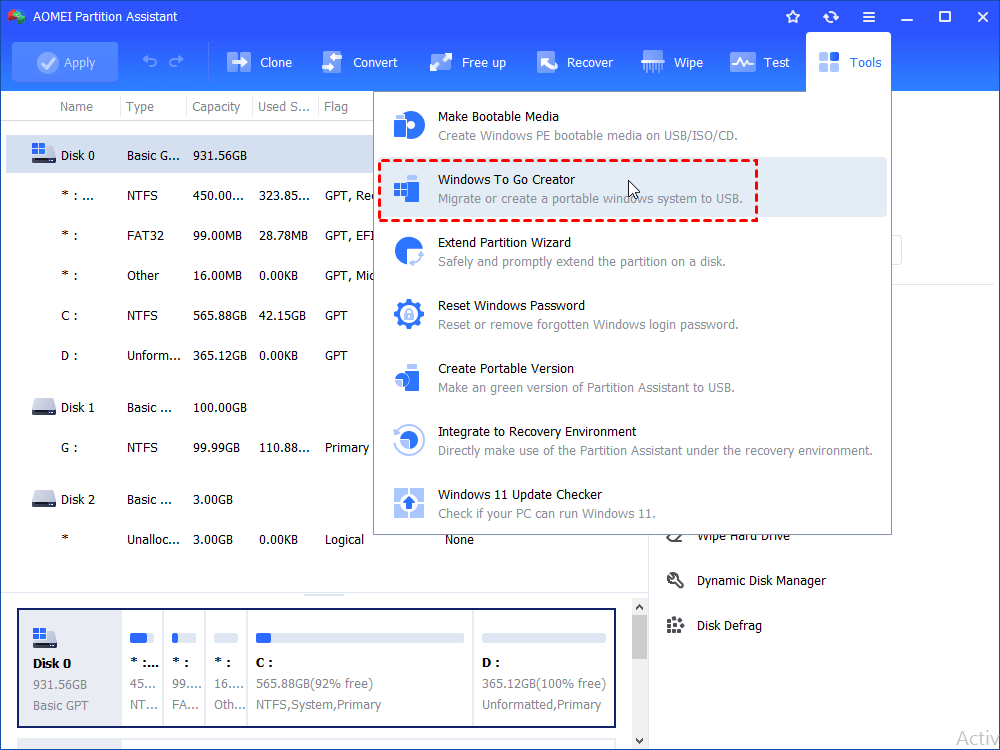
Step 2. In the main interface, if you see the USB drive is showing in AOMEI Partition Assistant, click “Tools” in the top toolbar, and choose “Windows To Go Creator”.
Step 3. Then, choose the first option “Create Windows To Go for personal computer”, and click “Next”.
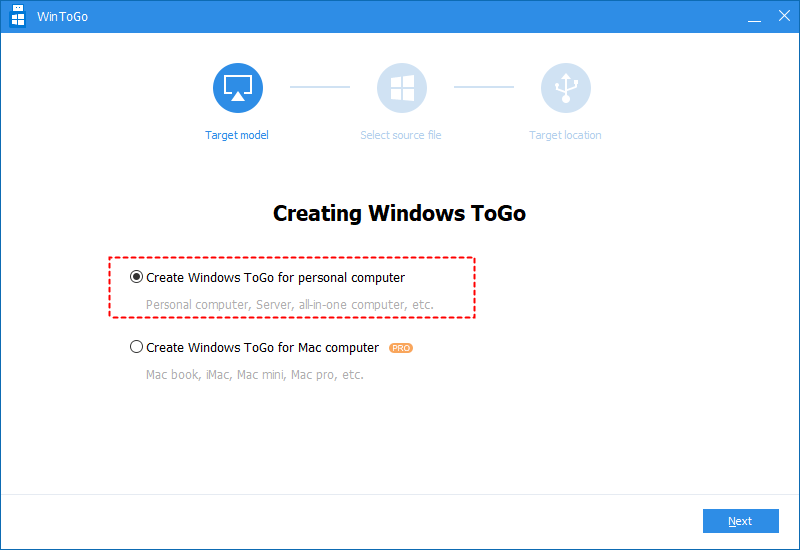
Note: if you want to boot Windows from USB on Mac, you can choose the second option.
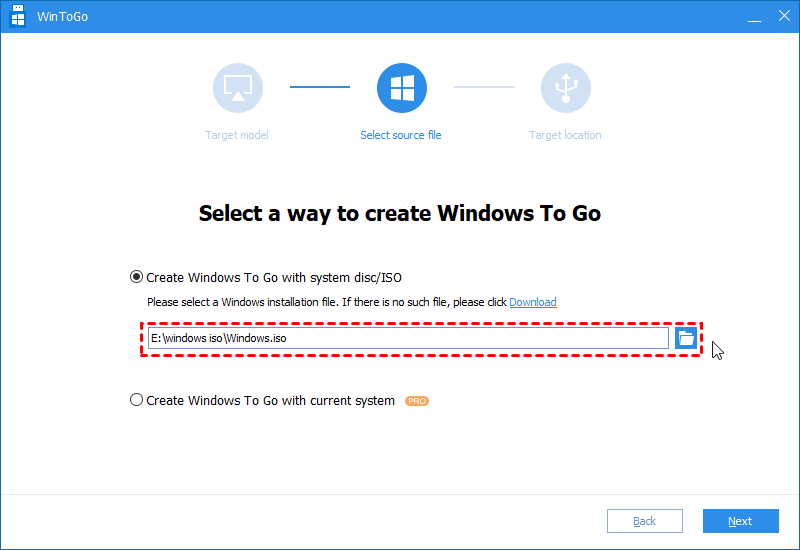
Step 4. Choose “Create Windows To Go with system disc/ISO” and select the prepared ISO file. Click “Next” to proceed.
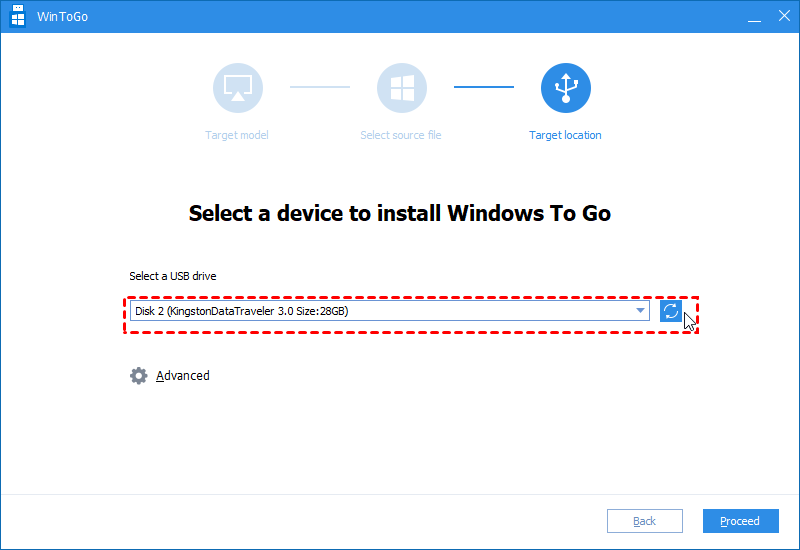
Step 5. Select the USB drive you have prepared and click “Proceed".
When the process finishes, you use this new created bootable USB drive to boot any Windows PC and bring this portable version of Windows 7 with you.
As you see from the screenshot, the USB flash drive used to install Windows 7 is an MBR disk, which means it can only boot PCs with Legacy boot mode enabled. If you want it to boot UEFI boot mode computers, you can convert it to GPT disk without data loss.
Besides the ability to install Windows 7 on USB drive, AOMEI Partition Assistant Standard also provides many other great features, like Migrate OS to SSD without reinstalling Windows, Merge Partitions and Resize Partition without data loss.
If you need more advanced features like convert dynamic disk to basic without data loss, you can try the Professional edition of AOMEI Partition Assistant.