How to Format Windows 7 With CD Step by Step?
In this article, we will show you how to format Windows 7 with CD step by step. Besides, you can also learn how to format Windows 7 with a USB drive.
By Emily / Updated on May 12, 2023
Need to format Windows 7 (C: drive)
“Some stubborn virus attacked my computer, I cannot eliminate them via anti-virus software. I have to format the computer, along with the Windows operating system to reinstall OS”
“Due to several problems on Windows 7 drive which I cannot repair. I have decided to format my C: drive and start a fresh.”
Formatting Windows 7 operating system always means formatting the C drive because Windows 7 or other operating system is usually installed on this partition. Formatting C drive can help solve some tricky OS issues or get rid of the stubborn virus.
How to format Windows 7 with CD step by step?
If you have tried to format Windows 7 (C:) drive in the way you format other drives in Windows, you might have failed and received an error message “You cannot format this volume”. That’s because Windows is installed on this drive. Hence, you need to boot your computer from Windows installation CD and format C drive during the installation process. Next, we will show how to format C drive in Windows 7 with CD step by step.
Warning: formatting C drive will erase all information within it, so if there are some files you want to keep, please back up them via free backup software first of all.
Step 1. Insert Windows 7 installation CD into the computer and enter BIOS to boot computer from it.
Step 2. After the Windows 7 install files are loaded into memory, you'll see the “Starting Windows” screen. Just wait for it to finish.
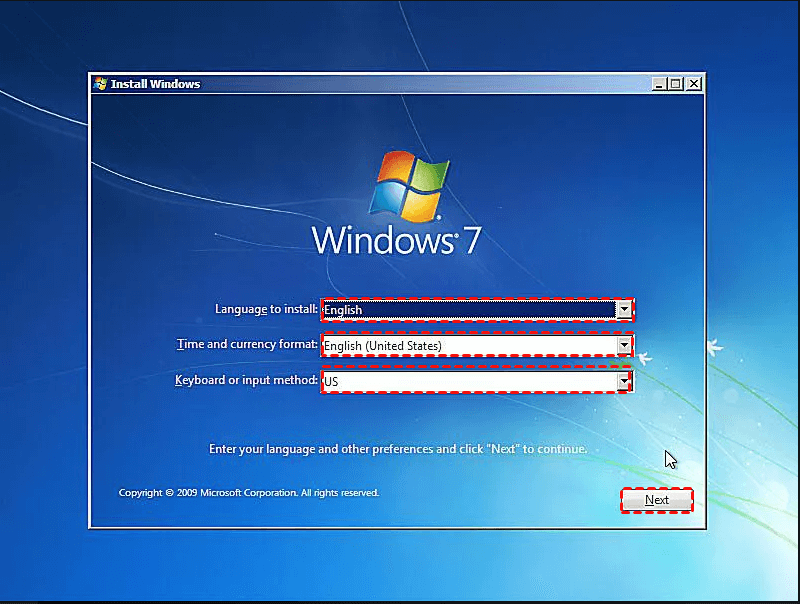
Step 3. Choose the “Language to install”, “Time and currency format”, and “Keyboard or input method” on this screen. Then click “Next”.
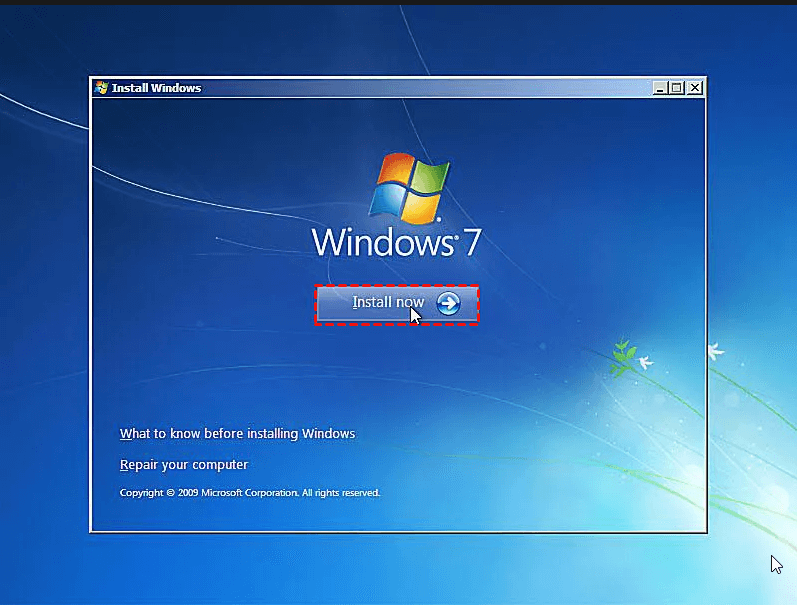
Step 4. Click on the “Install now” to officially begin the Windows 7 clean install process. And wait for the subsequent “Setup is starting” screen to complete.
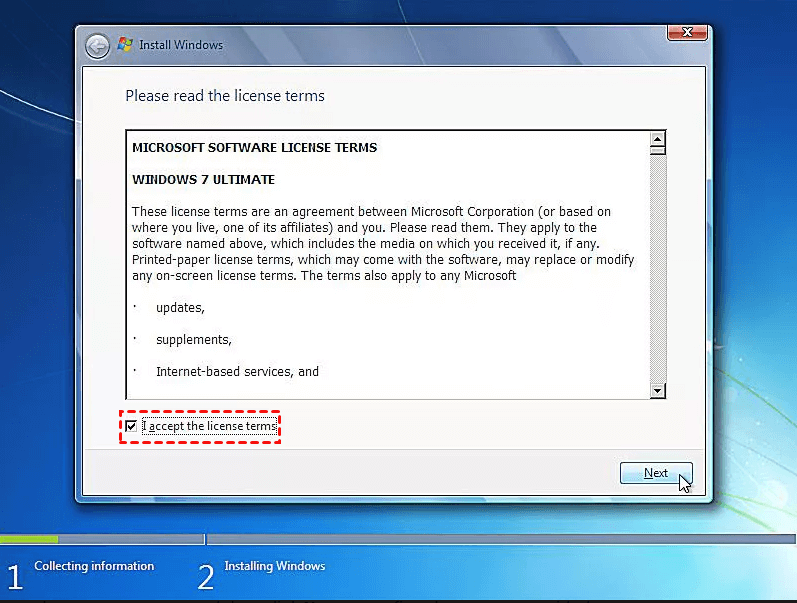
Step 5. This screen contains the Windows 7 Software License terms, read through it. Then tick “I accept the license terms” and click “Next” to confirm your operation.
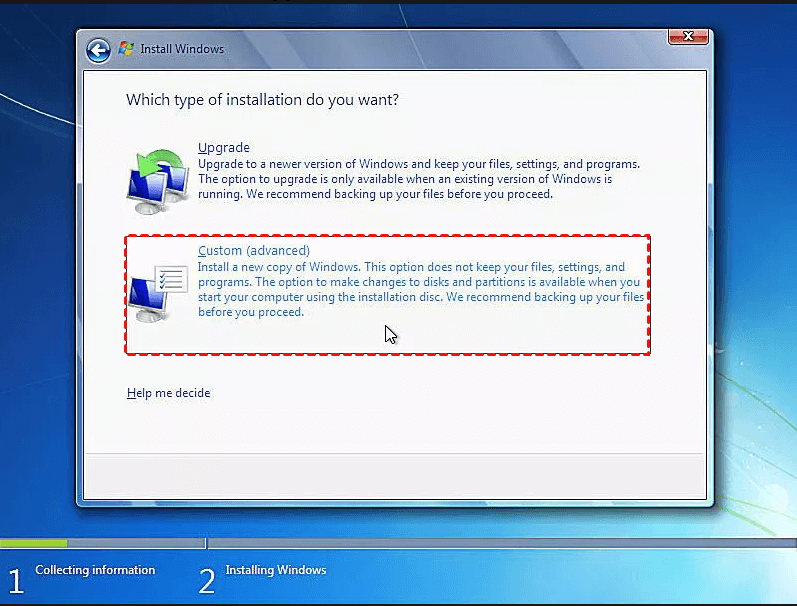
Step 6. Here, choose “Custom (advanced)”.
Step 7. In the “Where do you want to install Windows” window, you can view all recognized partitions on the computer. Click “Drive options (advanced)” and several drive options will appear.
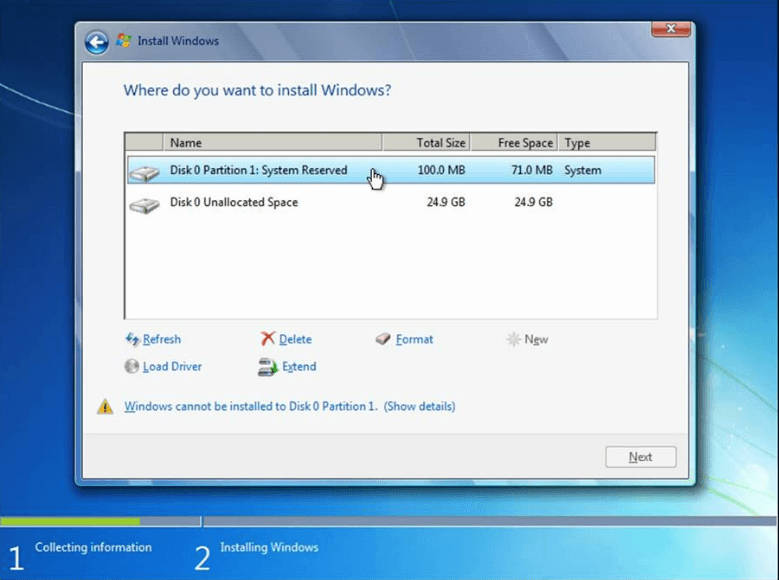
Step 8. Select C drive and click “Format” at the bottom.
Or you can click “Repair your computer” in step 4, select the operating system from the list and click “Next” to enter the “System Recovery Options” window, then open Command Prompt and format C drive using CMD.
How to format C drive in Windows 7 without CD/DVD step by step?
If you don't have a CD for formatting Windows 7, you can create a bootable USB and try to format Windows 7 with the USB drive. In such a case, you can make use of AOMEI Partition Assistant Standard, which format C drive in Windows PE mode in Windows 11/10/8/7/XP/Vista directly without CD/DVD. Now you can free download it and learn how to format C drive in Windows 7 without CD/DVD.
Once logged in, you will access to the main interface of AOMEI Partition Assistant. Then follow the steps to format Windows 7 hard drive without CD.
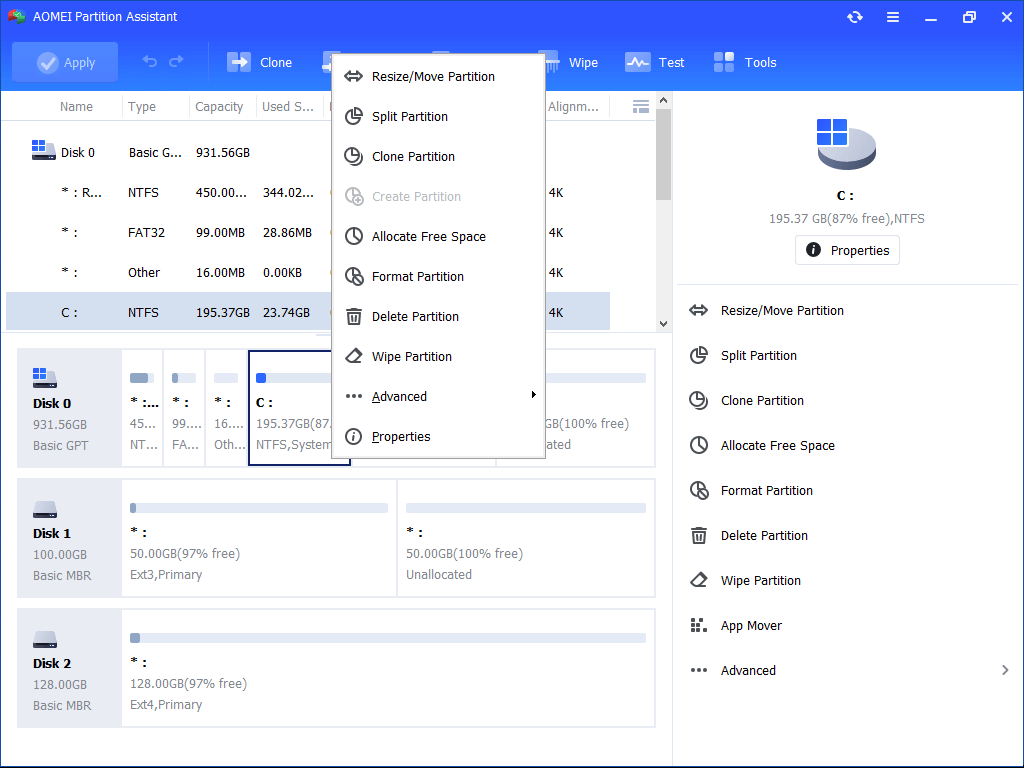
Step 1. Right-click the C drive and choose “Format Partition”.
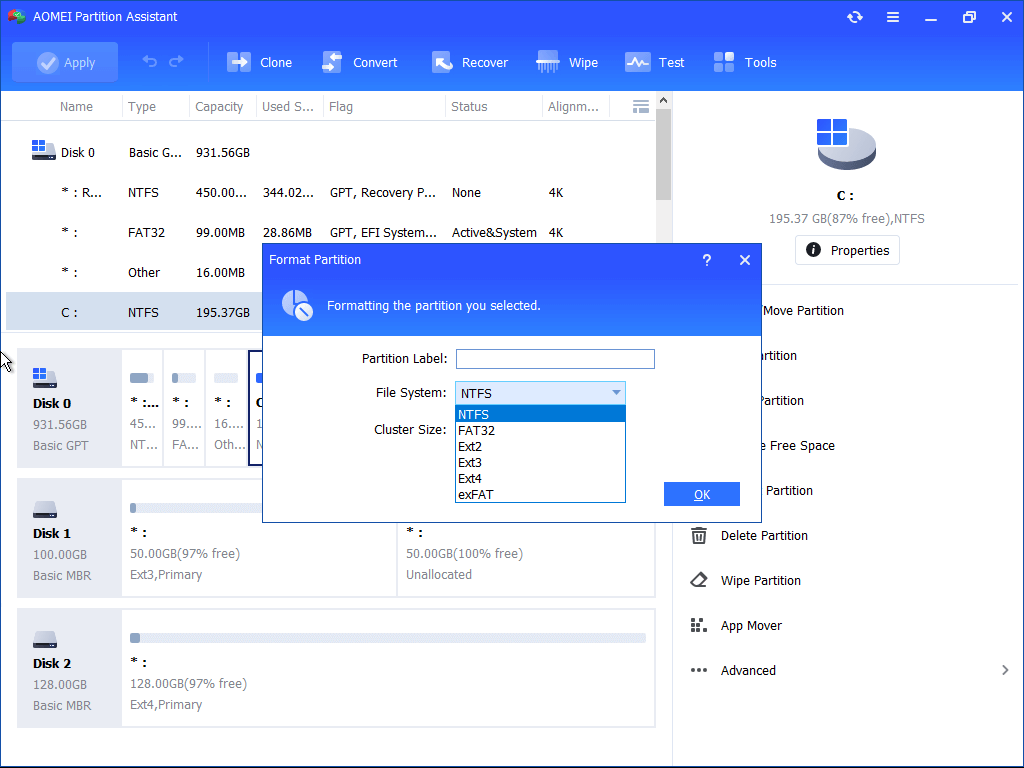
Step 2. In the pop-out mini window, select a proper file system and click “OK”.
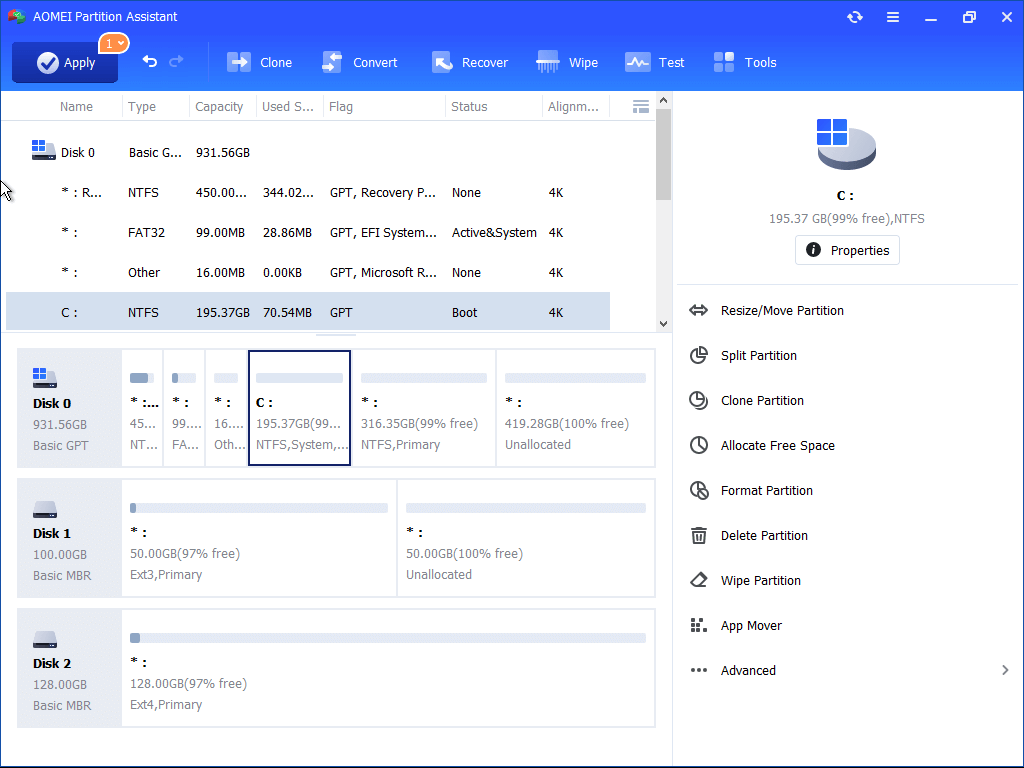
Step 3. Hit on “Apply” and “Proceed” to commit the pending operation.
No matter you are going to format laptop or desktop Windows 7 without CD available, this is a great alternative.
Bottom Line
No matter you want to learn how to format Windows 7 with cd step by step or format C drive in Windows 7 with USB, this article provides corresponding methods. If you just format Windows 7 for a fresh installation to speed up the slowing computer, you can try AOMEI Partition Assistant Professional, which enables you to migrate OS to SSD or extend system drive to achieve that goal.

