Learn to Creating a Windows 7 Boot Disk to Format System Hard Drive
What’s the right way to boot disk to use boot disk to format hard drive on Windows 7? We will show you how to create a bootable media and format hard drive easily and efficiently in Windows 7.
By Lucas / Updated on January 3, 2025
Why format hard drive via boot disk?
Generally speaking, format hard drive is the ultimate way to fix Windows operating system’s serious issues and other errors; you are not going to make that choice if there are other options. In the cases below, you may need to format hard drive with a boot disk:
-
Reinstall Windows operating system.
-
Remove a virus or malware not working using other ways.
-
Sell your Windows OS PC to others.
-
Some serious Windows system failures.
If your computer has only one hard drive and you have to format it, you could use the bootable disk to format.
What is a boot disk in Windows 7
A boot disk is a removable data storage medium that makes a computer load and boot an operating system or other utility. Like a CD/DVD or USB flash. In a general way, you will get an actual boot/installation disc that comes with your Windows 7 PC or a retail Windows 7 install disc that you bought separately.
Use Windows 7 boot/installation disk to format hard drive
Warning: formatting hard drive does not permanently erase the data. The deleted files and folders could be easily restored even after a computer is formatted. You could wipe data on hard drive permanently with free hard drive wipe software.
If you have a Windows 7 boot/installation disc, you could format hard drive with ease, refer to this state:
-
Please turn up your computer so that Windows starts normally, connect the Windows Installation/boot disk with your Windows 7 PC, and then restart your computer.
-
Press any key when prompted, and then follow the instructions that appear.
-
Input your language and other settings in the Install Windows dialog box, and press Next.
-
Then click Custom in the Which type of installation do you want dialog box.
-
Click Drive Options (Advanced) on Where do you want to install Windows page.
-
Click the partition that you want to format, click Format.
Tips: You could select a partition and click Delete option for each partition and then choose the unallocated space to format the hard drive if you have more than one partition.
-
Click Next.
-
Follow the instructions to finish installing Windows 7. Or you could cancel the installation at this point to keep the newly formatted hard drive.
If you do not have a boot disk to format hard drive Windows 7, there is a simple way to create your own Windows 7 boot disk.
Create boot disk to format hard drive in Windows 7
How to format computer in Windows 7 using USB bootable media? The following way is easier to operate than using Windows installation disc. First of all, there are some preconditions you have to meet with:
-
Download the best free hard drive formatting software - AOMEI Partition Assistant Standard.
-
Prepare a USB flash drive more than 13GB.
First, you have to make bootable disk to format hard drive in Windows 7:
Create Bootable media
How to make a Windows 7 boot disk to format hard drive? Here are the tutorial:
-
Insert the USB flash drive to the computer, and launch AOMEI Partition Assistant Standard to open its main console. Click “Tools” in the top toolbar, and choose “Make Bootable Media”.

2. Click Next at the next window.
3. Tick USB Boot Device, and press Proceed.
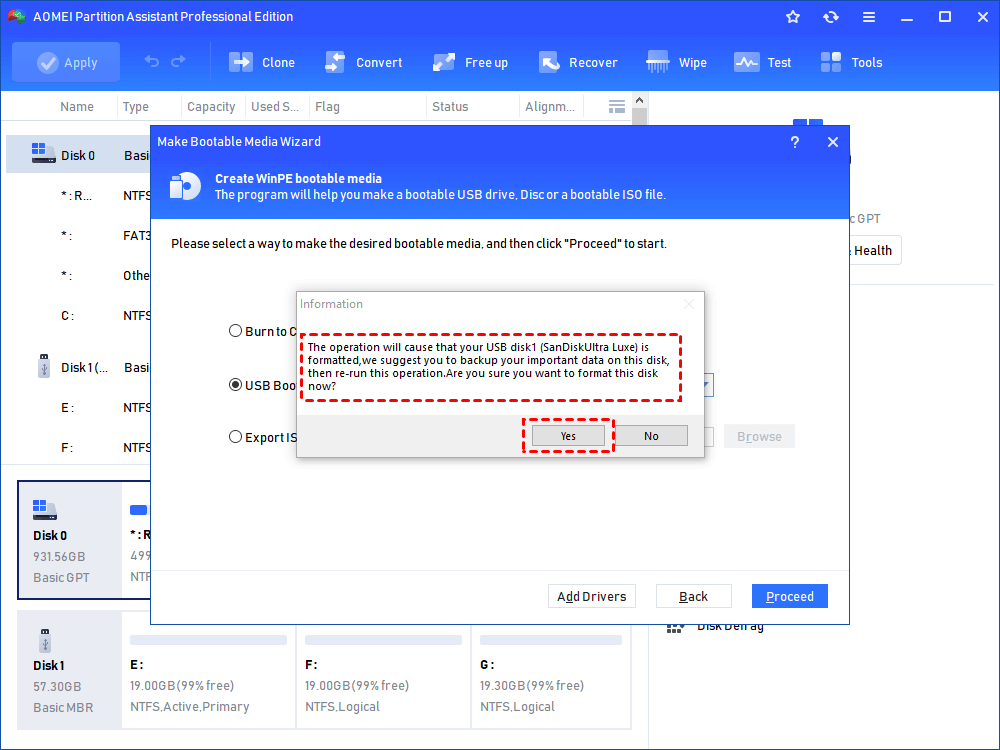
4. Press Apply to commit Windows 7 boot disk creation.
Format hard drive with boot disk in Windows 7
After creating Windows 7 boot disk, you can format hard drive (delete all partitions on it) with this media now:
1. Boot your computer from the Windows 7 boot disk.
2. The AOMEI Partition Assistant Standard will run automatically on the desktop.
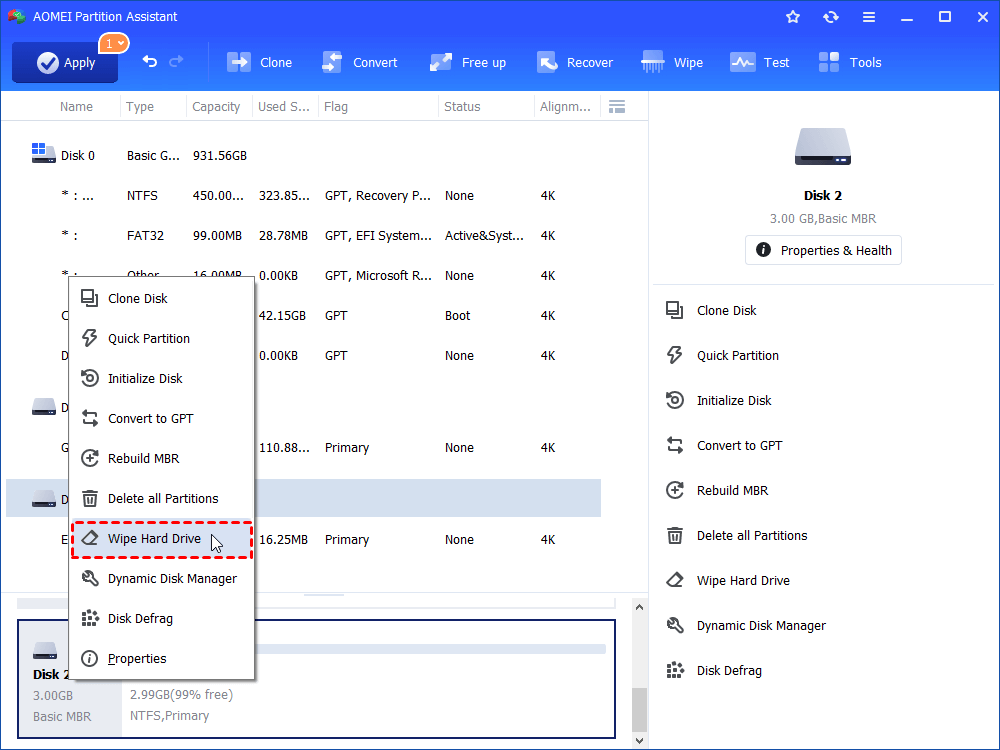
3. Right-click the hard drive you want to format, then click "Wipe Hard Drive ".
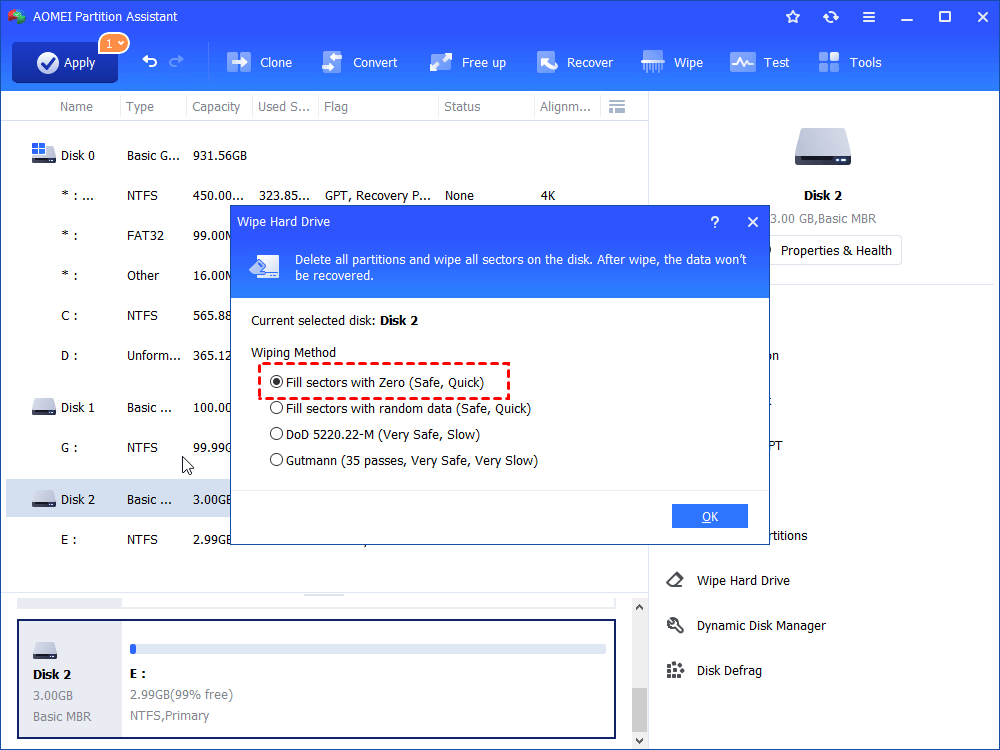
4. Select “Fill Sectors with Zero” and hit “OK” to proceed. If you want to select the other 2 options, you should upgrade the software to the Professional edition first.
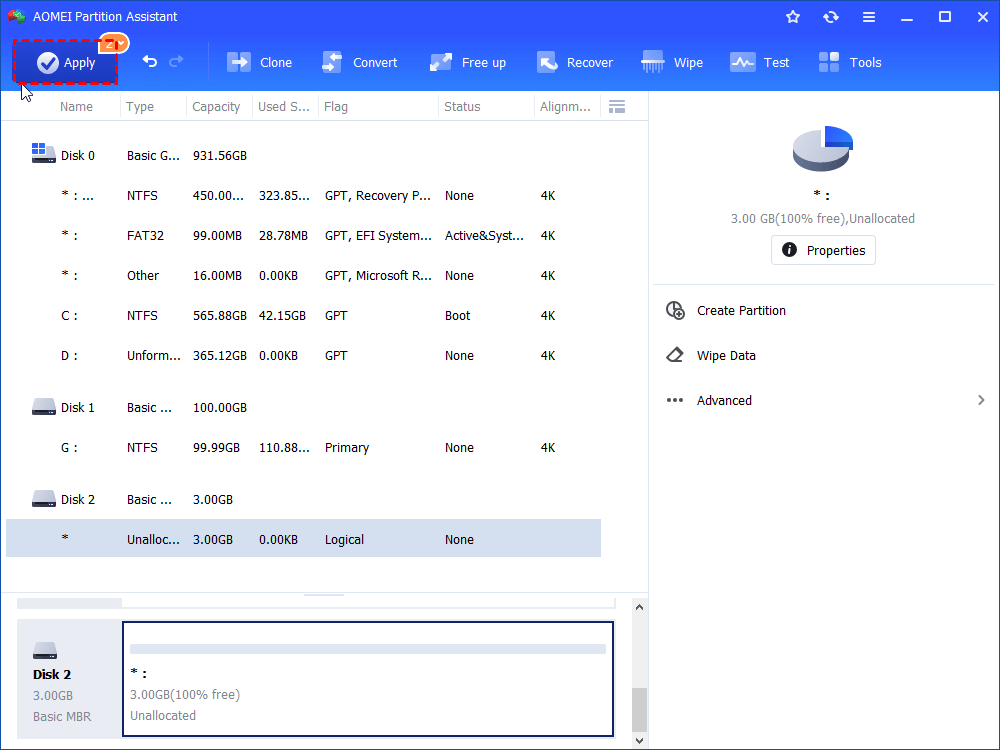
5. After returning to the main interface, click on “Apply” where the screenshot shows to commit the hard drive wiping operation.
After using boot disk to format hard drive in Windows 7, there is no need to worry about your sensitive personal files security any more. Besides, it’s worth to say that AOMEI Partition Assistant Standard will do you a favor with disk partition management, like merge partitions, format, delete, split, move, extend partition, copy disk, rebuild MBR, etc. The Professional edition is more than that, and provides the service to quick partition, allocate free space, migrate OS to SSD, convert disk between MBR and GPT, convert dynamic disk to basic and vice versa, and more. You could download the Server edition to take a shoot if you are using a Windows Server computer.
Now, the target disk has become unallocated without a file system. The next thing you should do is to is to use the feature of formatter to set it as NTFS or FAT32.
Conclusion
After using boot disk to format hard drive in Windows 7, there is no need to worry about your sensitive personal file security any more. Besides, it’s worthy to say that AOMEI Partition Assistant Standard will do you a favor with disk partition management, like merge partitions, format, delete, split, move, extend partition, copy disk, rebuild MBR, etc. The Professional edition is more than that, and provides the service to quick partition, allocate free space, migrate OS to SSD, convert disk between MBR and GPT, convert dynamic disk to basic and vice versa, and more. You could download the Server edition to take a shoot if you are using a Windows Server computer.

