[2023 Fixes] Windows 11 Update Fails? Follow The Clear Guidance to Solve That!
When you encounter “Windows 11 update fails” issue such as Windows 11 update fails at 48 and Windows 11 update stuck on restarting, you can follow this guidance to fix that.
By Irene / Updated on June 12, 2024
Windows 11 update is an important process for maintaining the security and functionality of your operating system by installing the latest patches and features. However, it's not uncommon to encounter issues where the update gets stuck or fails to load. For example, you may experience the update progress freezing at XX% for an extended period of time.
This situation is commonly known as a "Windows 11 update fails" problem. Fortunately, troubleshooting this issue is relatively straightforward, and in this article, we will explore the causes behind Windows 11 update getting stuck and provide effective solutions to resolve the problem.
Why does Windows 11 update fails?
In fact, various reasons may cause Windows 11 update fails. Here we list the 4 most common causes for reference.
1. Unstable Internet Connection: An unstable or poor internet connection can cause downloaded files to get corrupted or incomplete when updating
2. Interruptions in Power Supply: If the power supply is unstable, it can disrupt the installation process and cause the Windows 11 update to halt at a certain stage.
3. Corrupted ISO File: Once the ISO files get corrupted, it will have a negative impact on data integrity, causing Windows 11 update failed.
4. Insufficient Storage Space: Inadequate storage space on your system drive is also a major reason for Windows 11 update stuck. Please make sure there is enough space for data downloading. If you are not sure whether the space is enough, you can increase the drive space first.
Preparation: Back up important data before solving
When you attempt to modify system-related data for troubleshooting or adjustments, it's always a good practice to back up your important data. Although you can trust Windows data recovery tools, it is still recommended to back up important data in case of severe damage.
AOMEI Partition Assistant Professional, is a multifunctional and powerful tool designed to support Windows 11/10/8/7 users. With that, you can easily clone a disk to another without data loss, even including the Windows OS. When any unexpected issue comes, you can easily get the data if needed.
1. Connect the target disk to your PC, which may require opening the case or the bottom cover of the laptop.
2. If the target disk is a totally new disk, you need to initialize it before cloning. If your new disk is an SSD and you’re not sure how to choose between MBR and GPT, you can check MBR or GPT.
Now we will demonstrate how to clone the system hard drive to your target disk. First, we'll explain the process of cloning the entire disk.
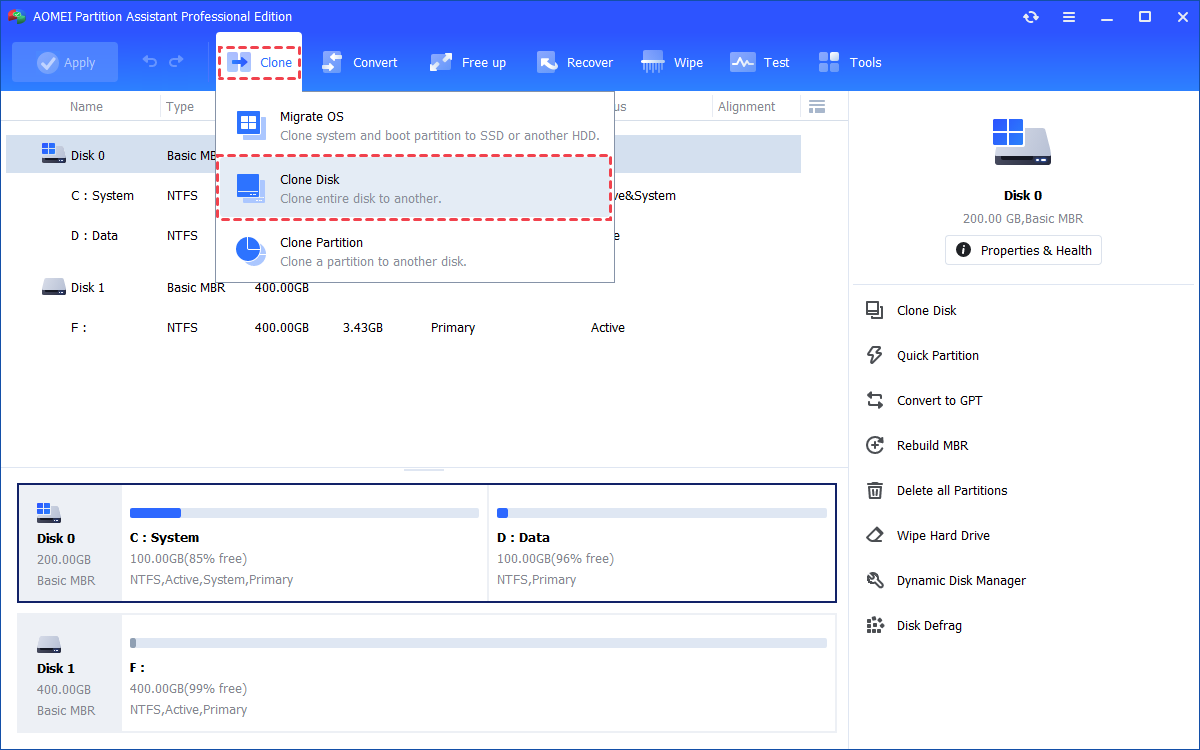
Step 1.Install and launch AOMEI Partition Assistant, click the "Clone" main tab and select "Clone Disk". (You can also right-click the Disk you want to clone and select the "Clone Disk" tool to run disk clone.)
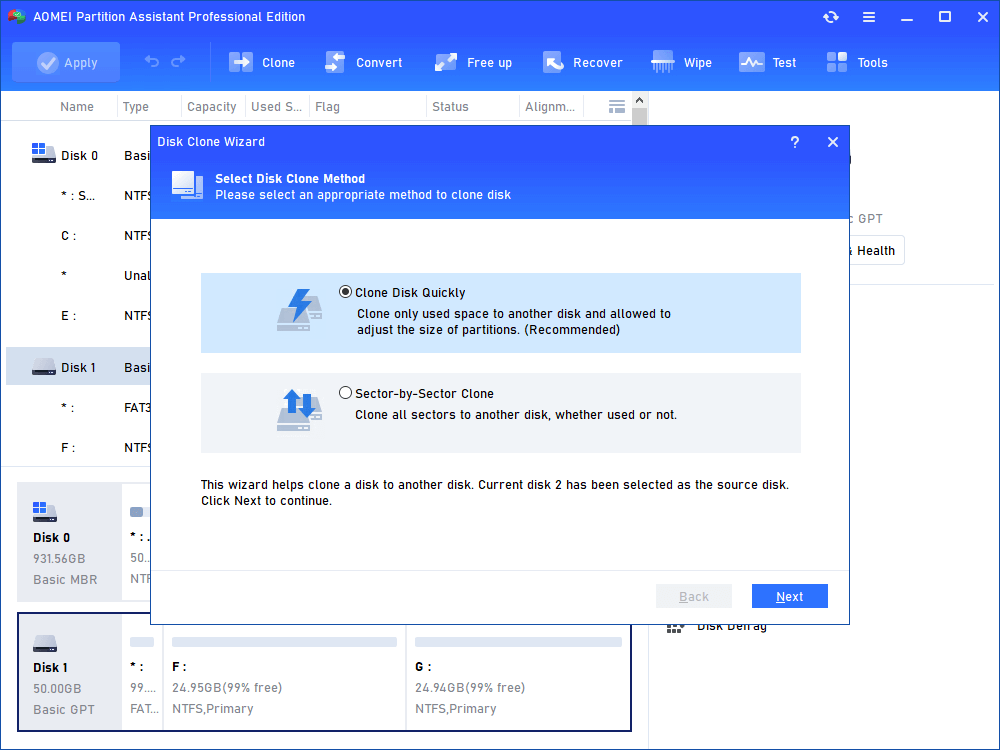
Step 2. Choose the hard disk that you need to clone as the source disk and click "Next".
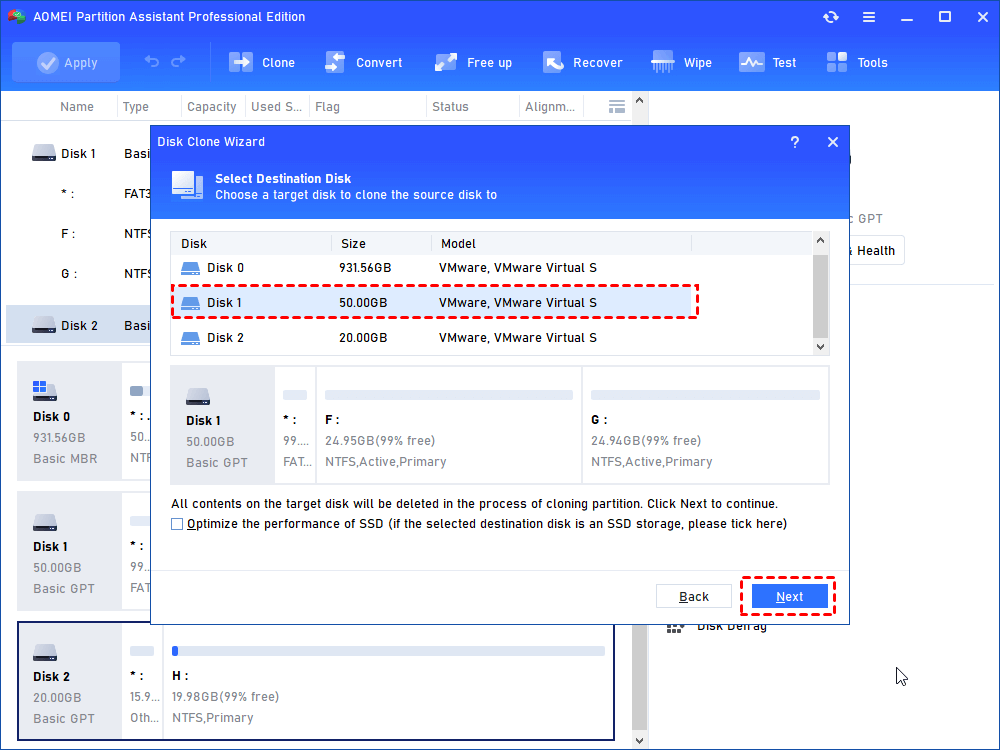
Step 3. Select the destination disk to put the data of the source disk on, and then click "Next".
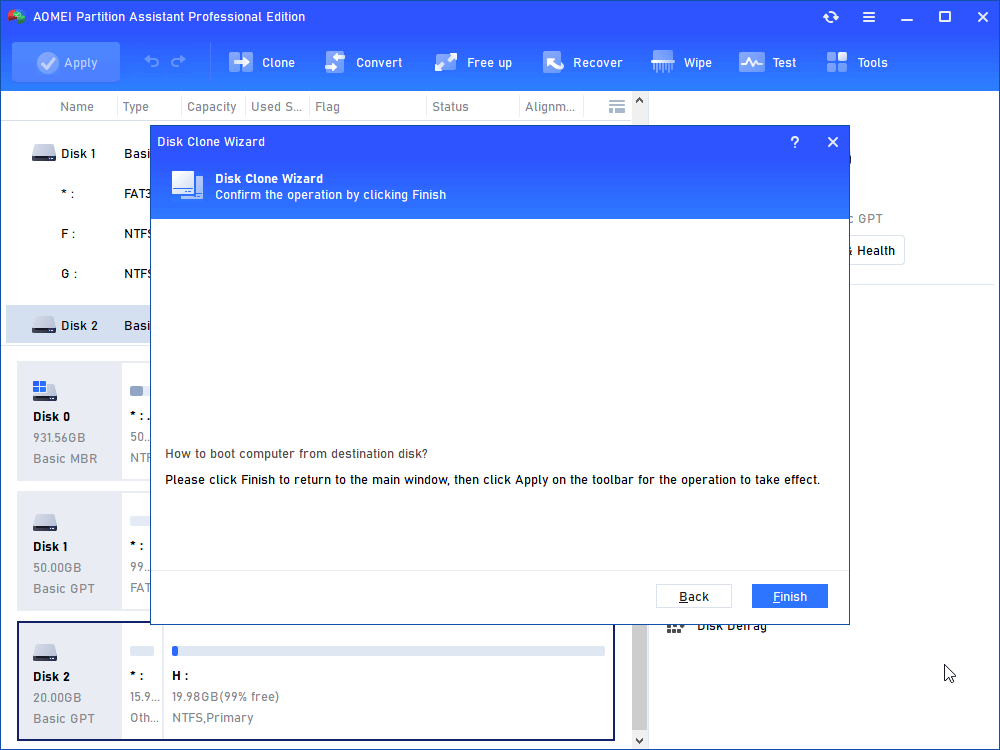
Step 4. Then, you will enter the Confirm interface where you can check the source and destination disk. After all is set, you can click the "Confirm" button to continue.
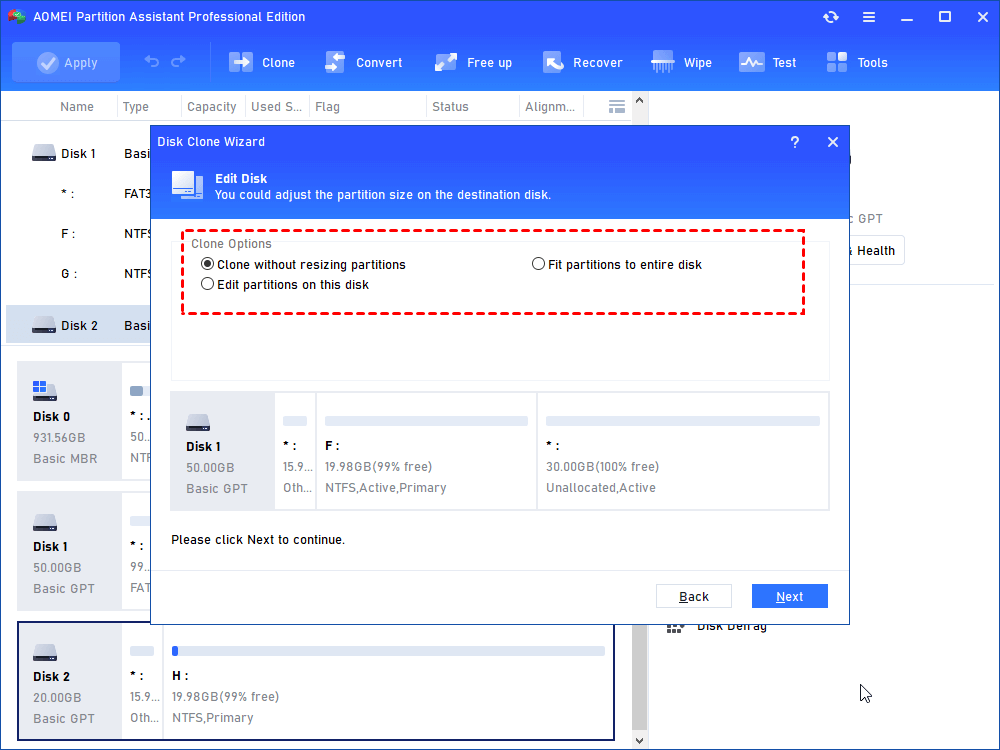
In lower left corner of the window, you can click the "Settings" button to adjust the partition size on the destination disk. There are three options for you:
- Clone without resizing partitions: all partitions will be cloned to the target disk as the original partition size. It is available when the target disk is larger than the source disk. If it is smaller, this option will be grayed out.
- Fit partitions to entire disk: all partitions will be cloned to the target disk and take up its full capacity according to the original partition size proportion.
- Edit partitions on this disk: you can change every partition size on the target disk as you need.
After finishing the adjustment, please click "Save".

Notes:
- You can tick "4k alignment" to improve the reading and writing speed of SSD if the selected destination disk is an SSD storage.
- All data on this selected destination disk will be wiped out after you save the operation to physical disk. If there is important data on the destination drive, please make a backup in advance.
- If you clone to a smaller SSD, the first option is grayed out. If you select Sector-by-Sector Clone, it is unable to adjust the size on the destination disk.
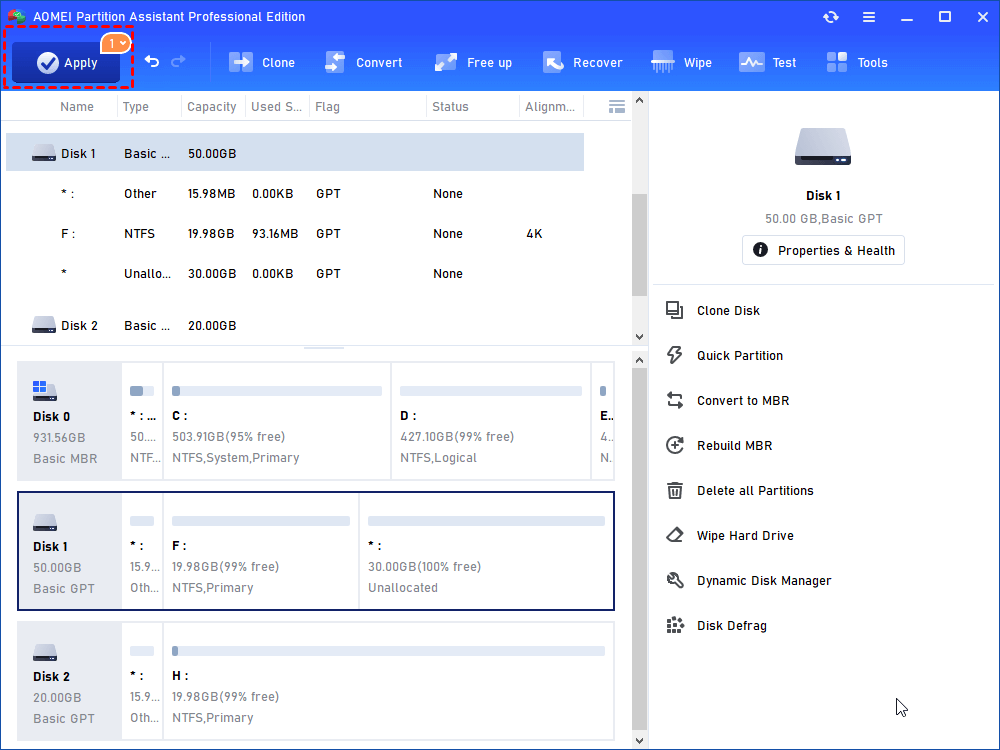
Step 5. You can preview the disk cloning operating by viewing the "Pending Operations". To commit the "Pending Operations", please click "Apply" and "Proceed".
Step 6. The cloning process will start and you can check the cloning process.
How to fix Windows 11 update failed
After backing up your important data, now, it is time to fix the problem related to Windows 11 update stuck.
Fix 1. Wait for your computer to complete the Windows 11 update
As mentioned previously, interruptions in the internet or power supply can lead to the Windows 11 update getting stuck. To address this, you can ensure your computer remains connected to a power source and let it complete the installation process on its own. It may require several hours for the update to finish.
Fix 2. Check the Network Status
Given an unstable or poor internet connection can cause downloaded files to get corrupted, it is advisable to check the network status first. If it is truly not connected well, you can try to re-download the files and try to update them again.
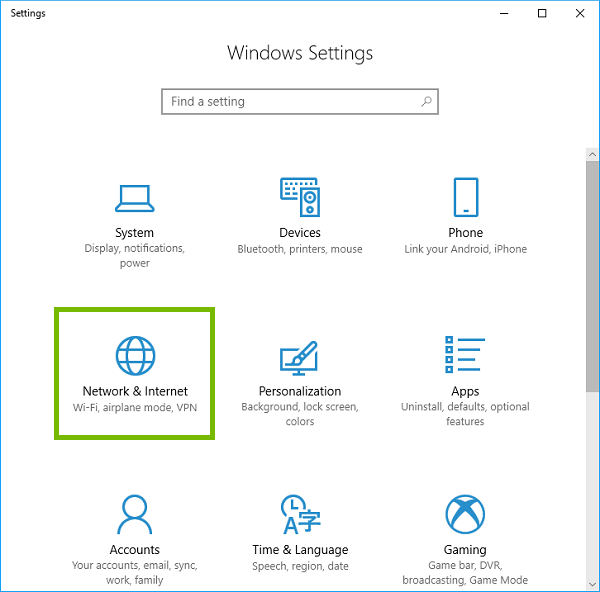
Step 1. Click “Start” and select “Settings”. In the main interface, choose “Network & Internet”.
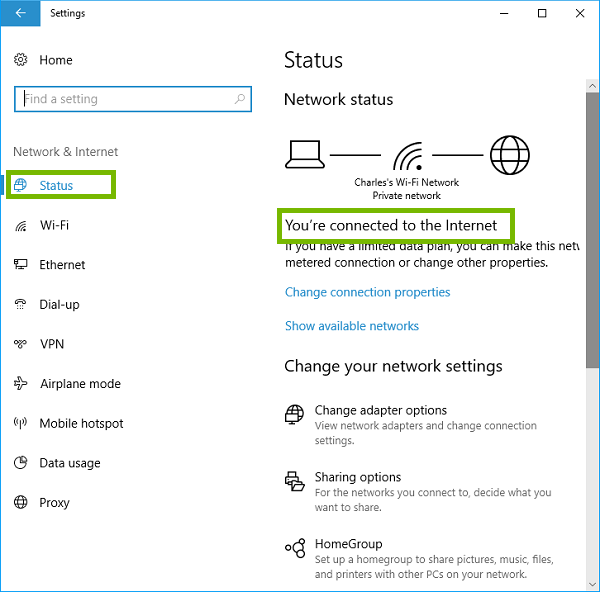
Step 2. Click “Status” and you will find that the current connection status will be displayed on the right side.
Fix 2. Run Windows Update troubleshooter for Windows 11 update fails at 48%
A help-seeker reported that everything work smoothly until 48% of the installation process, and after that, the screen went black and couldn't do anything. Before trying other methods, it is advisable to run the Windows Update troubleshooter to identify and resolve any issues with Windows Update. Once the problem appears, you can follow the suggestions for troubleshooting.
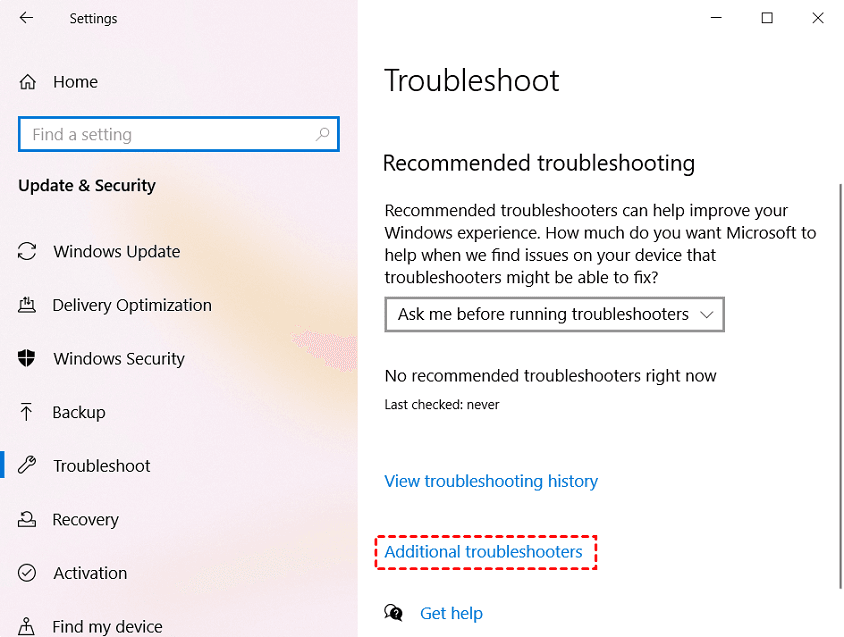
Step 1. Go to Start > Settings > Update & Security > Troubleshoot > Additional troubleshooters.
Step 2. In the Additional troubleshooters window, locate Windows Update, click on it, and select Run the troubleshooter.
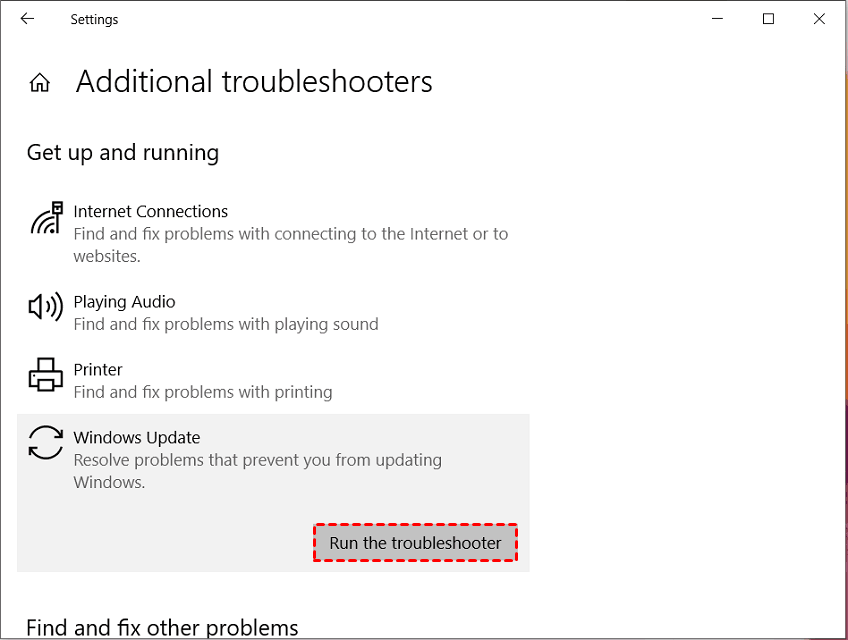
Step 3. Wait for the troubleshooter to scan for problems and apply any necessary fixes. Afterward, restart your PC, and the update should now download and install successfully.
Fix 3. Check the SoftwareDistribution folder and restart Windows Update
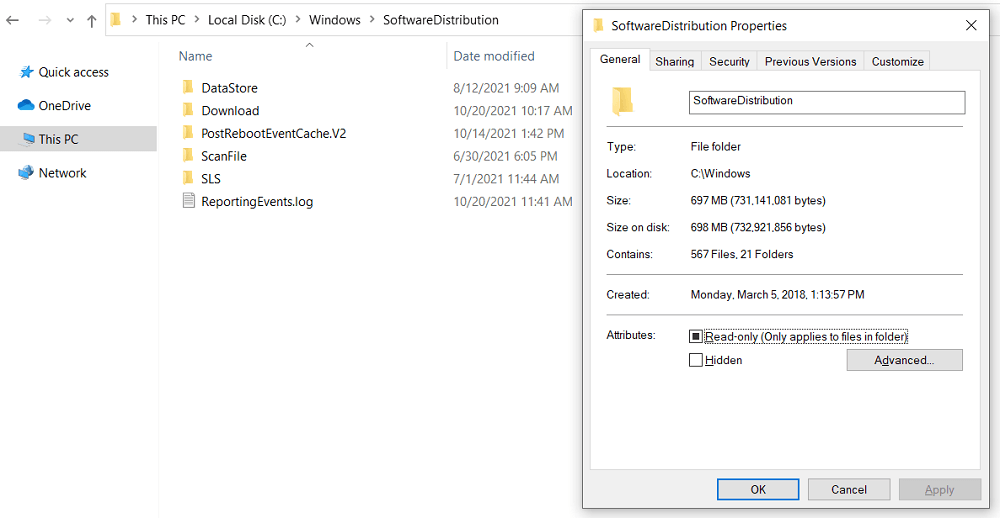
If you are unsure whether the update process is still ongoing, you can check the SoftwareDistribution folder located at “C:\Windows\SoftwareDistribution”. This folder contains temporary files and data required for the update.
While in the folder, right-click on an empty space and choose “Properties”. Monitor the folder's size to see if any new files are being added.
If the folder size remains the same, you can restart the Windows 11 update using the following steps:
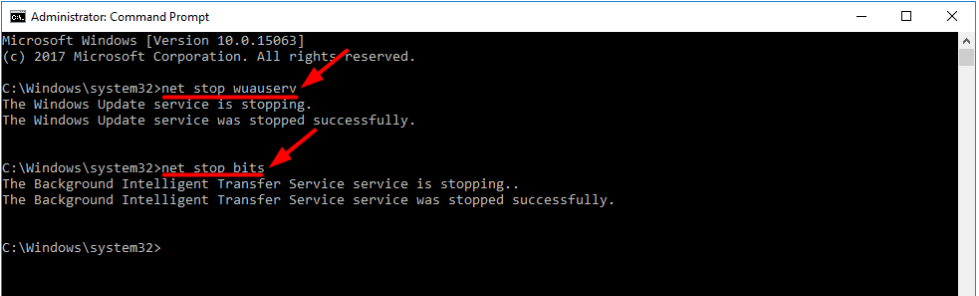
Step 1. Open the Start menu and search for "cmd". Select the "Run as administrator" option to open an elevated Command Prompt.
Step 2. Execute the commands "net stop wuauserv" and "net stop bits" sequentially. Then close the Command Prompt.
Step 3. Navigate to “C:\Windows\SoftwareDistribution” and select all the files and folders present. Right-click on the selected items and choose “Delete”. If you encounter any issues deleting them, restart your computer and attempt again.
Step 4. Launch the Command Prompt as an administrator. Run the commands "net start wuauserv" and "net start bits" one after the other. Finally, exit the Command Prompt.
Now, try updating Windows 11 once more and observing whether the Windows 11 update stuck on restarting still persists.
Fix 4. Uninstall a Conexant audio device in Device Manager
Some users have reported resolving the Windows 11 update stuck problem by uninstalling a Conexant audio device. Follow the steps below to try this method:
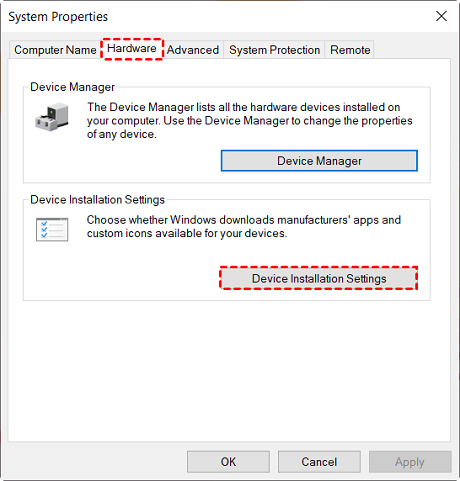
Step 1. Open the Start menu and search for "control". Select Control Panel. In the All Control Panel Items window, choose System. In the next window, select Advanced system settings.
Step 2. Click on the Hardware tab and select Device Installation Settings.
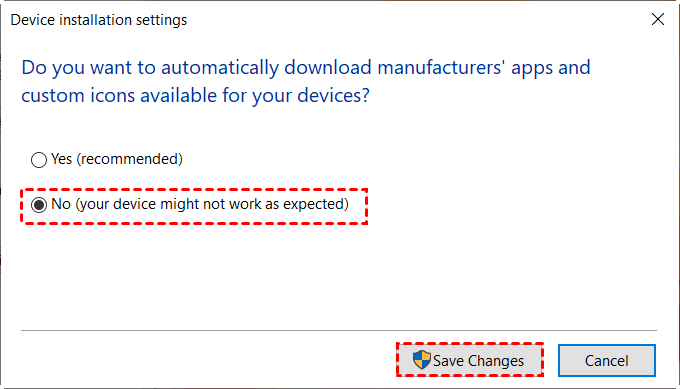
Step 3. Choose No (your device might not work as expected) and click Save Changes.
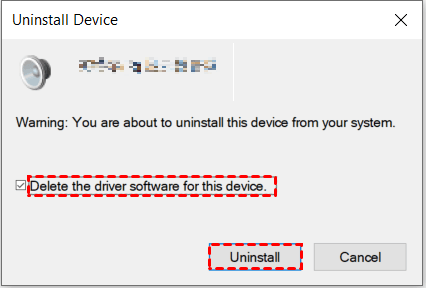
Step 4. Then Right-click on the Start menu and select Device Manager. Locate your audio device under "Sound, video, and game controllers". Right-click on the device and choose Uninstall device.
Step 5. In the pop-up window, check the box that says "Delete the driver software for this device" and click Uninstall.
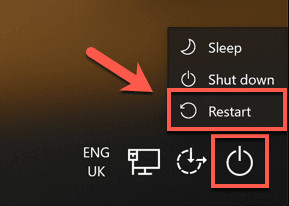
Step 6. Reboot your computer. Open Device Manager to ensure the device drivers are not automatically reinstalled. Then, attempt the Windows 11 update again. After the update finishes, re-enable driver downloads.
Fix 5. Launch Windows Update in Safe Mode with Networking
The error message "Updates are underway. Please keep your computer on" can sometimes occur due to conflicts between Windows Update and other programs or services. You can attempt to resolve this issue by booting Windows 11 into Safe Mode with Networking. Follow the instructions below:
Step 1. Press and hold the “Shift” key on your keyboard. Click the “Power” button, then select Restart.
Step 2. After your computer restarts and reaches the "Choose an option" screen, choose Troubleshoot > Advanced options > Startup Settings > Restart.
Step 3. Once your computer restarts, a list of options will appear. Press the 5 key or F5 key to start your computer in “Safe Mode with Networking”.
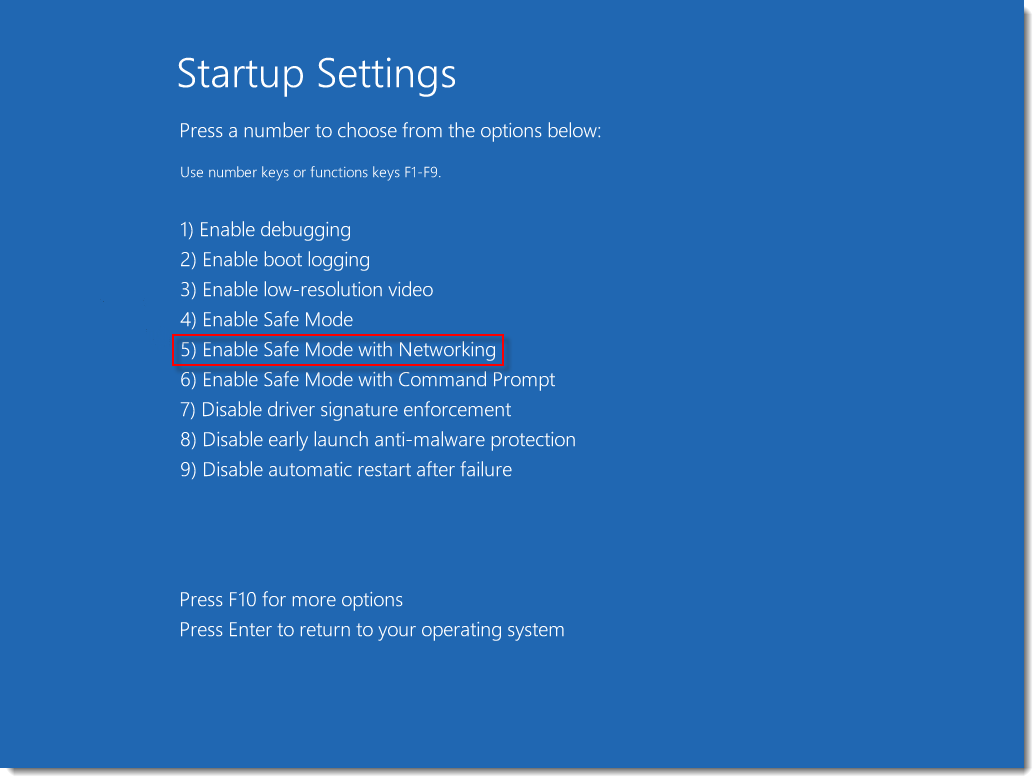
Step 4. Manually start the Windows Installer Service and then run Windows Update.
By following these steps, you can attempt to resolve the Windows 11 update fails and ensure a successful update process.
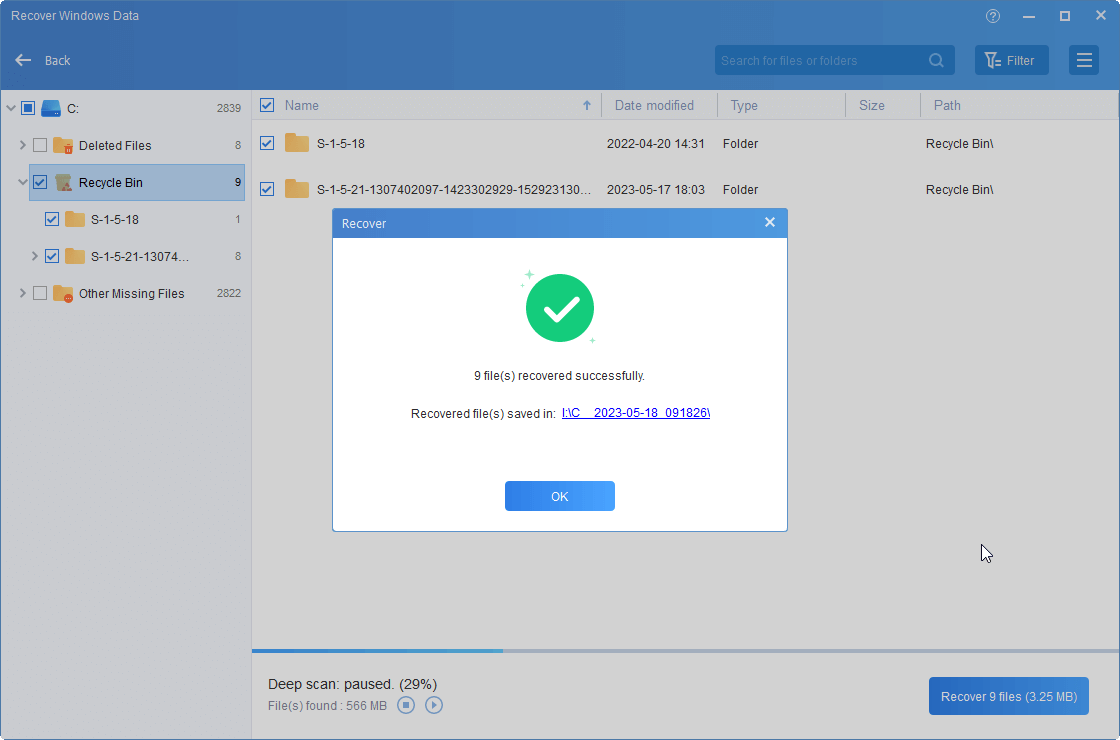
Further reading: Recover lost data after Windows 11 updating
Causes such as software bugs, compatibility issues, or system interruption may all probably lead to data loss. Once you indeed suffer from data loss due to the lack of backup, you can also turn to AOMEI Partition Assistant Professional for help.
This multifunctional and robust tool allows you can easily retrieve over 200 types of data files back from various drives like HDD/SSD/USB/SD cards due to disk formatting, crashes, and virus attack.
Conclusion
“Windows 11 update fails” issue can be solved with five methods. Before making system-related modifications or troubleshooting, it is necessary to back up important data for data safe. With AOMEI Partition Assistant, you can easily make a copy of all your data, including the operating system.
This multifunctional software can not only copy your disk and recover lost data, but it can also allocate free space to extend C drive space, migrate OS to SSD for computer performance enhancement, and convert system disk between MBR/GPT for Windows 11 upgrading. Windows Server users can turn to the Server Edition for a better experience.

