How to Create a Windows 11 Repair USB
Windows 11 repair USB is a helpful tool when your computer has problems and boot in failure. In this post, you can learn to make one to repair your PC when you need.
By Lucas / Updated on April 3, 2025
Why create a Windows 11 repair USB?
Windows 11 has been around for a time, and despite varied reviews and criticism, many users have used it since its debut.
Some people may already meet some issues that result in a system boot failure. In most circumstances, when the Windows 11 OS fails and the PC strangely begins to operate slowly, the first choice will be to look for solutions online. You might be able to find an effective solution to this problem.
But if this does not work, the last step should be to reinstall the operating system. What if your PC lacks an optical drive or the original installation CD/DVD is no longer available?
In this case, a repair USB is an excellent option, as it also allows you to reinstall Windows 11 using a USB drive. In a nutshell, the USB stick is portable and works with practically all PCs and laptops. Furthermore, installing the operating system or repairing system issues via a USB device is more convenient than using other tools like CD or DVD.
2 ways to create a Windows 11 repair USB
In this section, we have two methods for creating a Windows 11 repair USB stick. The first is to use CMD to make a USB that serves as both a repair and an installation USB. The second method is to use a third-party program to build a repair tool to repair system problems.
Method 1. Using CMD to create Windows 11 repair USB
· Download the Windows 10 ISO files from the official site
· Make sure the USB flash drive has at least 16GB of free space.
Step 1. Press “Win”+ “R” at the same time to open the “Run” dialogue. Input “cmd” and hit on the “Enter” key.
Step 2. When the Command Prompt opens, type “diskpart” and press “Enter” to launch the DiskPart.exe tool. Then execute the following command in sequence.
list disk
select disk #
clean
create partition primary
select partition 1
format fs=fat32 quick (Windows 11 requires UEFI boot, only fat32 can be used in this command.)
active
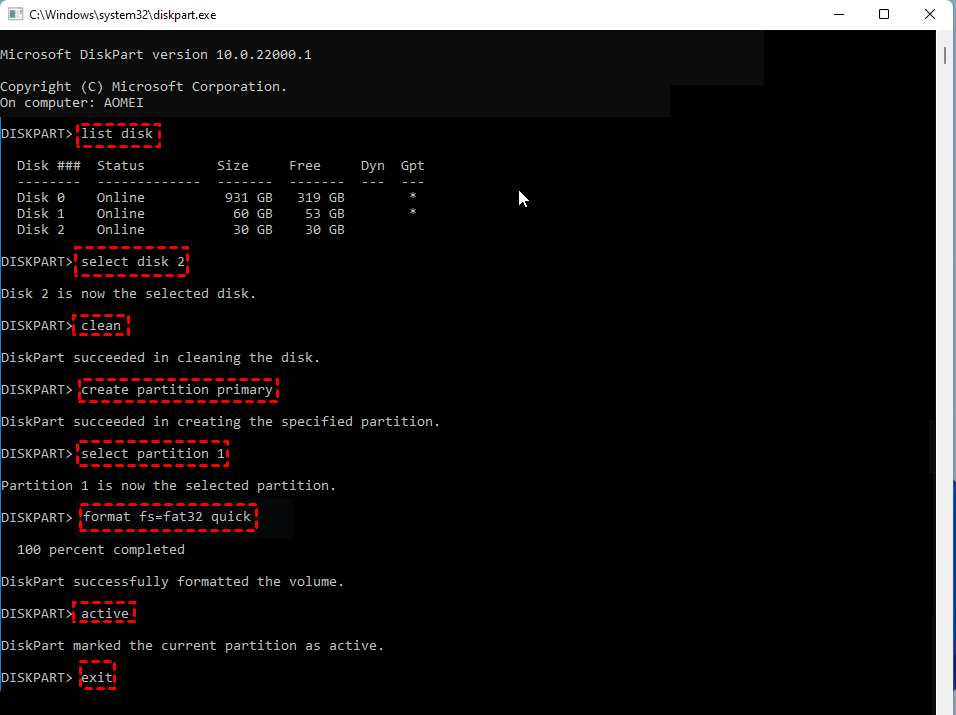
After you format the USB flash drive, please type “Exit” to close the diskpart.exe. Then use File Explorer to copy and paste the entire contents of the Windows ISO to the USB flash drive.
If the Windows image file is over 4GB, you will fail to copy files onto the USB, because it surpasses the file size limit of the FAT32 file system. Once it happens, do as below:
• Copy everything except the Windows image file (sources\install.wim) to the USB drive, either dragging or dropping. Or use the command: robocopy D: F: /s /max:3800000000 (D: is the mounted ISO and F: is the USB flash drive.)
• Split the Windows image file into smaller files, and copy them onto the USB drive:
Dism /Split-Image /ImageFile:D:\sources\install.wim /SWMFile:F:\sources\install.swm /FileSize:3800
Some users might also have question about “How do I run Windows repair from USB?”, don’t worry, we’ll show you.
Step 1. Plug your USB in the port and turn on your computer and enter the UEFI interface, here you need to select the USB as the boot device.
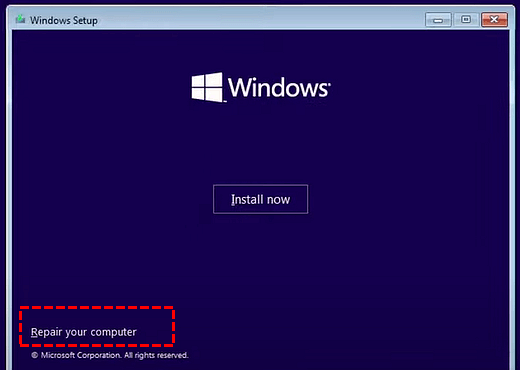
Step 2. Then, you’ll see the Windows Setup window. Please set all language, time, and keyboard information.
Step 3. When you see “Install now”, please click the “Repair your computer” to enter the repair environment.
Then you can choose the needed option. “Troubleshoot” offers advanced repair tools like CMD and automatic repair option.
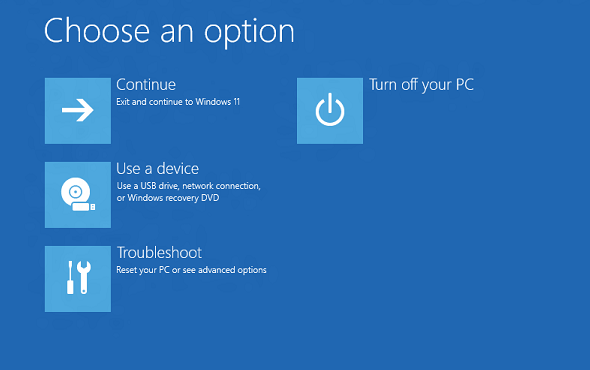
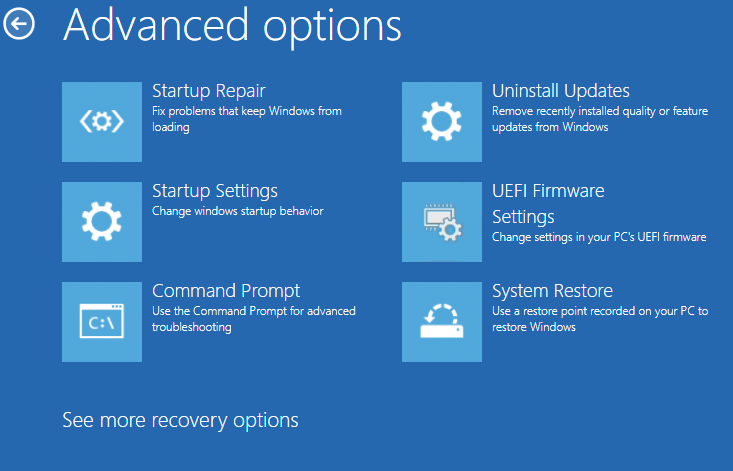
You can choose one to fix your problem.
Method 2. Create Windows 11 repair USB via a third-party disk manager
Although CMD is a helpful built-in tool, the complex commands might be too professional for many ordinary users. And sometimes the commands can’t run because of some system or setting limits.
Therefore, if you’re a bit confused about CMD orders, a user-friendly third-party tool is a convenient alternative to help you make a Windows repair USB. AOMEI Partition Assistant Professional is such a tool you need. It’s developed for Windows 11/10/8/8.1/7 system to manage their disk easily and efficiently.
There are 2 functions of this handy tool that can help you repair your Windows 11.
● Make Bootable Media
The “Make Bootable Media” feature can help you create a repaired USB. Once you plug the USB in and boot your PC from this USB, the interface of this tool will appear on the screen, and all functions can be used to fix your issue. You can “Rebuild MBR” to fix “Operating System Not Found”, convert the system disk to GPT/MBR, and extend the C drive for OS upgrade…
● Boot Repair
This Windows disk and partition manager's "Boot Repair" feature is designed to fix missing or corrupted BCD files, providing users with a simple and efficient way to restore their computer's normal boot function quickly.
No complex order typing, only clicks are needed. Next, we’ll show you the details.
▶ Note: Both functions will erase all data on the USB drive, please back up crucial data.
▍ Make Bootable Media
Step 1. Install and run this tool. Click "Tools"> “Make Bootable Media” and click “Next”.

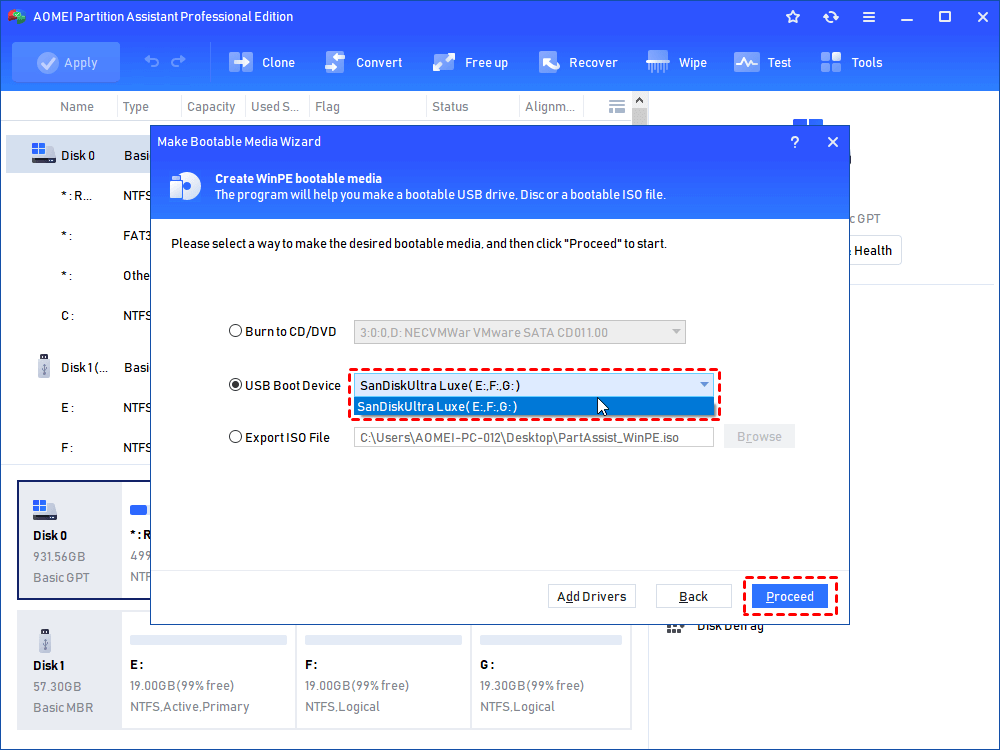
Step 2. On this page, choose “USB Boot Device” and select your USB drive. Then, click “Proceed”.
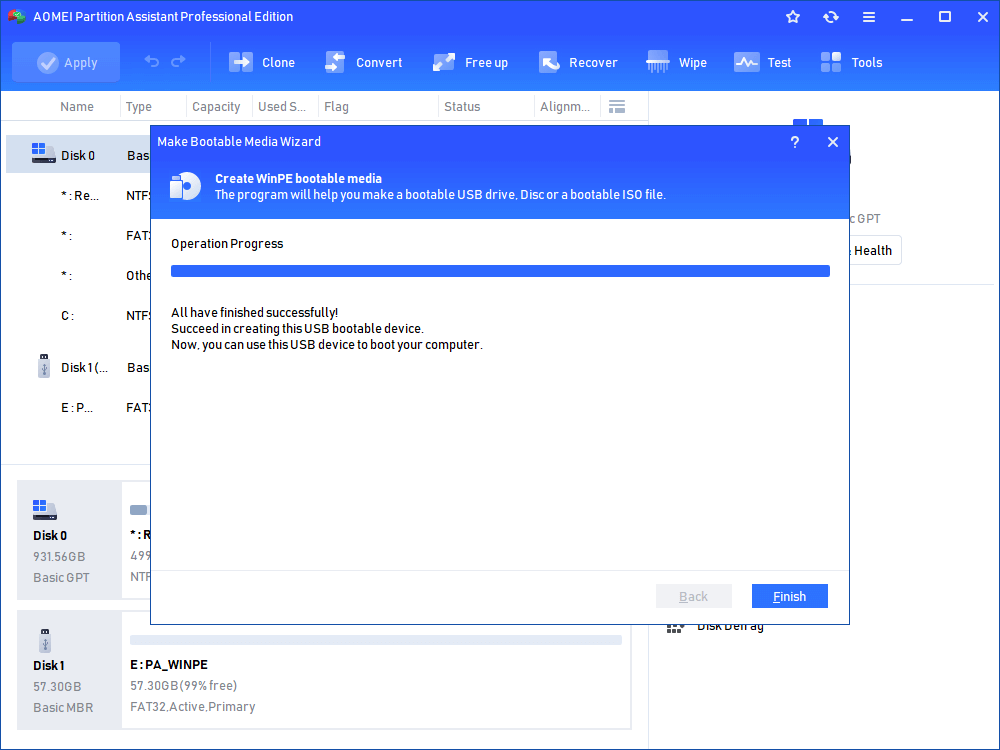
Step 3. Click “Yes” to continue. When the process completes, click “Finish”.
In only 3 steps, you can create a Windows 11 repair USB, and then you can use it to solve PC problems.
This tool also allows users to create a Windows 11 to-go USB to run Windows 11 on any PC anywhere they need.

▍ Make Boot Repair USB
Step 1. Install and launch AOMEI Partition Assistant on a working PC, click "Recovr"-"Boot Repair" and then click the "create a bootable disk" option to create a WinPE "Boot Repair" disk.

Step 2. Follow the instruction, you can enter the guide to create window for creating a Win PE bootable Media. Please download ISO file that fit your OS.
Step 3. After you create a boot repair disk for Windows, you can plug the bootable disk you created into the target computer you wish to repair the boot issue.
Step 3. Enter BIOS in your computer, choose the bootable disk as the boot drive to access AOMEI Partition Assistant.
Step 4. The PC that cannot boot into WinPE will automatically load the Boot Repair tool and start the boot entries scan process. After the process is completed, it will display the scan result: system paths, system versions, and boot status. And, all repairable boot entries will be available to select.
If you click "Advanced Options", you can customize the a location to store the repaired boot entry.
Step 5. Select one/multiple repairable boot entries you want to repair and click the "Repair" button to start the boot repair.
Step 6. Wait for the repair process to finish. Once it is finished, you can check the repair result. If it succeeds, you will get a "Repair Successfully" result.
Now you can remove the USB and boot your computer to check.
Summary
Are you satisfied with the 2 ways how to create a Windows 11 repair USB we offer? The clear operation of AOMEI Partition Assistant is easy for many users, and various functions it has can help you manage your device conveniently such as dynamic disk management, disk clone, migrating OS to SSD, etc.

