[Answered] Should I Partition My SSD for Windows 11? How?
If you want to know “should I partition my SSD for Windows 11 or not?” You can read to know the answer. If you need, you can follow the guide to partition an SSD in Windows 11 easily.
By Lucas / Updated on March 17, 2025
User case: SSD only has 1 partition on Windows 11 PC
"I just bought a new PC from a local digital store. After it powers on, I planned on installing some video games and so, I went to the File Explorer to check storage space. However, I noticed there was only 1 partition on the SSD, unlike my old PC that contains the C, D, E, F, and G drives. Thus, should I partition my SSD for Windows 11 or just let it be?"
Should I partition an SSD for Windows 11?
The SSD, short for Solid-State-Drive, is becoming more and more popular over the past few years. Compared with a traditional HDD, an SSD dramatically improves the system performance. For example, shorter load time, higher read-write speed, and less noise.

Many users choose PCs with SSDs pre-installed on Windows 11. However, upon first boot, they often find only one partition—the C drive—rather than multiple drives like C, D, E, and F. So, is it necessary to partition an SSD for Windows 11? The answer depends on your needs. For most users, a single partition is sufficient. However, power users or those running multiple operating systems may benefit from partitioning.
Partitioning an SSD in Windows indeed have benefits and drawbacks, depending on your unique requirements and circumstances. In conclusion, whether it is advisable to partition your SSD in Windows is determined by your unique needs and tastes. Partitioning can help you organize your data, segregate various sorts of data, or set up a dual-boot arrangement.
However, if you don't have a specific partitioning requirement or prefer simplicity, leaving your SSD as a single partition may be more appropriate. Here are some considerations list in the following table.
Pros of partitioning SSD
| Pros of Partitioning SSD | Description |
|---|---|
| Organization and Data Management | Divides SSD into separate areas, making it easier to organize files (e.g., OS, apps, personal data). |
| Improved Performance | Enhances speed by separating different types of data, reducing access times and improving system performance. |
| Dual-Boot Setups | Allows multiple operating systems dual boot on separate partitions, enabling easy switching. |
| Data Protection and Recovery | Isolates important files, reducing the risk of data loss in case of system or disk boot failure. |
Cons of partitioning SSD
| Cons of Partitioning SSD | Description |
|---|---|
| Potential Space Constraints | Fixed partition sizes may lead to inefficient SSD space usage or running out of storage in certain partitions. |
| Complexity and Maintenance | Requires ongoing management, resizing, and adjustments, making storage more complex to maintain. |
| Reduced Flexibility | Changing partition sizes later can be difficult and may require data backup and restoration. |
Top 2 ways to partition an SSD for Windows 11
"Should I partition Windows 11 SSD and how to get it done?" After referring to the introduction above, some of you must’ve decided to make the disk partitioning. Here, the top 2 ways are listed. Just choose either of them according to your requirements.
Way 1. Use Disk Management to partition SSD in Windows 11
Disk Management is a powerful Windows built-in program that helps manage your hard drives and partitions efficiently. It performs various operations including partition format, partition extension, and partition deletion. This time, we’re going to partition an SSD for Windows 11 from Disk Management.
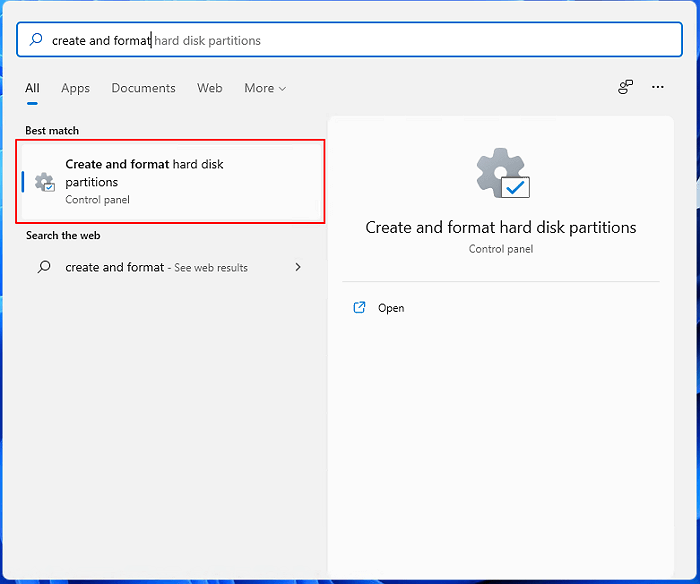
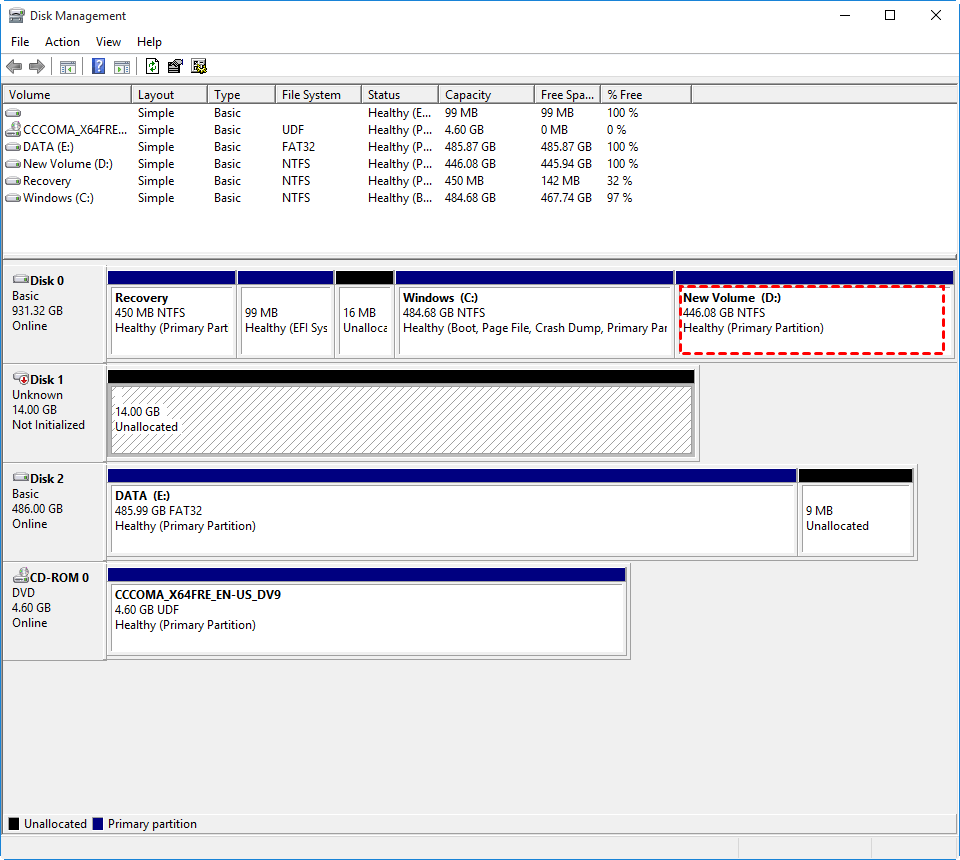
Step 1. Hit the search icon from the Windows 11 desktop and type "create and format hard disk". Then, open Disk Management.
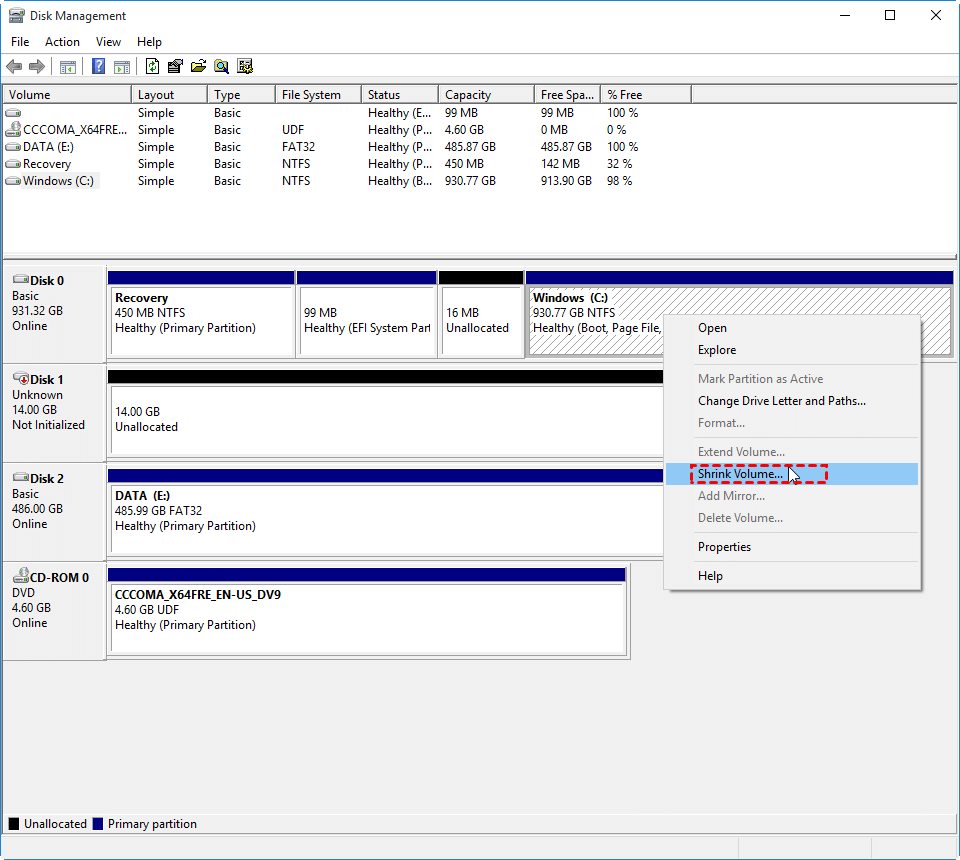
Step 2. Then, you’ll find the SSD only contains one partition. Right-click on the partition and select "Shrink Volume".
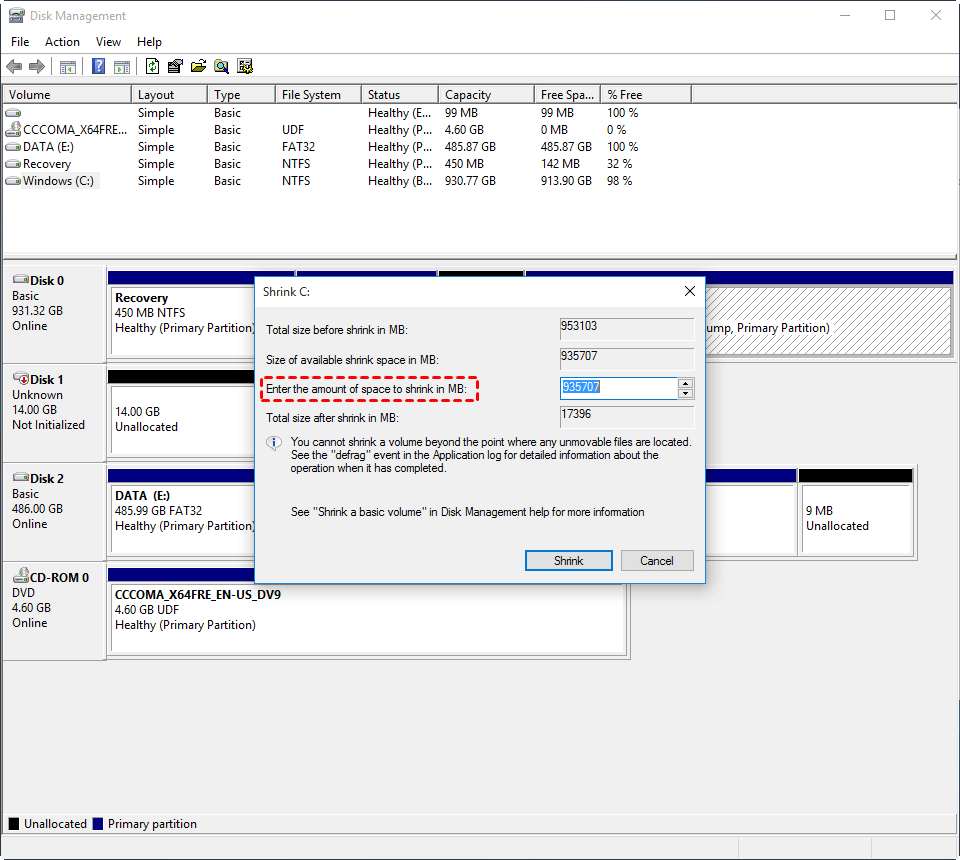
Step 3. Enter the amount of space to shrink in MB and after that, hit "Shrink" to proceed.
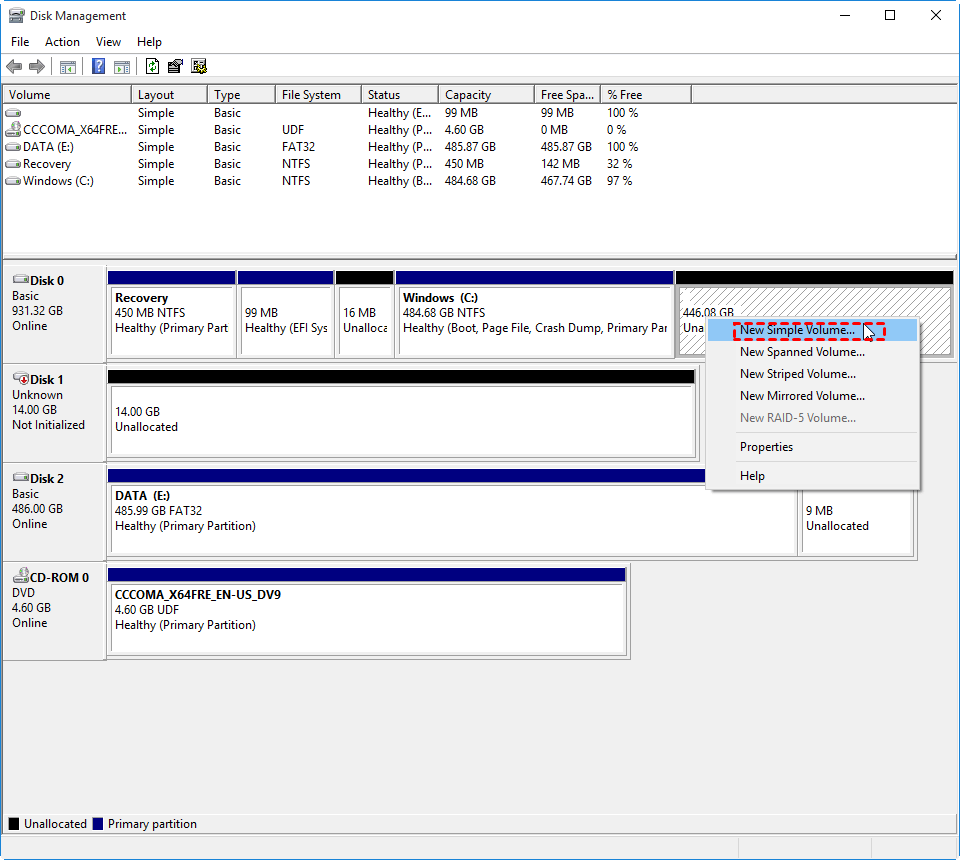
Step 4. Now, a piece of unallocated space appears right after the C drive. Right-click on it and select "New Simple Volume".
Step 5. Follow the onscreen guide to finish the rest steps.
Note:
1. Disk Management only supports shrinking NTFS and RAW partitions. If it’s an FAT32 partition, you have to convert FAT32 to NTFS first.
2. When shrinking the C drive, it’s suggested to leave at least 100GB or 120GB of free space. On the on hand, it ensures there’s sufficient storage space for a future update; on the other hand, a PC runs smoothly when there’s enough storage space on the system drive.
🔥Way 2. Try an all-in-one disk partition manager for Windows 11/10/8/7
Disk Management is a good tool for disk partitioning. However, as you’ve seen above, you have to shrink the source partition first to create unallocated space before you’re able to create another partition. If you think it’s too complex or the only partition on your SSD is in FAT32, then, there’s a better alternative – AOMEI Partition Assistant – to help you complete the SSD partitioning in only a few clicks.
In addition to this function, it also offers many practical features for partition management. For example, its 1-Click Adjust Space allows you to even shrink partitions in Windows PCs with unmovable files, or you can try its delete, resize, wipe, and clone partition feature according to your own needs.
To partition SSD on Windows 11, try the best disk manager out there to save both your time and energy.
The Best Windows Disk Partition Manager and PC Optimizer
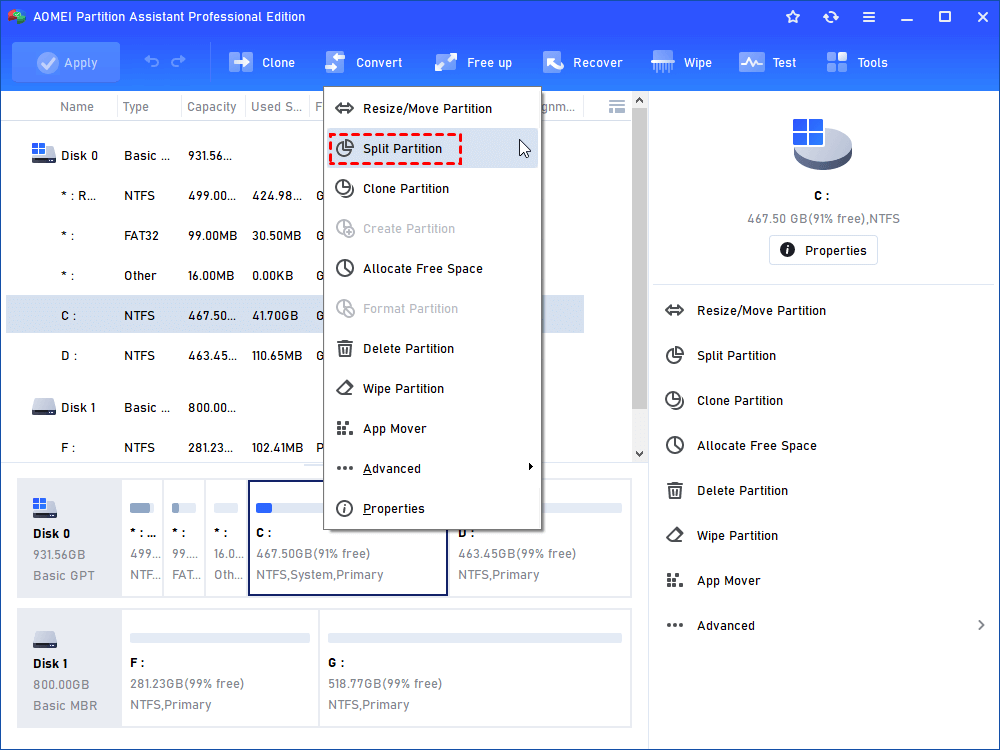
Step 1. Install and launch AOMEI Partition Assistant. When all disks and partitions appear, right-click on the C drive and select "Split Partition".
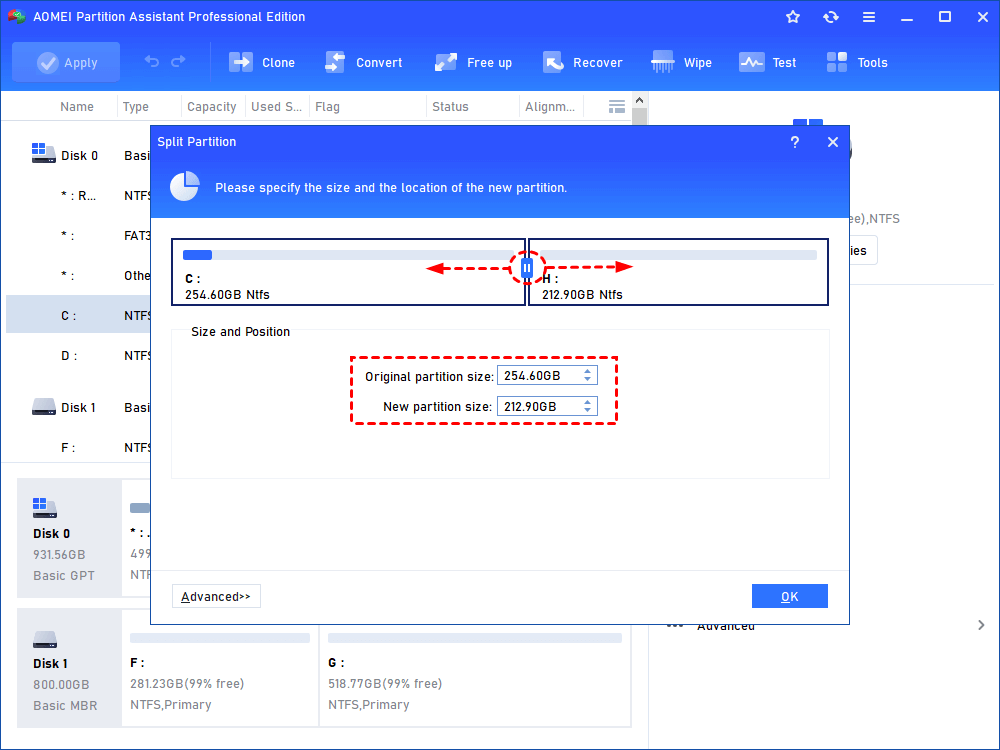
Step 2. Now, you can see 2 partitions on the screen. One is the C drive and the other is the E drive. Drag the ring between the 2 partitions to customize the sizes. When it’s done, click on "OK".
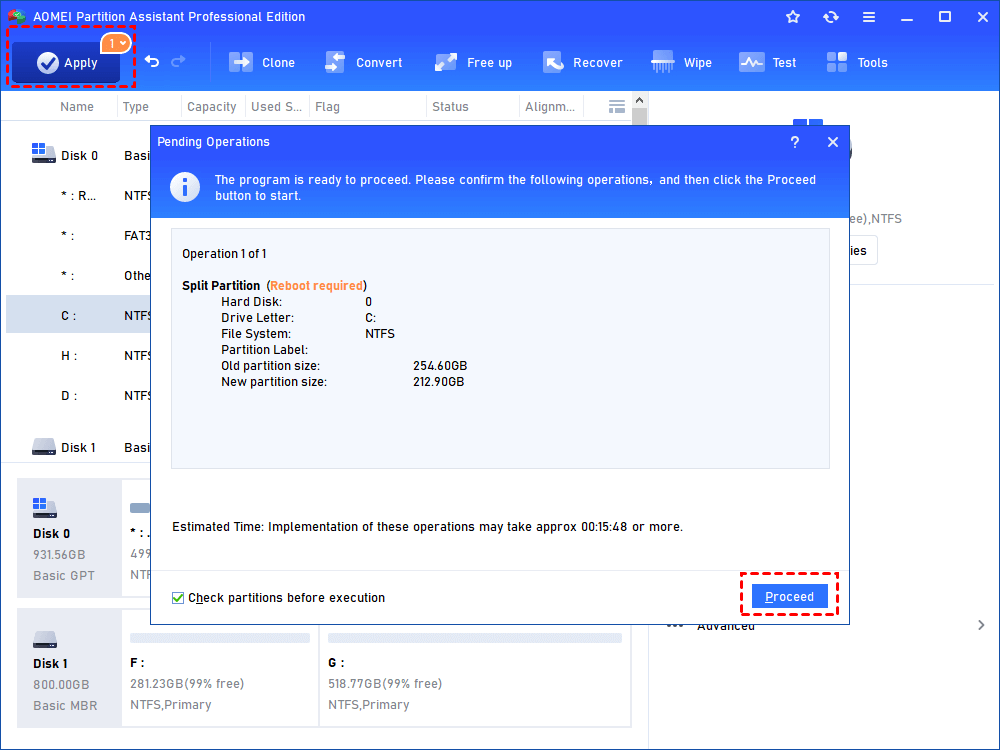
Step 3. After returning to the home interface, hit "Apply" to commit the operation.
Apart from partition splitting, you can also try another feature of this software – Quick Partition – to create multiple partitions simultaneously from the C drive. In this way, the old existing files will be covered. So, please make a backup first.

Further reading: How to partition an SSD during Windows installation?
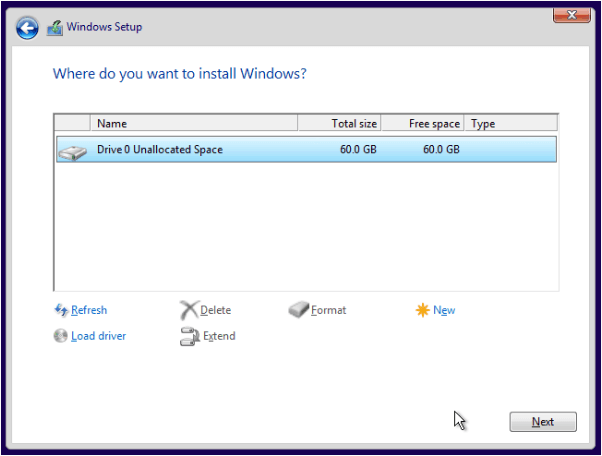
Sometimes, people want to install Windows on their newly purchased SSD but have no idea how to create multiple partitions during the Windows Setup. So, you’ll learn to use a Windows installation disc to run DiskPart and create extra partitions as follows.
Step 1. Insert your installation disc into your PC and boot from it.
Step 2. At the Windows Setup screen, press “Shift + F10” at the same time to launch Command Prompt.
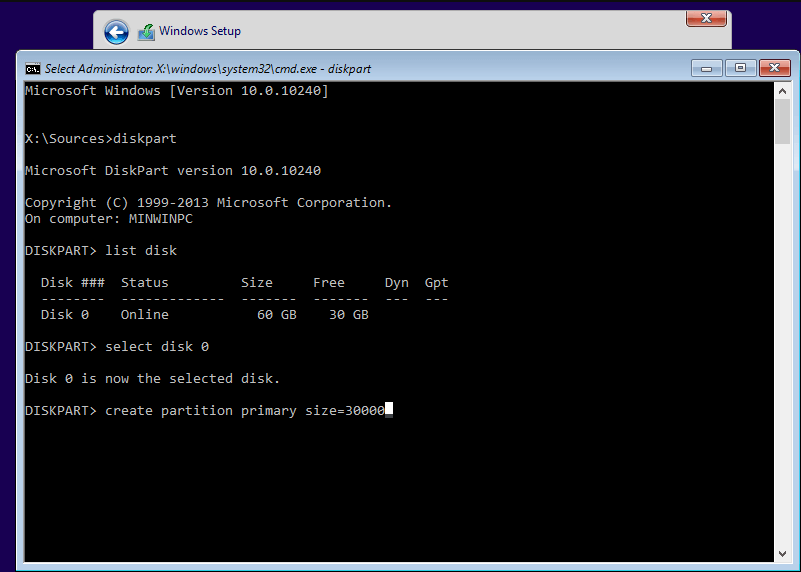
Step 3. Type "diskpart" and hit "ENTER".

Step 4. Run the lines below to create a new partition.
◆ select disk [disk number]
◆create partition primary [size=n]
For example, the follow process is creating a 30000MB primary partition on disk 0:
◆ select disk 0
◆ create partition primary size=30000
Conclusion
Should I partition my SSD for Windows 11 when there’s only one partition on your newly purchased computer? Don’t worry, besides using Disk Management to create partitions from unallocated space, the more powerful third-party software – AOMEI Partition Assistant – helps you partition SSDs on Windows 11 with much more ease. If you dig deeper, you’ll discover more useful features of this AOMEI product including free space allocation and SSD 4K alignment. If you want to use this software on Servers, you can try the Server edition.

