How to Manage Disks on Windows 11 Safely and Easily
In this post, we’ll talk about what is Disk Management and how to use it to manage disks on Windows 11. Besides, another powerful partition manager AOMEI Partition Assistant Standard will also be provided too.
By Tina / Updated on May 12, 2023
Overview of Disk Management on Windows 11
Windows 11 is an operating system developed by Microsoft Corporation and released on October 5, 2021. Compared with Windows 10, Windows 11 adds many innovative features including a new version of the Start menu and input logic. Besides, it’s smoother, and the desktop settings are simpler and more beautiful, which can improve the users' comfortableness.
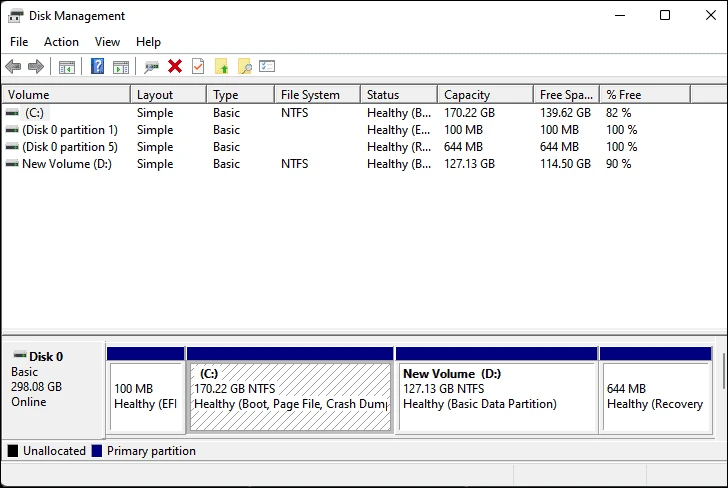
Disk Management is a free and practical utility can manage disks on Windows 11. When encountering some disk problems, users can first consider using Disk Management to solve these problems, such as extend volume, format volume, create a new partition, and so on.
How to get Disk Management on Windows 11
There are various and simple ways to open Windows 11 Disk Management, and we'll show you two of them.
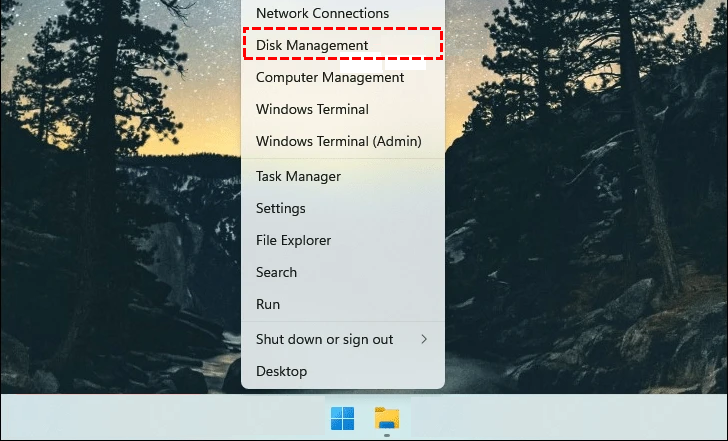
Method 1. Via Start Menu
Step: Right-click "Start" to open this quick menu, then click "Disk Management".
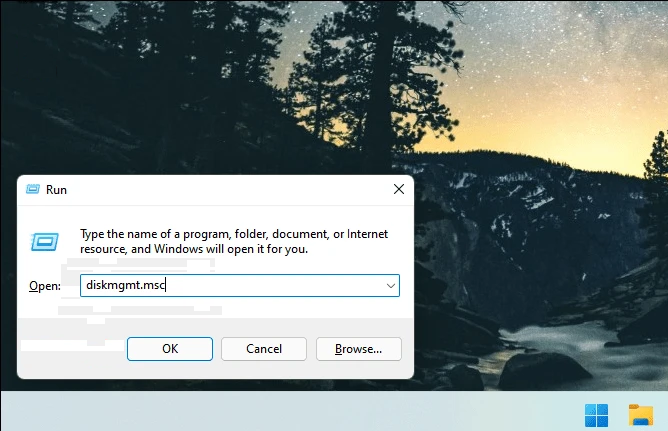
Method 2. Via the "Run" program
Step: Press "Windows+R", then type "diskmgmt.msc" in the popped window and press "Enter".
How to use Windows 11 Disk Management
We already knew what is Disk Management mentioned above, now we’re gonging to discuss how to use this built-in disk manager on Windows 11 to solve several common disk problems in the following content.
│Case 1. Extend volume
When Windows users receive the low disk space warning, they may want to look for an easy and free way to extend the C drive, which Disk Management can be helpful to do it.
Note: There must be an adjacent unallocated space next to the target volume is needed, or you will meet the bad situation taht Extend Volume will be greyed out.
Step 1. Open Disk Management with the "Run" program mentioned above, right-click the boot partition and select "Extend Volume".
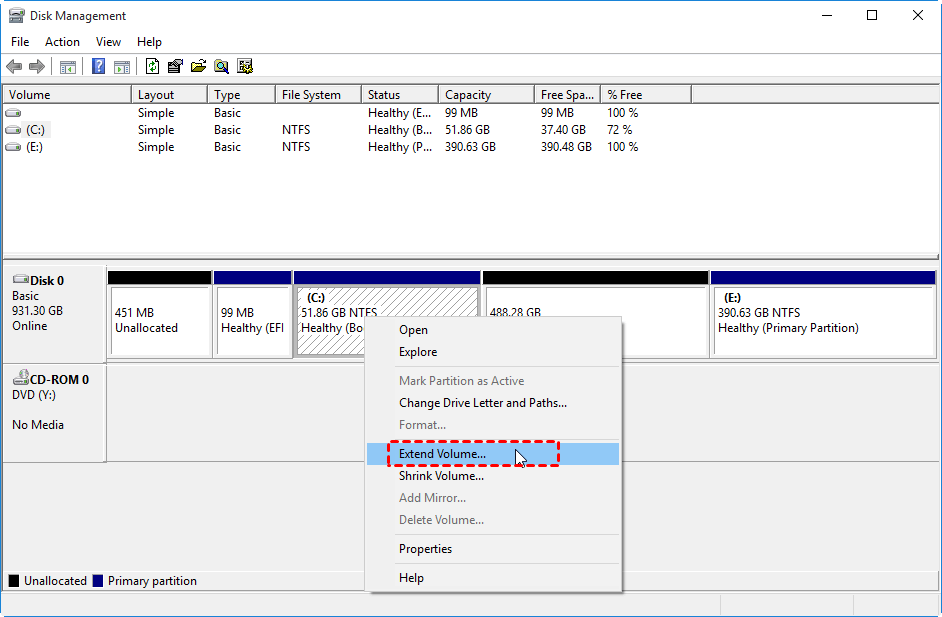
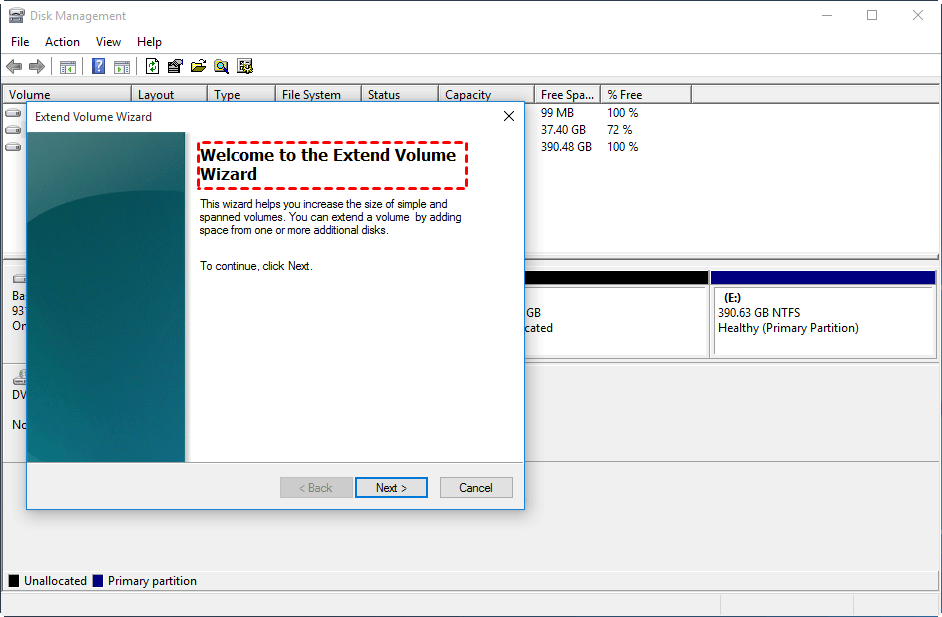
Step 2. You can see a guidance popped, please follow it to complete the rest steps.
│Case 2. Format partition
Formatting partition is the best way when the file system corrupted or you want to reallocate space of the hard drive.
Warnings:
✍ Once the partition is write-protected, you also cannot format it.
✍ If the size of your target drive is over 32GB, you will fail to format it on your computer.
Step 1. Click "My Computer" and click "Management", then select "Disk Management" under "Storage" in the popped window, right-click the target partition and select "Format".
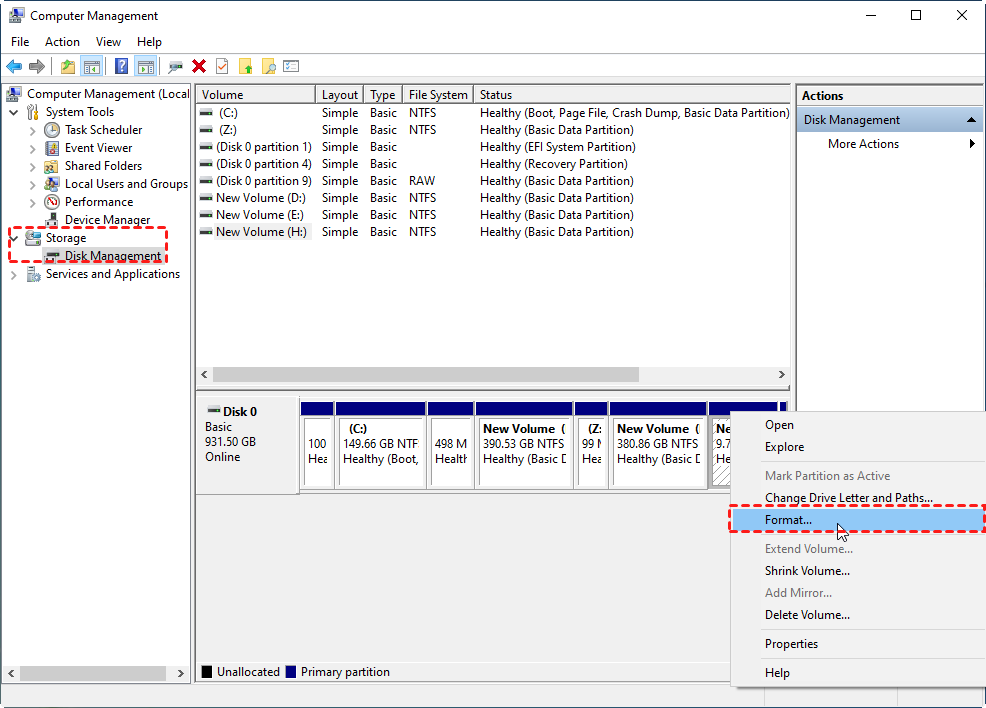
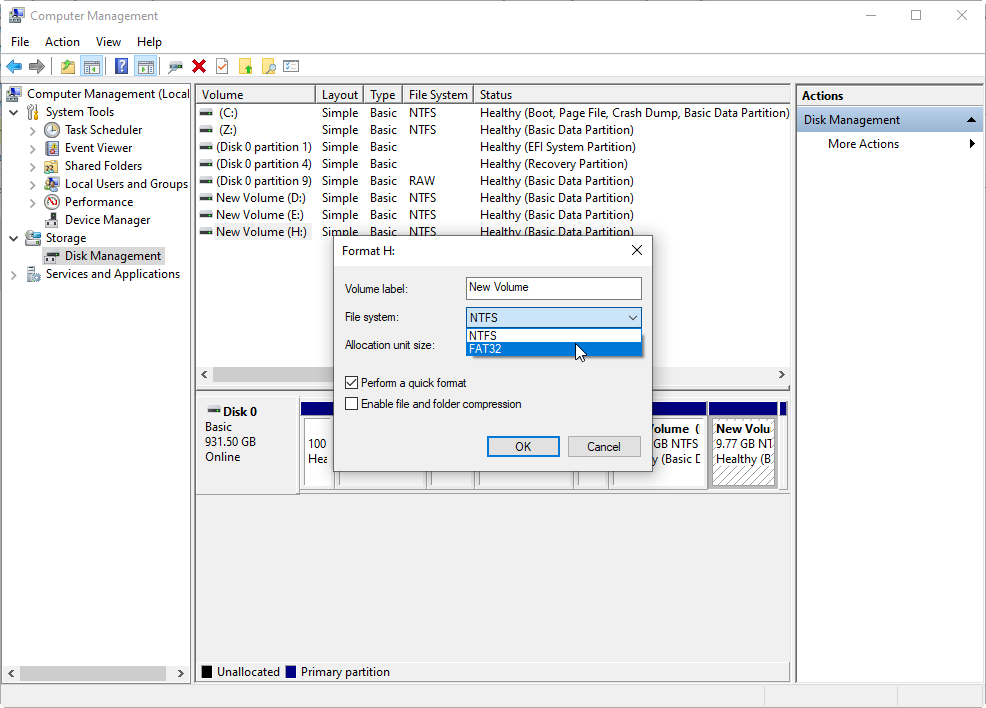
Step 2. Set the volume label and file system, then click "OK".
│Case 3. Convert MBR to GPT
For some reasons, users may need to convert MBR disks to GPT or GPT to MBR. In this case, you can also do it with Disk Management.
Step: Open Disk Management and right-click the target volume, select "Convert to GPT Disk" and follow the guidance to complete the whole task.
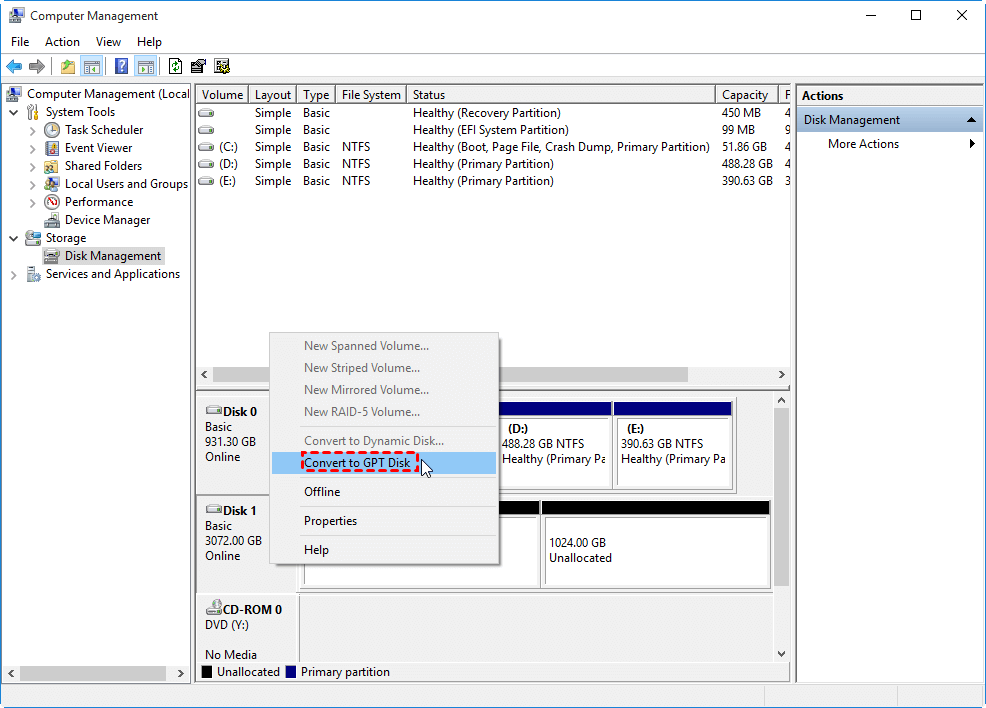
Tip: Disk management can only convert empty non-system disks from MBR to GPT, because it requires deleting all volumes on the hard disk before converting. Otherwise, Convert to GPT Disk will be grayed out.
A better disk manager on Windows 11
You may have discovered that although Disk Management can help you manage disks on Windows 11, it has some limitations: There must be adjacent unallocated space to the partition when you want to extend it; the partition must be smaller than 32GB and not be write-protected when you need to format it; the hard drive must be empty if you want to convert it to GPT.
To manage your disks more safely and easily, you can try AOMEI Partition Assistant Standard, which is a better Windows 11 disk manager specially designed to manage drive. It breaks through various limitations of Disk Management, and provides solutions for different situations.
In addition to several functions to be mentioned next, this powerful software can also help you wipe hard drive, delete partition, rebuild MBR, etc.
Let’s see how to use the tool to manage disks together.
│Situation 1. Extend volume
When you extend volume via Disk Management on Windows 11, you may encounter some limitations. Below, I will use AOMEI Partition Assistant to show you how to expand the volume in different situations.
Method 1. Resize partition (Free)
When there is an adjacent unallocated space of the target partition on the same hard disk, you can resize the partition for free.
Step 1. Right-click the partition you decide to extend and click "Resize/Move Partition".
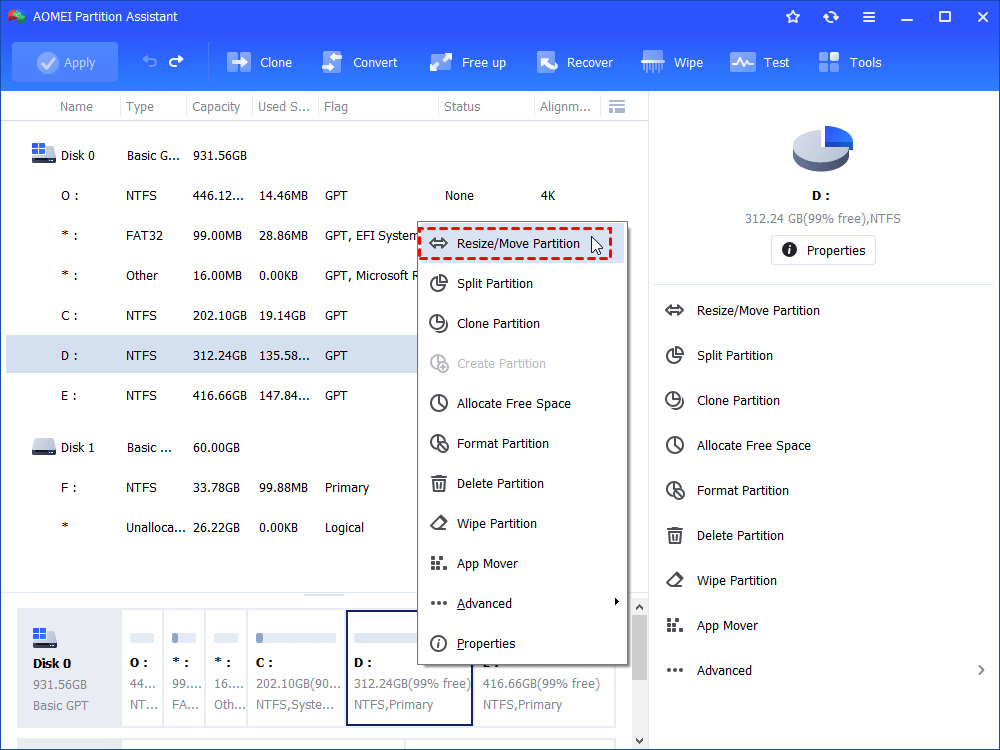
Step 2. Drag the circle to the right side and click "OK".

Step 3. Click "Apply" and "Proceed" to complete the pending operation.
Method 2. Merge partitions (Free)
If the target partition and the unallocated space are on the same disk, but not adjacent. The “Merge Partition” feature can merge the unallocated space with the target partition.
Step 1. Right-click the target partition and click "Advanced"> "Merge Partitions".
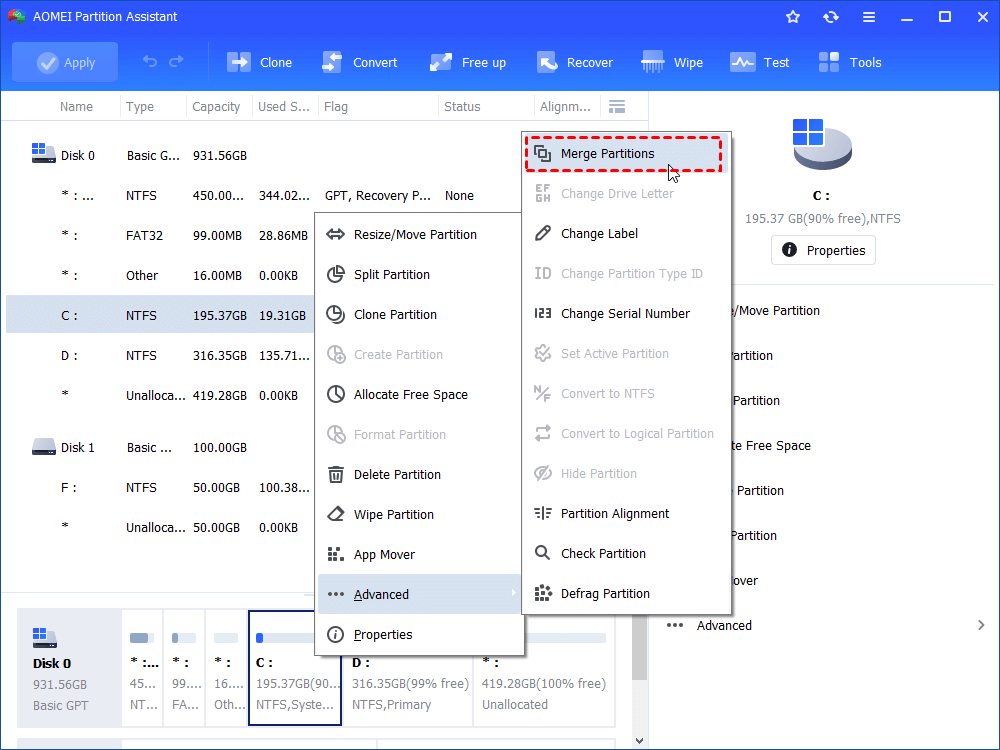
Step 2. Tick C drive and the unallocated space, then click "OK".
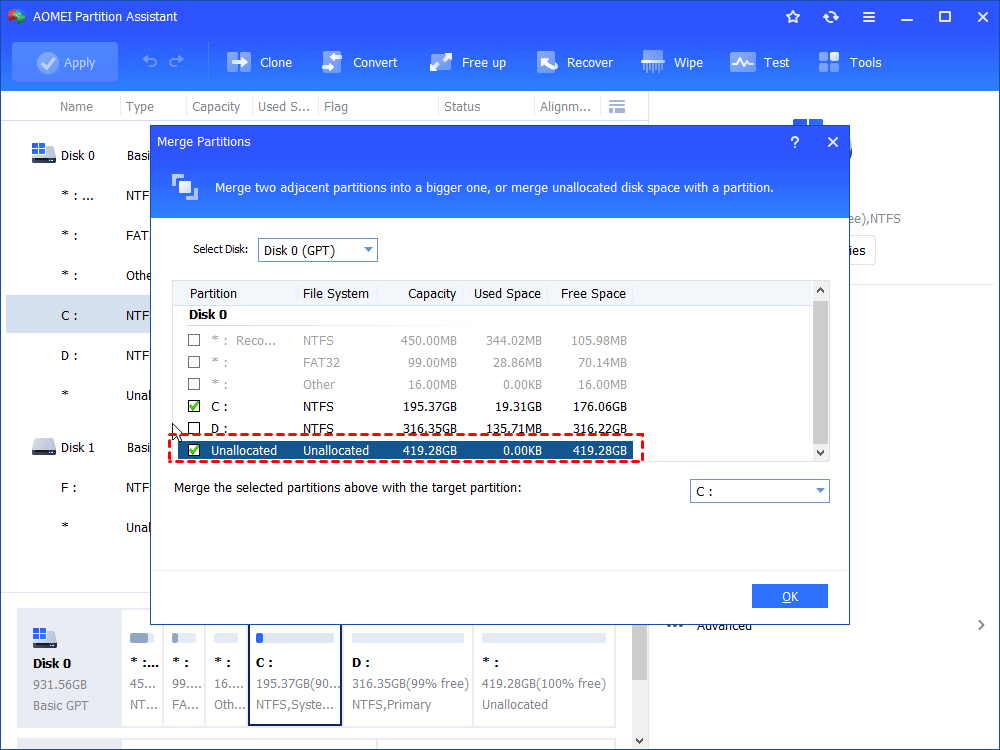
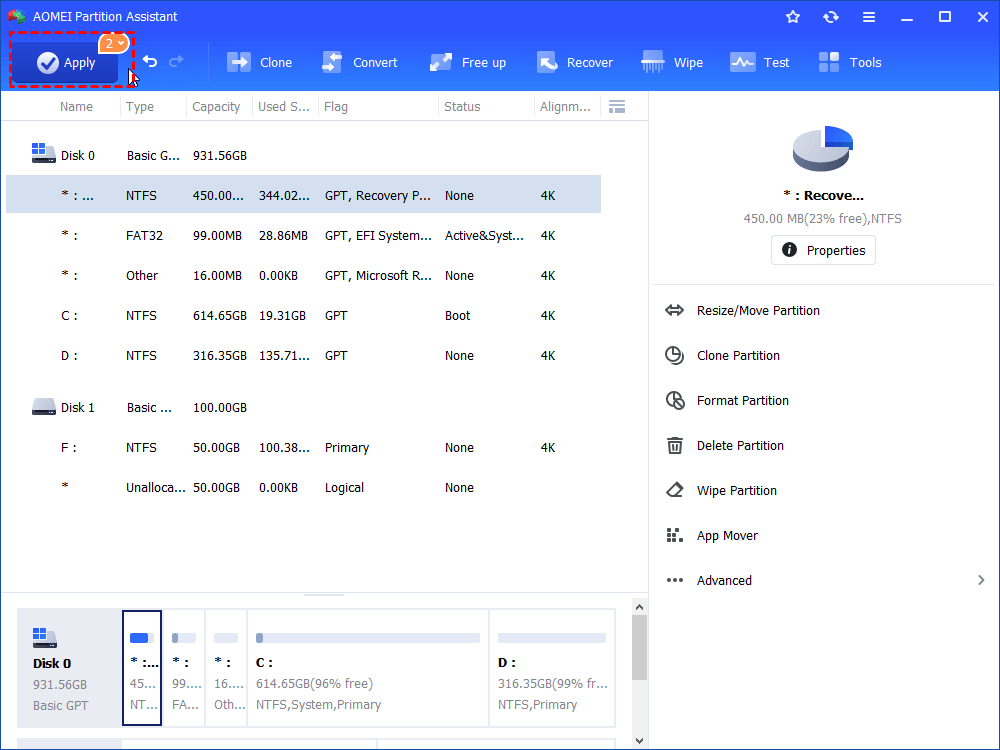
Step 3. Click "Apply" to execute the whole setting.
Method 3. Allocate free space (Advanced)
If the “Extend Volume” button is greyed out because there is no unallocated space in the same hard drive, you can turn to the Professional Version and use the advanced feature "Allocate Free Space" to move the free space of another drive to expand the C drive without losing any data.
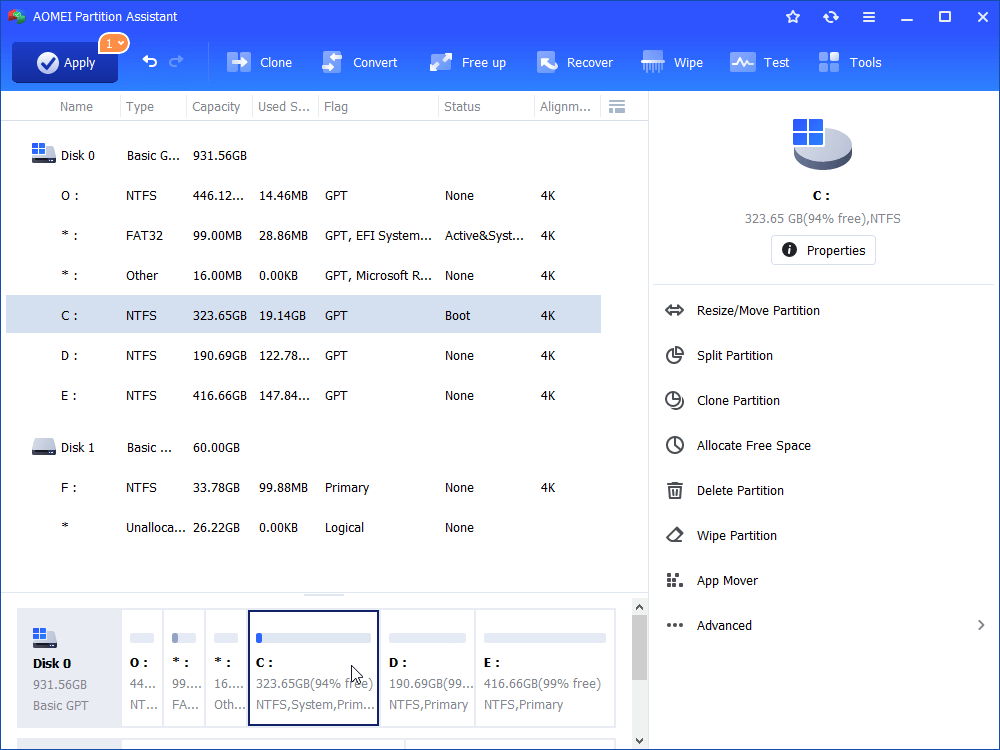
Step 1. Right-click D drive with much free space, then select "Allocate Free Space".

Step 2. Select the size and target partition in the small window and click "OK".

Step 3. Click "Apply" to execute this task.

│Situation 2. Format partition
When you fail to format the target partition in Disk Management, you can also turn to AOMEI Partition Assistant Standard. It can format partitions as NTFS/FAT32/exFAT, etc, and is not limited by partition size.
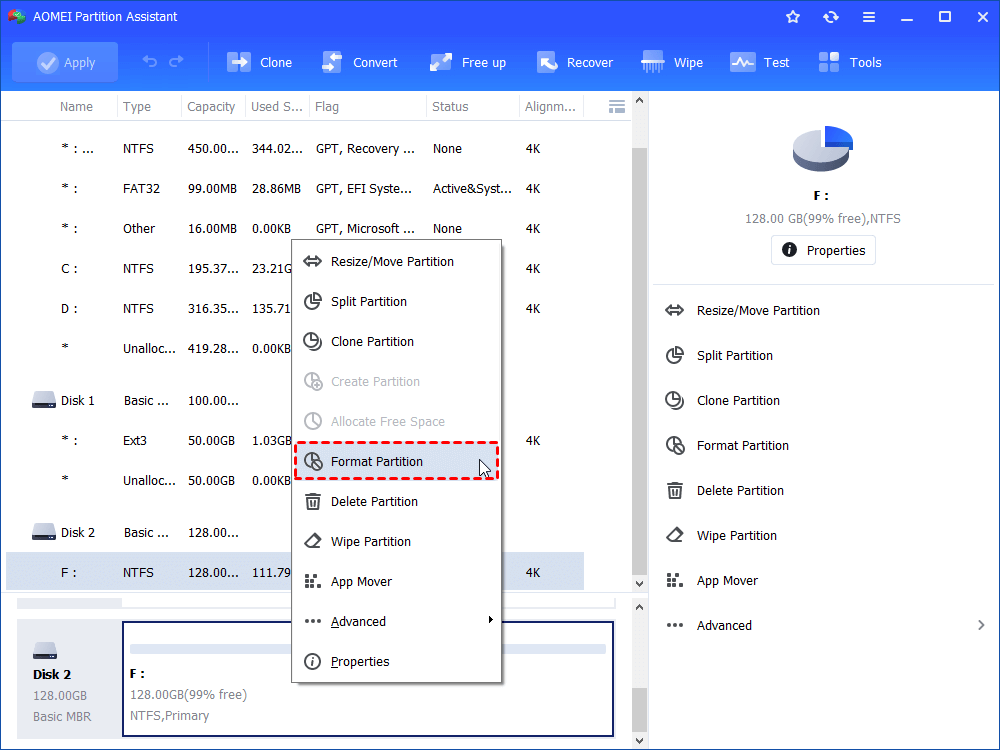
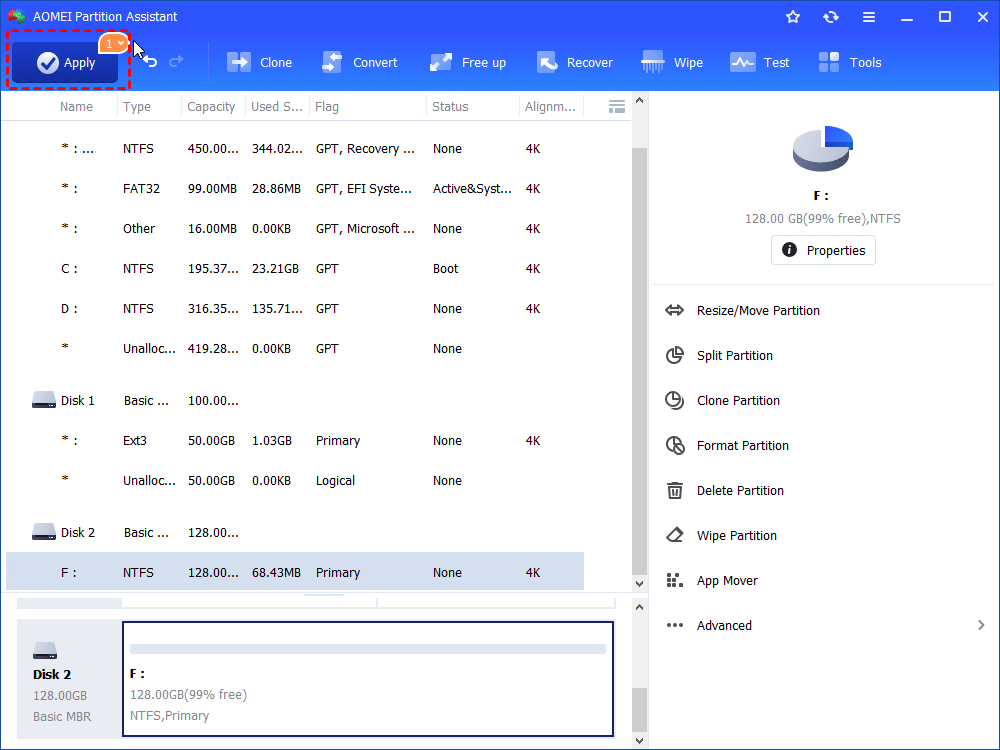
Step 1. Right-click the partition you wish to format to FAT32 and click "Format Partition".
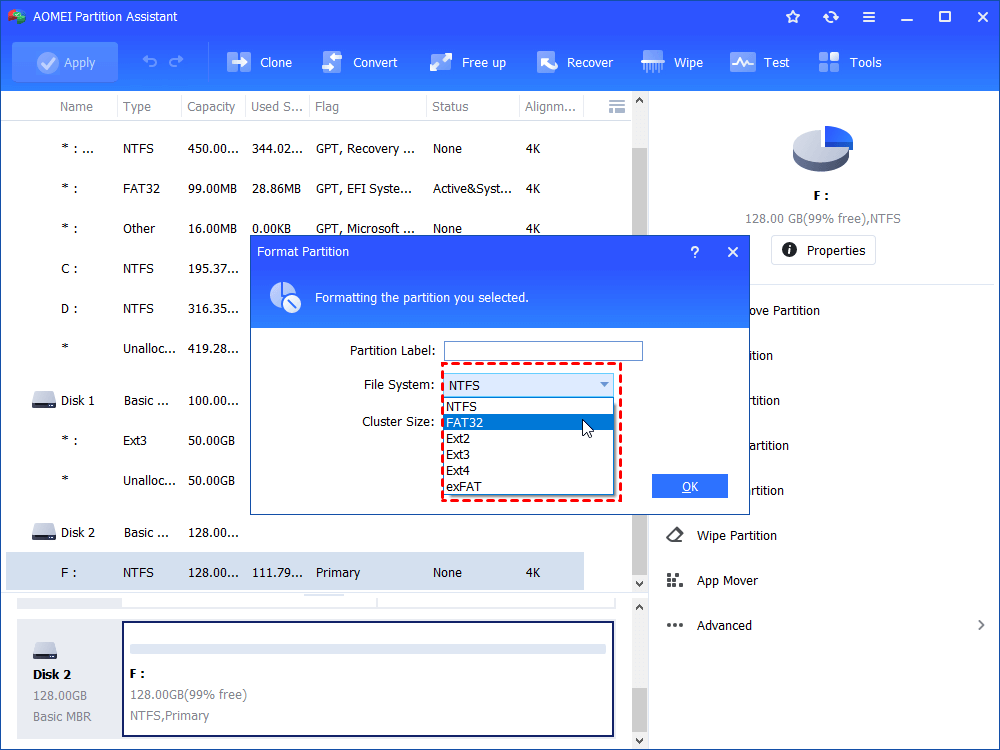
Step 2. Select the "FAT32" option and click "OK".
Step 3. Click "Apply" to begin formatting the disk to FAT 32.
│Situation 3. Convert MBR to GPT
If you fail to convert MBR drive to GPT drive with Disk Management, don’t worry. The “Convert to GPT Disk” and “Convert to MBR Disk”functions can complete mutual conversion between MBR disk and GPT disk without losing data.
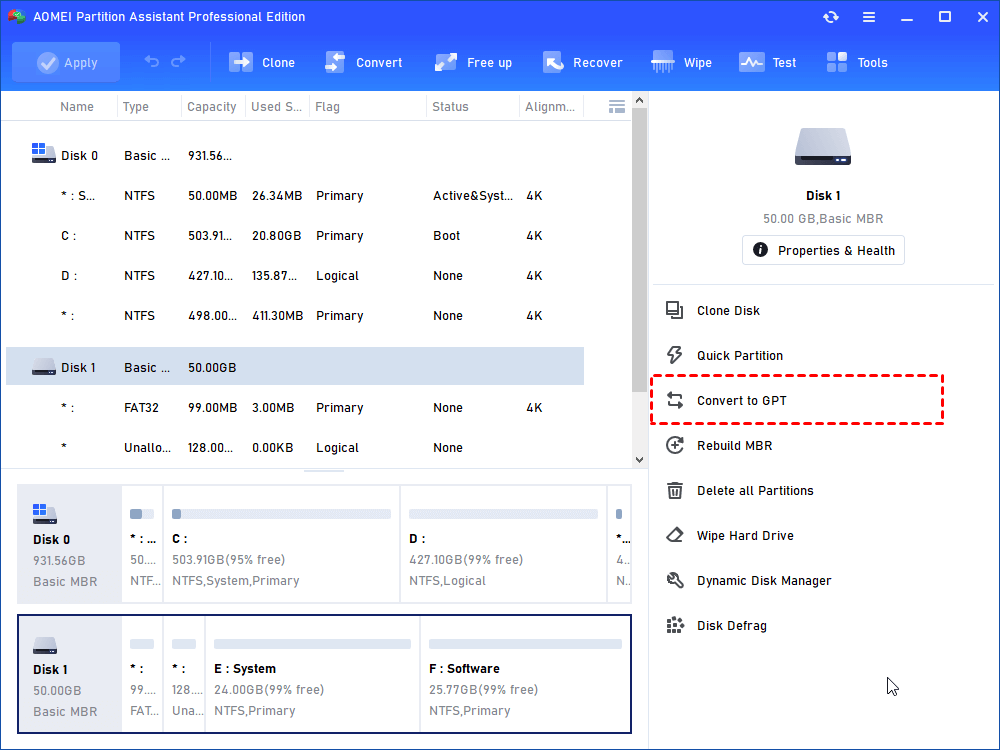
Step 1. Open AOMEI Partition Assistant Professional, right-click the target MBR disk and select "Convert to GPT".
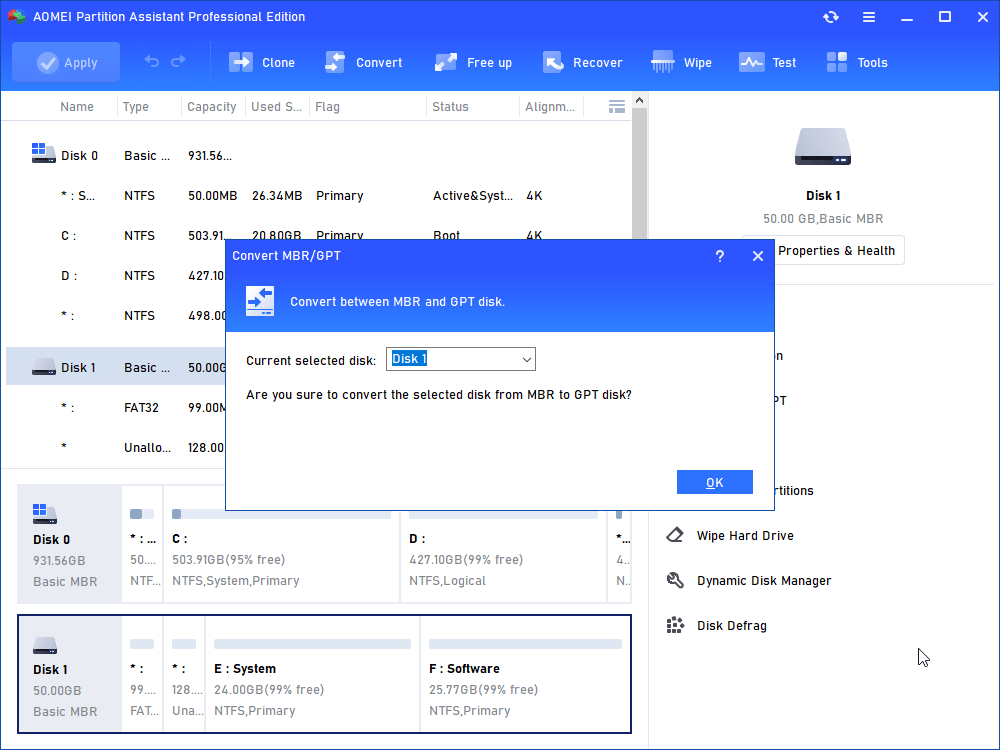
Step 2. Click "OK" if you're sure to covert MBR drive to GPT drive.
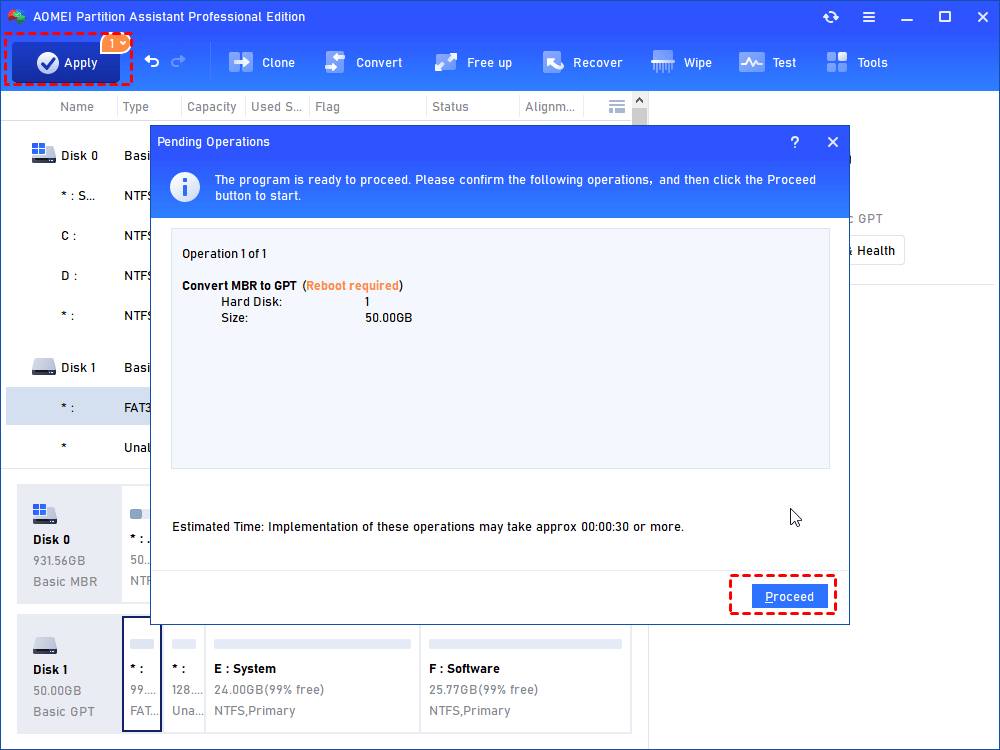
Step 3. Click "Apply" to commit the operation.
To sum up
As you can see, when disk management fails, AOMEI Partition Assistant Standard, as a disk management expert, can help you manage disks on Windows 11 for free. Of course, you can also enjoy more advanced features in the Professional Version like clone partition and move application to another drive.
By the way, the Server Edition is for Windows Server users. If you’re a business user or service provider, the Unlimited Version is designed for you.