[Solved] How to Perform M.2 SSD Windows 11 Install
To perform M.2 SSD Windows 11 install, you can learn to upgrade from Windows 10 or do a clean Windows 11 install. This post will also guide you to install Windows 11 on M.2 SSD without reinstalling.
By Tina / Updated on April 8, 2025
About M.2 SSD Windows 11 install
Windows 11 is the latest operating system from Microsoft, released in 2021. It is known as a "complete visual upgrade" of Windows. With its modern look and smooth performance, it has become popular among users. To run Windows 11 smoothly, you need a fast and reliable drive. Today, the M.2 SSD is the most recommended option.
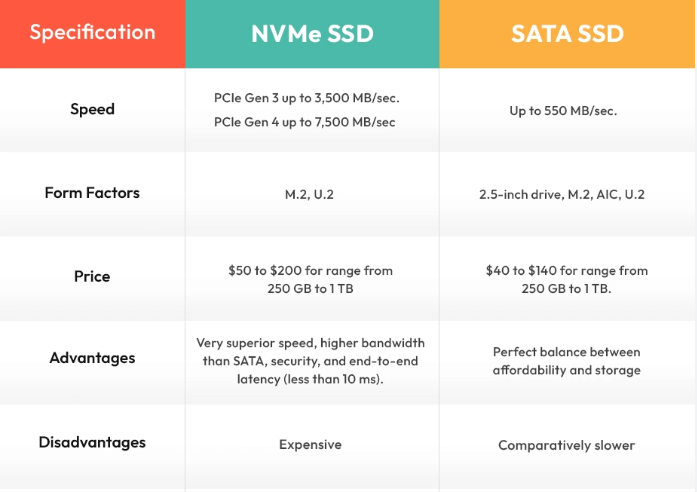
An M.2 SSD is a type of solid-state drive. It looks similar to a USB stick and is smaller than an mSATA SSD. Because of its small size and high speed, it is commonly used in laptops. It also offers faster data transfer and lower delay compared to mSATA SSDs. Here is a picture that can tell you the differences between M.2 SSD and SATA SSD.
For a better experience, many users choose to install Windows 11 on an M.2 SSD. But how can you do that? This guide will show you how to install Windows 11 on a new M.2 SSD. Whether you're upgrading from Windows 10 or doing a clean installation for Windows 11, you’ll find the steps here.

How to perform M.2 SSD Windows11 Install? (2 options)
If you don't know how to install Windows 11 on M.2 SSD, please read the following carefully. We will provide different Windows 11 installation methods according to different situations.
Option 1. Upgrade current Windows 10 to Windows 11
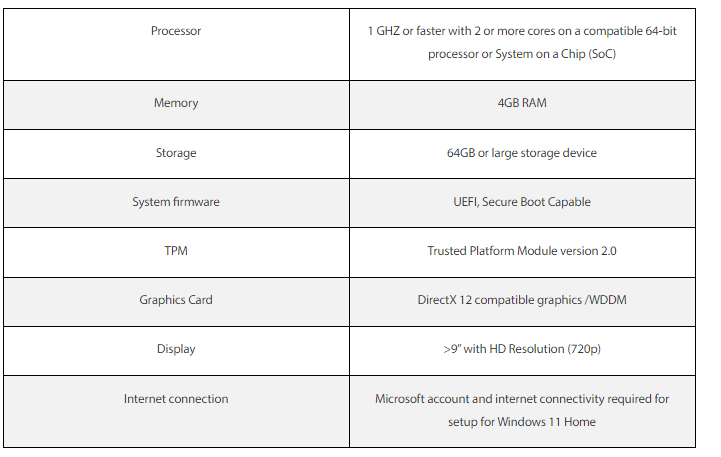
When you want to install Windows 11 on the current M.2 SSD, you can upgrade to Windows 11 from Windows 10. Before installing Windows 11, please check whether your device can meet the system requirements for running it. You can use a professional tool to perform a comprehensive Windows 11 hardware check.
The Best Windows Disk Partition Manager and PC Optimizer
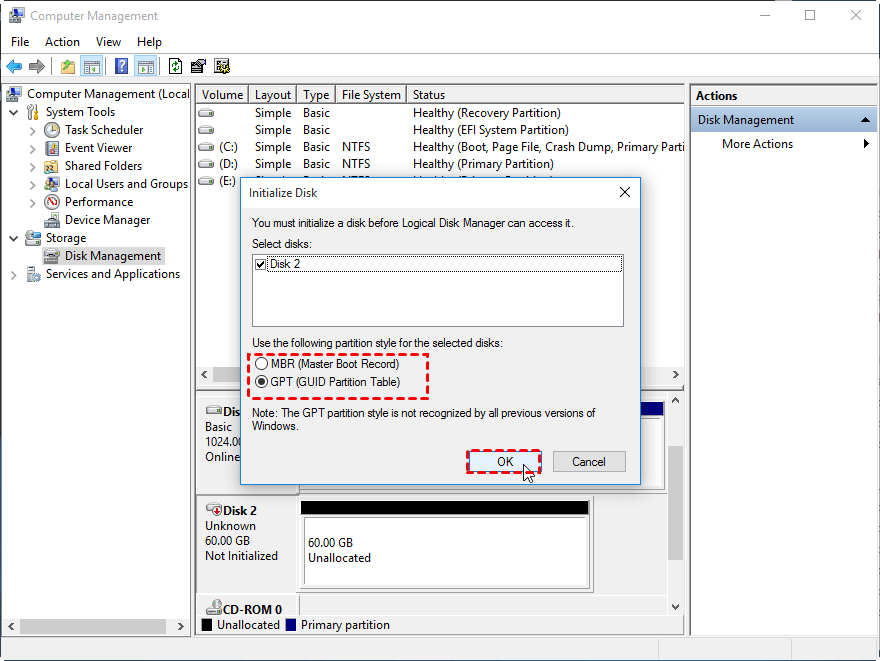
Note: Windows 11 only supports UEFI boot mode and GPT system disk. So before installing Windows 11 on M.2 SSD, you need to convert MBR system disk to GPT.
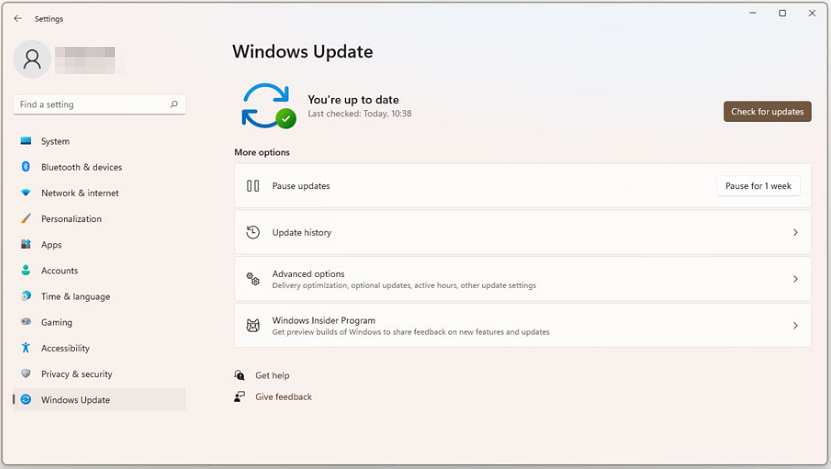
Step 1. Open the Windows Settings. In the new popped window, click "Update & Security", "Windows Update" and "Check for Updates".
Step 2. If the update option is available, click "Download and install".
Step 3. Follow the guidance, then wait for the Windows 11 installation on the SSD.
Option 2. Clean install Windows 11
If you want to clean install Windows 11 on a new M.2 SSD, you should initialize this disk and set it to GPT. Then, refer to the following steps. This method also helps to bypass Windows 11 requirements if your device is outdated or you need a portable version for Windows 11. You can also choose an easier method that is to create a Windows 11 To Go USB or follow the methods below.
The Best Windows Disk Partition Manager and PC Optimizer
🌟Stage 1. Create Windows 11 installation media
We need to create Windows 11 installation media first.
Notes:
✍ Be aware of the power stability.
✍ Prepare a USB larger than 8GB.
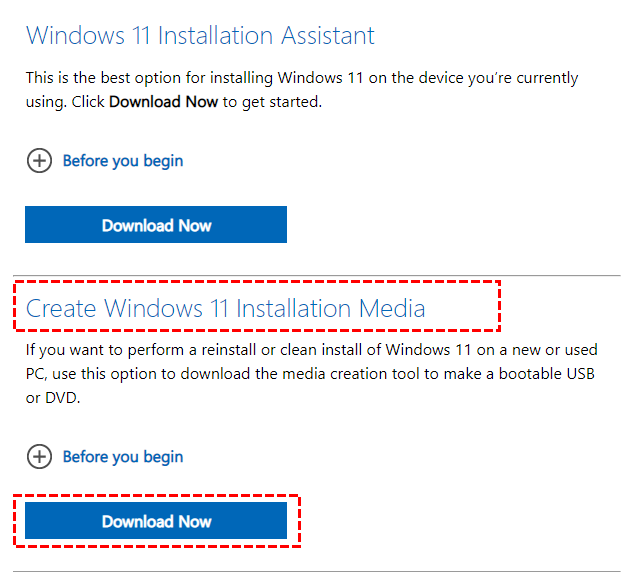
Step 1. Download the Media Creation Tool from the official web.
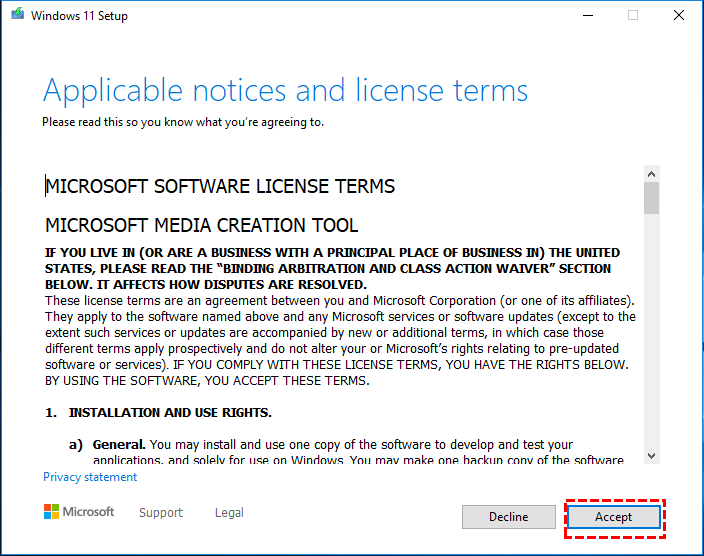
Step 2. When you download it, open the installation package file. In the new Window, click "Accept" when you have read the license terms carefully.
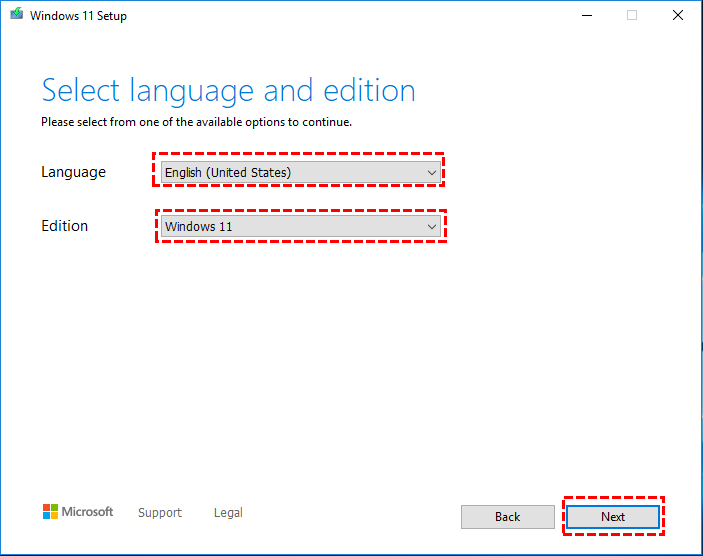
Step 3. Select "Create installation media for another PC", and click "Next". In a new window, choose language, edition, and click "Next".
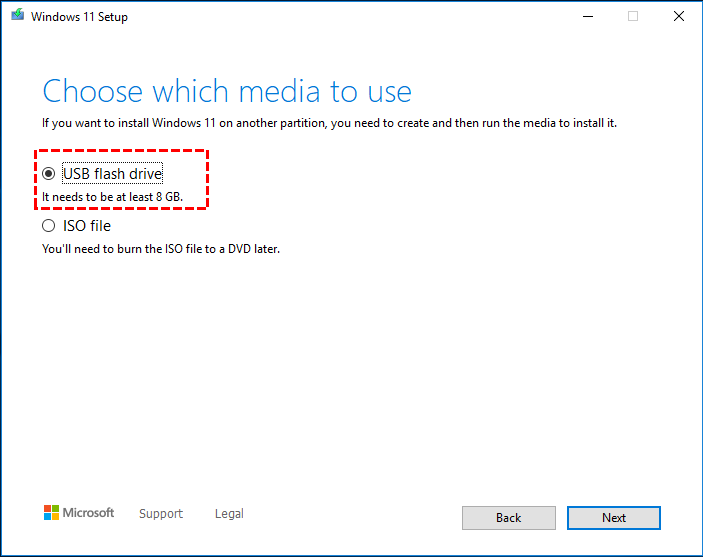
Step 4. The guidance will ask "choose which to use", you can tick "USB flash drive" or "ISO file". Here, we select the USB and click "Next".
Step 5. Wait for a while, when the Windows 11 installation USB is created, you can install Windows 11 with it.
🌟 Stage 2. How to install Windows 11 with the installation media
After creating the Windows 11 installation media, you need to install Windows 11 on the M.2 SSD. This operation will overwrite all data on the M.2 SSD, so please back it up in advance.
Step 1. Connect the Windows 11 installation media to the PC. And enter BIOS settings to choose it as the boot drive.
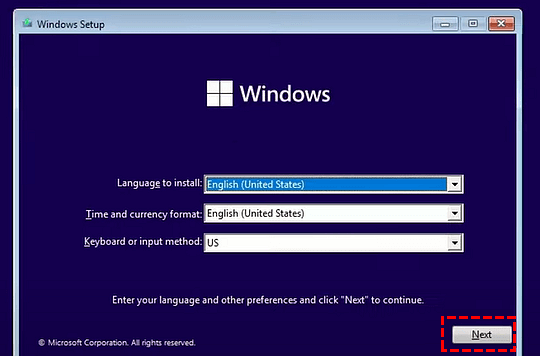
Step 2. You will turn to the "Windows Setup" window, please set all the options and click "Next".
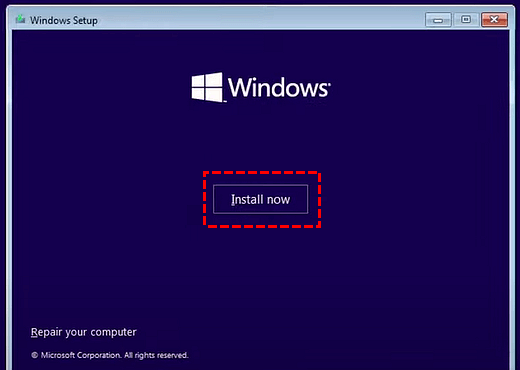
Step 3. In the new window, click "Install now".
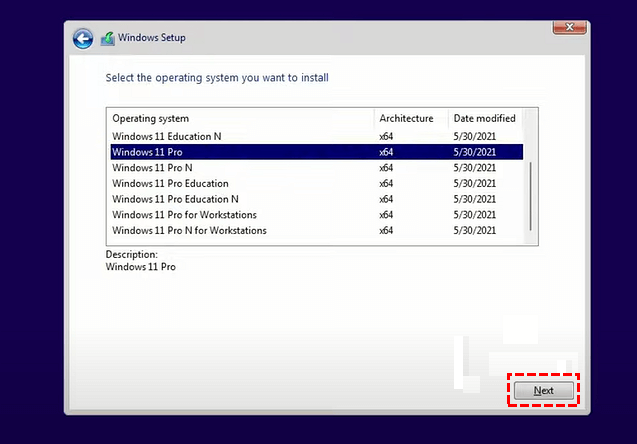
Step 4. Choose "I don't have a product key". Then select an OS version and click "Next".
Step 5. Accept the License Terms and click "Next", then select the "Custom: Install Windows only (advanced)" option.

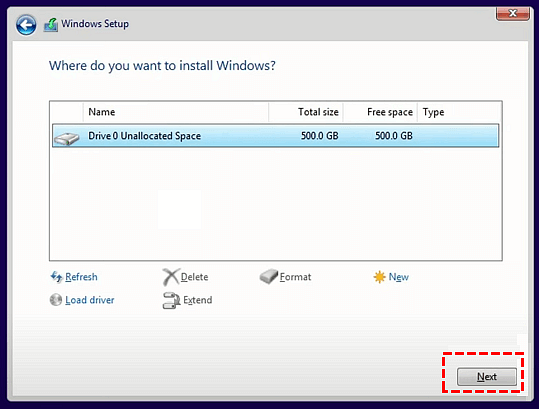
Step 6. Then, choose the hard drive to install Windows 11 and click "Next".
Step 7. Wait for some minutes, then reboot your PC.
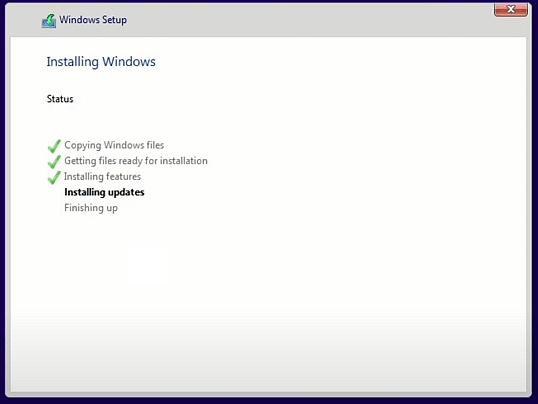
Step 8. Now, you have successfully installed Windows 11 on the M.2 SSD. When the PC is reboot (It may reboot repeatedly. ), you can set and enjoy it.
🔥Migrate Windows 11 to M.2 SSD without reinstalling
If you’ve already installed Windows 11 on your current drive and just want to upgrade to a faster one for better performance, doing a clean install can be complicated and time-consuming. Actually, there’s an easier way. You can use AOMEI Partition Assistant to directly move your Windows 11 system from the old drive to a new one, such as an M.2 SSD. This saves you from reinstalling everything and helps you enjoy better speed and performance quickly.
With a few clicks, its "Migrate OS" function can safely migrate Windows 11 and system-related files to M.2 SSD without reinstalling. And ensuring the migrated Windows 11 can be successfully started on the target disk. In addition, it also provides you with some advanced functions to manage your hard drive, including Allocate free space, Clone Disk (Clone the whole hard drive to another one), App Mover, etc.
The Best Windows Disk Partition Manager and PC Optimizer
Notes:
✌ If you want to migrate Windows Sever to another hard drive, the Server Edition can help you.
✌ Before the Windows migration, you should connect the M.2 SSD with Windows 11 PC and make sure it can be detected.
Step 1. Install and run this tool, then click "Clone"> "Migrate OS" in the top panel.

Step 2. In the small window, select the target disk and tick "I want to delete all partitions on this disk 2 to migrate system to the disk", then click "Next".

Step 3. Ajust the size of the target partitions and click "Next".

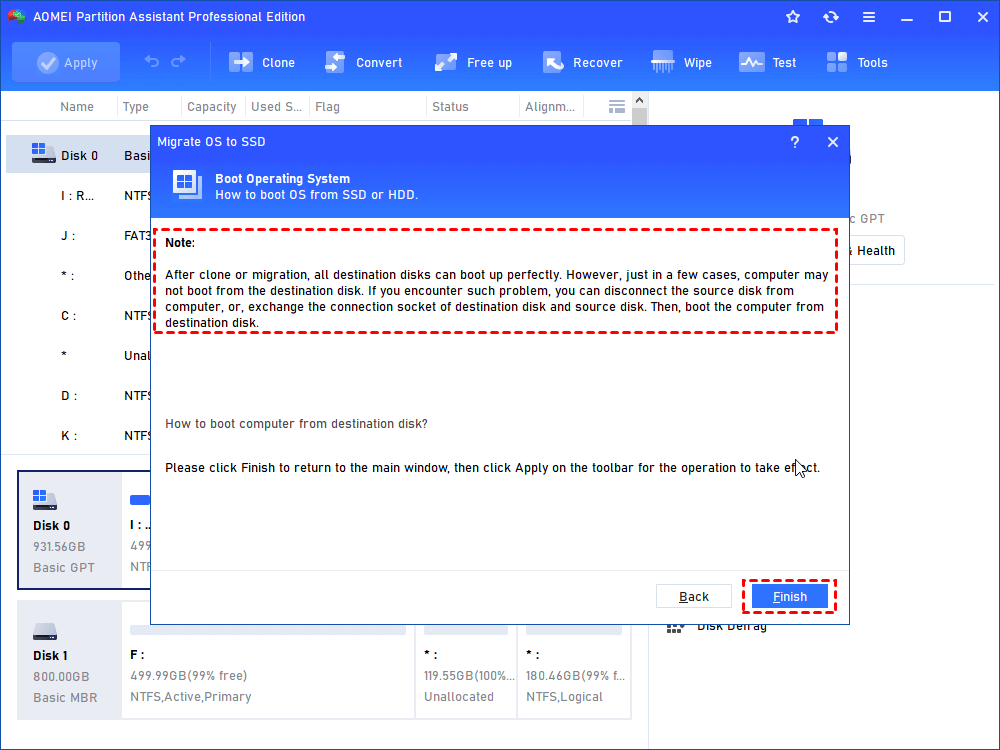
Step 4. Read the note carefully and click "Finish".
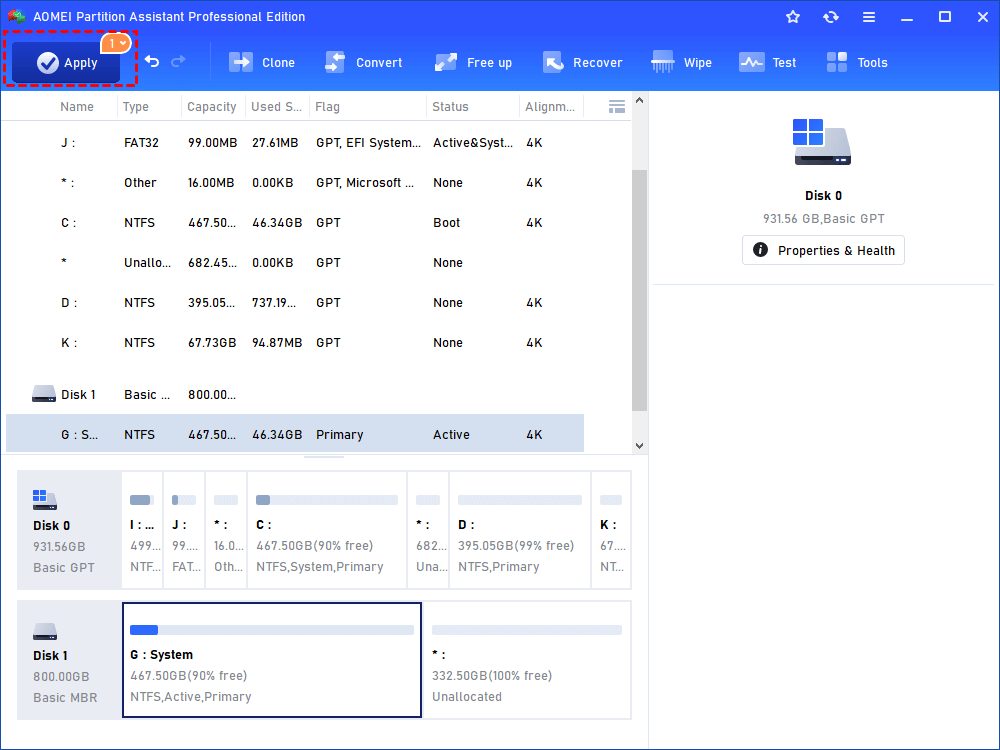
Step 5. Click "Apply" to start the Windows 11 migration.
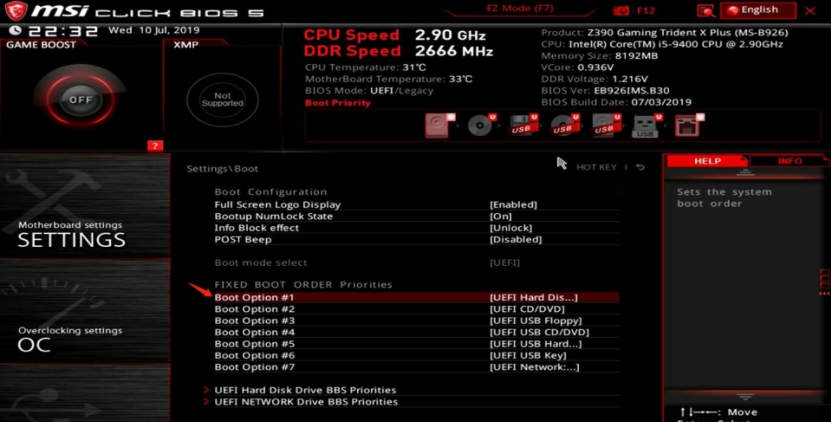
Step 6. Install this M. 2 hard drive on the PC. Then you should change the boot drive: Restart the PC, then repeatedly hit one key of F1/F2/F3/F5/Esc to enter the UEFI settings. Then turn to "Boot" and click "Change boot order".
Verdict
Performing M.2 SSD Windows 11 install is a great way to enjoy faster speed and better performance. In this guide, we introduced three different methods to help you: upgrading from Windows 10, doing a clean installation, and migrating your system using AOMEI Partition Assistant.
Among these, using AOMEI Partition Assistant is the easiest and most time-saving option. It lets you move Windows 11 to an M.2 SSD without reinstalling everything. Choose the method that suits your situation best, and enjoy a smoother Windows 11 experience on your new SSD.
The Best Windows Disk Partition Manager and PC Optimizer