How to Create & Install Windows 11 from USB via CMD: A Step-by-Step Guide
Learn to install Windows 11 from USB by creating bootable USB via CMD, and use handy software to install Windows 11 with easier operations.
By Lucas / Updated on April 2, 2025
Since the release of Windows 11, most new computers come pre-installed with this OS. However, if you're using Windows 10 and your computer doesn’t meet the minimum system requirements, such as GPT disk or TPM 2.0, you can still upgrade to Windows 11 or perform a fresh installation from a bootable USB.
The other spot is that some users wish to fresh install Windows 11 on another computer. No matter which situation you’re in, creating Windows 11 bootable USB is a nice choice for these two.
But, nice doesn’t mean easy. Creating Windows 11 bootable USB is a little challenging for many users, especially if you want to use CMD to create it. Thus, we make a clear tutorial to help you finish it, let’s do it!
How to install Windows 11 from USB
Before we start, you’ll need to: Prepare a USB with at least 8GB and make sure it’s OK to wipe all data on it.
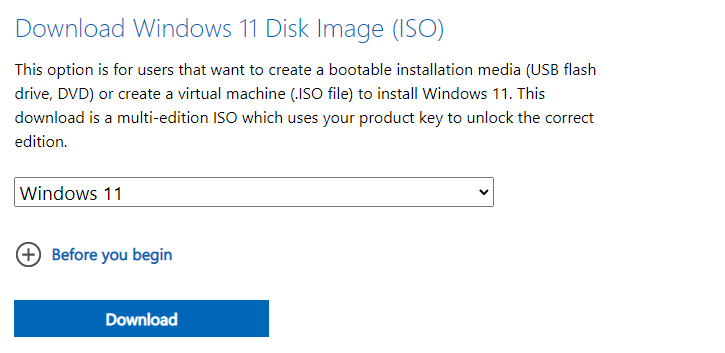
1. Download Windows 11 ISO files from Microsoft
To do a clean Windows 11 installation, please download Windows 11 ISO from Microsoft web.
2. Create Windows 11 bootable USB via CMD
After the download, click “Start”, search “Command Prompt”, right-click the best match, and select “Run as Administrator” to open CMD.
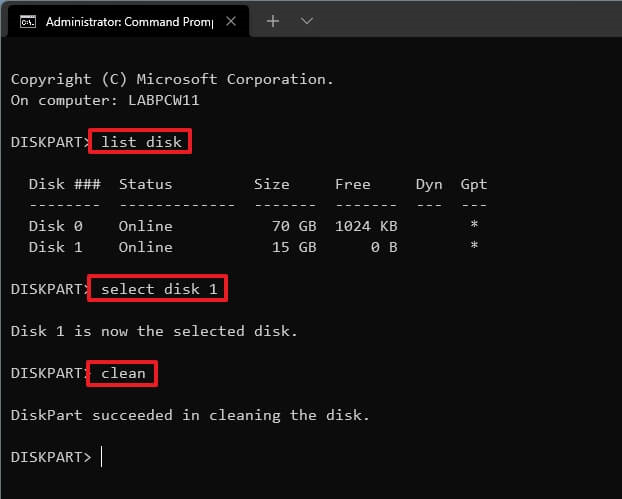
▶ Section 1. Delete data on your USB
Step 1. Type “diskpart”, press “Enter”.
Step 2. Type “list disk”, press “Enter”.
Step 3. Type “select disk 1” (You need to change“1” to the number of your USB), press “Enter”.
Step 4. Type “clean”, press “Enter”.
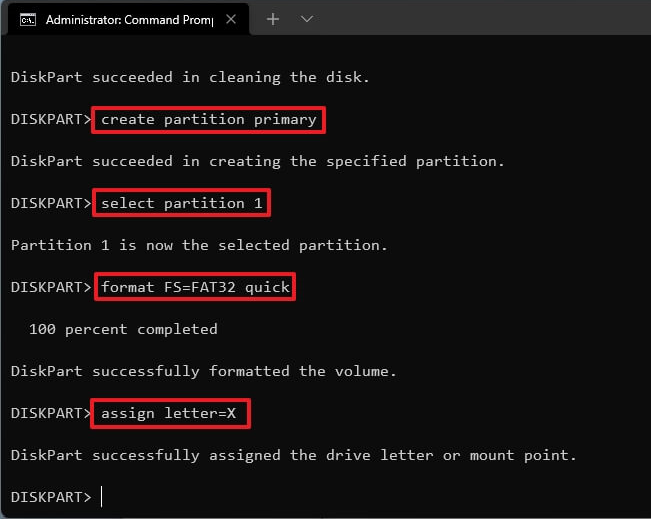
▶ Section 2. Create a primary partition
Step 1. Type “create partition primary”, hit “Enter”.
Step 2. Type “select partition 1”, hit “Enter”.
Step 3. Type “format FS=FAT32 quick”, hit “Enter”.
Step 4. Type “assign letter=X” (“X” is the letter of the partition, change it to the letter you wish to use.), hit “Enter”.
Step 5. Type “exit” and hit “Enter” to quit the tool.
▶ Section 3. Move ISO files to USB
Step 1. Open CMD again, type “PowerShell Mount-DiskImage -ImagePath "C:\path\to\Windows11.iso"(make sure the path is right), press “Enter”.
Step 2. Type “diskpart”, press “Enter”.
Step 3. Type “list volume”, press “Enter”.
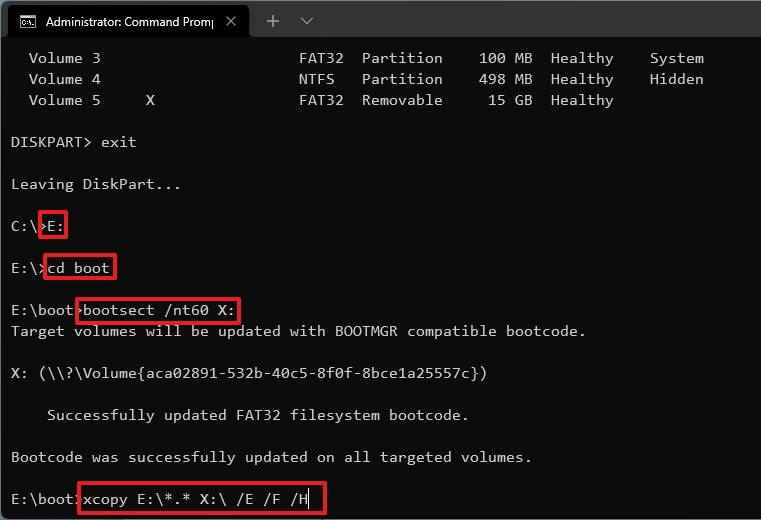
Step 4. Type “exit” to exit Diskpart, press “Enter”.
Step 5. Type “E:” to access ISO files, press “Enter”.
Step 6. Type “cd boot”, press “Enter”.
Step 7. Type “bootsect /nt60 X:”, press “Enter”.
Step 8. Type “xcopy E:\*.* X:\ /E /F /H”(change E and X to the drives with Windows 11 ISO image and your USB.)
Then your USB is ready, let’s move to the installation.
3. Install Windows 11 from a bootable USB
In this part, we’ll install Windows 11 from the bootable USB we made, make sure the computer you’re going to install Windows 11 is UEFI boot mode.
Step 1. Connect the USB to the computer, start the computer and enter BIOS, change the USB as the first boot order. Then save the change, reboot the computer.
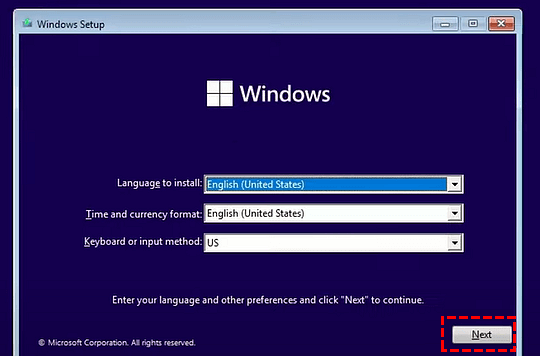
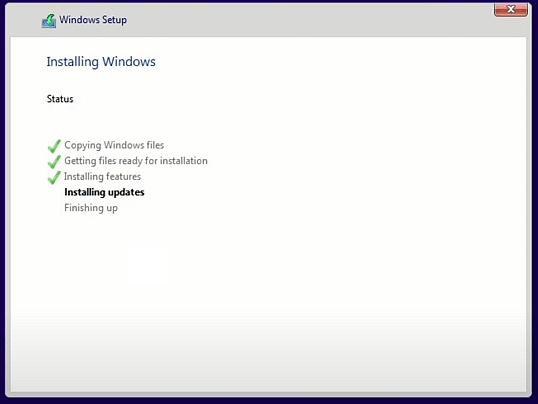
Step 2. You see the Windows Setup window, please follow the order to finish the settings.
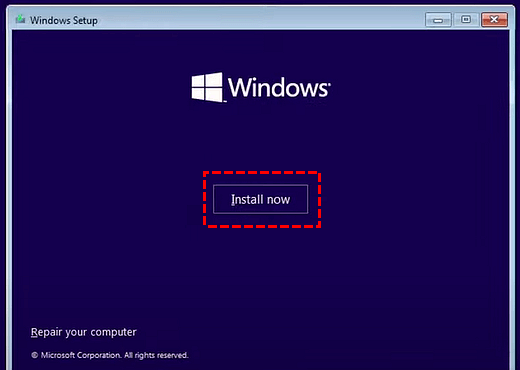
Step 3. Click “Install now”.
Step 4. Choose “I don’t have a product key”.
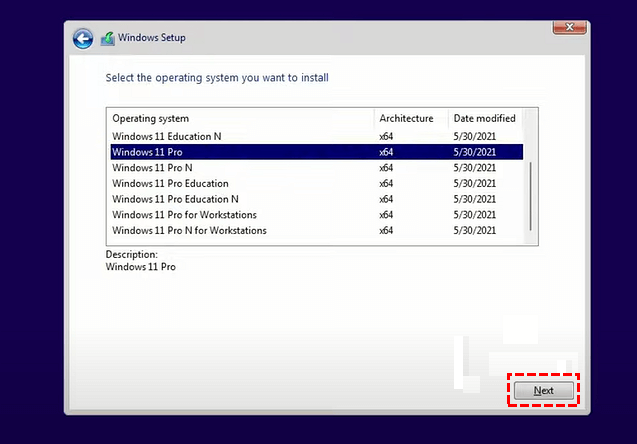
Step 5. Choose an OS edition you wish to install and click “Next”.
Step 6. Accept the License Term and click “Next”, click “Custom: Install Windows only (advanced)” in the next window.

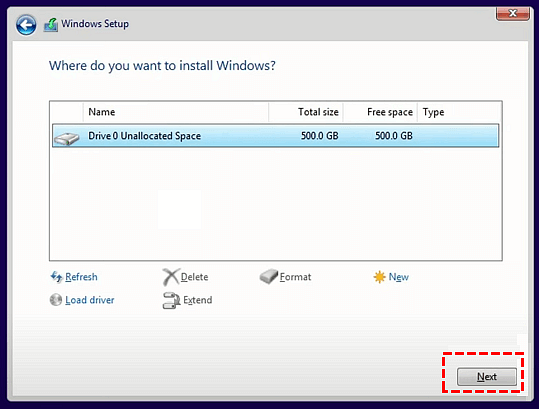
Step 7. Choose the target disk you wish to install Windows 11 OS, then click “Next”.
Step 8. Please wait for the process and your PC will reboot.
After your PC boot successfully, you can enjoy Windows 11 OS.
An easier way to install Windows 11 on your disk
Although using CMD to create a Windows 11 bootable USB can help you, it takes too much time, and with a load of complex orders, you need to type, many users might feel troublesome. Do there have any easier methods to install Windows 11 on your disk?
Yes, AOMEI Partition Assistant Professional can simplify the sophisticated operations of CMD. Users can migrate a Windows 11 OS to their disk and they don’t need to install it from scratch. The “Migrate OS to SSD” function can copy all OS files and settings to the destination disk, so users can keep all settings from the source system.
And due to the hot clone way, you don't need to reboot the computer several times to complete the migration. All running programs can keep the current status during the process.
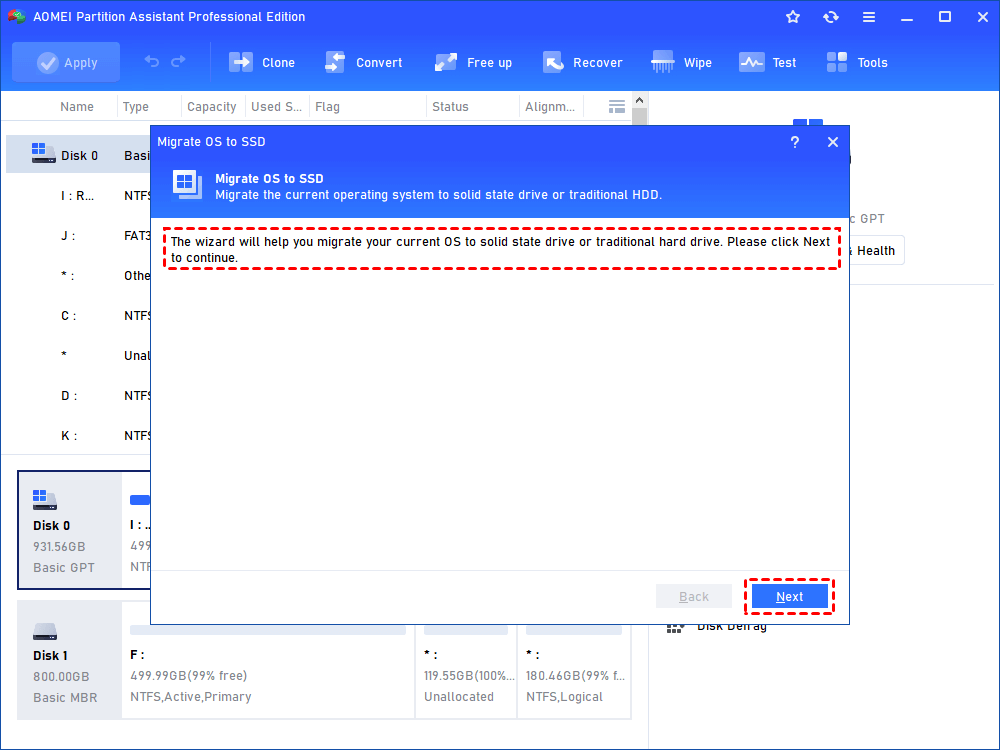
Step 1. Connect the disk of the target computer to a Windows 11 computer. Then, install and run AOMEI Partition Assistant, choose "Clone"> “Migrate OS” in the top menu.

Step 2. Click “Next’ in the new window.
Step 3. Choose an unallocated space on your disk.

Step 4. Now you need to resize the size of the partition, and click “Next”.

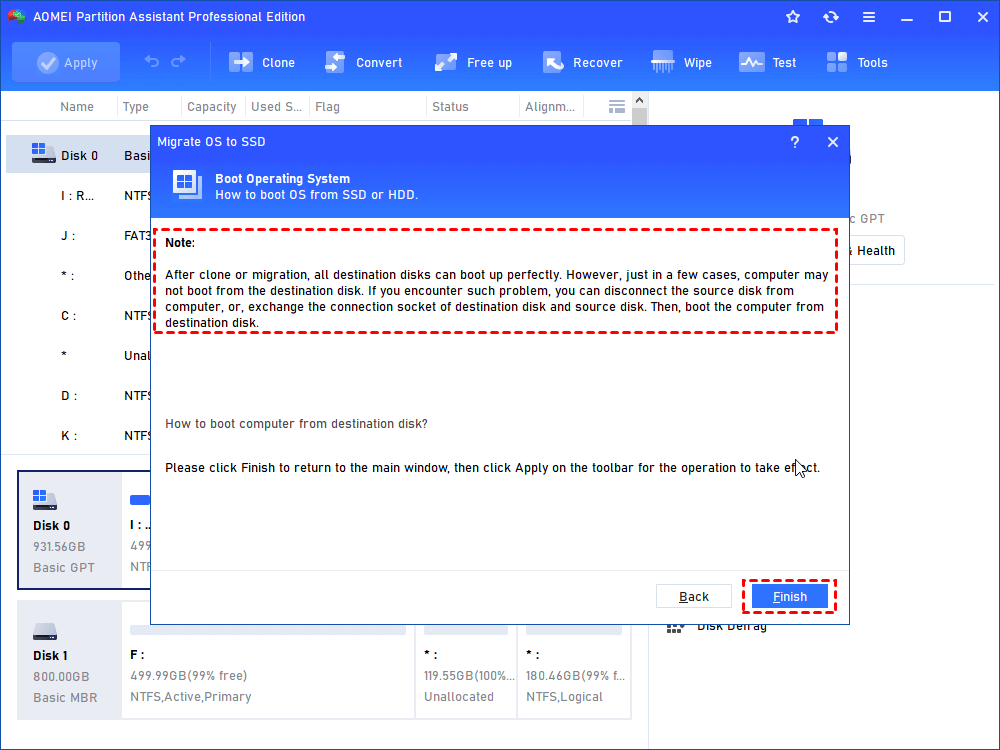
Step 5. Click "Finish" to continue.
Step 6. Click “Apply” in the upper-left corner.
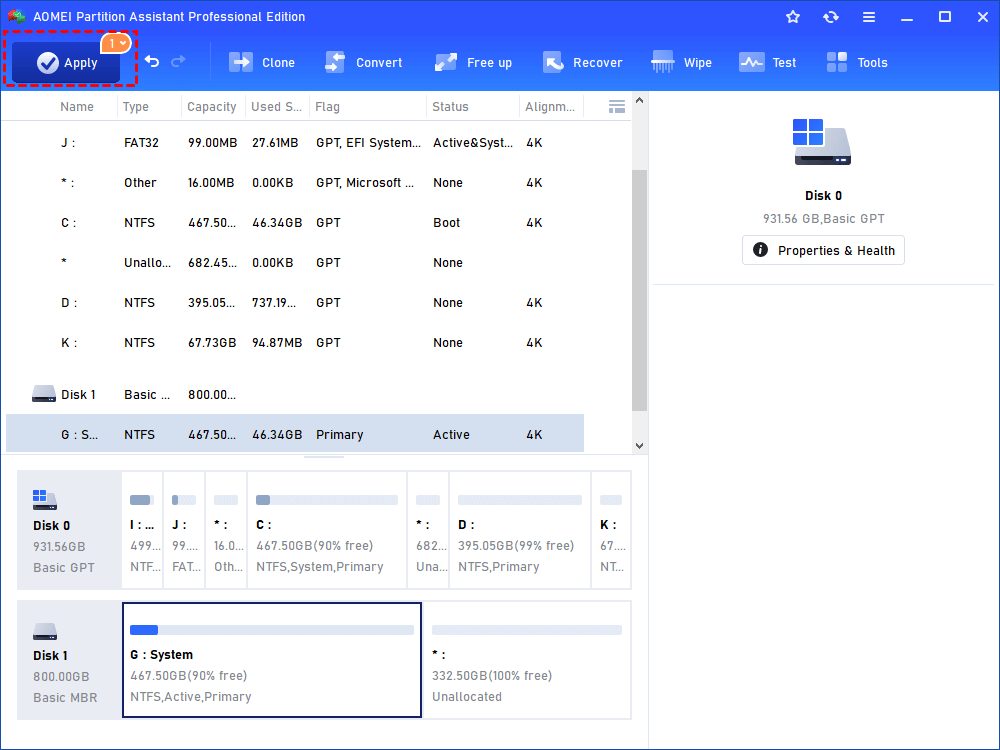
Then, plug the disk back into your computer, start it.
Warning: You might need to change the boot order if your computer has one more disk.
Ending
This is how to install Windows 11 from USB. You can choose CMD to create Windows 11 bootable USB if the difficult orders won’t trouble you. However, if you need an easier way to install Windows 11 to your computer, migrating one Windows 11 will be a better choice for you.
AOMEI Partition Assistant can do more than OS migration, you can use it to convert system disk from MBR to GPT without data loss, extend partition for a low-capacity drive, and move installed programs to another drive/disk…
FAQs about installing Windows 11 from USB
1. What are the minimum system requirements for Windows 11?
To upgrade to or install Windows 11, your PC must meet the following minimum system requirements:
- Processor: 1 GHz or faster with at least 2 cores on a compatible 64-bit processor or System on a Chip (SoC).
- RAM: 4 GB or more.
- Storage: 64 GB or larger storage device.
- Firmware: UEFI, Secure Boot capable.
- TPM: Trusted Platform Module (TPM) version 2.0.
- Graphics Card: DirectX 12 compatible graphics / WDDM 2.x driver.
- Display: >9” with HD resolution (720p).
- Internet Connection: An internet connection is required to perform updates and to download and take advantage of some features.
Note: Some older PCs may not be eligible for an upgrade due to TPM 2.0 or other hardware limitations. You can check your PC’s compatibility using Microsoft's PC Health Check tool.
2. Can I upgrade from Windows 10 to Windows 11 without TPM 2.0?
Technically, you cannot upgrade to Windows 11 without TPM 2.0, as TPM 2.0 is a strict requirement for Windows 11 installation, according to Microsoft’s guidelines. However, some users may attempt a workaround to bypass this check using a registry tweak, though this is not recommended for the general public due to potential security risks and instability.
If your device doesn't have TPM 2.0, it’s advisable to either upgrade your hardware (if possible) or stick with Windows 10, which will continue to receive support until October 14, 2025.
3. How do I know if my PC supports Windows 11?
To check if your PC is compatible with Windows 11, you can use the following methods:
▍ PC Health Check Tool: This official tool from Microsoft will tell you whether your PC meets the minimum system requirements for Windows 11. You can download it from Microsoft's website.
▍ Check Manually:
- TPM 2.0: Press Windows + R, type tpm.msc, and hit Enter. If TPM 2.0 is present, you’ll see it listed in the status window.
- Secure Boot: Reboot your computer and access the BIOS/UEFI settings (usually by pressing F2, F10, or DEL during startup). Check if Secure Boot is enabled.
- Processor Compatibility: Visit the manufacturer's website and search for your CPU’s specs to ensure it is compatible with Windows 11 (most Intel 8th gen or newer and AMD Ryzen 2000 series or newer CPUs are supported).
4. What’s the difference between upgrading and clean installing Windows 11?
▍ Upgrading to Windows 11 means moving from an existing version of Windows, such as Windows 10, to Windows 11 while keeping your apps, settings, and files intact. This process is usually faster and easier, as it doesn’t require a full system reset. However, some users might experience performance issues or leftover files from the previous system.
▍ Clean Installing Windows 11 involves wiping your current operating system and installing Windows 11 from scratch. This process ensures a fresh start without any remnants of old settings or files, which can improve performance and resolve issues. However, you will need to back up your files beforehand and reinstall your apps after the installation.

