How to Partition C Drive in Windows 11 [Data-Safe Ways]
If you want to know how to partition C drive in Windows 11 to classify your data when there’s only one drive on your disk, this post can give you some help.
By Lucas / Updated on December 14, 2023
Can I partition the C drive in Windows 11?
After several updates, some users decided to accept Windows 11 now. This new Windows OS received lots of criticism when it was released in 2020. However, with more and more bugs that have been found and solved, things have changed.
Due to the higher hardware requirements of Windows 11, some people choose to use an SSD as the system disk and combine an HDD as the data disk to ensure the OS has sufficient space to store system data. But, many users have only one SSD which is the C drive on their PC. If these users wish to use other drives to separate personal files and system data, they’ll need to partition the C drive.
However, since the OS has already been installed on the C drive, this task might not be easy to keep all data safe. Thus, in this post, we’ll help you securely partition the C drive in Windows 11.
How to partition C drive in Windows 11
Now, let’s see how to quickly partition the C drive in Windows 11 Disk Management and a handy tool.
▌ Way 1. how to Create partition on Windows 11 from C drive with Disk Management
Generally, Disk Management is the first tool we can try to manage your disk. To create more partitions from the C drive, you need to shrink it at first and then you can assign a letter for that space.
Step 1. Click the search button and type Disk Management in the search box. Click “Open”.
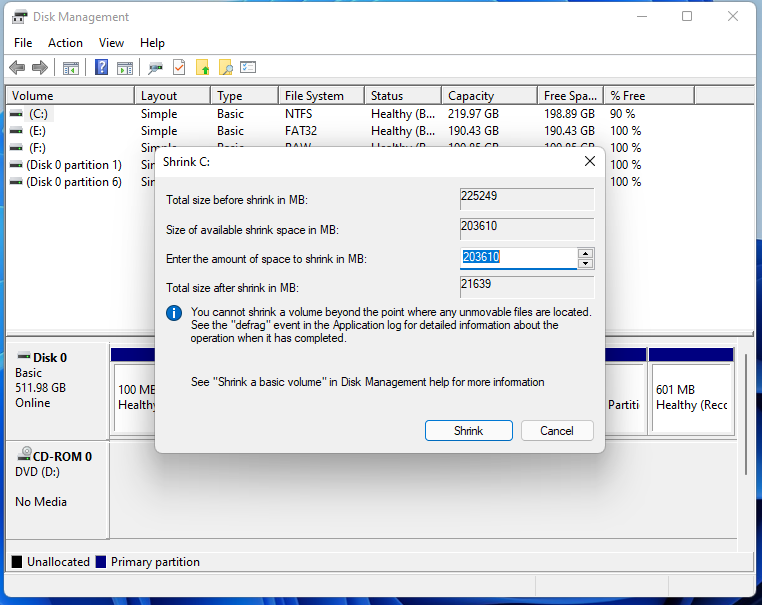
Step 2. In the Disk Management window, you can see all disks and partitions on your PC. Right-click the C drive, and select “Shrink Volume” from the menu.

Step 3. Then there would be a pop window, and you can set how much space you want to shrink. Please leave enough available space for your C drive, the updates in the future and the apps you installed will store many files on the C drive.
Step 4. After the shrink, there’s unallocated space on the right of the C drive. Right-click this space, and choose the “New Simple Volume” option.
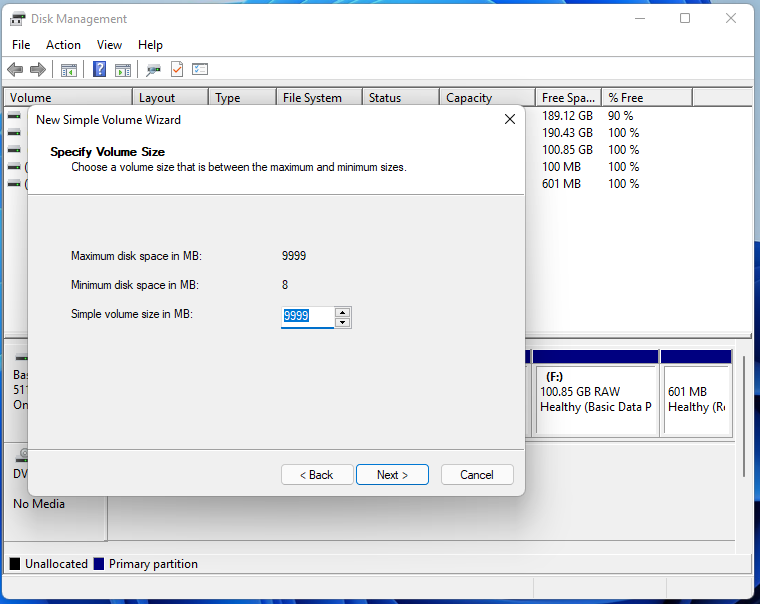
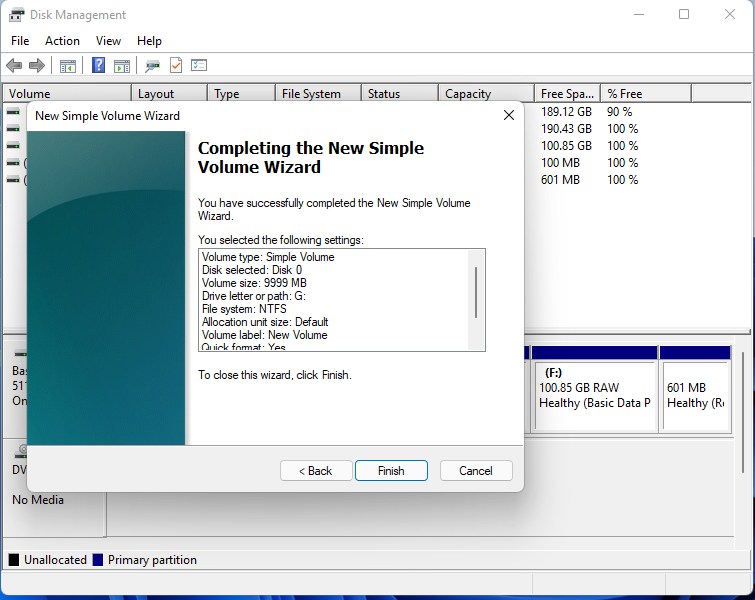
Step 5. In the new window, you need to assign a new letter and set other details, then your disk will have two drives. And if you need, you can repeat the operation to create more drives.
▌ Way 2. Partition C drive without formatting
In Disk Management, users need to shrink before creating a new partition. Sometimes, the shrink option might be greyed out. And many users don’t know how much space should be left for C drive. To quickly and easily partition the C drive, AOMEI Partition Assistant Professional, a better Windows disk partition tool is more suitable for you.
It’s a versatile program with various helpful features like converting to GPT, moving installed programs, cloning disk, etc. This practical tool has two ways for Windows 11/10/8/8.1/7/XP users who want to partition the C drive. Both methods allow you to directly and visually.
Let’s see more details.
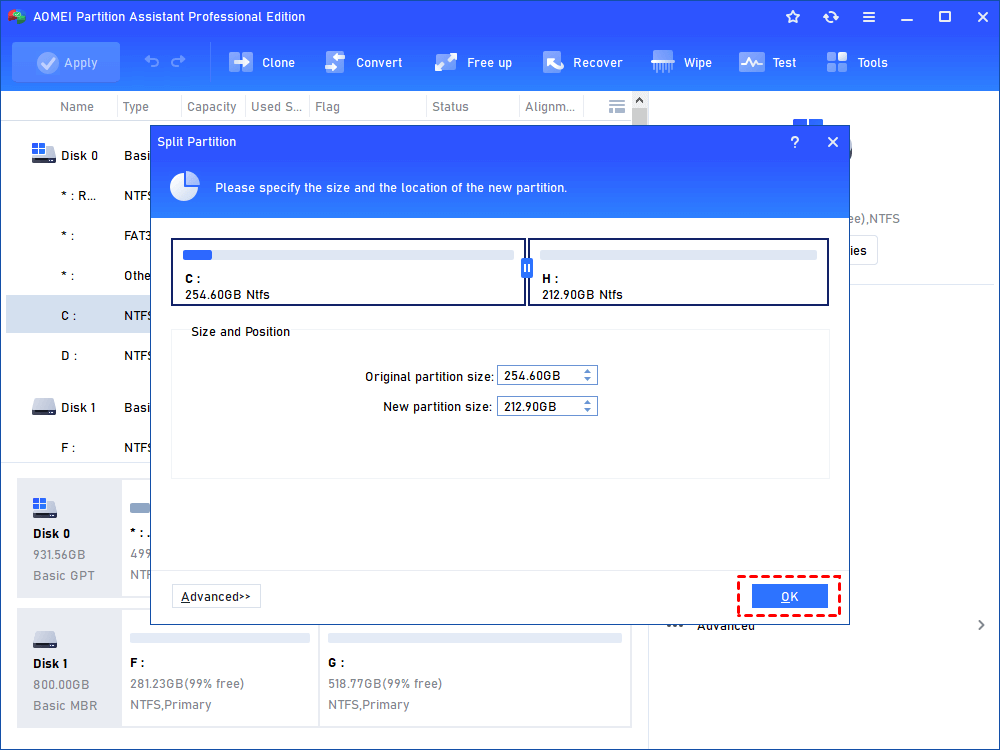
Step 1. Install and run the tool. Right-click C drive, and choose the “Split Partition” function.
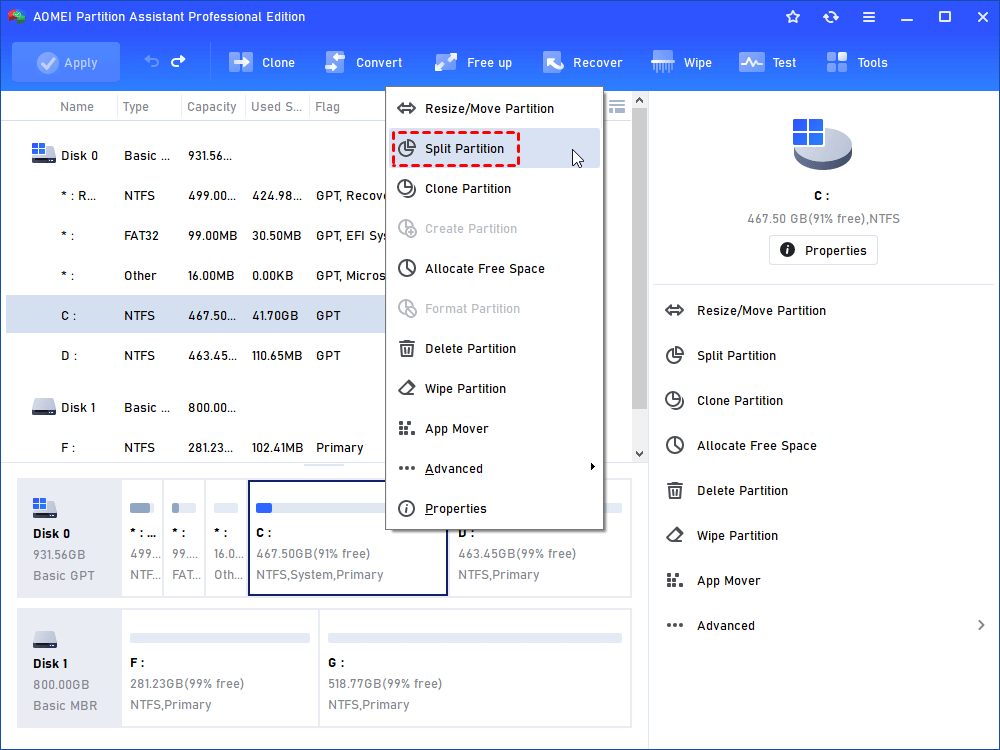
Step 2. Drag the button to adjust the size of the drives or you can type the size (GB) of the drive.
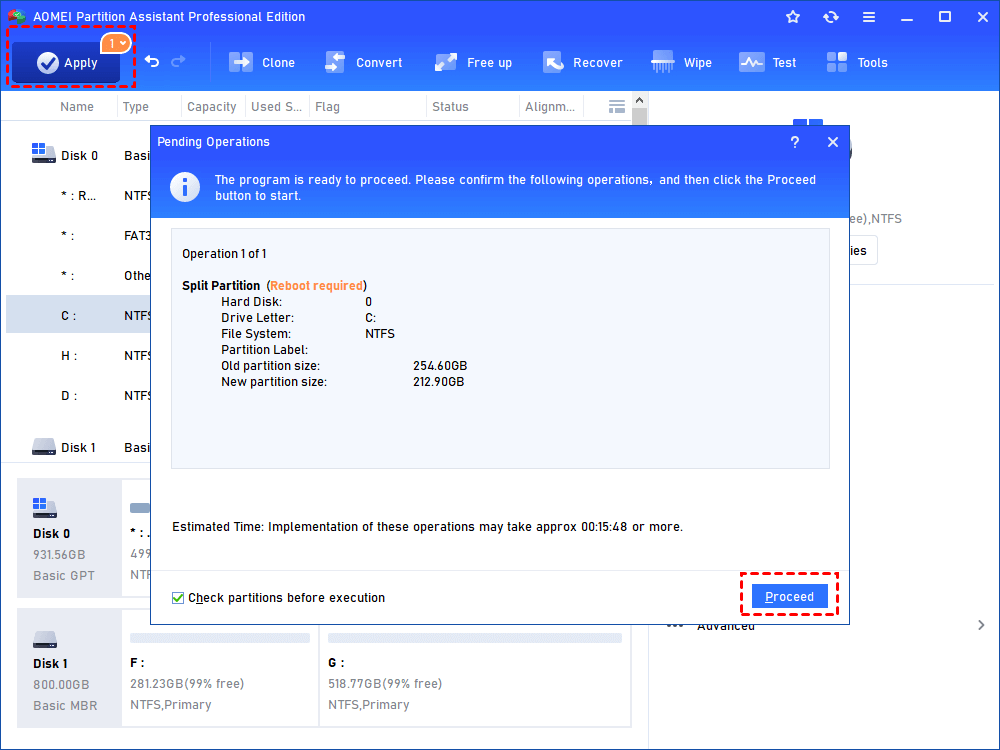
Step 3. Click “Apply” and “Proceed” after confirming the adjustment and reboot your PC.
▶ Tip: If the vendor partitioned your disk when you purchased it. However, you discover that the system partition is far from large enough for you to operate the system. You can also use this tool to increase the C drive with the "Allocated Free Space" function which can directly share free space on the other drive to the target drive.

Further tips: How to quickly set up a new hard drive on Windows 11
If you wish to partition a new-bought disk on Windows 11, only unallocated space, this tool offers “Quick Partition” function which can quickly make all partitions ready and the target disk can be bootable.
Right-click the disk you want to partition, and choose the “Quick Partition” function. Then you’ll see a pop window with all details about the disk you’re creating. Then, you can choose the number of the partition that will be created on the selected disk, the partition type, adjust all parameters of each partition. After all the settings are done, the partition layout of the disk after being partitioned will be presented in the preview window.

To sum up
In this guide, we show you 2 ways to guide you to partition the C drive in Windows 11. Although Disk Management is a useful tool, it has many limits when users wish to adjust their devices. AOMEI Partition Assistant is a user-friendly partition manager for Windows 11 and other Windows systems, even for Server users. It has the Server Edition for all Windows Server users to organize their computers efficiently.

