How to Make Laptop Run Smoother in Windows 11 and Maintain the Performance?
How to make laptop run smoother in Windows 11? By knowing why is your laptop so slow in Windows 11, you can then follow the effectively methods to speed up Windows 11.
By Irene / Updated on December 29, 2023
With the release of Windows 11, you've likely downloaded and enjoyed the new features. However, if you've been using Windows 11 for some time, you may have noticed the lagging issues.
Are you wondering how to make laptop run smoother in Windows 11, speed up the boot process, and maintain high performance? This article is here to assist you by offering several tips to optimize this new operating system.
Why is my laptop so slow in Windows 11?
Before fixing, let’s see why is your laptop so slow in Windows 11. As the successor to Windows 10, Windows 11 comes with many upgraded features and improvements. This translates to stricter system requirements for the new operating system.
If your PC just meets the minimum requirements for upgrading to Windows 11, you might notice a slowdown after using it for some time as it has limited system resources, especially on slightly older PCs or devices with lower configurations. If you manage to bypass the requirements because the hardware cannot meet them initially, things could get even worse.
Besides, if you're using a brand new PC with Windows 11 but it's still running slowly, it might be because of other factors like default settings, unnecessary background processes, or specific software-related issues.
Fortunately, there are tips you can try to speed up Windows 11 and enhance overall performance. Discover these steps in the following section.
How to make laptop run smoother in Windows 11?
In a discussion post titled “What advanced tips do you know to speed up your Windows 11 computer?” on Reddit, users list tips such as changing Power Mode, disabling startup programs, defragmenting the hard disk, disabling restartable apps, and more. In addition to these standard methods, we would like to share more advanced tips for effectively making Windows 11 faster in this section.
Way 1. Turn off Game Mode
Windows 11's Game Mode optimizes your PC for gaming by prioritizing system resources. While beneficial for serious gamers, it may slow down your system when not gaming, as it reserves resources in anticipation. Turning off Game Mode could provide a quick boost and resolve occasional stability issues. You can easily re-enable it when ready to play a game.
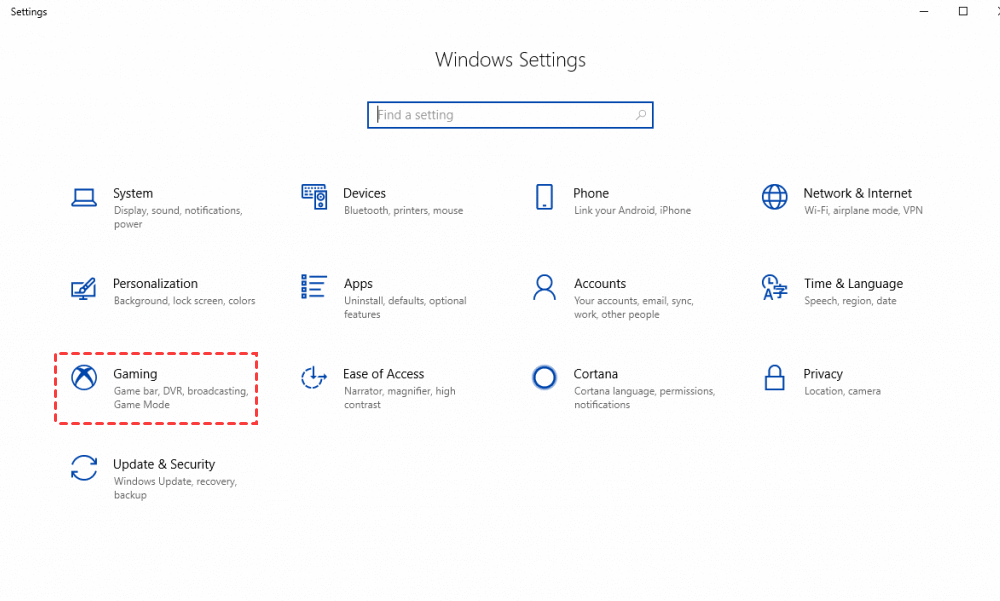
Step 1. Press "Win + I" to open Windows Settings, and choose the "Gaming" option.
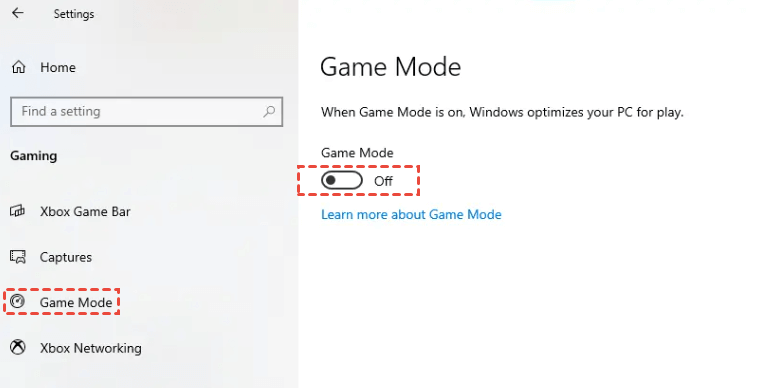
Step 2. Click on "Game Mode" on the left, and then switch off the Game Mode.
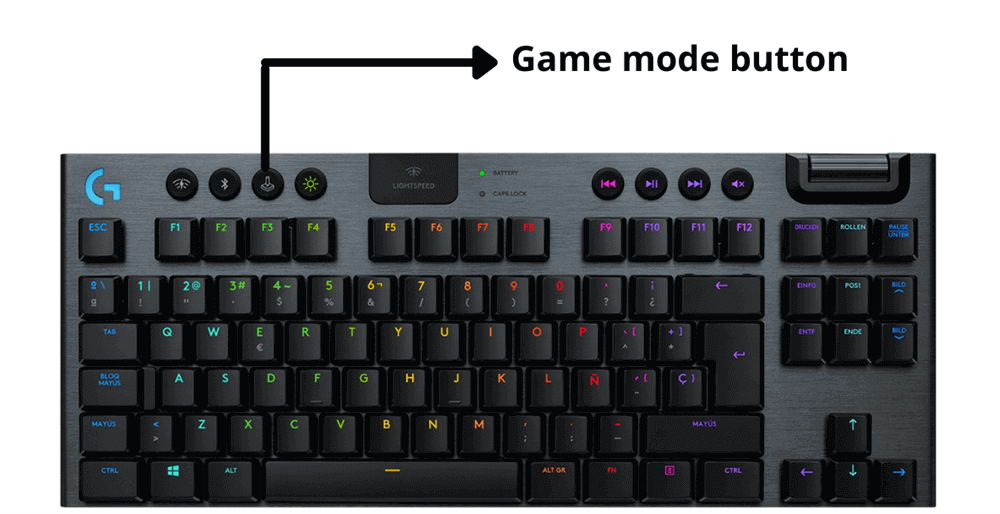
Note: Some keyboards have a dedicated Game Mode button; you can press it directly to disable Game Mode.
Way 2. Disable autostart programs
When your PC starts up, automatic loading of startup programs consumes memory and system resources in the background. Having numerous startup programs can significantly delay the boot time and speed of your Windows 11. To speed up Windows 11, you can disable autostart for programs that aren't essential for system startup.
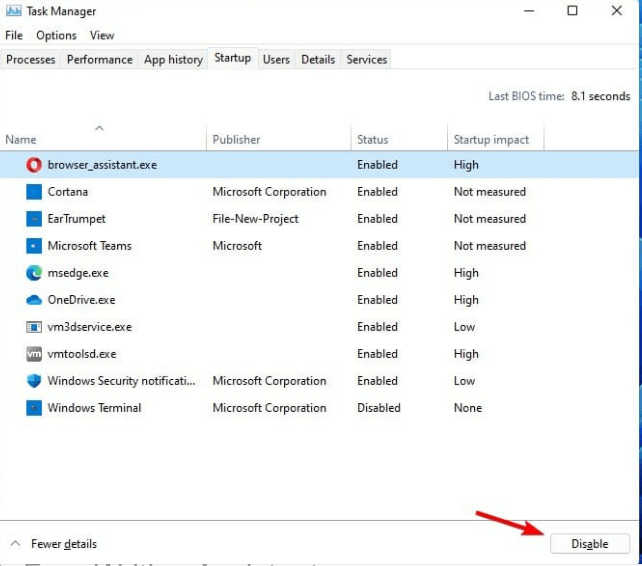
Step 1. Simultaneously press "Ctrl+Alt+Del" and select "Task Manager". In the appearing dialogue box, navigate to the Startup tab, where all startup apps are displayed.
Step 2. Right-click on the program you wish to prevent from loading automatically during startup and select "Disable."
Way 3. Transfer installed programs out of C drive
Having enough space on your OS drive, usually the C drive, is vital for your Windows 11 computer to run smoothly. When the C drive is almost full, it slows down the system work and its overall speed. Programs you don't use often on the drive can use up resources needed for essential files, impacting performance.
But it doesn’t mean you need to uninstall them. Once you want to use them, you have to reconfigure all the settings one by one. In fact, AOMEI Partition Assistant Professional provides a handy option: App Mover. It allows you to move the installed programs from the C drive to another drive that has sufficient space. This lets you free up space on the C drive without losing your apps, making it effective to make Windows 11 faster and maintain good performance on your PC.
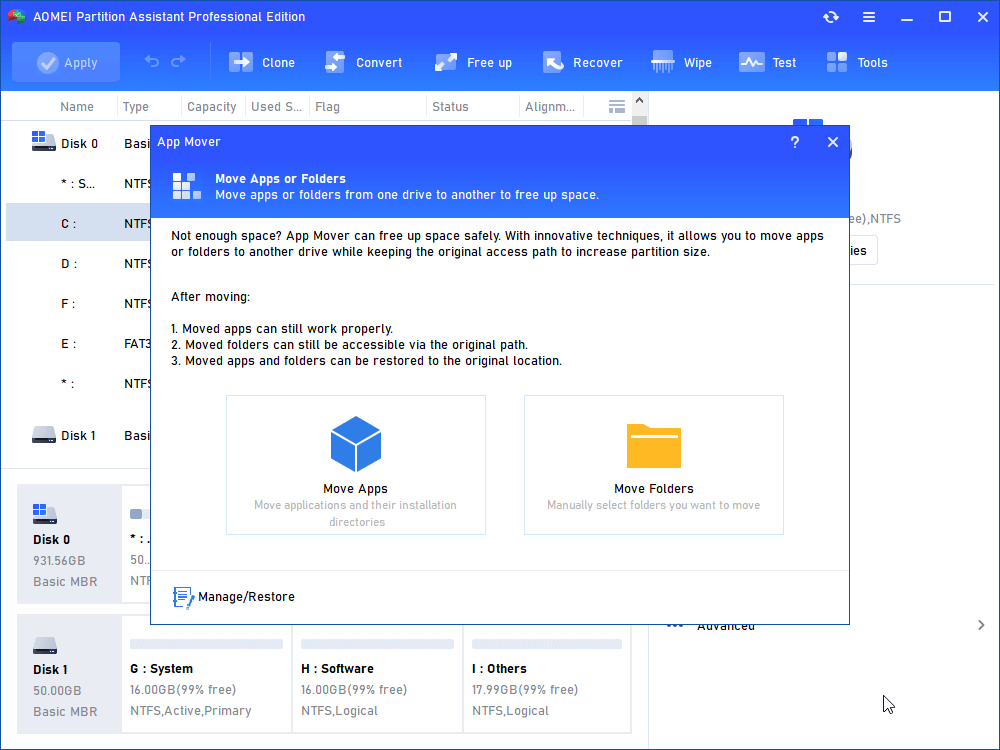
Step 1. Install and launch AOMEI Partition Assistant Professional, then right-click on the drive where you want to move the applications and choose "APP Mover".

Step 2. There are 2 options, click “App Mover”. You can also click “Move Folders” if you need to move folders from C drive to D drive.
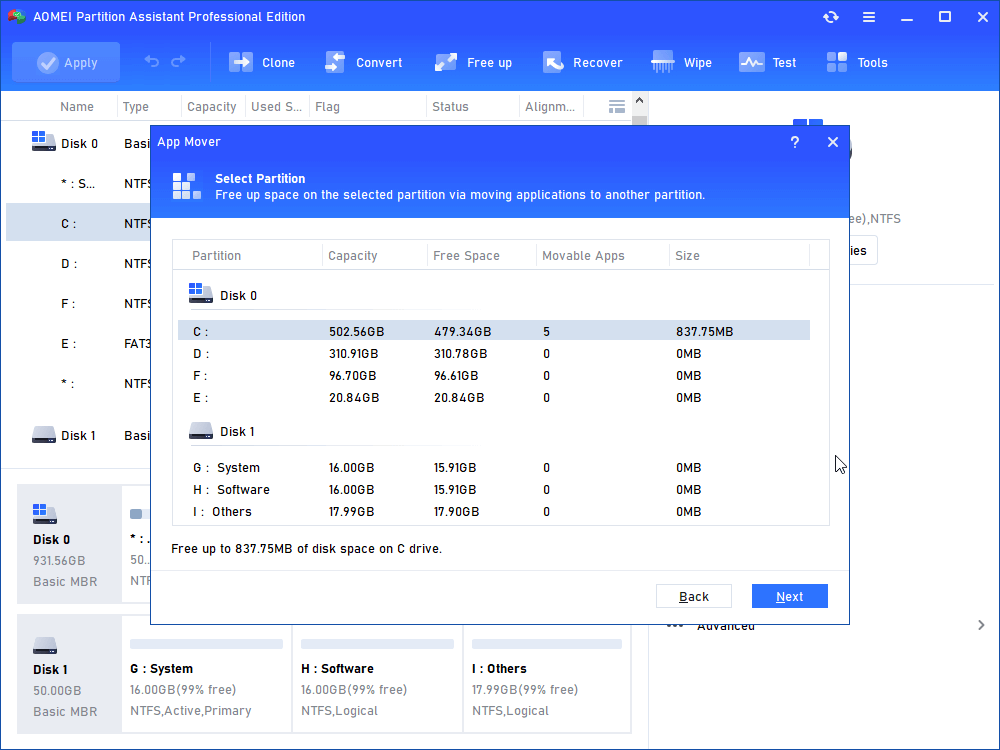
Step 3. Then, select the C drive and click "Next".
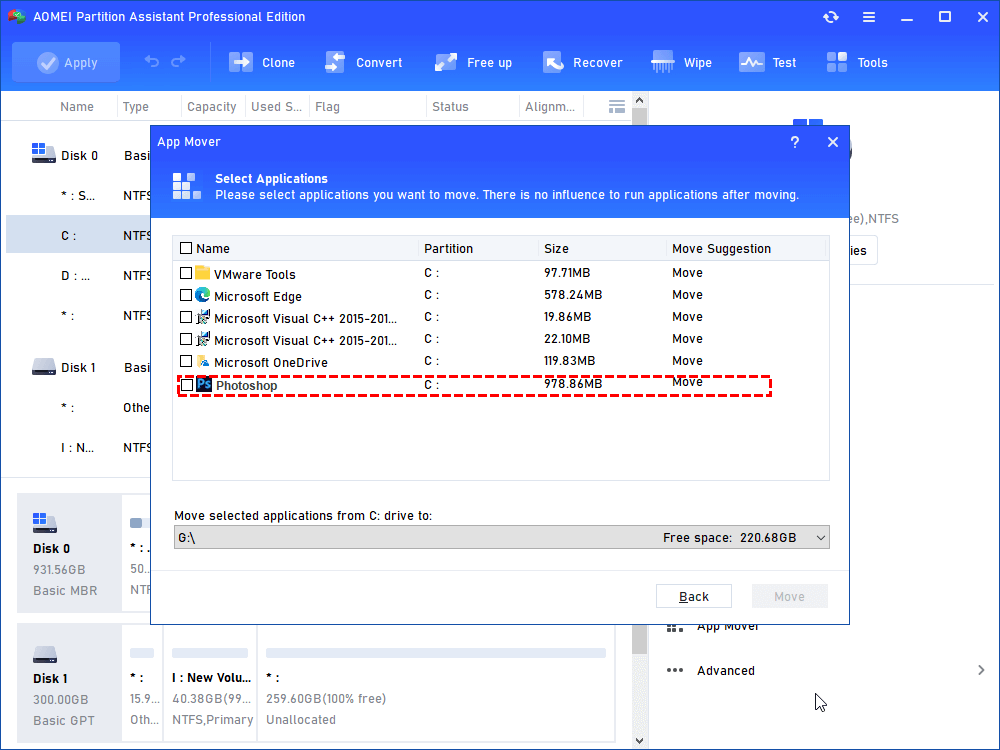
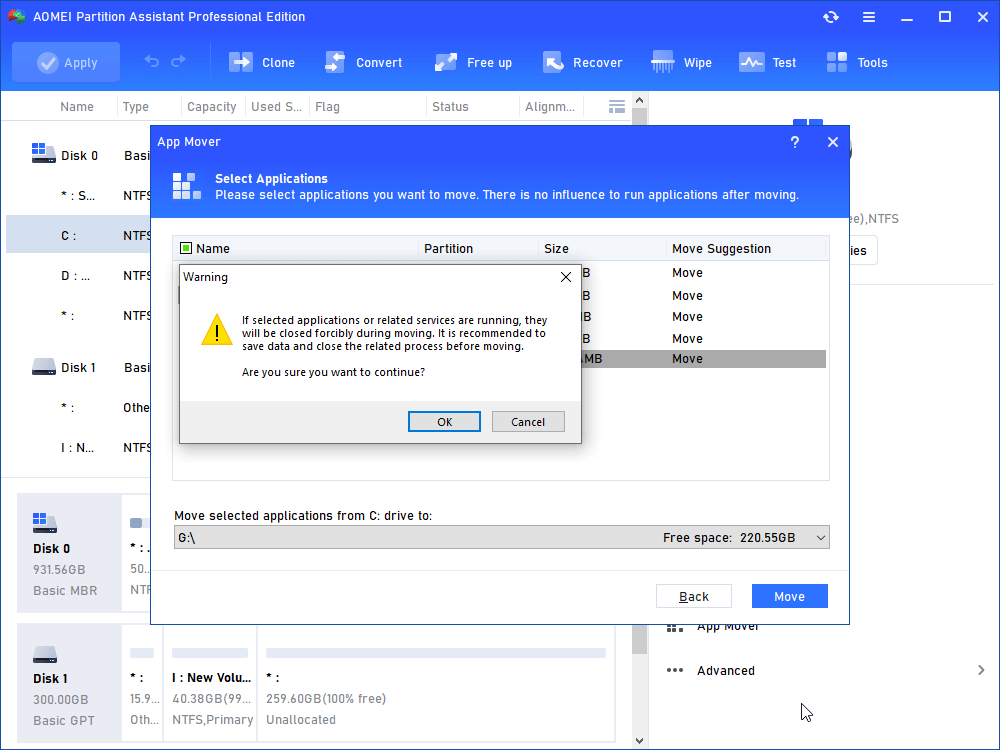
Step 4. Choose the target apps you want to move and select the destination location, then click "Move".
Step 5. In the pop-up window, you need to read the prompts. Click "OK" to begin the process.
Way 4. Turn off visual effects
New operating system versions often come with design enhancements. However, such upgrades can consume many resources and impact device performance, especially if you are using an old device. To make laptop run smoother in Windows 11, it is a good idea to disable certain built-in visual effects.
Step 1. Click the Windows icon on your desktop, type "View advanced system settings," and open it. Select "Advanced" and choose "Performance Settings."

Step 2. Check the "Adjust for best performance" option.
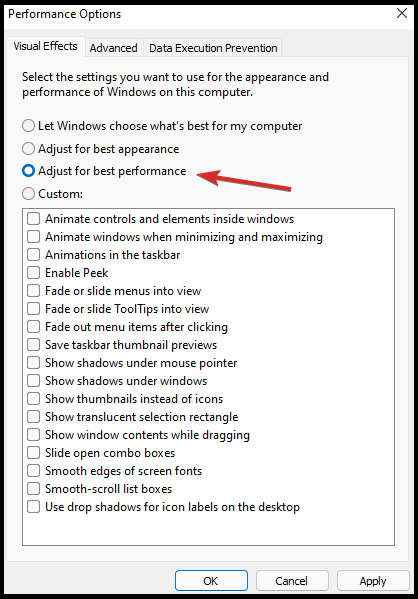
Step 3. Click "Apply" and then "OK" to save these changes.
Way 5. Clean junk files on your PC
"Why is my laptop so slow in Windows 11?” When asking this question, you probably know one of the culprits: junk files. They are useless but take up space and consume resources on your Windows 11 PC. If you don’t know where to find them or how to delete them, just open the downloaded AOMEI Partition Assistant Professional and run its PC Cleaner function to remove the junk files and speed up Windows 11 with just a few clicks.
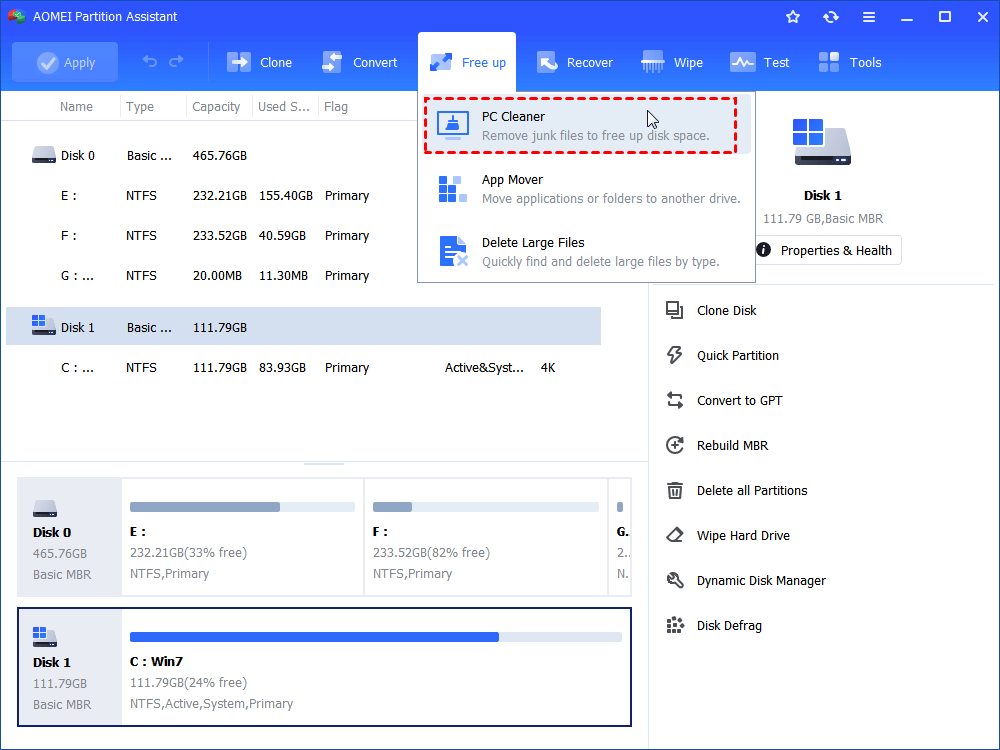
Step 1. Click "Free up" > "PC Cleaner" in the main interface.
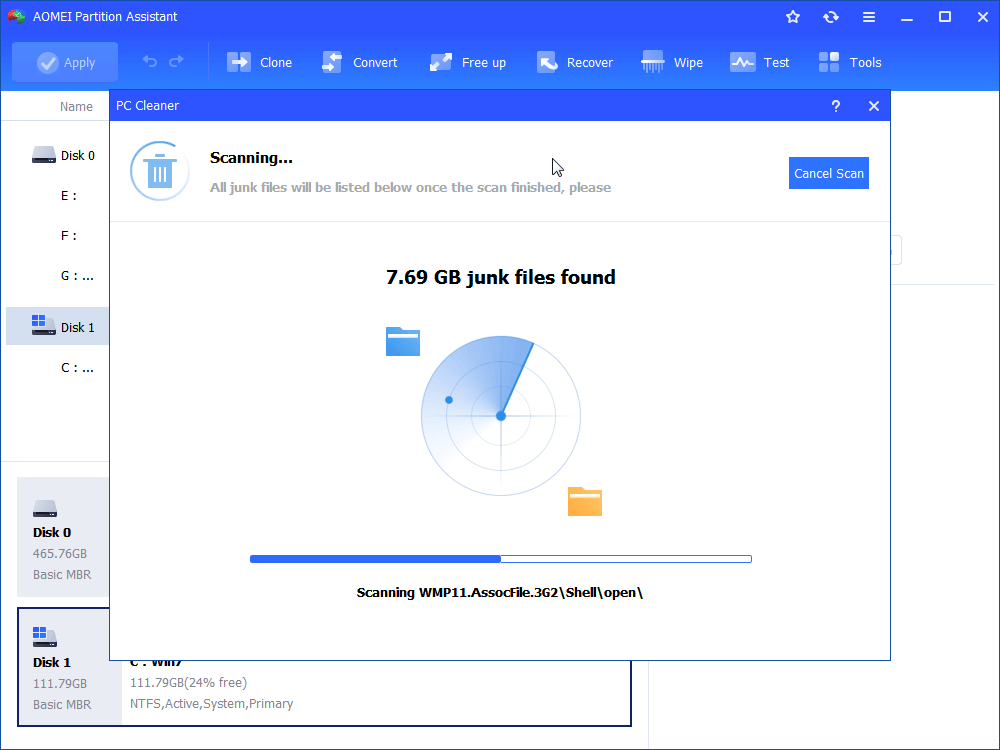
Step 2. In the pop-up window, click "Start Scan" to scan for junk files.
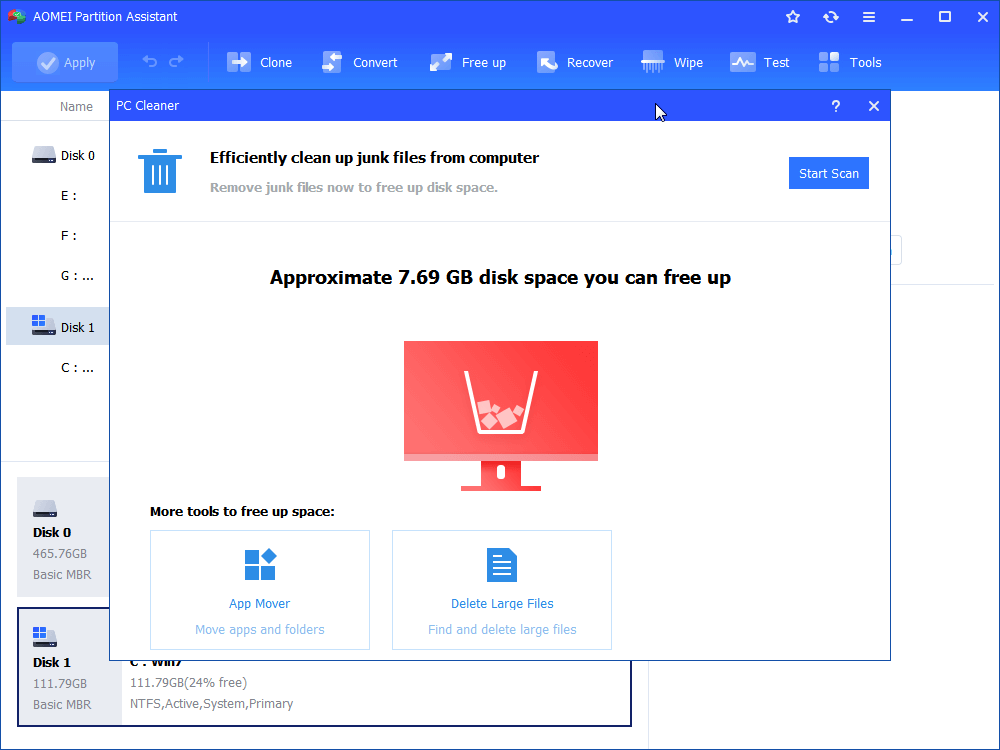
Step 3. Wait until the scanning process completes.
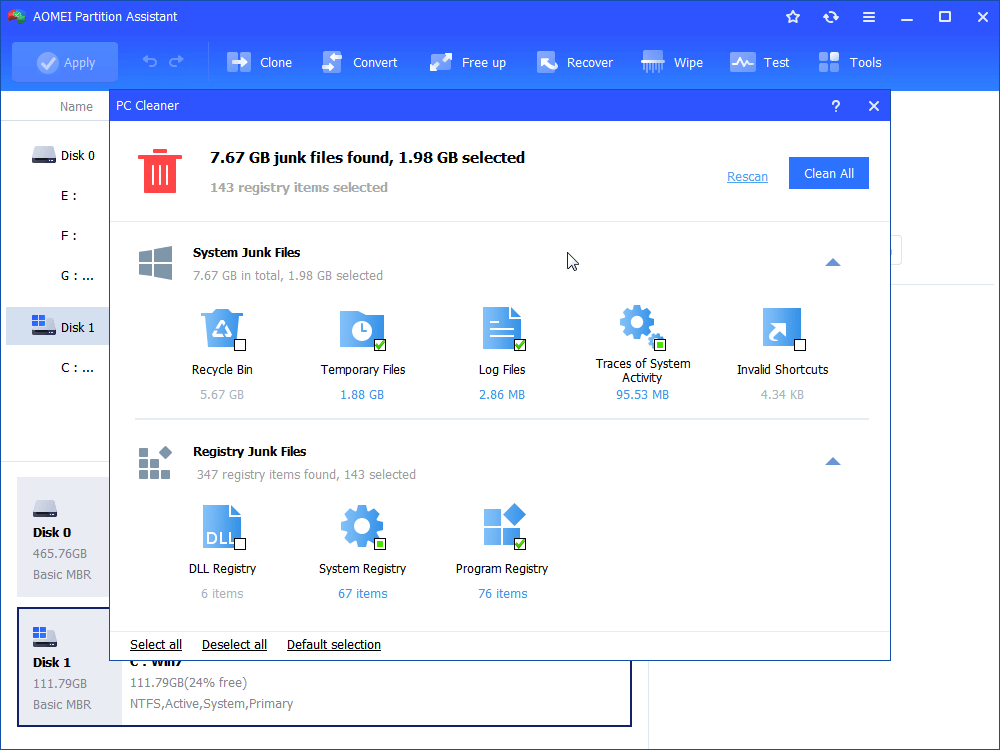
Step 4. After the scan is completed, all kinds of available junk files will be listed. Then, tick the options you want to clean, then click "Clean All" to begin the cleaning process.
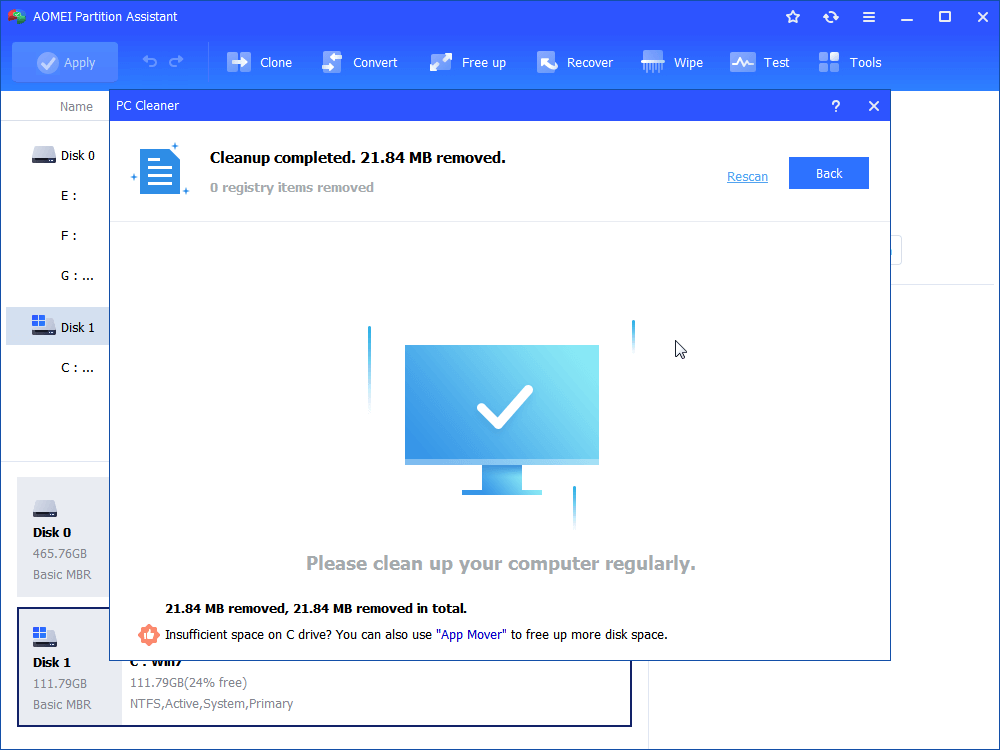
Step 5. When you see a symbol displayed in the interface, you can click "Back" to exit the window.
Way 6. Upgrade your disk
If your device is too old to run Windows 11 and there's nothing left to enhance, such as freeing up space or removing junk files, it may be time to consider upgrading your disk. This step involves upgrading from an HDD to an SSD or from one SSD to a better, faster, and larger SSD. For those who want to play games, a recommended option is a 500GB NVMe M.2 SSD.
AOMEI Partition Assistant offers you 2 options for easy data transfer. If you want to migrate only the OS to SSD, use the OS Migration feature. If you want to move all the original data, including files, programs, and OS, choosing Clone Disk may be better.
Step 1. Choose "Clone" and "Clone Disk" in turn from the top pane.
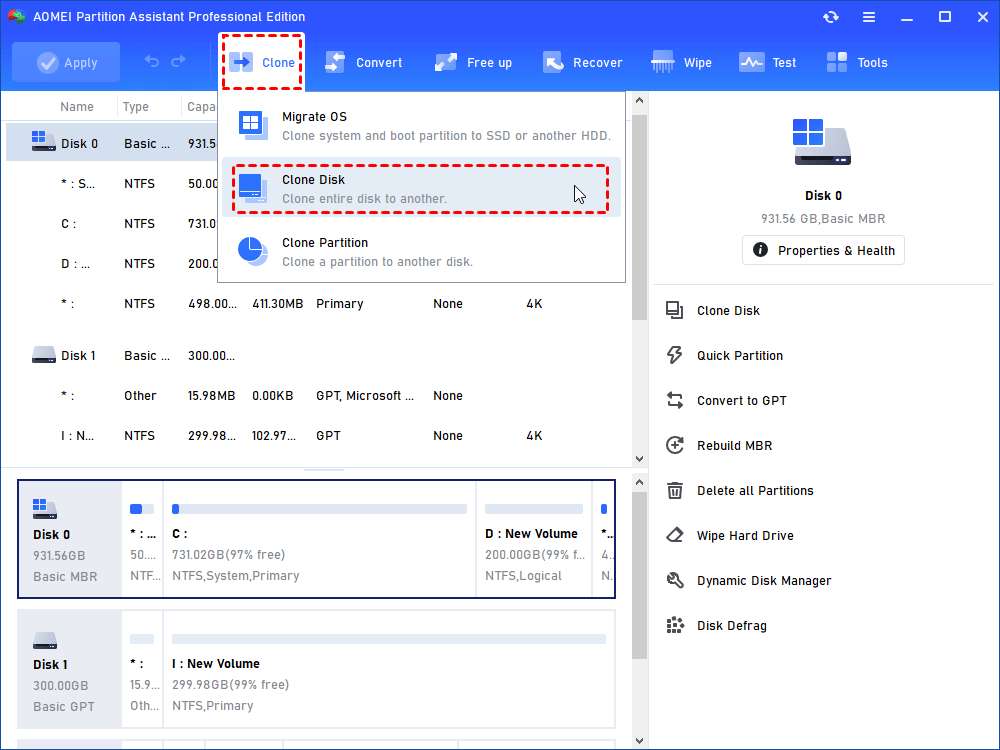
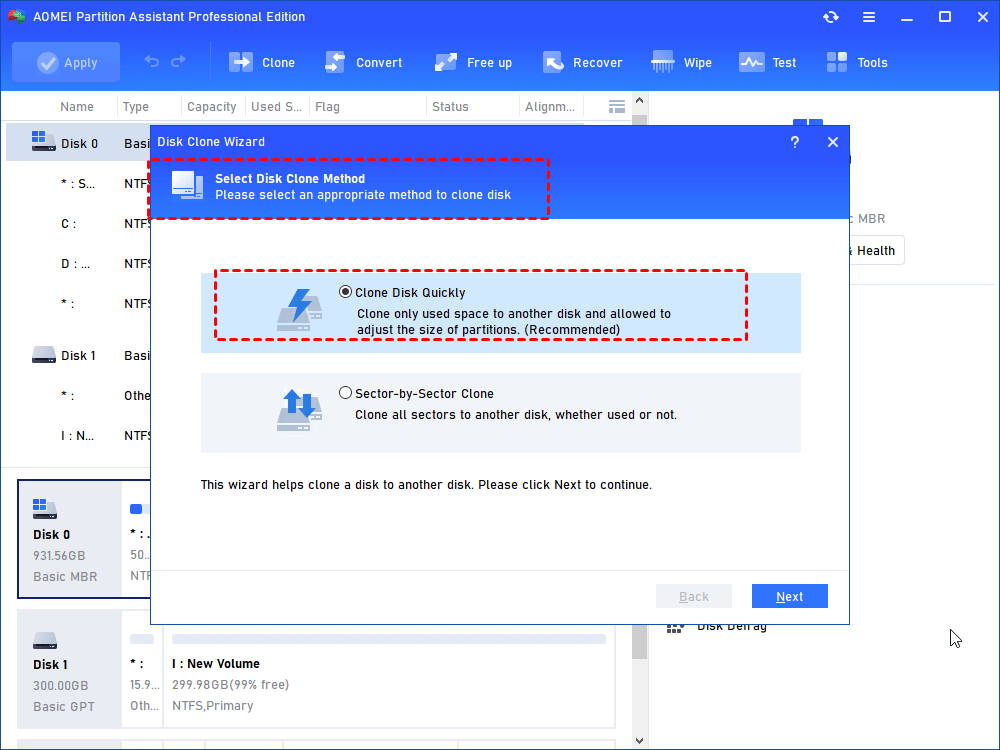
Step 2. In the pop-up window, choose “Clone Disk Quickly”. If you need to clone a hard drive with bad sectors and the capacity of the target SSD is not smaller than the source disk, please choose “Sector-by-Sector Clone”.
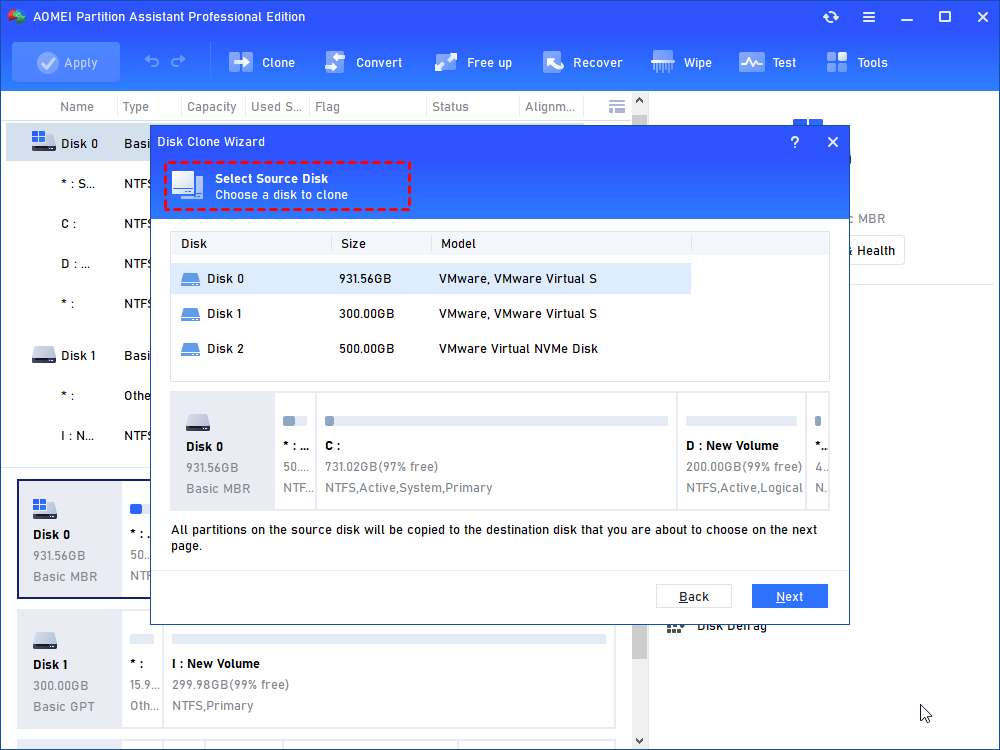
Step 3. Locate the system disk and choose it as the source disk.
Step 4. Choose the SSD as the destination disk, and tick the box before “Optimize the performance of SSD…” to make SSD partition alignment.
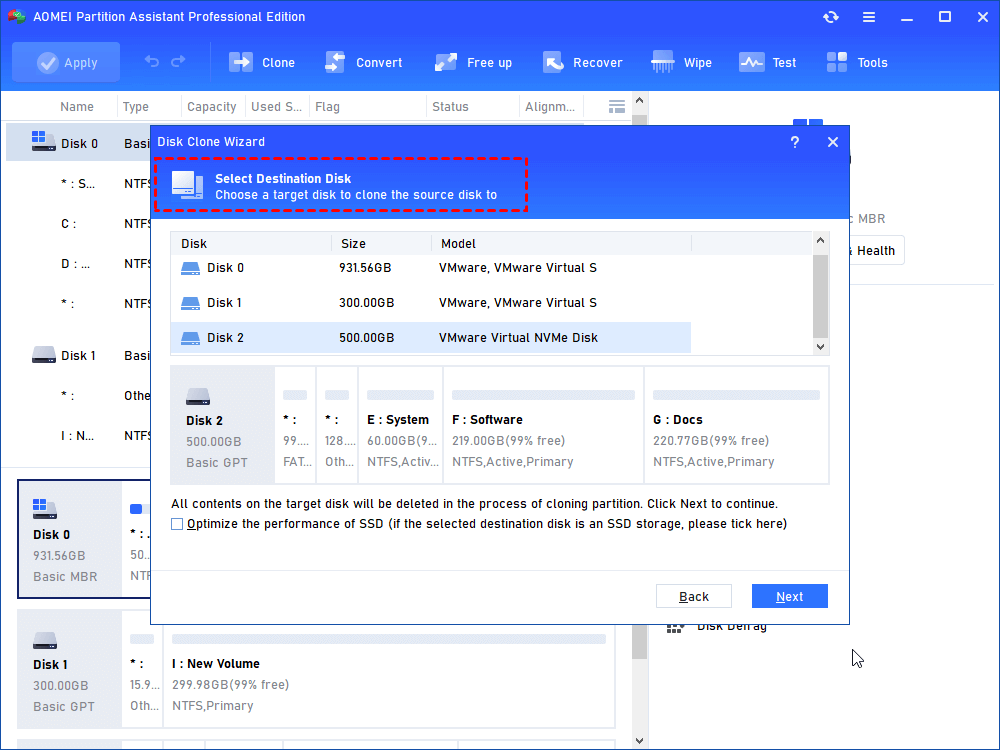
▶ Note: If there are data saved on SSD, you'll be prompted to delete all partitions and wipe all data on SSD.
Step 5. In this window, adjust the partition size on the destination SSD.

▶ Note: If you clone HDD to a smaller SSD, the option of “Clone without resizing partitions” will be greyed out.
A note will appear in the pop window, read and keep it in mind.
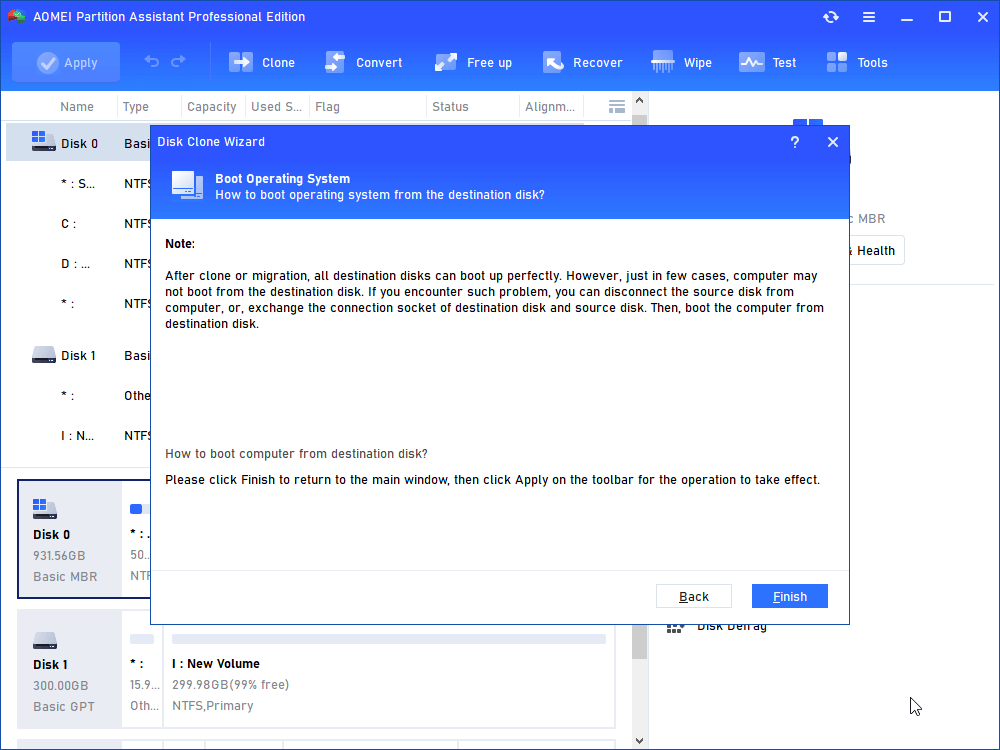
Step 6. In the main interface, to perform the cloning operation, click “Proceed” and “Apply”.

At last, don't forget to enter BIOS to set the NVMe drive as a boot drive. If you don't know how to enter BIOS on Windows 11, AOMEI Partition Assistant Professional offers the UEFI BIOS Boot Options Manager function for you.
Way 7. Defrag the hard disk
Over time, files on an HDD get scattered, causing slower performance. Defragmenting the HDD can organize these files, making them easier to read and making PC faster in Windows 11. If you are using an HDD and don’t want to upgrade the disk, AOMEI Partition Assistant Professional also offers you the option.
Note: If the partitions on your external hard drive are not NTFS partitions, please convert them to NTFS partitions before we start to defragment.
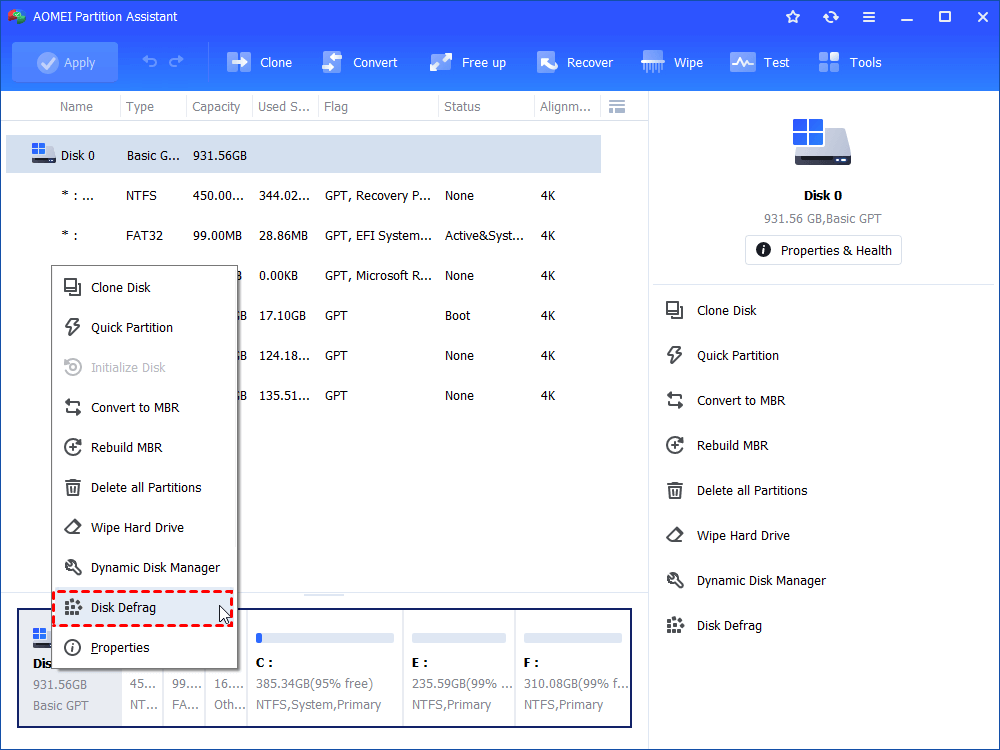
Step 1. Click "Disk Defrag" in the left menu, or just right-click on the disk and select the "Disk Defrag" function.
Step 2. Check the partition you want to be analyzed, and click "Analyze". You need to check the partition, not select it. This function currently only supports NTFS partitions, so it will only list NTFS partitions on SSD, HDD, and USB drives.
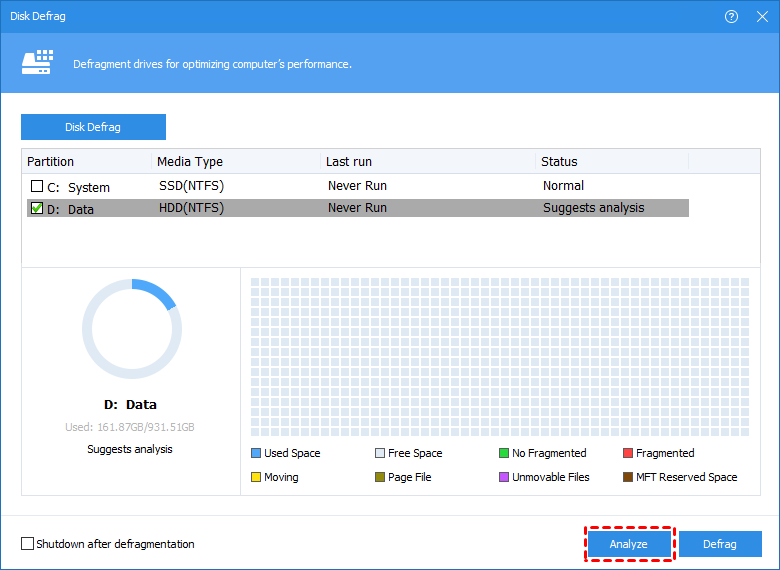
Tip: You can click "Pause" to halt the process and resume later, or click "Stop" to end the analysis process completely.

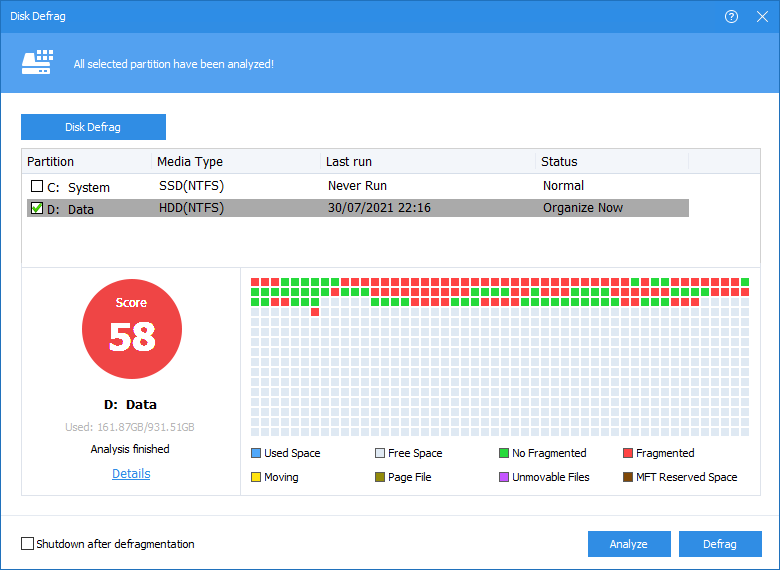
Step 3. The program will score the partition based on the fragmentation rate when the analysis is over. You can check the distribution of fragments through the Tetris view. After the analysis, you can click on "Details" to see more information about the analysis results.
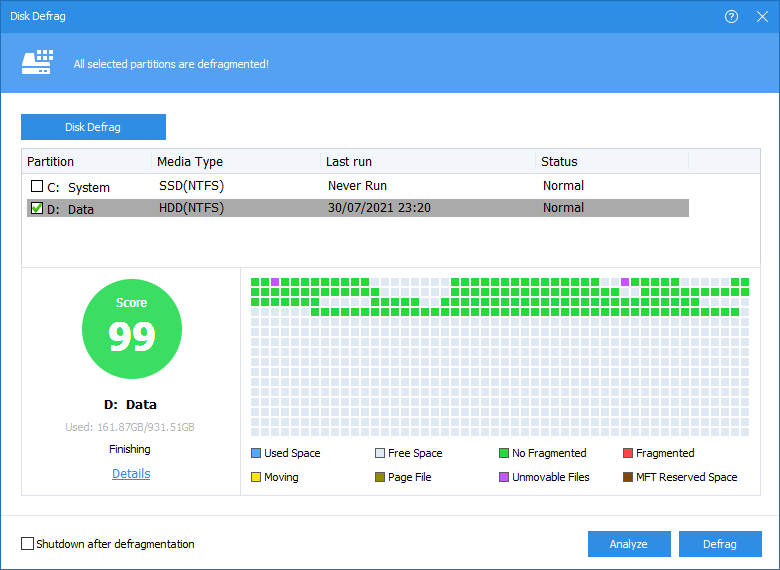
Step 4. Click the "Defrag" button to start the defragmentation.
Tip: You could click "Pause" to halt the procedure and resume later, or click "Stop" to terminate the process completely.
After the defragmentation is completed, the partition will be scored according to the defragmentation result.
▌Note: If the fragment files are in use, they cannot be defragmented.
Way 8. Check for Windows updates
Regularly updating Windows 11 is advisable for several reasons. Microsoft frequently addresses crucial security vulnerabilities through its updates. Besides, the system receives bug fixes and optimized code, automatically enhancing stability and performance.
While the Update Center typically notifies you of available system updates, it's worthwhile to check for them regularly to make laptop run smoother in Windows 11.
Step 1. Search and open Settings in the search box.
Step 2. On the left, select "Windows Update."
Step 3. Click "Check for updates".

Summary
How to make laptop run smoother in Windows 11? These 8 introduced methods are proven to be quite effective if your Windows 11 is running sluggishly, especially after upgrading from an old version.
As you can see, AOMEI Partition Assistant can provide you with various solutions to speed up Windows 11. It is also recommended to explore Allocate Free Space, Duplicate Files Finder, and Delete Large Files. If you are a Windows Server user wants to effectively manage the PC, kindly please choose the AOMEI Partition Assistant Server edition for a compatible environment.

