[11 Easy Methods] Fixing Epic Games Launcher not Opening in Windows 11
If you encountering the Epic Games Launcher not opening in Windows 11, follow the shared solutions to easily fix that. You can also learn to enhance the gaming speed after troubleshooting.
By Irene / Updated on June 6, 2024
The Epic Games Launcher is a popular tool for getting and playing awesome games like GTA, FIFA, PGA Golf, Cyberpunk, and Fortnite. It's like Steam, where you can buy, download, and enjoy your favorite games easily. Many PC gamers use it because it offers lots of choices in one place.
But what if the Epic Games Launcher won't open? If it's not working, you can't play the games you bought. Some people also see a black screen when trying to open it on Windows 11. To address this, we have compiled several top methods to try when the Epic Games Launcher is not opening in Windows 11.
What to do when Epic Games launcher not opening in Windows 11?
Why won’t Epic Games Launcher open or work? This may be attributed to many factors. In this section, we will share possible reasons along with specific solutions to effectively troubleshoot the problem.
Method 1. Check the system requirements
Ensure your computer meets the necessary system requirements to run the Epic Games Launcher smoothly. Your computer must be running Windows 7 or a higher version with the specified hardware. Attached are some specifications for reference:
Memory: 2GB
Video card: DirectX 9.0c Compatible GPU; NVIDIA Geforce 7800 (512MB)/AMD Radeon HD 4600 (512MB)/Intel HD 4000
Hard drive: 1.5GB
Method 4. Free up RAM on PC
Insufficient RAM may prevent the Epic Games Launcher from opening normally. Use the Task Manager to check memory utilization, end unnecessary tasks, and free up RAM on your PC.
Step 1. Press the Windows key, enter "Task Manager," and press Enter. Then, review memory usage in the Memory tab.
Step 2. Identify unnecessary apps and services, and click "End task" at the top to close them.
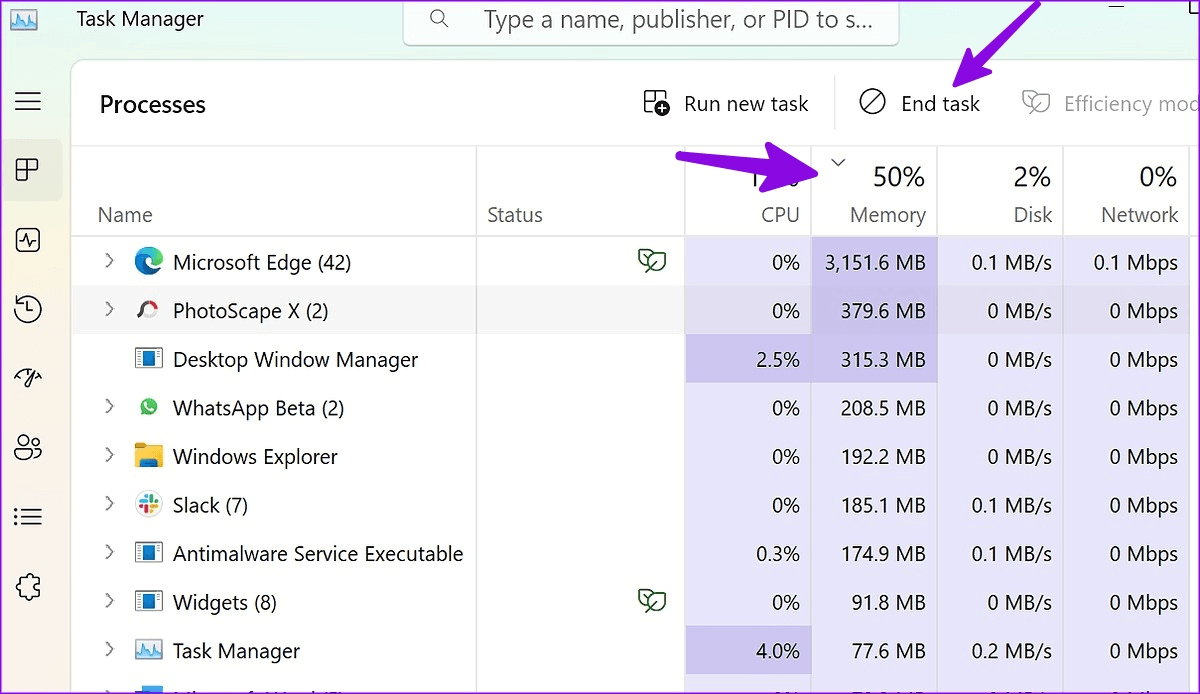
After doing that, reopen the program to check whether the issue of the Epic Games Launcher not opening in Windows 11 has been fixed.
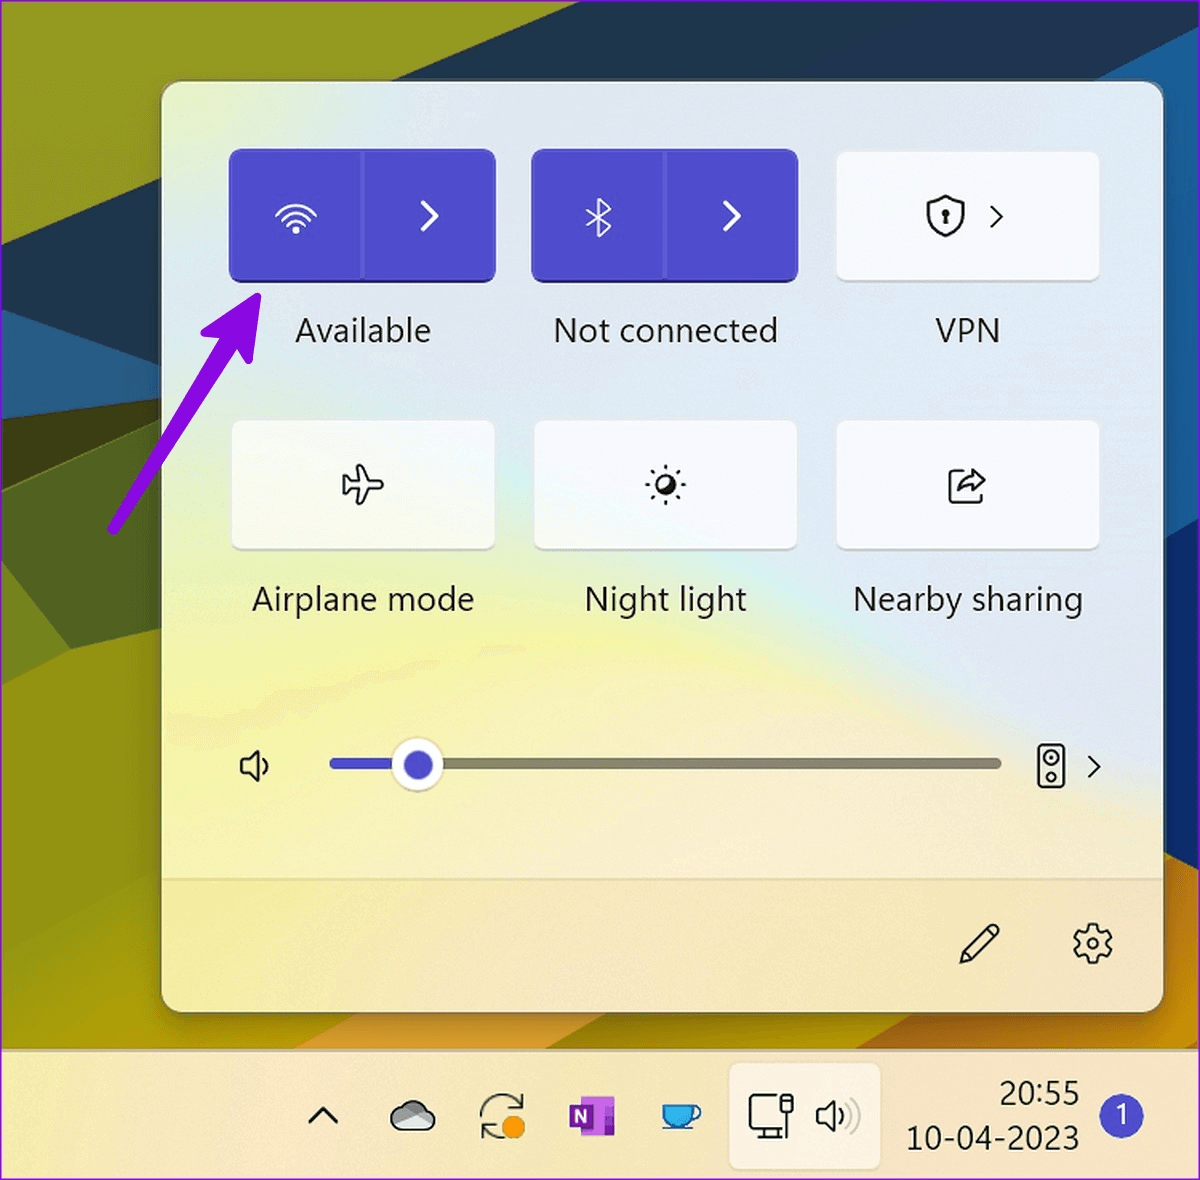
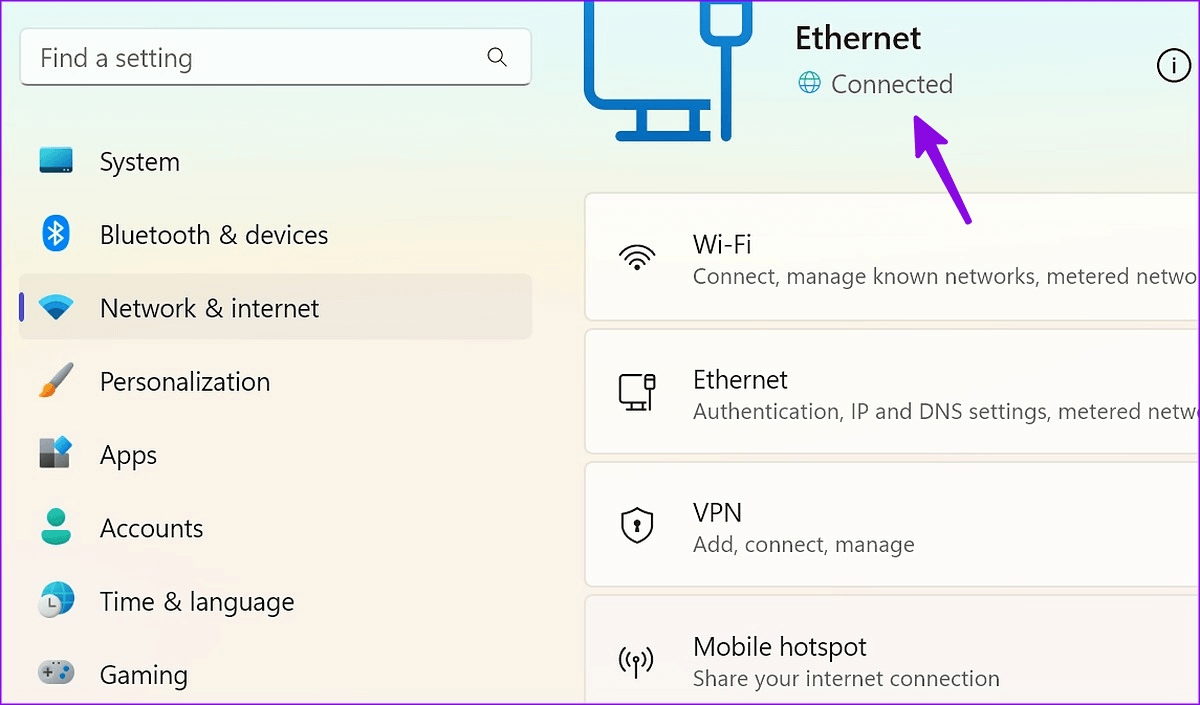
Method 2. Check PC's internet connection
When the Epic Games Launcher not opening, it is time to confirm an active internet connection on your PC. Check and establish a stable Wi-Fi connection, and verify network status in Windows settings.
Step 1. Open the connection menu on the Windows taskbar and link your PC or laptop to a strong Wi-Fi network.
Step 2. Press the Windows + I keyboard shortcut to launch Settings. Choose Network & Internet from the sidebar and verify a Connected status.
Method 3. Run Epic Games as an Administrator
Launch Epic Games as an administrator to address the issue of the Epic Games Launcher not working or opening. Just find Epic Games in the search box, right-click on the app name, and choose to open it as an administrator.

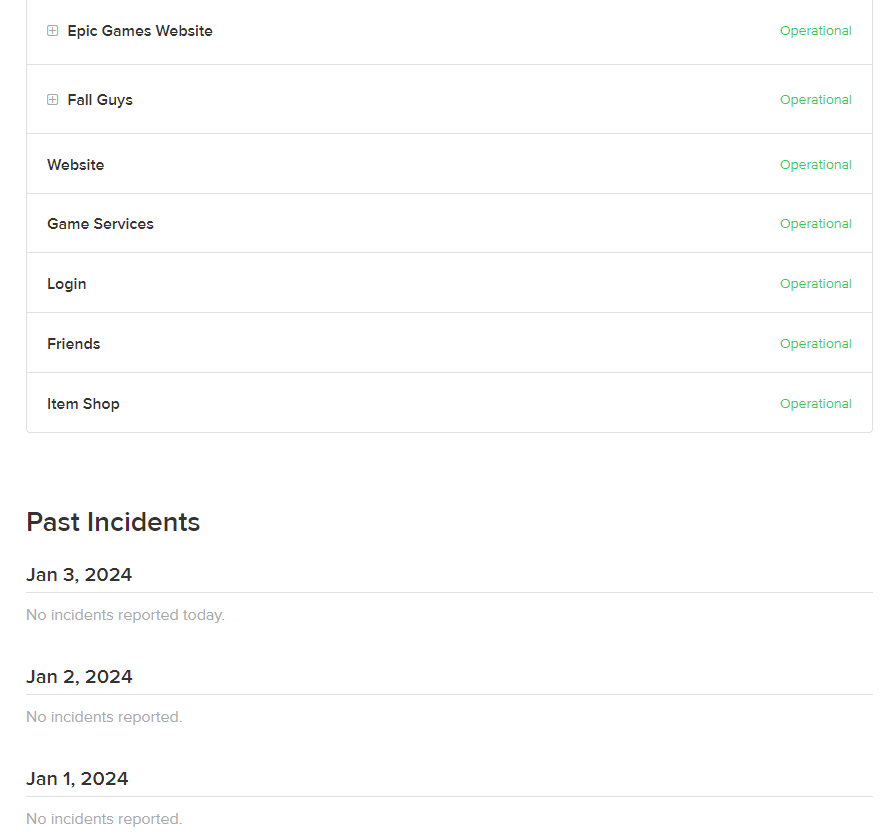
Method 5. Verify Epic Games server status
If the Epic Games Launcher won’t open, you can see how Epic Games servers are doing. Go to their special status webpage, which tells you if Epic Games Store, Epic Online Services, and Game Services are working properly. If your Games Launcher has issues because of a problem or system failure, they might fix it once they deal with the server problems.
Method 6. Clear the Epic Games Launcher webcache
To fix Epic Games Launcher not opening in Windows 11, you can try to clear the Epic Games cache folder on your PC, known as the Webcache subfolder.
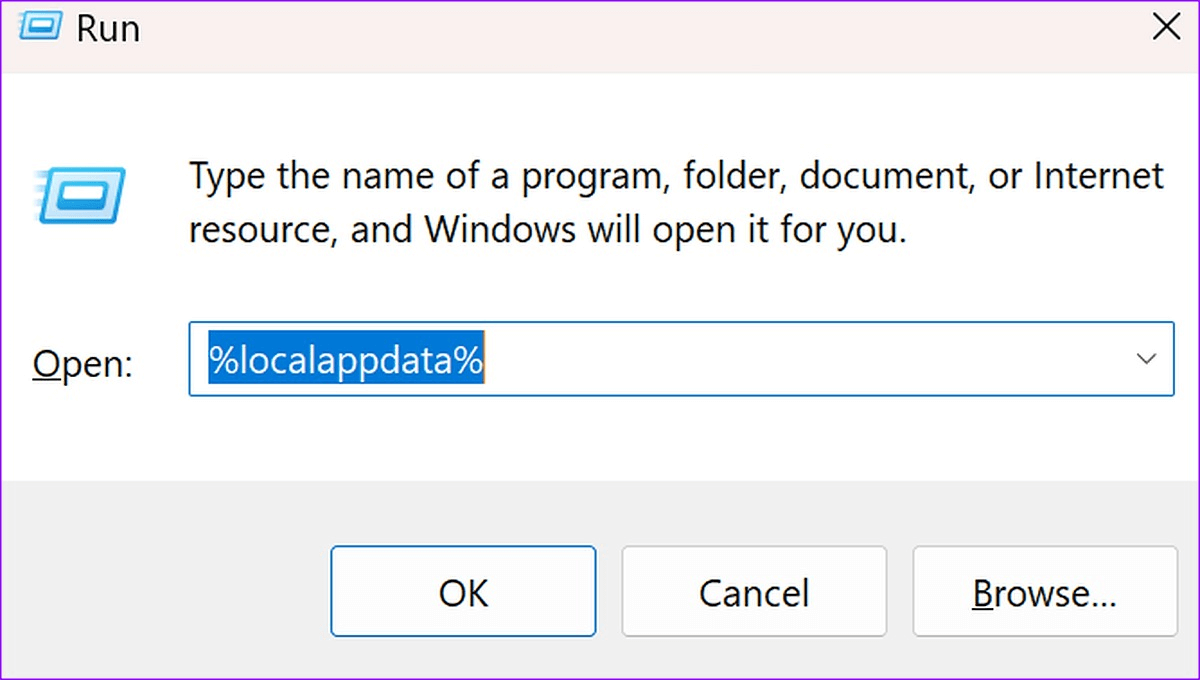
Step 1. Press the Windows + R keyboard shortcut to open the Run menu, then type %localappdata% next to Open and press Enter.
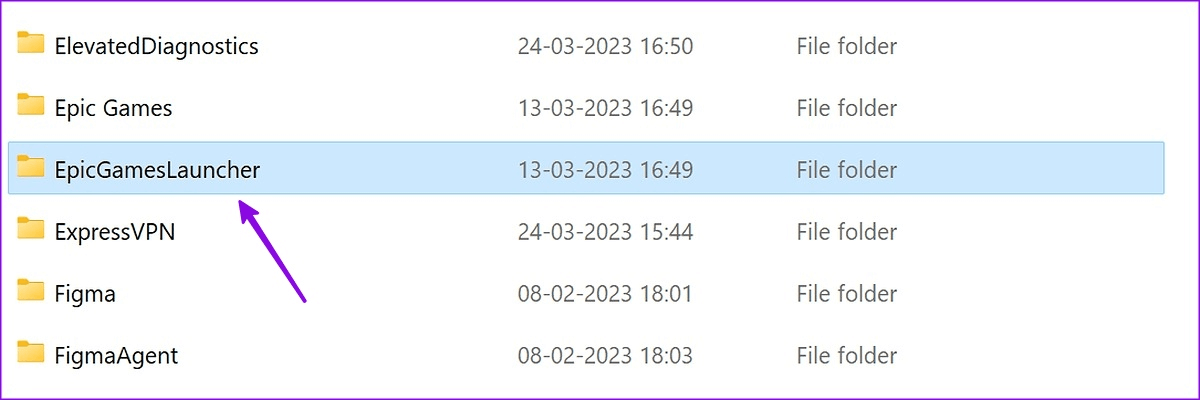
Step 2. Open the EpicGamesLauncher folder.
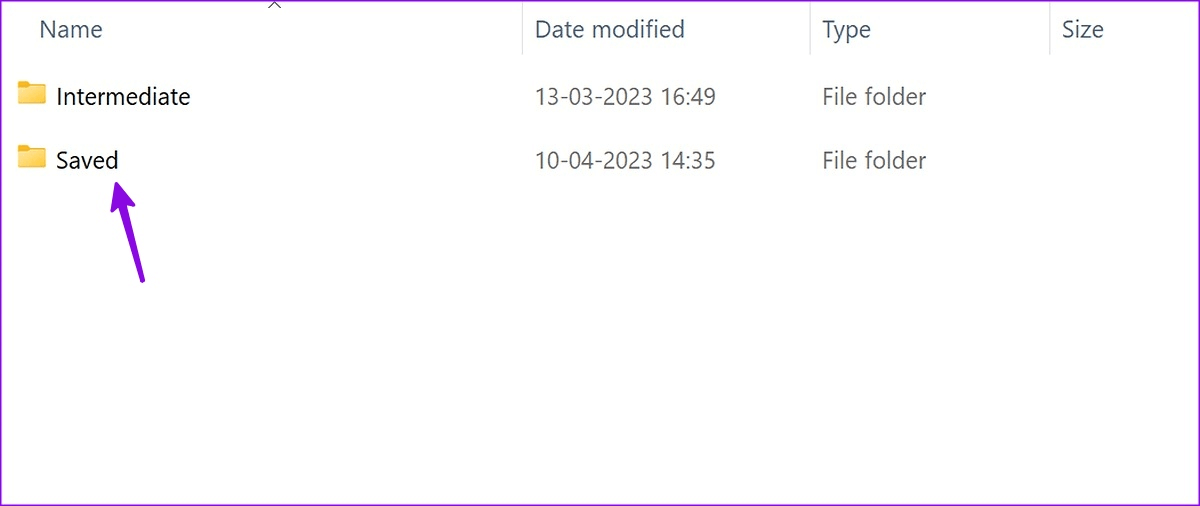
Step 3. Select the Saved folder.
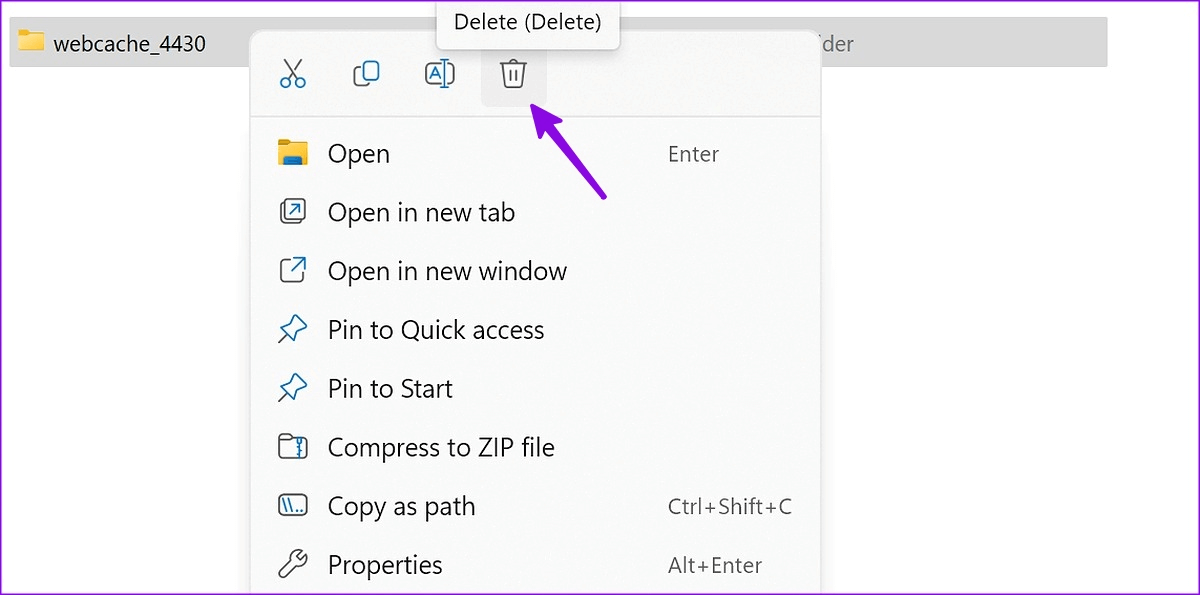
Step 4. Right-click the webcache folder and choose Delete.
Restart your Windows PC and see whether the Epic Games Launcher can work normally.
Method 7. Adjust display settings
Epic Games Launcher may not function well with custom display scaling settings. Set the scaling settings to 100% by accessing the Display menu under the System settings.
Step 1. Press Windows + I to open Settings. Go to the System menu and choose Display.
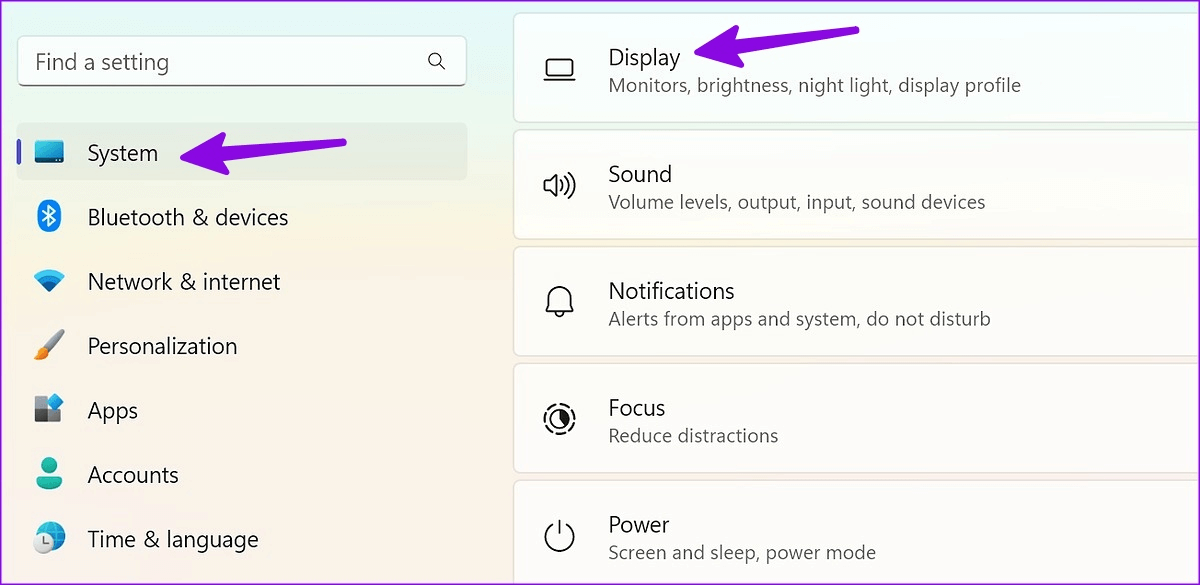
Step 2. Make sure the scaling settings are set to 100%.

Method 8. Repair the Epic Games Launcher
When the Epic Games Launcher not opening in Windows 11, you can use the Repair option in the Control Panel to address problems with the program.
Step 1. Press the Windows key, type Control Panel, and hit Enter.
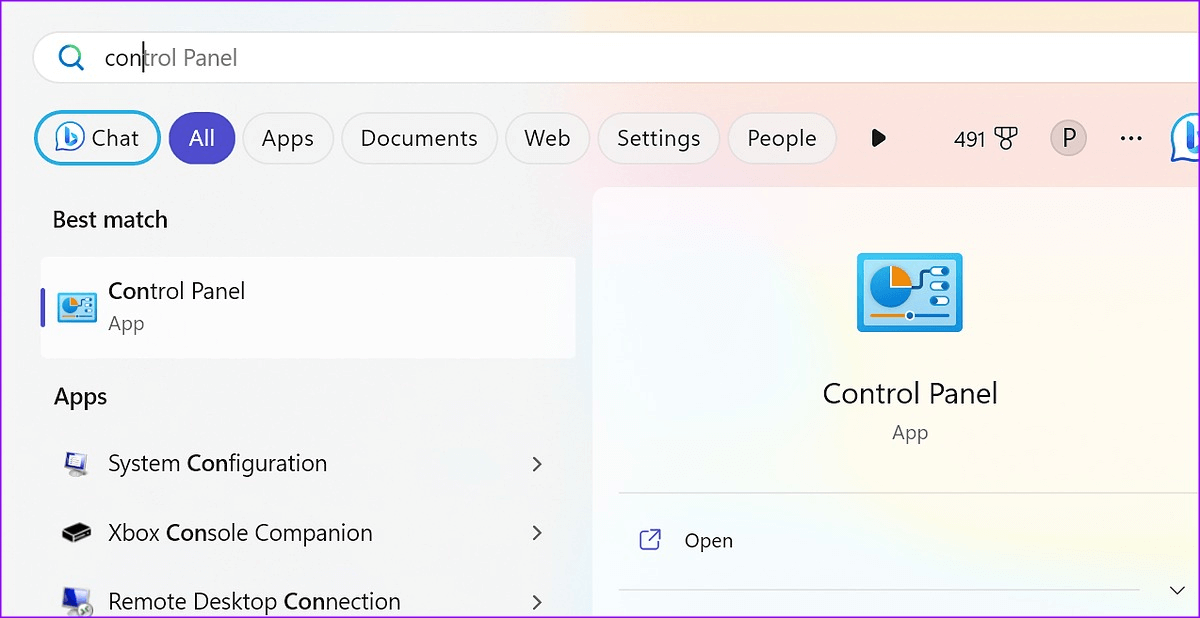
Step 2. Choose Programs and open Programs and Features.

Step 4. Click on Epic Games Launcher and select Repair at the top.
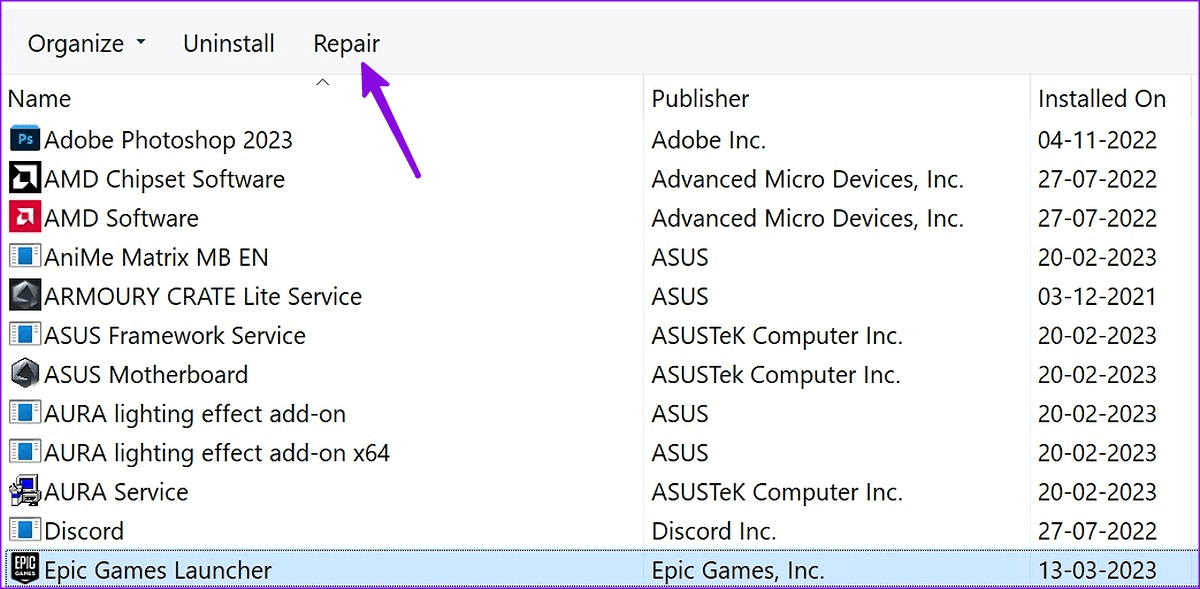
Follow the on-screen instructions to run the Repair tool.
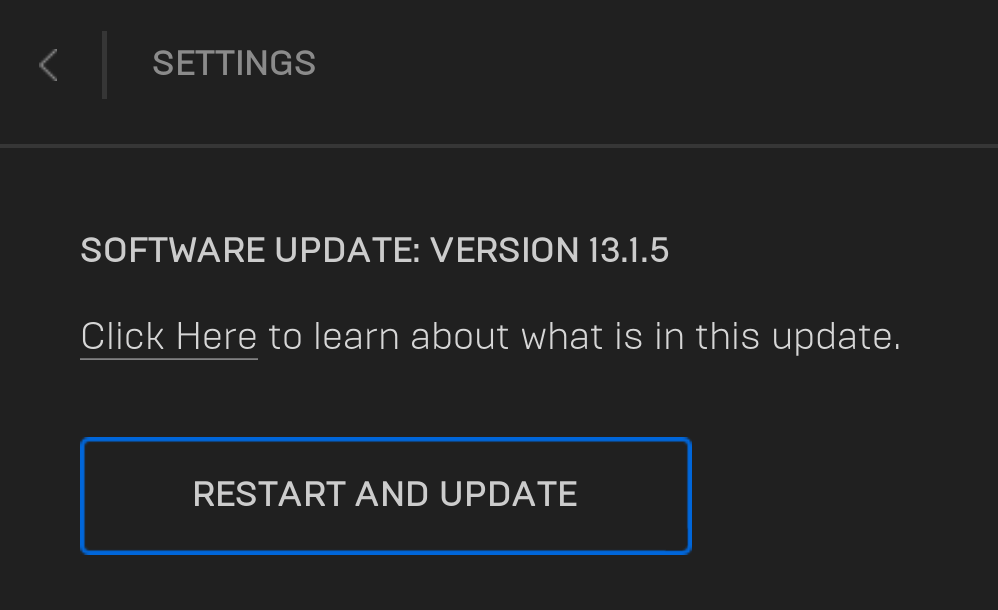
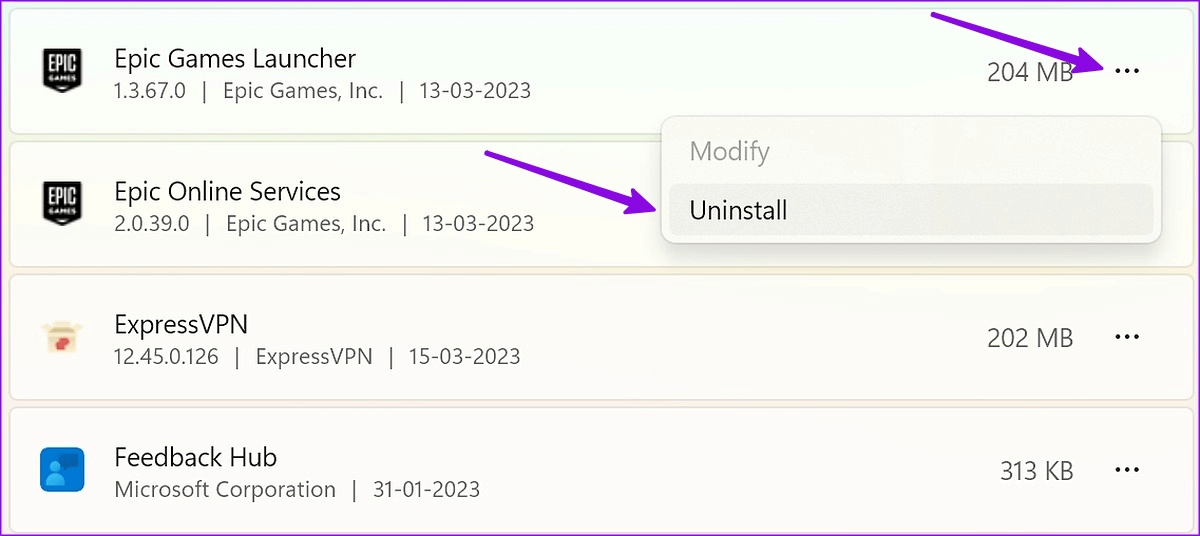
Method 9. Check the Epic Games Launcher updates or reinstall it
If the Epic Games Launcher not working, check for updates. Click your profile icon in the top right corner, choose Settings, and if there's a RESTART AND UPDATE button, click it to update the Launcher.
If that doesn't solve it, uninstall the launcher from the Installed Apps menu in Settings. Then, download and reinstall it from the official website, signing in with your account details.
Method 10. Disable anti-virus software
Third-party anti-virus software might interfere with Epic Games Launcher. Temporarily disable the anti-virus software and attempt to open the application again.
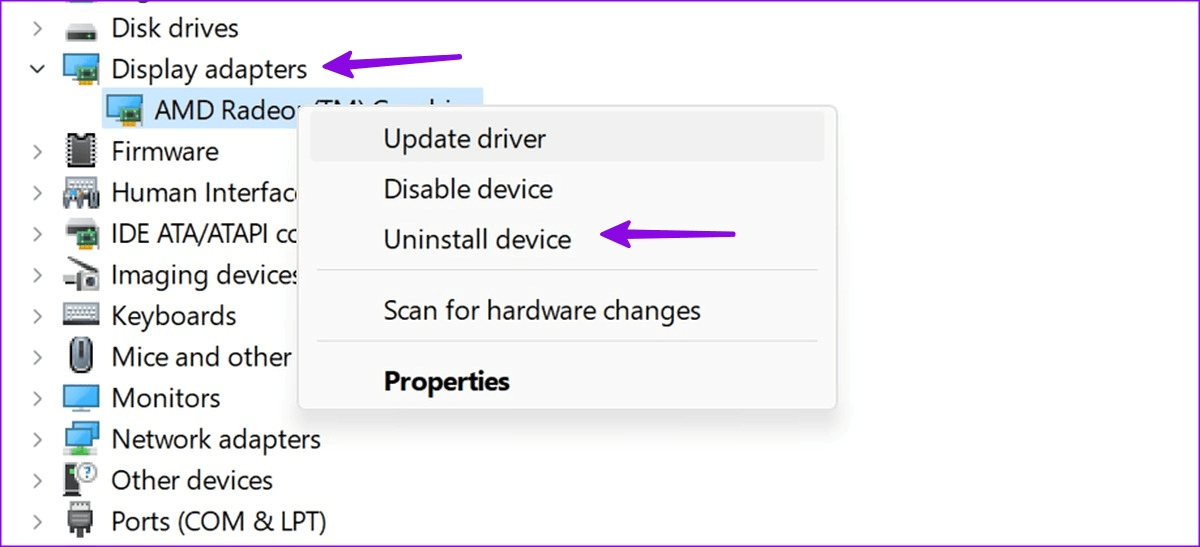
Method 11. Upgrade or reinstall graphics card drivers
If graphics drivers are causing problems, uninstall and reinstall them. Access Device Manager, uninstall the graphics drivers under Display adapters, and restart your PC to allow the system to download the required drivers.
Further reading: How to enhance gaming speed?
If your hard disk is old and small, it's common for the Epic Games Launcher not opening in Windows 11. If you've been using the disk for several years, it is a good idea to consider upgrading it to a better one, like a 500GB NVME M.2 SSD. This will improve overall performance, including the speed of your games.
To skip any reinstalling and experience fast data transfer, you can rely on AOMEI Partition Assistant Professional, a comprehensive computer management tool. It offers 2 practical options for disk upgrading. If you only want to move the operating system, you can use its OS Migration function. For transferring all data, including files, programs, and the OS, it's recommended to opt for Clone Disk. Here we display how to run the Clone Disk feature to upgrade your disk
▌Migrate OS only:
Step 1.Run AOMEI Partition Assistant Professional. Select Clone > Migrate OS from the top section. Examine the introduction in the next window.

Step 2. Select the SSD as the destination disk. If there are partitions on this disk, check the option "I want to delete all partitions on this disk 2 to migrate system to the disk."

Step 3. Resize the system partition on the target disk if you need to.

Step 4. Please remember this note as it may be useful later on.
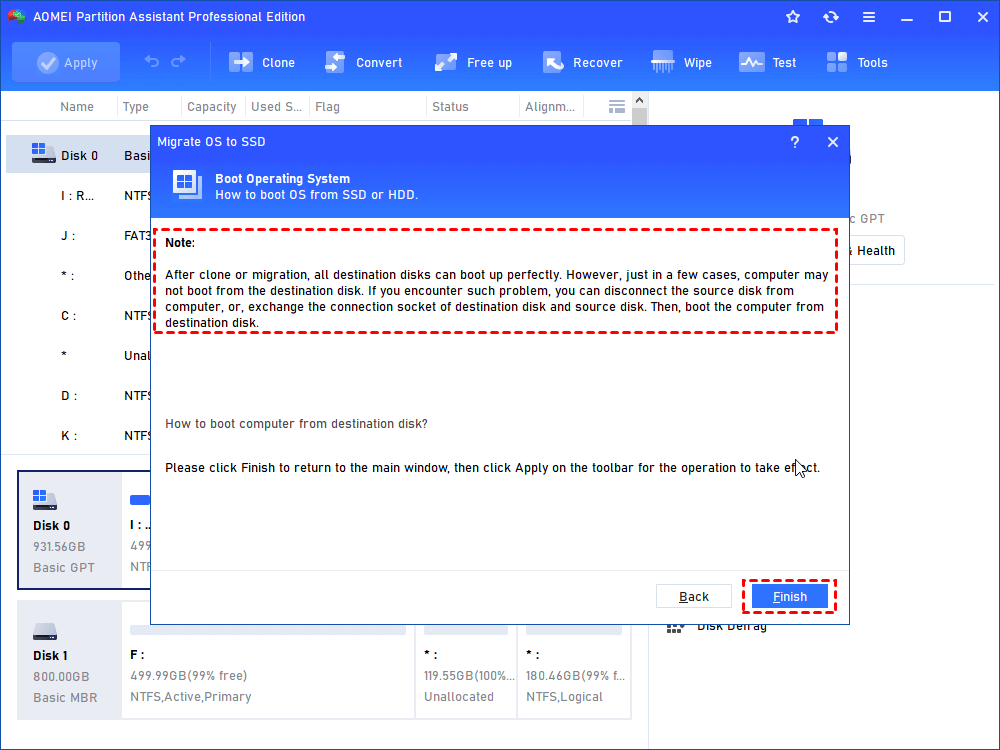
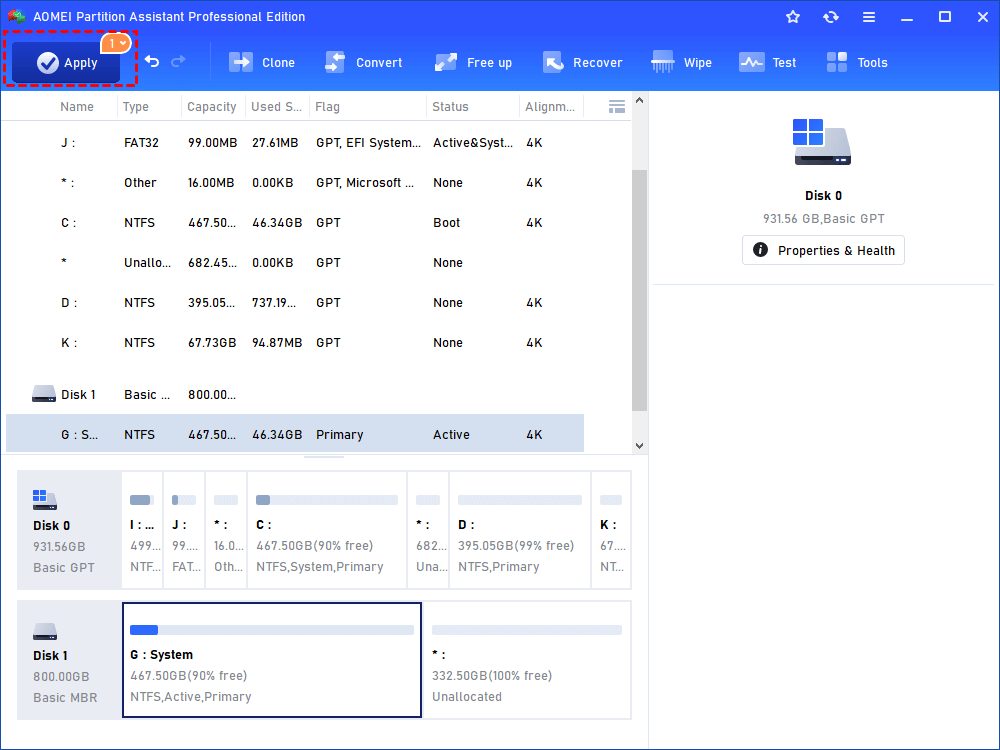
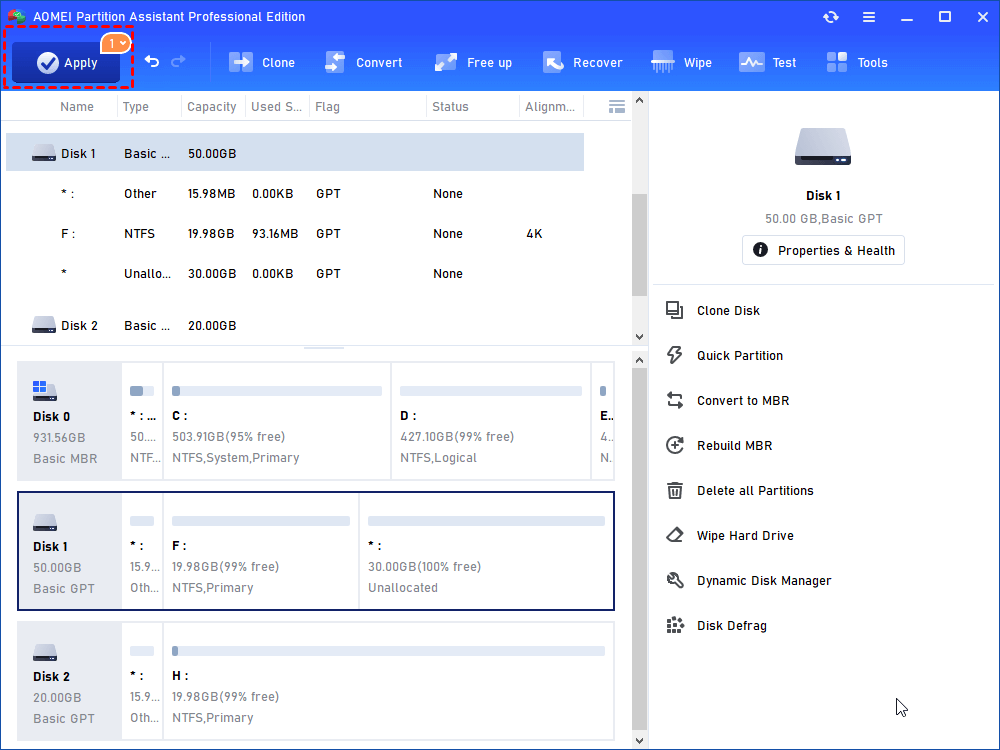
Step 5. Go back to the main interface, and click on Apply to execute the pending operations.
▌Transfer all the data:
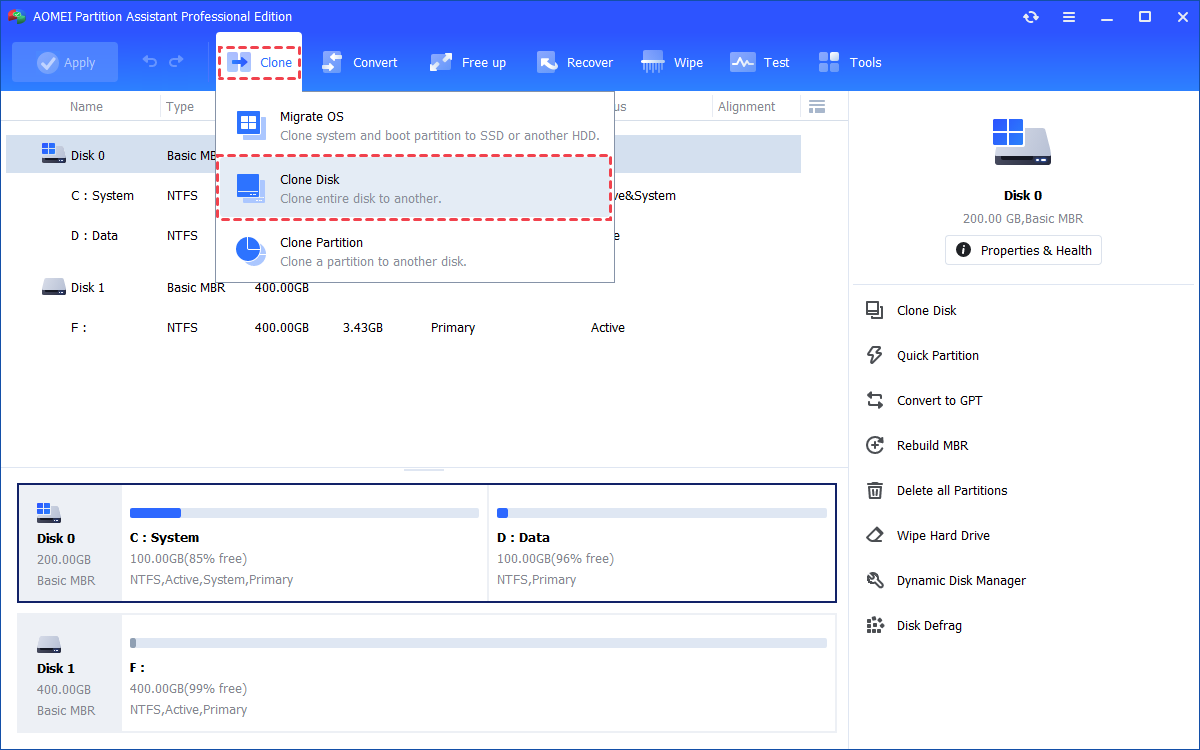
Step 1.Install and launch AOMEI Partition Assistant, click the "Clone" main tab and select "Clone Disk". (You can also right-click the Disk you want to clone and select the "Clone Disk" tool to run disk clone.)
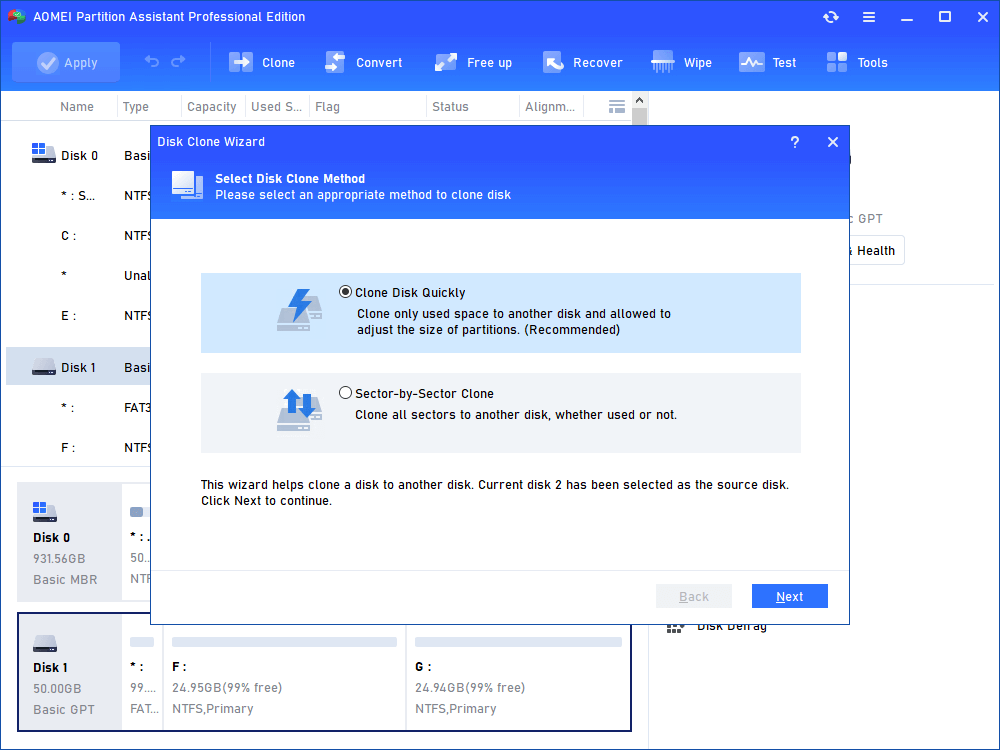
Step 2. Choose the hard disk that you need to clone as the source disk and click "Next".
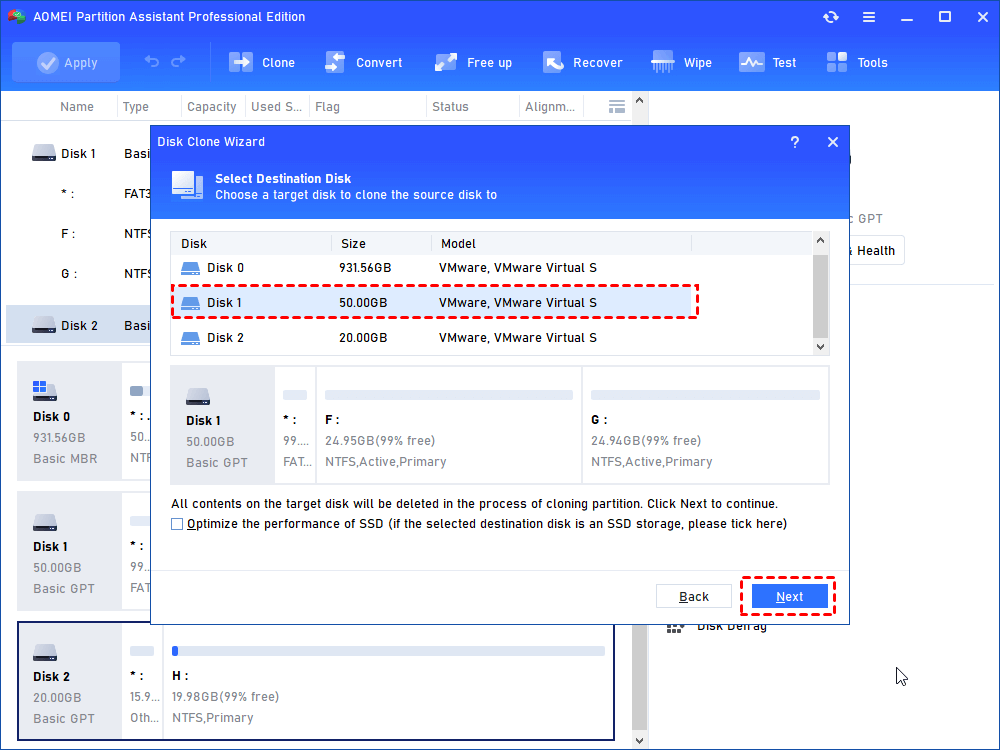
Step 3. Select the destination disk to put the data of the source disk on, and then click "Next".
Step 4. Then, you will enter the Confirm interface where you can check the source and destination disk. After all is set, you can click the "Confirm" button to continue.
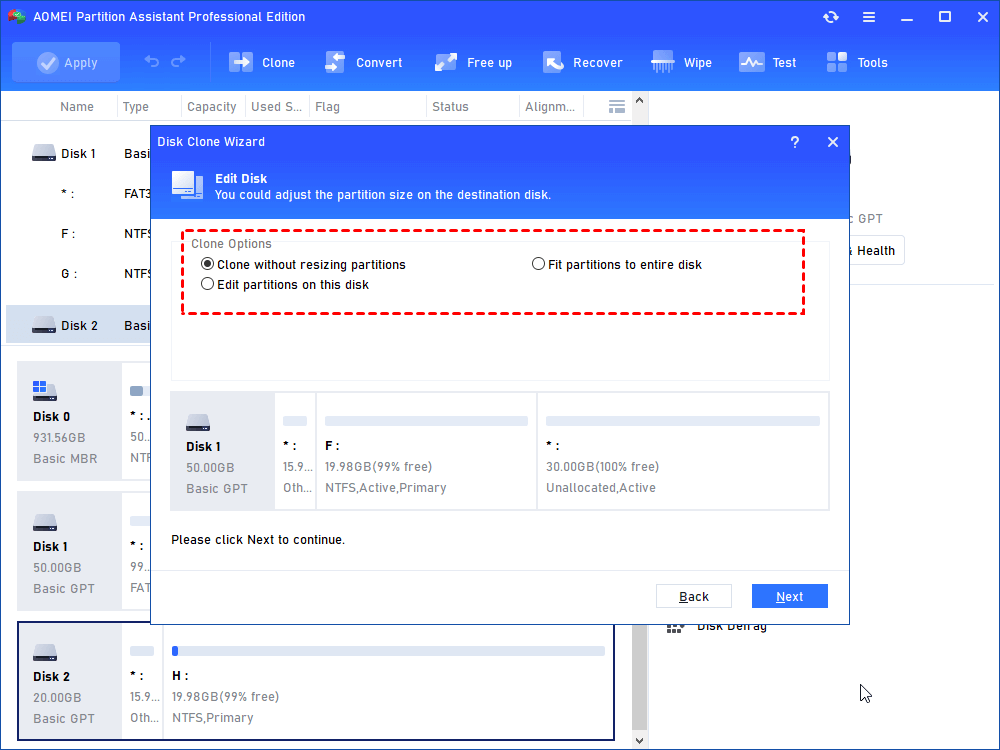
In lower left corner of the window, you can click the "Settings" button to adjust the partition size on the destination disk. There are three options for you:
- Clone without resizing partitions: all partitions will be cloned to the target disk as the original partition size. It is available when the target disk is larger than the source disk. If it is smaller, this option will be grayed out.
- Fit partitions to entire disk: all partitions will be cloned to the target disk and take up its full capacity according to the original partition size proportion.
- Edit partitions on this disk: you can change every partition size on the target disk as you need.
After finishing the adjustment, please click "Save".

Notes:
- You can tick "4k alignment" to improve the reading and writing speed of SSD if the selected destination disk is an SSD storage.
- All data on this selected destination disk will be wiped out after you save the operation to physical disk. If there is important data on the destination drive, please make a backup in advance.
- If you clone to a smaller SSD, the first option is grayed out. If you select Sector-by-Sector Clone, it is unable to adjust the size on the destination disk.
Step 5. You can preview the disk cloning operating by viewing the "Pending Operations". To commit the "Pending Operations", please click "Apply" and "Proceed".
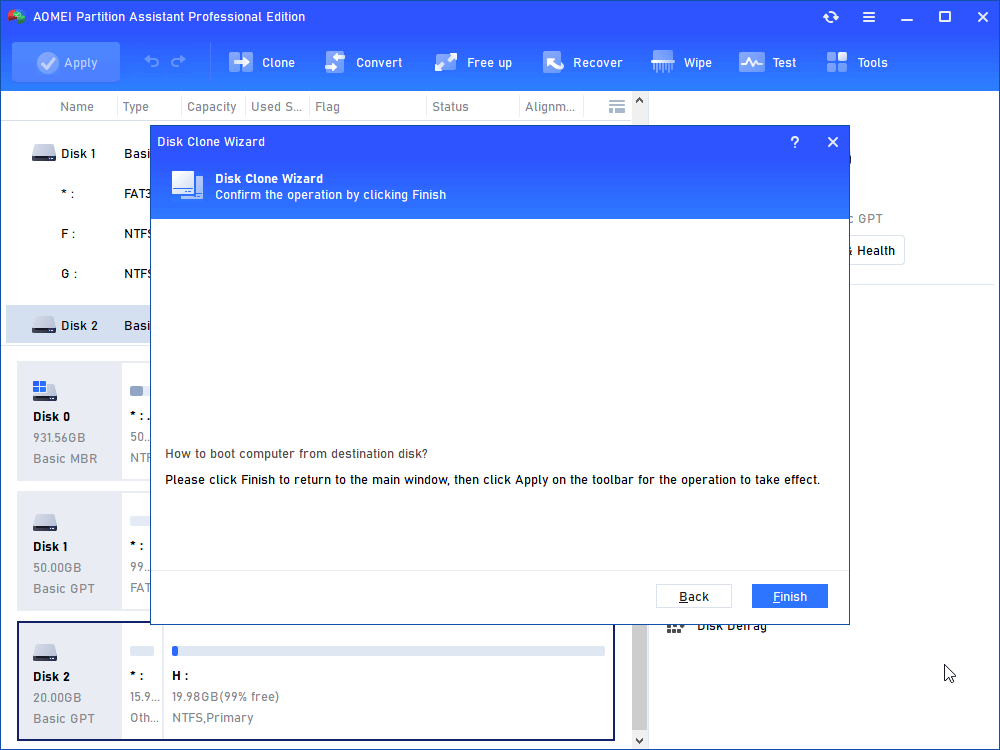
Step 6. The cloning process will start and you can check the cloning process.
Final words
When facing the Epic Games Launcher not opening in Windows 11, you can try the 11 solutions for troubleshooting. Afterward, it is suggested to run the recommended functions provided by AOMEI Partition Assistant for enhancing gaming speed. If you are a Windows Server user want to enjoy the benefits, please choose the AOMEI Partition Assistant Server edition.

