[6 Ways] How to Fix Device Settings Not Migrated Windows 11
This post will explain why device settings not migrated Windows 11 as well as 6 effective ways to troubleshoot that.
By Irene / Updated on February 25, 2025
Scenario: Is there any method to fix "Device settings not migrated Windows 11"?
“Hello, I having an issue that my USB hub not detecting any device that connects to it while it only receives power. When I check on the device manager, there is no issue found overall but when I check the device events, it there is a problem while migrating to the windows update. Is there any method to fix that? ”
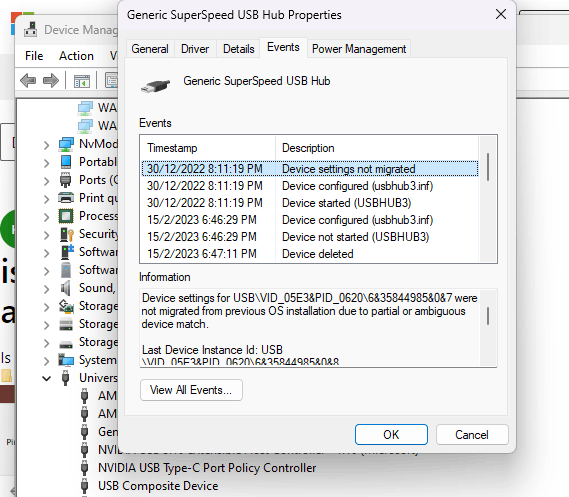
In the above case, we can find that the user encounters an issue of Device settings not migrated Windows 11, and his USB hub fails to detect any connected devices, despite receiving power. However, a closer examination of the device events reveals an error pertaining to the migration process during a Windows 11 update.
To address this problem, several methods can be employed to rectify the situation and restore proper functionality to the USB hub. Today we will introduce 8 effective and easy ways for fixing the issues of Device setting not migrated Windows 11.
6 Ways for fixing Device setting not migrated Windows 11
In the following section, we will provide you with 6 available methods to address that issue. By following these methods, you can regain proper functionality and overcome any compatibility hurdles that may arise.
Way 1. Restart the computer
Restarting the computer is an effective troubleshooting technique. When you restart the computer, it shuts down all running processes and clears the system's memory. This action can help resolve common issues by terminating any problematic processes or software that may be causing conflicts or errors.
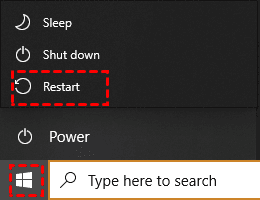
Step 1. Click on the “Windows” icon in the lower-left corner of the desktop.
Step 2. Select "Power options."
Step 3. From the menu that appears, choose "Restart" and patiently wait for your computer to reboot.
Way 2. Check for driver update
Up-to-date drivers can ensure compatibility and functionality, and can resolve bugs or conflicts. Keeping drivers current is especially important after operating system updates to maintain compatibility, which can increase the chances of proper device detection and resolving the issue of Windows 11 Device settings not migrated at hand.

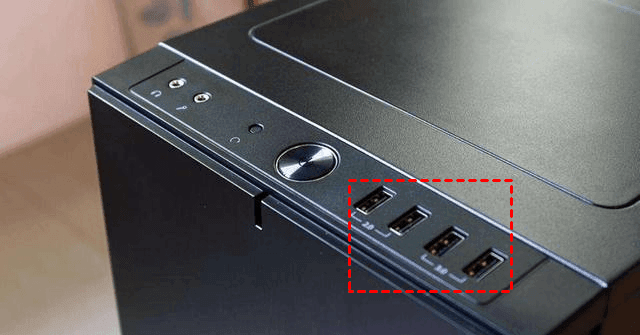
Way 3. Check the PC USB interface
By examining the computer's USB interface, you can identify and address any physical or compatibility issues that may be causing the USB hub's failure to detect connected devices. This step is crucial in troubleshooting and narrowing down the potential causes of Device settings not migrated, facilitating a more targeted and effective resolution.
You can try these methods to check whether the USB or the slot work normally:
2. Check for device detection: Once you connect the USB device, observe if the computer recognizes it, including a notification sound or a pop-up message. Or check the device manager to see if the connected USB device is listed without any error indicators.
3. Test functionality: After the device is recognized, check if it functions as expected and verify that they respond and work properly.
4. Try different USB slots: If the USB slot you initially tested doesn't seem to work correctly, try connecting the USB device to a different USB slot on your computer. This will help determine if the issue is specific to that particular slot or if it is a broader problem with the computer's USB functionality.
5. Repeat with other USB devices: If possible, repeat the above steps with multiple USB devices to ensure consistent results. This will help confirm if the issue lies with the USB slot or if it is specific to the device you initially tested.
Way 4. Back to a system restore point
Utilizing a system restore point can be useful when facing Device settings not migrated Windows 11. It allows you to roll back to a previous stable state and undo recent changes that may have caused the problem. Restoring to a system restore point serves as a troubleshooting method to isolate the issue and potentially resolve it.
Step 1: Open the taskbar search box and type "restore." Find and click on the "Create a restore point" option.
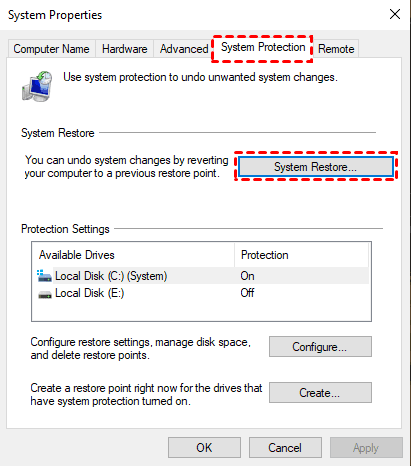
Step 2: In the System Properties window, navigate to the System Protection tab and click on the "System Restore..." button.
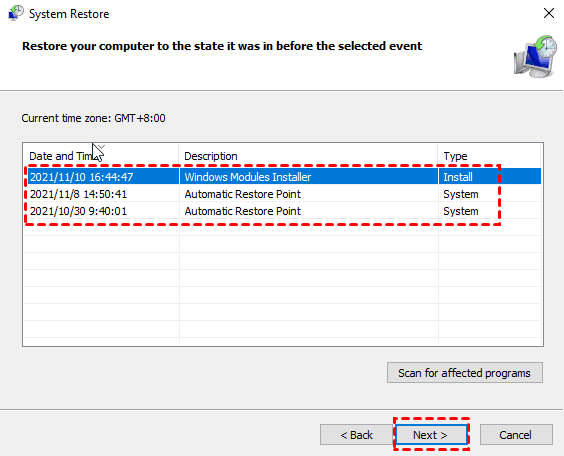
Step 3: Within the System Restore window, select the "Choose a different restore point" option.
Step 4: Choose the restore point that predates the occurrence of the "Device settings not migrated" error. Click "Next" and patiently wait for the system restore process to complete.
Way 5. Update or back to the previous Windows version
Windows updates include bug fixes, stability improvements, and access to additional features. Rolling back to a previous version helps eliminate compatibility issues caused by recent updates.
Overall, it is a recommended troubleshooting step to restore functionality and address the Device settings not migrated Windows 11 problem.
1. Update Windows version
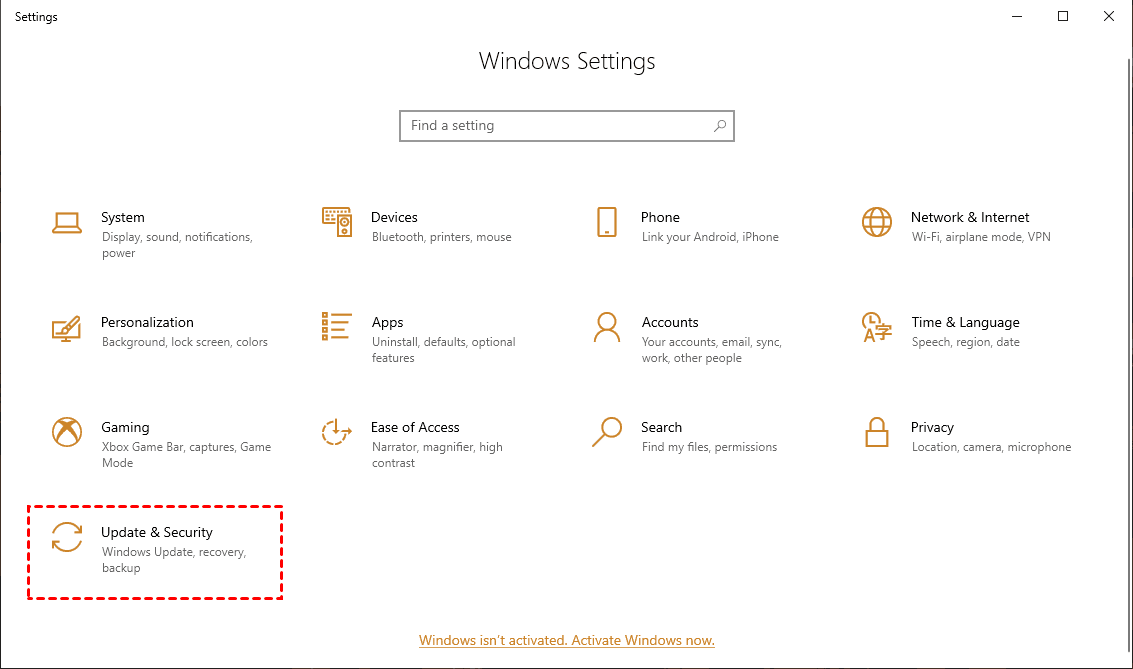
Step 1. Simultaneously press “Win+R” to enter the “Settings”. Click “Update&Security”.
Step 2. Go to the Windows Update tab and click “Check for updates” in the right window.
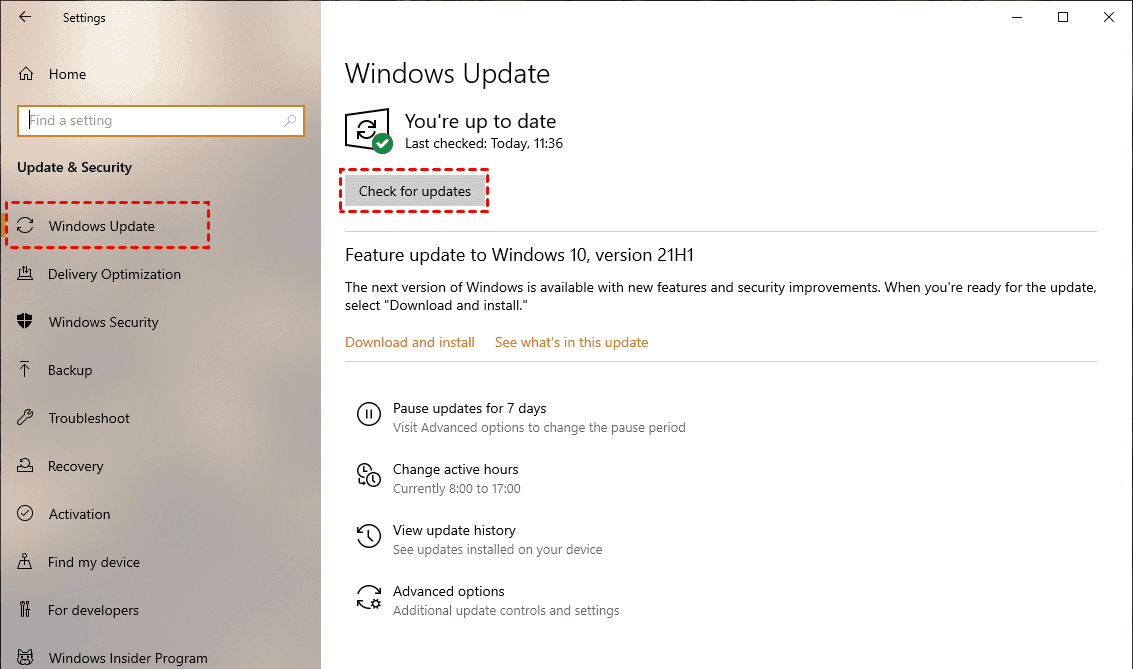
Step 3. If there is any available update, download it in a stable network condition.
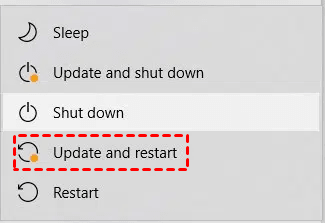
Step 4. When it is finished, click the “Start” button in the lower-left corner of the desktop, and choose the power icon.
Step 5. Select the “Update and restart” option in the expanded menu to restart the computer.
2. Back to the Windows version
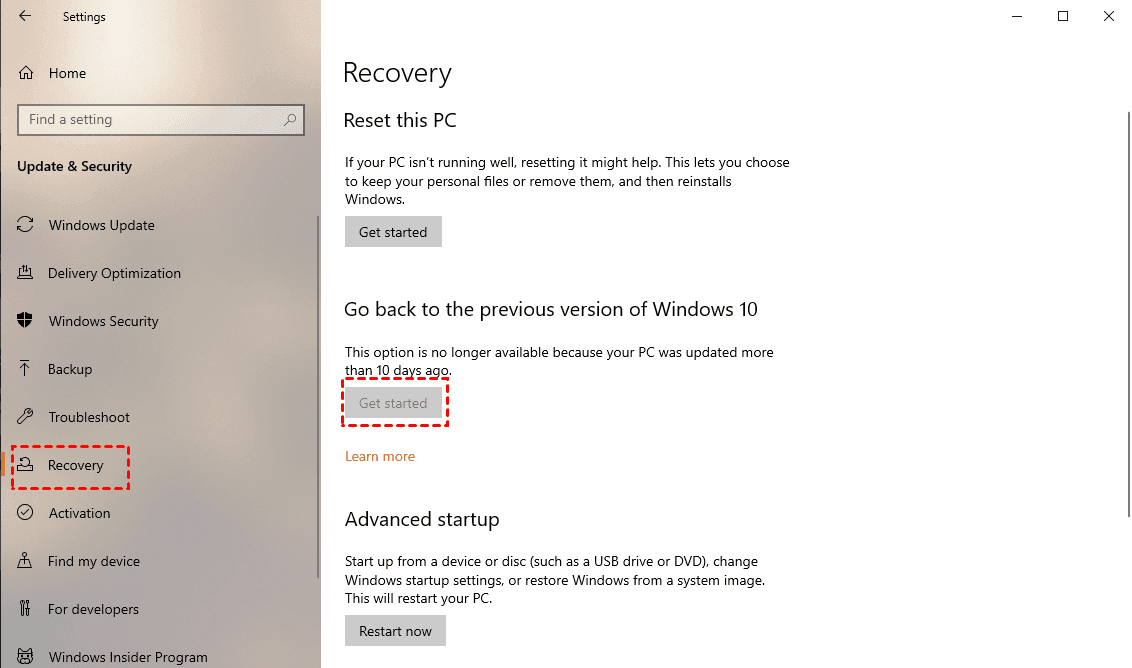
Step 1. Open the “Update & Security” window and turn to the tab to “Recovery” on the left.
Step 2. Click “Get Started” as the picture shows, then follow the instructions and restart your computer.
Way 6. Run Windows Update Troubleshooter
The Windows Update Troubleshooter helps identify and fix update-related issues, repairs corrupted system files and resets Windows Update components. By following the provided steps, yous can resolve update-related problems to some extent.
Step 1. Click the “Start” button located on the left side of the taskbar.
Step 2. From the expanded menu, click on the “Settings” button. This will open the Windows Settings interface.
Step 3. Look for and click on the “Update & Security” option.
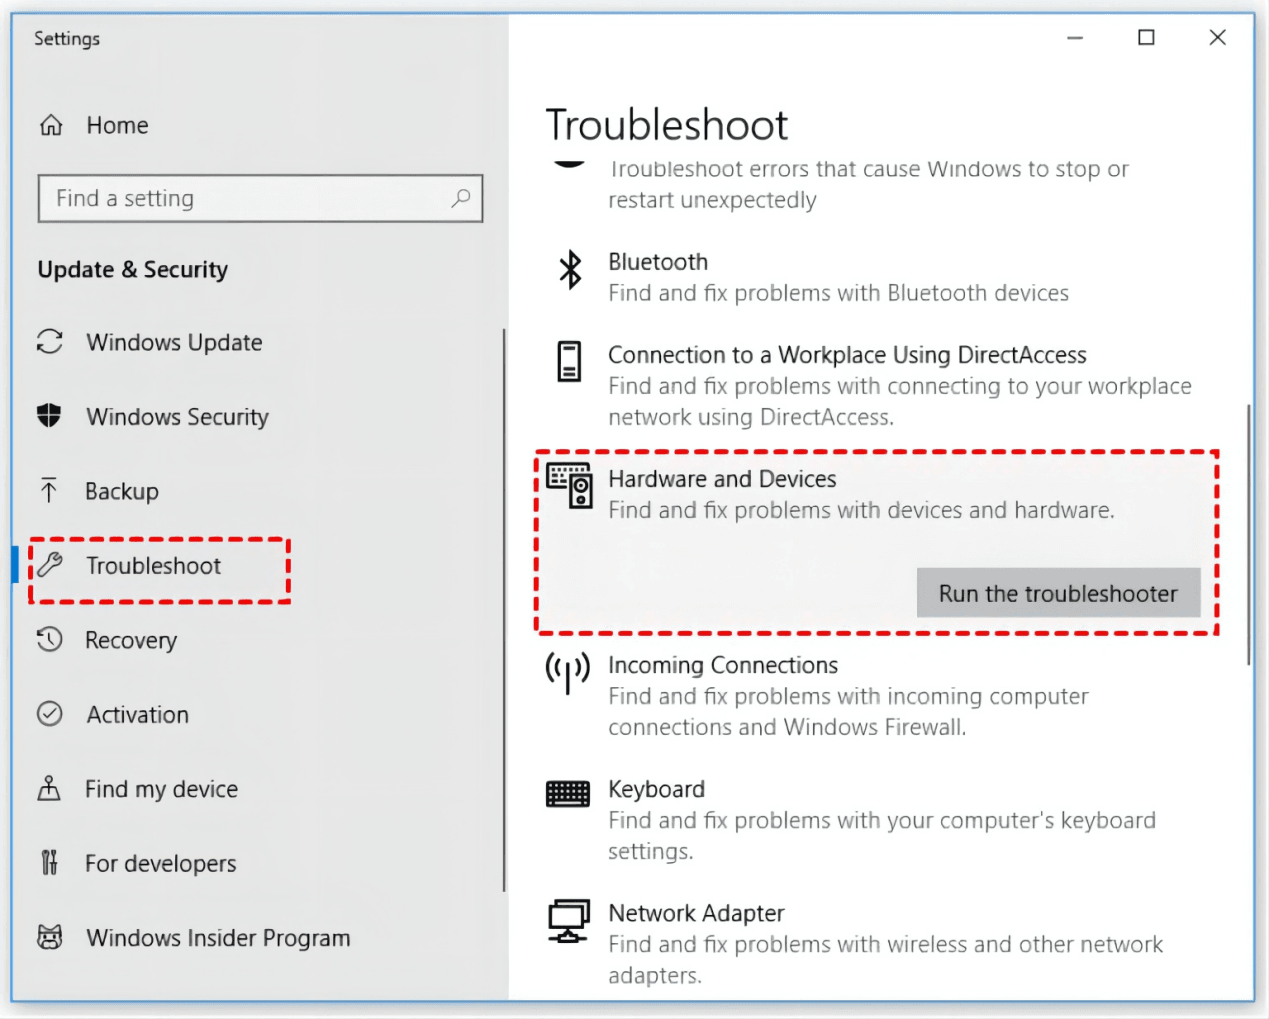
Step 4. Next, navigate to the Troubleshoot tab in the left window of the Update & Security settings. In the right window, locate the “Hardware and Devices” option.
Step 5. Click on the “Run the troubleshooter” option to initiate the troubleshooting process.
Further reading: How to effectively protect data safe when fixing device settings not migrated
However, when making changes to the system configuration or performing updates, there is always a risk of unexpected issues during the troubleshooting process that could potentially lead to data loss.
While the chances of data loss are unpredictable, it is still recommended to back up important data as a precautionary measure before implementing any system modifications or updates.
Creating backups ensures that your valuable files are securely stored and can be easily restored if any unforeseen problems arise. It acts as a safety net, providing peace of mind and allowing for a quick recovery in the event of any unintended consequences.
AOMEI Partition Assistant Professional is a well-known and reputable disk management software, and its "Disk Clone" feature is widely recognized for its capabilities as a reliable precautionary measure for backing up important data.
- It mainly provides two clone methods for different demands:
- Clone Disk Quickly: Clone only used space to another disk. This method is suitable when the goal is to clone the disk while optimizing time and storage space.
- Sector-by-Sector Clone: Clone all sectors to the target disk whether they are used or not, and even can clone the bad sectors. This method results in a precise and identical clone of the original disk.
Step 1. Install and launch AOMEI Partition Assistant, click "Clone" in the main interface, and select "Clone Disk".

Step 2. Choose the hard disk that you need to clone as the source disk and click "Next".

Step 3. Select the SSD as the destination disk to store the data on the source disk, and then click "Next".

Step 4. Then, you can check the source and destination disk in the next window or change to "Sector to Sector clone", and click the "Confirm" button to continue if there is no problem.

Here, you can also click the "Settings" button to adjust the partition size on the destination disk or tick "4k alignment" to improve the destination speed.

Notes:
♦ There are three options for you: "Clone without resizing partition”, "Fit partition to entire disk” and "Edit partition on this disk”. After finishing the adjustment, please click "Next". If you clone to a smaller SSD, the first option is grayed out.
♦ You can tick "Optimize the performance of SSD" to improve the reading and writing speed of SSD if the selected destination disk is an SSD storage. If there are partitions on the destination disk, they will be deleted.
Step 5. After returning to the main interface, check the pending operation and click "Apply" and "Proceed" to commit the operation.

Then you can connect the new disk to your new computer and enter BIOS to finish the boot set.
Bottom line
In this passage, we share 6 methods for fixing Device settings not migrated Windows 11. However, most of the methods may need to make system changes or modifications, which may lead to data loss.
So, it is advisable to use the feature “Clone Disk” of AOMEI Partition Assistant to back up your important data. This multifunctional tool also offers a wide range of practical features, including moving applications without reinstalling, converting MBR system disk to GPT, and making a repair bootbable USB to fix the error, along with restoring the lost data. For Windows Server users, you can choose the Server Edition to manage your device effectively.

