Create and Format a Hard Disk Partition in Windows 11: How to Do It?
It is necessary to create and format a hard disk partition in Windows 11. This post will share the partition manager for Windows 11 with step-by-step guidance to easily finish the task.
By Irene / Updated on November 27, 2023
Why do you need to create and format a hard disk partition in Windows 11?
When setting up a new Windows 11 computer or a new hard disk, you may notice that you need to create and format a hard disk partition. But why is this process necessary?
Formatting a partition in Windows 11 is crucial because it prepares the disk for use, establishing a specific file system that the operating system can recognize. After this formatting, the disk becomes usable for installing the operating system and storing data.
The subsequent step is creating partitions on Windows 11. This isn't merely a technicality; it's a critical measure in safeguarding your data. For example, if you have only one partition and need to reinstall Windows 11 due to an error, you might end up formatting the entire drive. However, with multiple partitions, you can isolate issues to a specific partition, minimizing the impact on other data.
Furthermore, the location of installed programs and games can impact computer performance. Storing them on the same drive as the operating system may gradually slow down your system. To address this, creating partitions with labeled organizations proves beneficial for enhancing file management. For optimal performance, it's advisable to consider the file system type and ensure proper alignment of partitions, especially if your hard drive has ample space.
How to create and format a hard disk partition in Windows 11
To create and format a hard disk partition in Windows 11, you can follow the guidance.
Part 1. Format partition in Windows 11
To format partition in Windows 11, you can use the Disk Management tool, or you can right-click on a drive in Windows Explorer and choose the "Format..." option. But if you prefer employing a command line for the formatting process, DiskPart would be the optimal selection.
Step 1. To format a hard drive using the command line, you need to first open the command prompt. You can do this by clicking on Start, typing "cmd", right-clicking it, and selecting "Run as Administrator". Or you can press "Win+X" and choose Command Prompt (Admin) to open the command prompt.

Step 2. Type "diskpart" to open the diskpart command prompt. Then type the following commands:
• Type "select volume n" and press Enter, where "n" is the number of the volume you want to format.
• Next, type "format fs=fat32 quick label=test" and press Enter. This will initiate the DiskPart quick format, as shown in the screenshot.
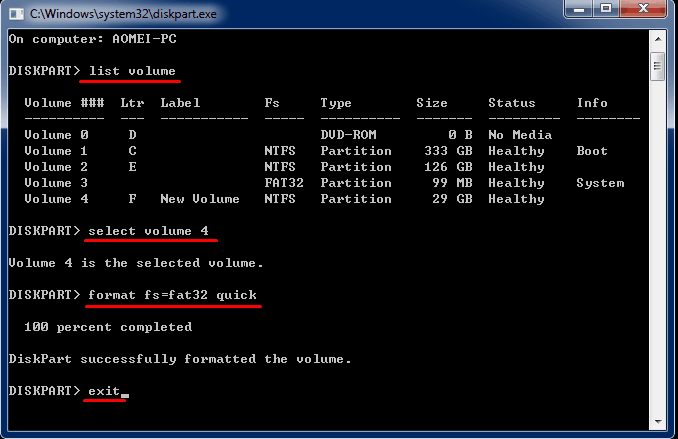
Finally, type "exit" and press Enter to close the command prompt after the formatting process is complete. Now, you can find the newly formatted drive in My Computer and start using it.
Part 2. How to create a partition on Windows 11
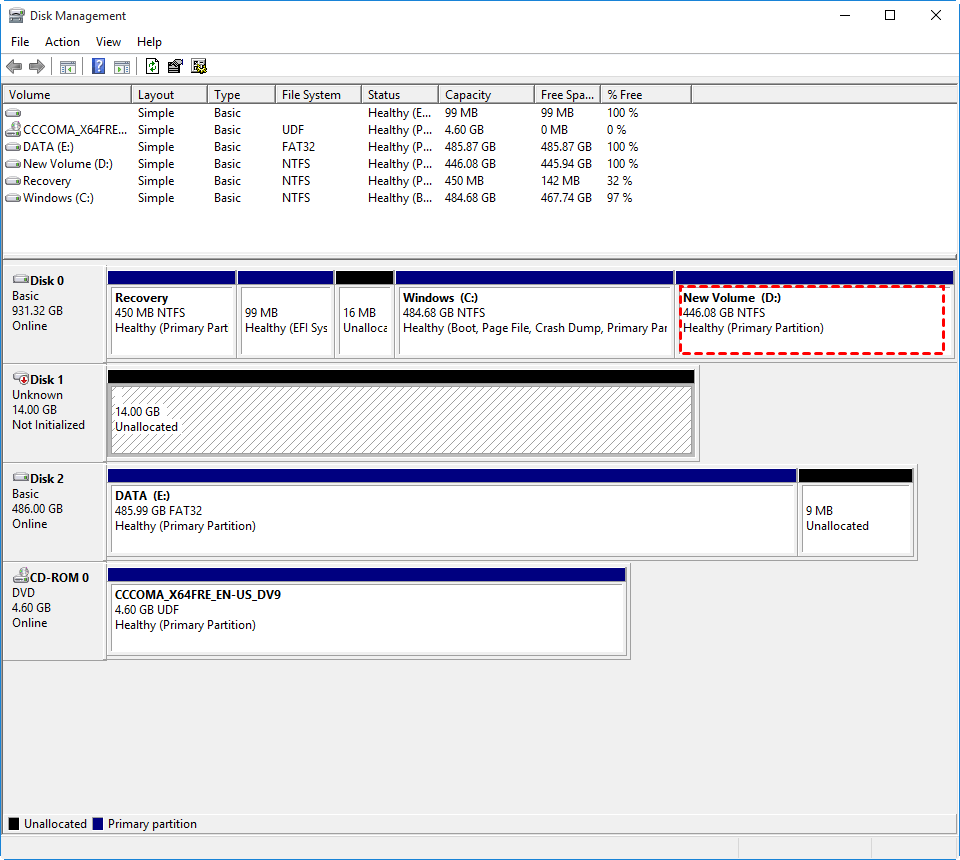
Disk Management, found within the Computer Management console, is a routine task in the Windows system. It facilitates actions such as deleting, shrinking, extending, and creating volumes, initializing disks, and formatting volumes to either FAT32 or NTFS file systems. If you want to know how to create a partition on Windows 11 via Disk Management, please refer to the following steps.
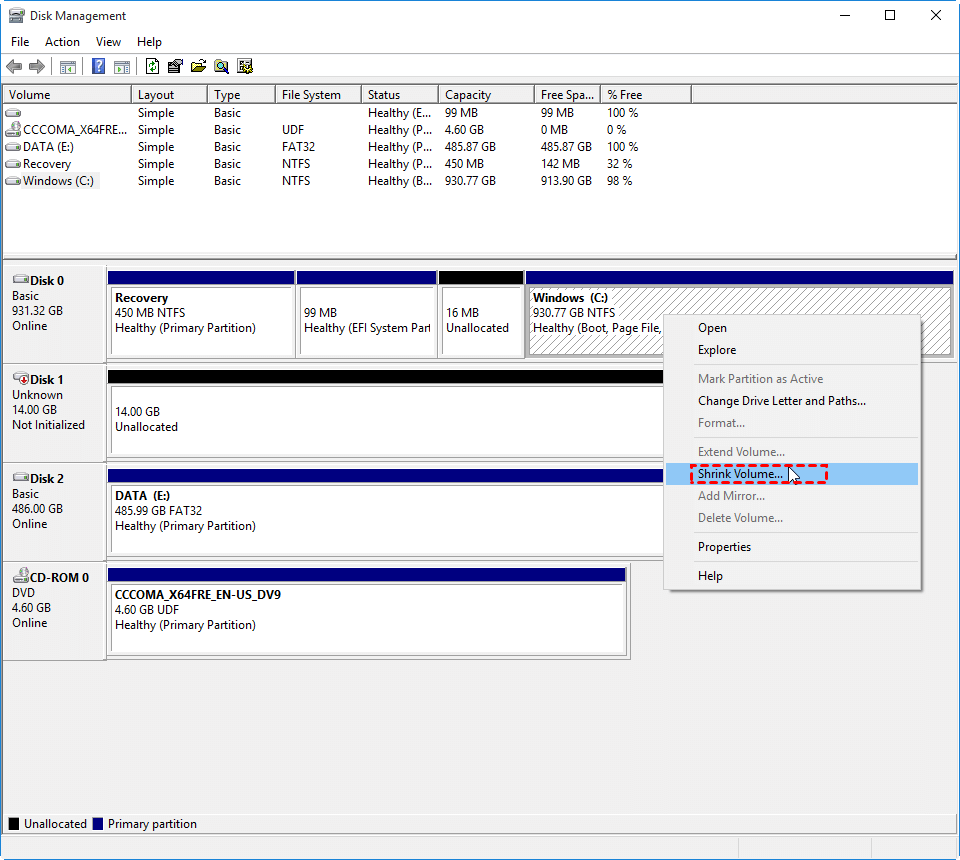
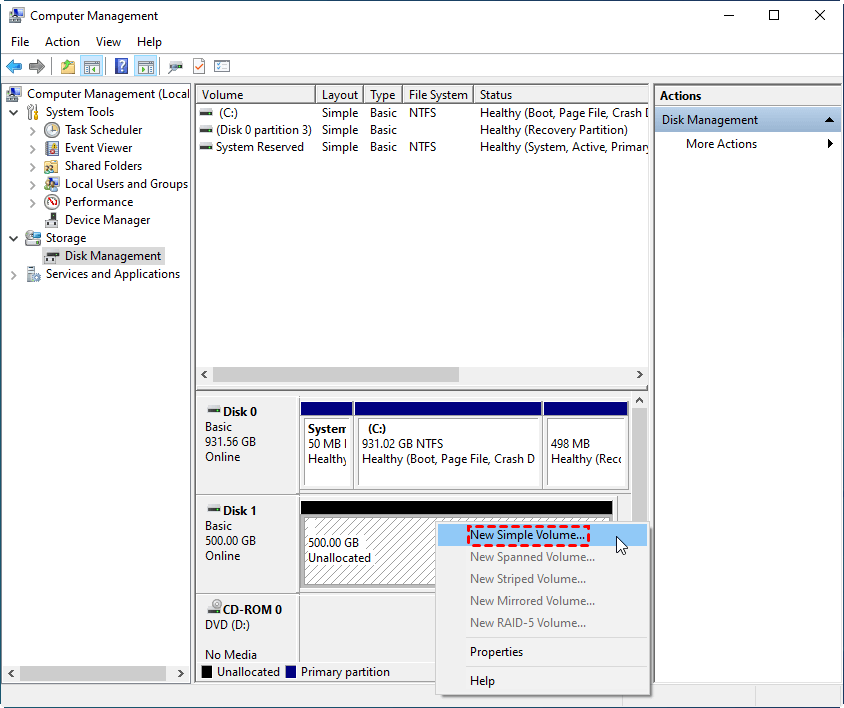
▌ Case 1: When the hard drive has only one partition, you need to shrink that partition to generate unallocated space and then create a new partition.
Note: Disk Management exclusively supports shrinking volumes with the NTFS file format. If it is in FAT32, please convert the FAT32 to NTFS beforehand.
Step 1. Press "Win +R" and input "diskmgmt.msc", then right-click on the C drive and select "Shrink Volume".
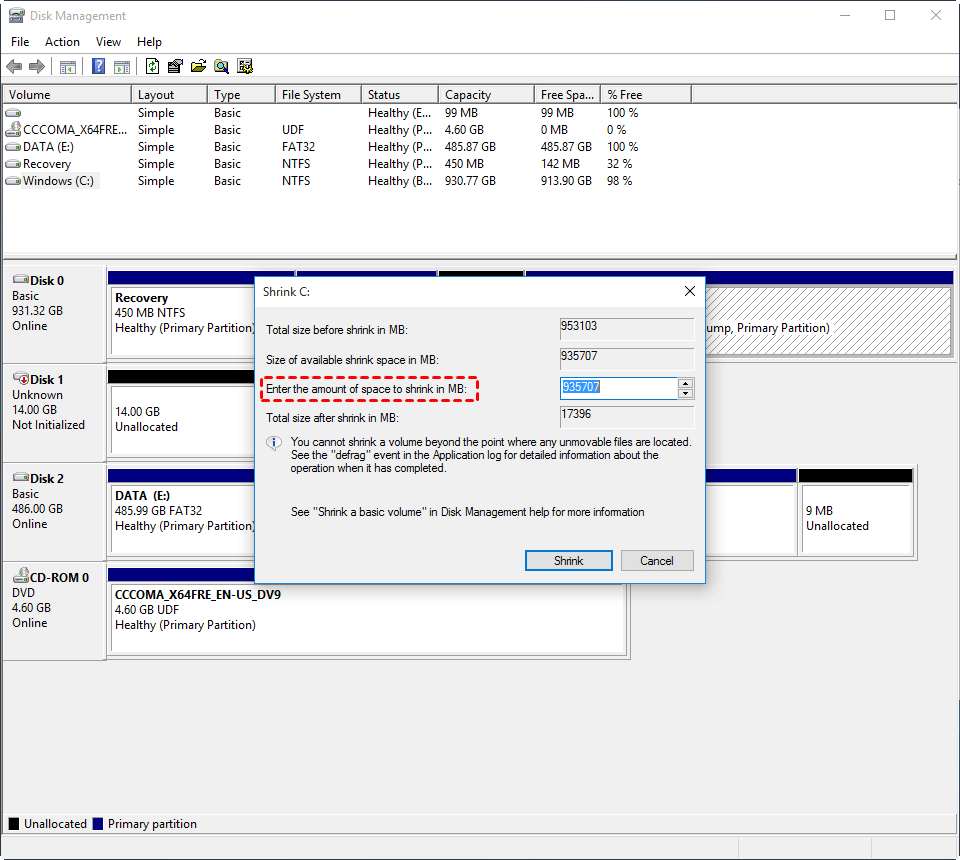
Step 2. Enter the amount of space you want to shrink and click "Shrink Volume".
Step 3. After shrinking the C drive, you can see that there is an unallocated space next to it, right-click on the unallocated space and select "New Simple Volume".
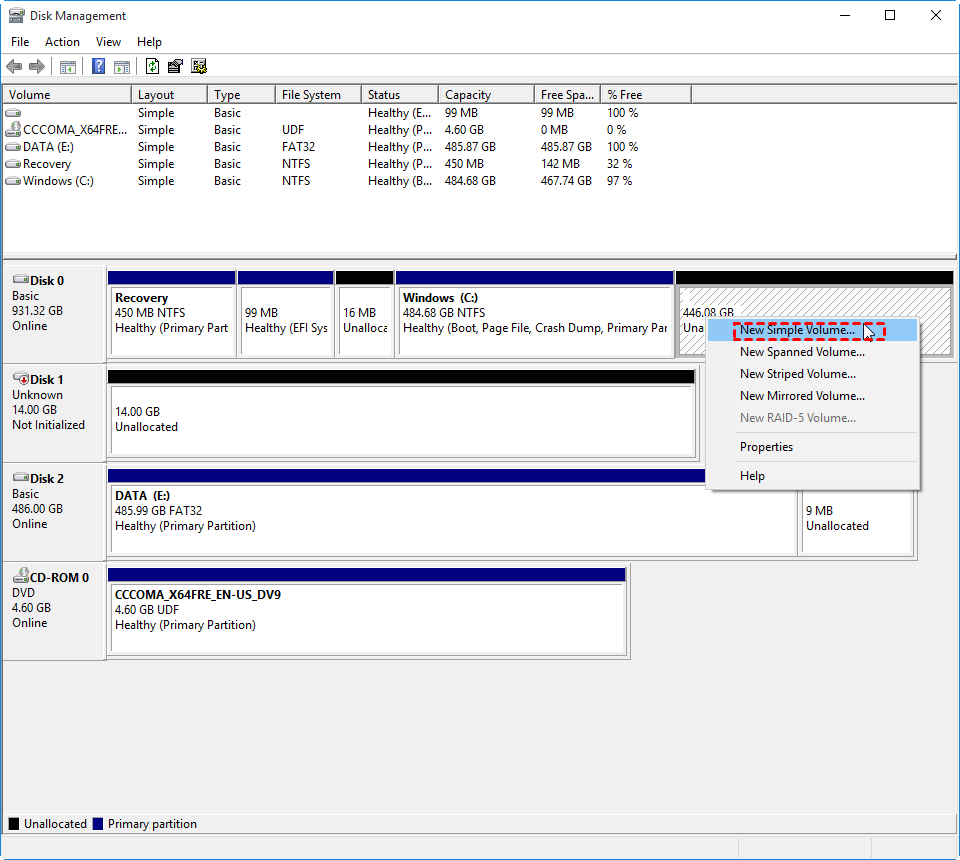
Step 4. In the new pop-up window, you will see the New Simple Volume wizard which will guide you to set the partition size, assign a drive letter, etc. Then you can create a new partition successfully.
Case 2. If the hard drive already has allocated space, you can create a new partition directly.
How to effectively create and format a hard disk partition in Windows 11?
Sometimes, the Windows built-in tools may not always work as effectively as expected. For instance, you might encounter issues such as receiving a Windows error code 0x80070057 notice, or the tools may only support shrinking volumes with the NTFS file format.
Actually, you can choose AOMEI Partition Assistant Professional, a multifunctional and powerful partition manager for Windows 11,10, 8.1, 8, 7, Vista, XP, and continue to receive updates. This tool can break the limitations of Windows built-in tools and allows you to effectively format, create, delete, move, resize, and clone partition. Let’s see how to use it to create and format a hard disk partition in Windows 11.
Part 1. Format partition in Windows 11 with AOMEI Partition Assistant
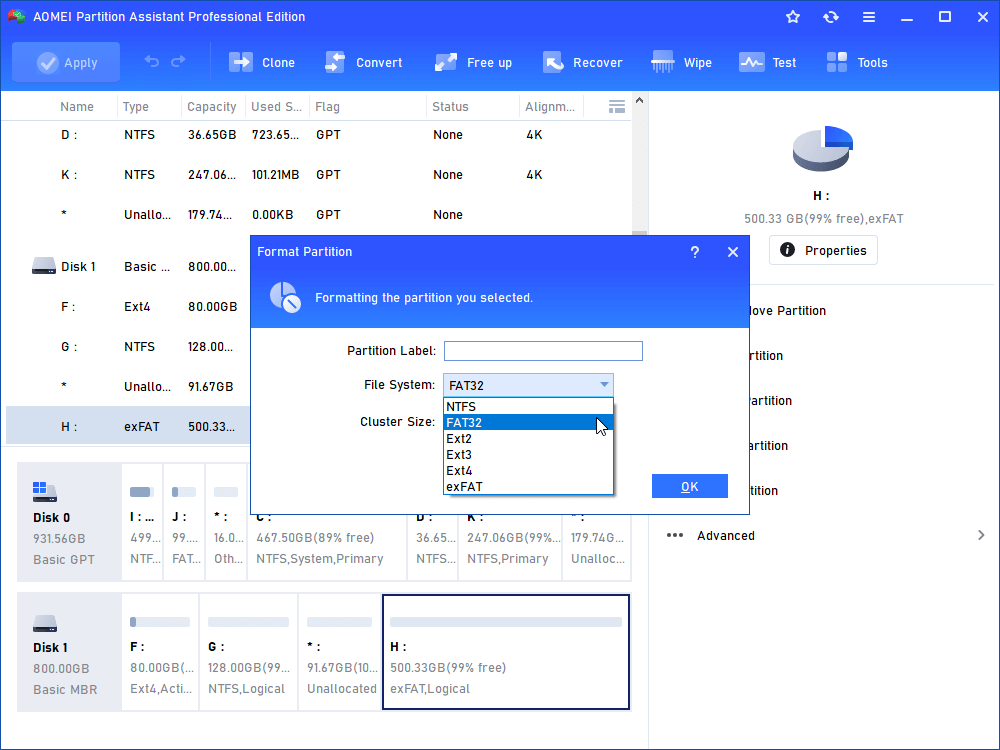
Step1. Launch AOMEI Partition Assistant Professional, and you can see the main interface of your disk(s). Select the partition you want to format, right-click on it, select "Format Partition" in the pop-up menu.

Step2. Here you can give a partition label and format the partition to what kind of file systems. Click OK.
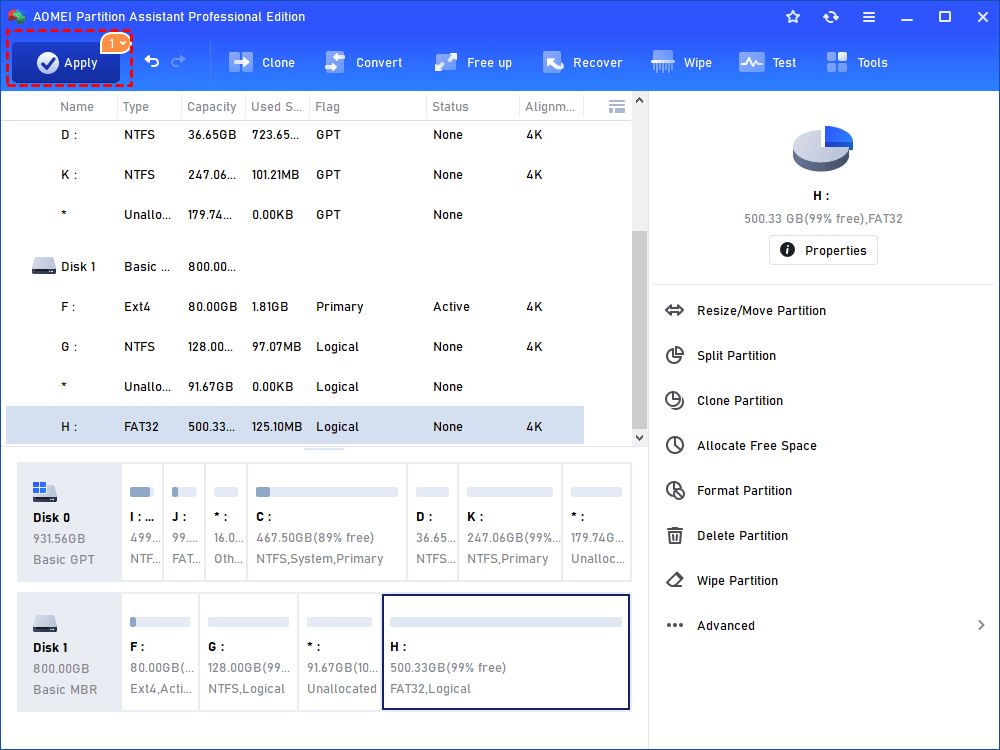
Step3. Finally, click Apply at the toolbar to execute all operations.
You can format every partition on your hard drive. Or you can initialize the disk directly. Both of them will delete the data on the hard drive, so if there are some important data stored on your hard drive, please backup them first.
Part 2. Create a partition on Windows 11 with AOMEI Partition Assistant
Situation 1. Create partition with no unallocated space
If there is no unallocated space on the system disk, you can opt for a partition with available space. However, be aware that this operation will result in a reduction of the target partition's space.
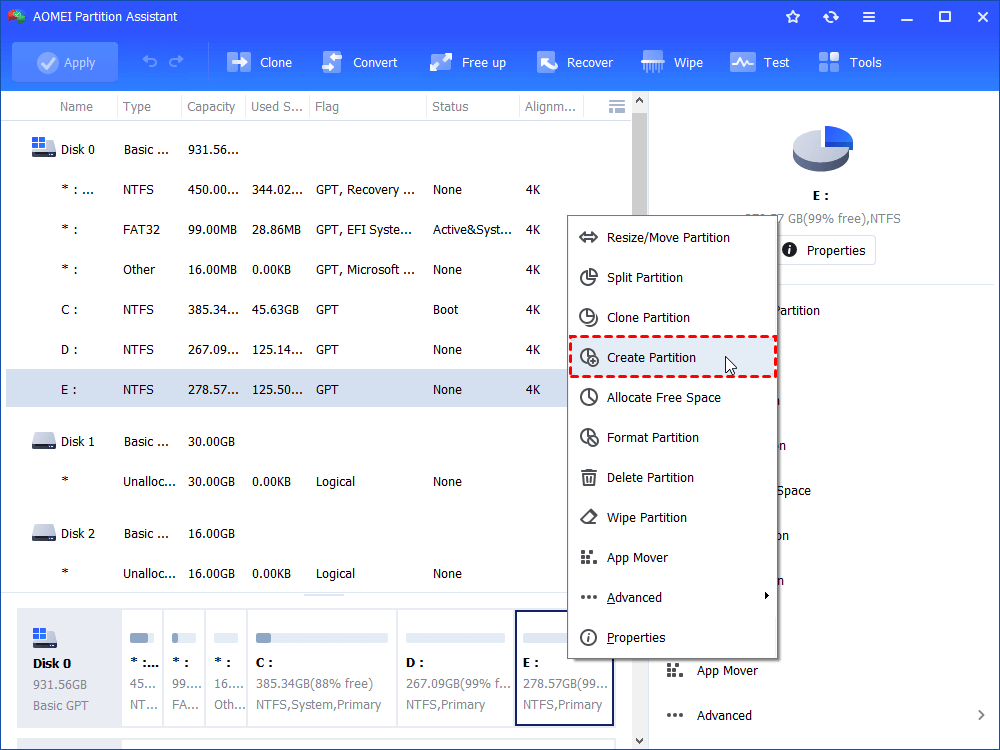
Step 1. Run the software. Right-click the E drive, then click "Create Partition".
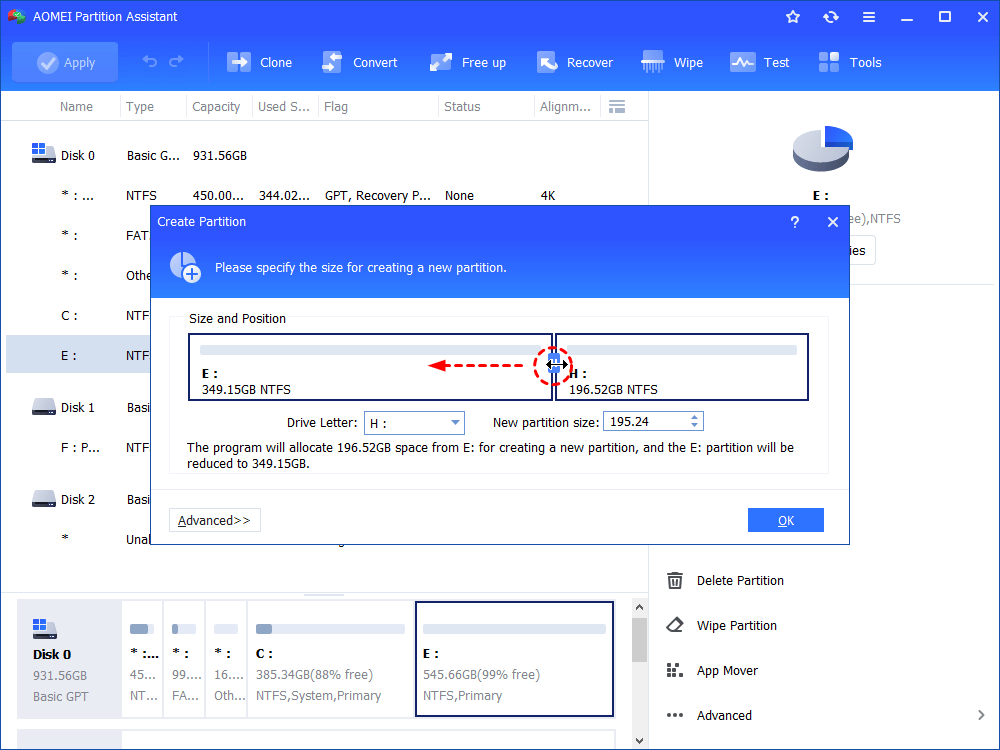
Step 2. In the small window that appears, you can either drag the double arrow or enter the desired size for the new partition. Afterward, click "OK".
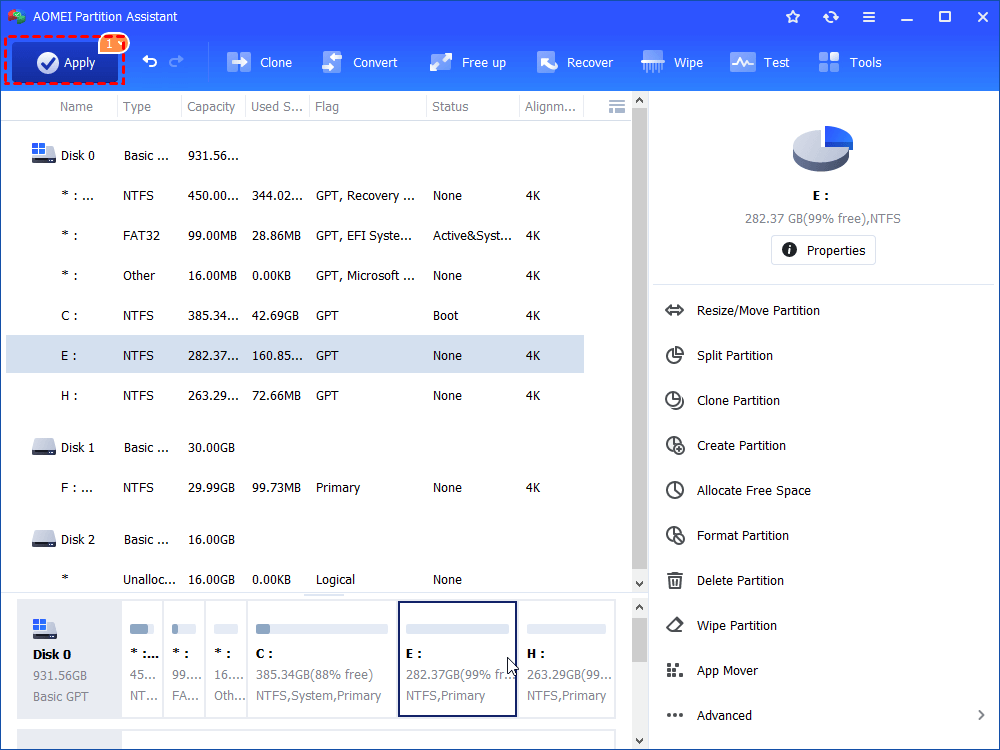
Step 3. After setting all, click "Apply" to execute these operations
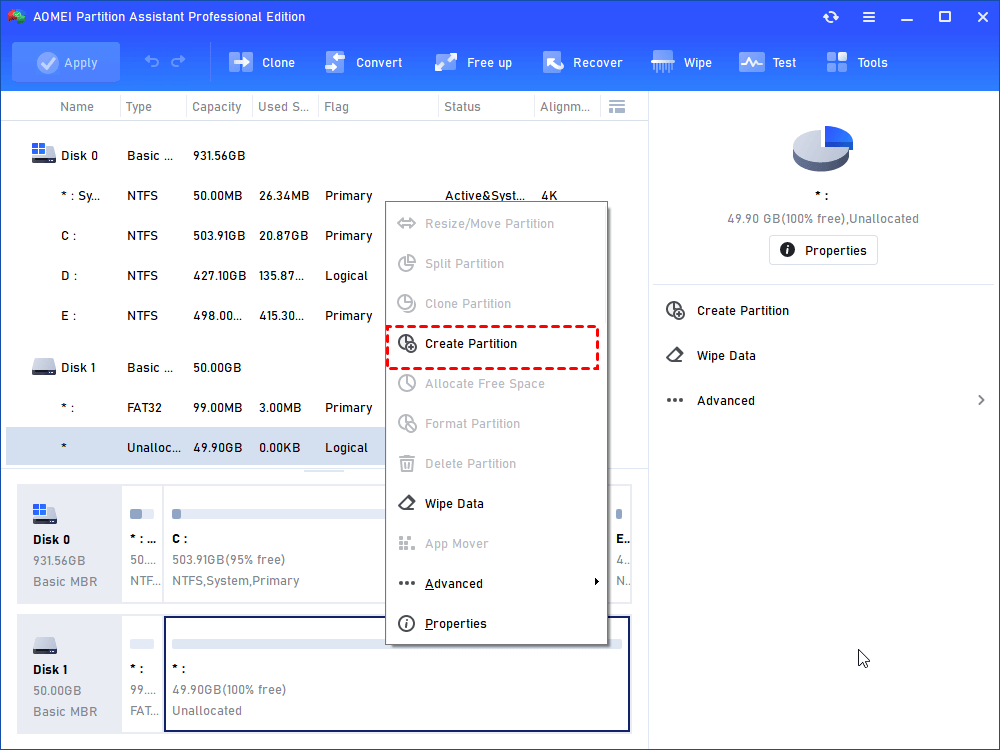
Situation 2. Create a partition with an unallocated space
If there is unallocated space in the target drive, you can do the following:
Ending words
With the detailed information, to create and format a hard disk partition in Windows 11 can be an easy task. If you want to take further steps for partition management, it is recommended to explore more advanced functions of the professional partition manager Windows 11, AOMEI Partition Assistant.
Whether your needs involve deleting, resizing, moving, or cloning partitions, this tool provides highly effective solutions. For users operating Windows Server, the AOMEI Partition Assistant Server edition is available, catering to the specific requirements of server environments.

