4 Ways to Fix--Can't Access Disk Management in Windows 11
Can’t access Disk Management on Windows 11 computer? Here we list some helpful solutions for you to fix this error with detailed steps.
By Lucas / Updated on May 12, 2023
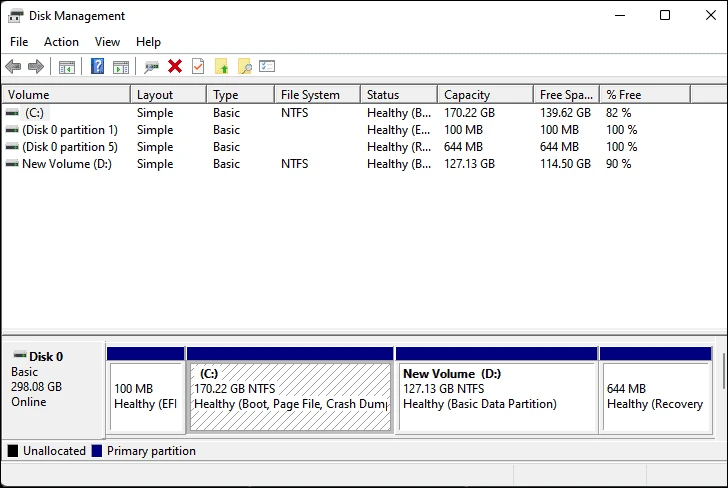
Disk Management offers good choices for disks, file systems, and volumes. It is the built-in software in the Windows operating system that is available to all Windows users. Users can make some easy changes to their disks and other connected devices.
Because Windows 11 has many changes, some users are confused about how to open it in Windows 11. Here, we’ll show you some quick ways to open Disk Management in Windows 11.
How to open Disk Management in Windows 11?
1. Quick access menu
You only need to right-click the “Start” button or press “Windows”+ “X” together to open the menu and choose Disk Management.

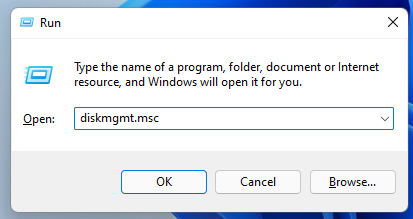
2. Use the Run command
Press “Windows” + “R” simultaneously, and input “diskmgmt.msc” in the search box, press “Enter” to access Disk Management.
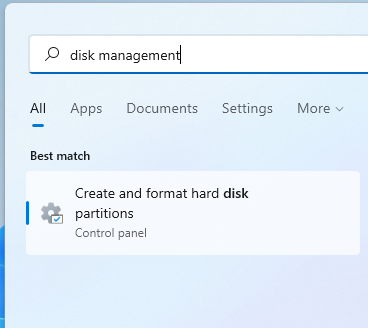
3. Use the search box
You can directly type Disk Management in the search box and open the best match.
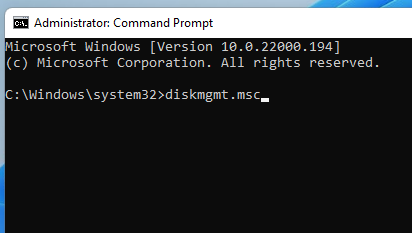
4. Use CMD
If you need to use Disk Management when you enter CMD before you normally boot OS, you can type “diskmgmt.msc” to summon it.
Can’t access Disk Management on Windows 11 PC
However, Disk Management may also meet some problems. You may see Disk Management not showing after you attempt to open it, and you might even receive some errors like “Unable to Connect to Virtual Disk Service”, and “Disk Management could not start Virtual Disk Service (VDS) on TECHNOYL”.
What’s more, some users also find other issues such as Disk Management taking a long time to load, Disk Management being stuck on loading disk configuration, and Disk Management not working, etc.
If you also can't access disk management in Windows 11, or you also confront similar issues as we mentioned, don’t worry, next we’ll help you fix this problem.
How to fix [Can’t access Disk Management in Windows 11]?
Way 1. Check hardware, external devices, and OS update
If Disk Management takes a long time to load or becomes stuck when loading disc settings, the issue might be with your hardware, faulty external devices, or earlier versions of your system. Thus, the first option is to check your hardware and all external devices and make sure they all work well. After that, check your system update to exclude the cause of outdated OS versions.
Way 2. Fix Disk Management from the Services window
Step 1. Open the Services window in windows by pressing the “Win” + “R” keys. Enter “services.msc” in the text box to open the window.
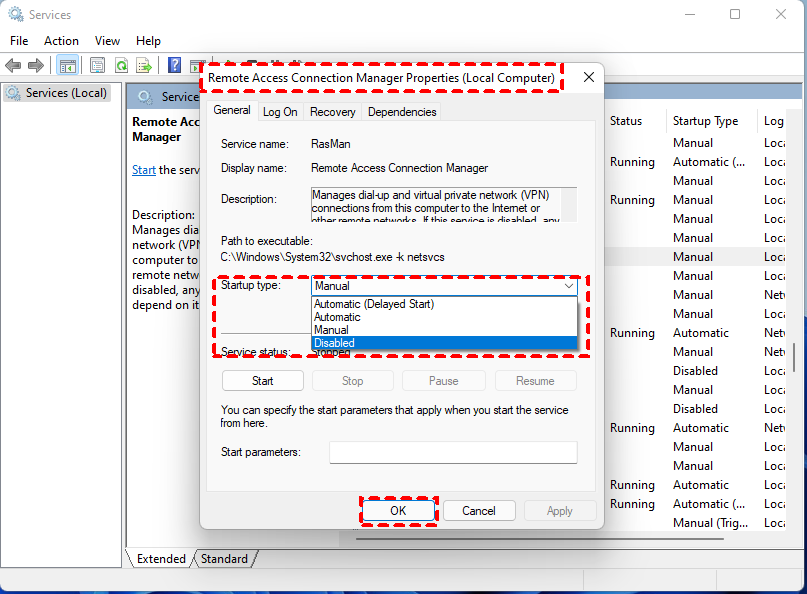
Step 2. Scroll to Remote Access Connection Manager and double-click it.
Step 3. Click the Startup type drop-down menu, select Disabled, and press the Apply and OK buttons at the bottom of the window.
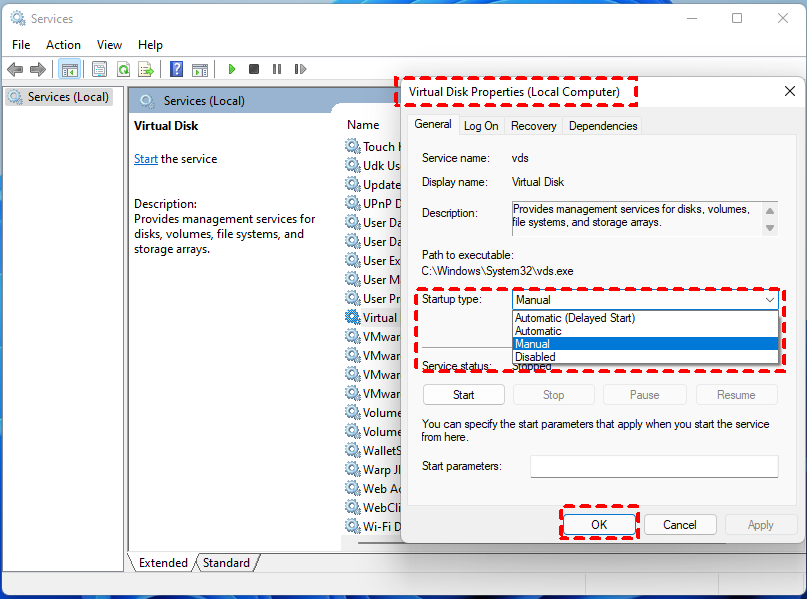
Step 4. Then, scroll down to "Virtual Disk" and double-click on it.
Step 5. Click the Startup type drop-down menu and select either Manual or Automatic from there. Then you should press Apply and OK to confirm the new settings.
Now you need to reboot your computer to confirm your changes. Then you can try to open Disk Management again.
Way 3. Run the System File Checker and DISM
First, we run SFC to scan the system files.
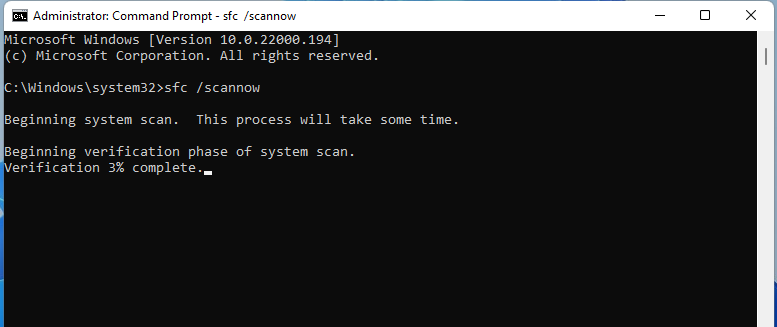
Step 1. Press Windows Key + S, type cmd, and click on Run as administrator.
Step 2. Enter “sfc /scannow”
System File Checker will scan your system and if any problem is found will be noted on the Command Prompt. You should see the following on-screen messages:
• Beginning the system scan. This process will take some time.
• Beginning verification phase of system scan.
• Verification % complete.
Once the scan has been completed you will receive an on-screen message resembling one of the following:
• found no integrity violations
• found corruption but repaired it
• found corruption that it could not repair
If the error is repaired, you can reboot your PC to run Disk Management to check. If you see another two results, you can try the DISM scan.
Step 1. Start Command Prompt as administrator. When the Command Prompt starts, please enter: DISM /Online /Cleanup-Image /RestoreHealth and press Enter key.

DISM scan might take up to 20 minutes or more to complete please do not close to interrupting it. Once the scan is finished, check if the problem persists.
Way 4. Try a third-party alternative to Disk Management
If you still can't access Disk Management on your Windows 11 PC and don't have the patience to try one troubleshooting advice after another, you might want to start with a third-party program.
To be honest, while Disk Administration is a helpful tool that comes with Windows, it has too many limitations in many management choices. You can't even flexibly resize or expand your partitions unless your disk matches all criteria; otherwise, the "Shrink Volume" and "Extend Volume" buttons will be greyed out.
Unlike Disk Management, several disk management apps have additional functionality for easily managing drives and partitions. AOMEI Partition Assistant Standard is what we highly recommend.
It is a free disk and partition manager for Windows 11/10/8/8.1/7/XP PC users, you can freely extend/shrink/delete/create/format/check partitions, and you can use it to do more than the built-in tool, split partitions, merge non-adjacent unallocated space or two partitions, clone disk/partition, defrag disk/partition, check disk speed, and convert a data disk between MBR/GPT without data loss…
Let’s take “Merge Partition” as an example. If your disk has unallocated space but is not on the right of your C drive, however, you wish to add it to your C drive to extend it, Disk Management won’t support it. This tool can help you.
Step 1. Install and launch AOMEI Partition Assistant. Right-click the space which you want to merge, and select "Advanced"> "Merge Partitions" in the drop-down menu.
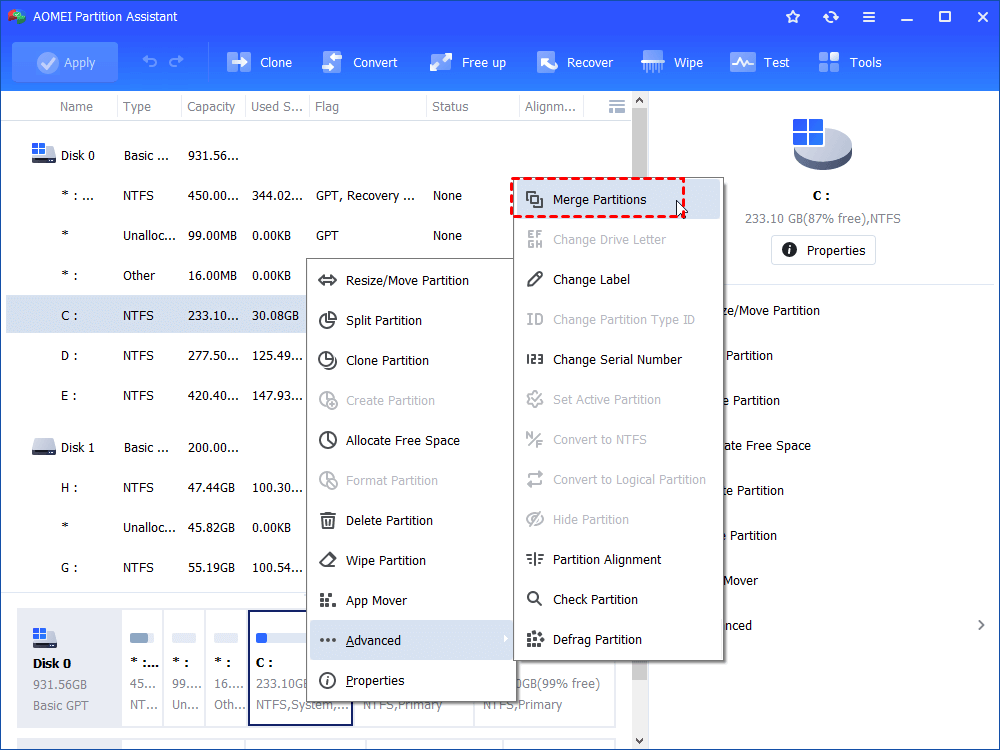
Step 2. In the pop-up window, tick the check box of which is in front of the unallocated space, and then click "OK" to continue.

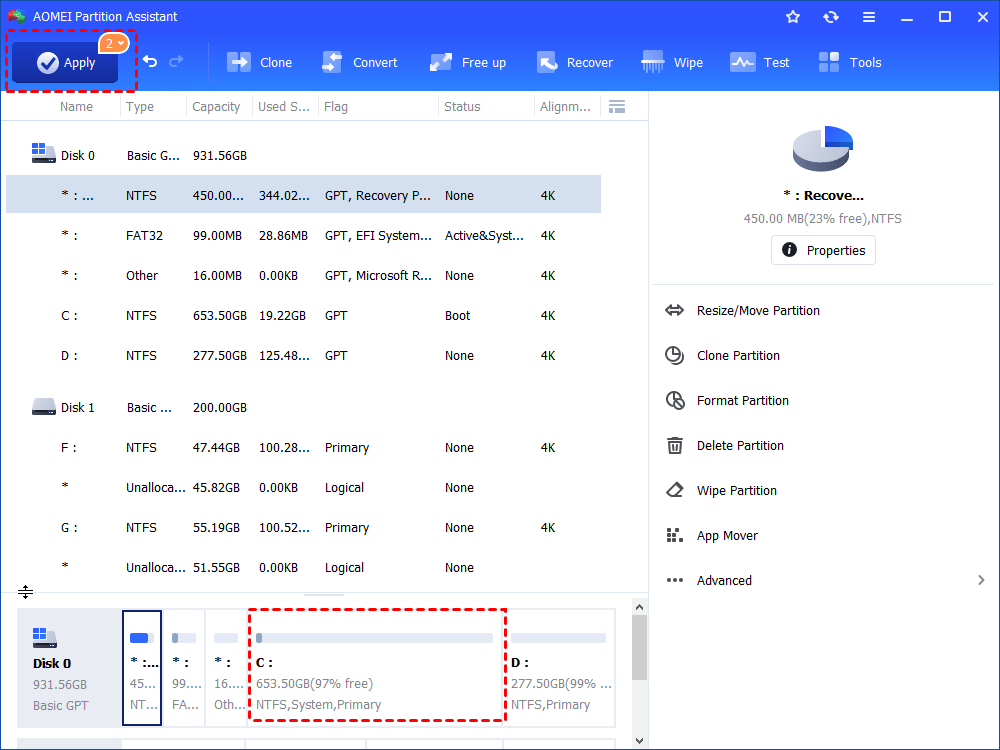
Step 3. You can preview changes. To save the changes, please click "Apply" on the toolbar.
The operation is quite easy for all users. In only three steps with a few clicks, the non-adjacent unallocated space is added to the C drive.
What’s more, if you need more advanced features, you can upgrade to the Professional Edition to unlock more practical functions:
◤ Migrate OS to another disk to easily set it bootable
◤ Allocate free space from one partition to another to extend it
◤ Convert system disk between MBR/GPT without data loss
◤ Move folders and installed programs
◤ Partition recovery wizard
…
Ending
If you find that you can't access Disk Management in Windows 11, you can try the first 3 solutions to see if you can fix it or not, or you can choose a handy third-party tool to replace it. The various features of AOMEI Partition Assistant can meet user needs in different ways. It can offer you more options to fix many problems with your computer.
You can use AOMEI Partition Assistant Server Edition if your PC is running Windows Server 2025/2022/2019/2016/2012, or 2003, you may try out the free Standard edition.

