3 Ways for App Migration on Windows 11
What’s the best way for app migration on Windows 11? In this post, you’ll not only learn why to move apps from one dive to another, but also, learn how to perform app migration in 3 different ways.
By Michael / Updated on May 12, 2023
Benefit of app migration on Windows 11
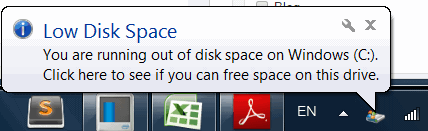
You can’t ignore the fact that over time, your Windows 11 PC gets sluggish and less responsive for drives, especially the C drive, are running out of space. The low space warning appears when the boot drive is almost full and you can’t install more software or programs on it.
Then, how to fix the C drive full issue? There're many ways out there but one of the best is migrating apps to another drive which is much faster and more efficient than deletion and reinstallation of those apps.
How to perform app migration on Windows 11?
Then, how to move apps from one drive to another on Windows 11? Here, the top 3 ways for app migration between 2 drives are listed for you to refer to.
Way 1. Manually cut and paste apps to another drive
Although it’s not the most secure way, most people will probably think of “cut and paste” first when it comes to app migration on Windows 11. If you try it, data like your boot files may go missing in the course of the migration which prevents you from running the apps normally. Although it’s not recommended to cut and paste apps, you can follow the step-by-step guide below as it does work sometimes.
Note: The target app must be shut down before the migration starts.
1. Open “This PC” from the desktop and locate the folder where the app and its related files are.
2. Select, right-click on the folder and select “Cut”.
3. Go to the destination drive, find some blank space, right-click on it, and select “Paste”.
Wait for the migration to be completed. The time it takes depends on the size of your app.
Way 2. Use Apps & Features in Windows settings
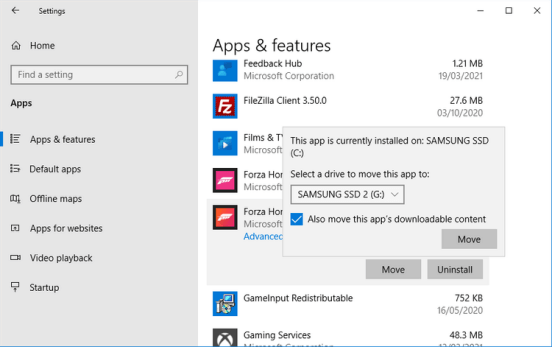
Does Windows 11 have a migration tool? In Windows settings, a feature is provided with which you can migrate apps you previously installed from Microsoft App Store like Minecraft and Microsoft Office to another drive. That’s “App & Features”.
1. Log in to the Microsoft account on your PC and then, you can preview all apps and software you installed in the app library of the Microsoft Store before.
2. Hit “Windows +I” to run Windows settings.
3. Follow “Apps > Apps & Features”. Then, all apps and software that’re currently on your computer will appear on the right side.
4. Scroll down to the app you want to move, select it, and hit the “Move” button. In the popup dialogue box, select the destination drive and hit the “Move” button again.
Way 3. Try a third-party app mover
As you can see, the “cut and paste” could make you suffer from data loss and “Apps & Features” can’t be applied to all kinds of apps on your PC. So, in this case, another more powerful and reliable third-party disk management software – AOMEI Partition Assistant Professional – is recommended for app migration on Windows 11. With its built-in app mover, you can migrate any kind of app no matter whether it's installed from Microsoft App Store from one drive to others without data loss and in only a few clicks. You can choose to transfer one app per time or transfer multiple in bulk.
How do I move a program to another drive in Windows 11? Download the demo of the all-in-one disk manager to have a try!
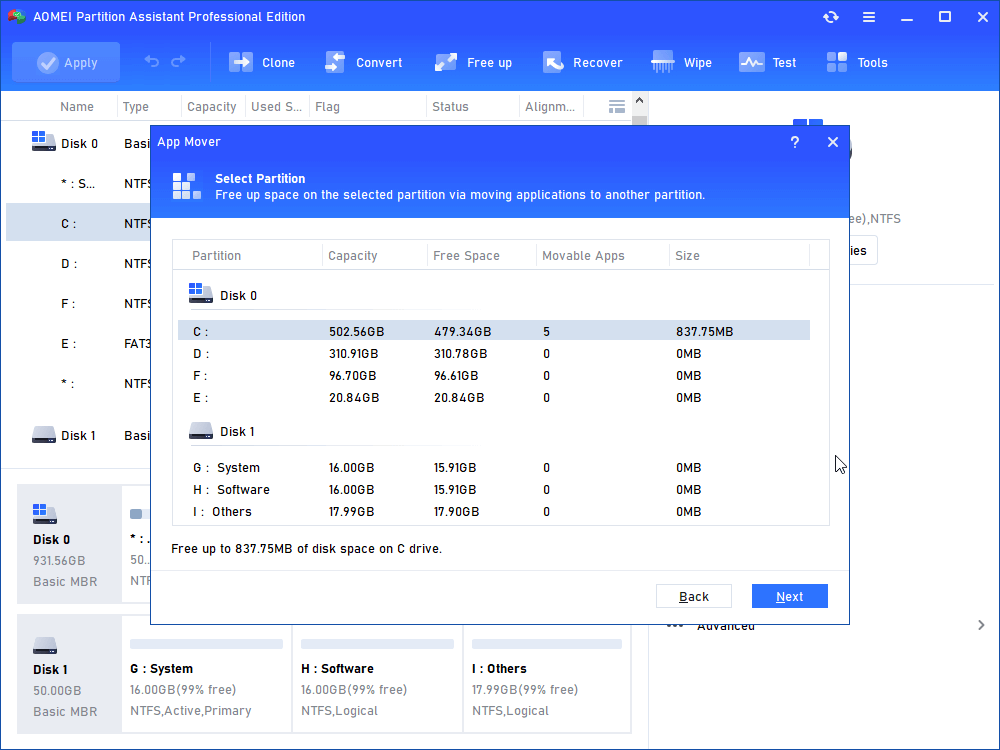
Step 1. Install and run AOMEI Partition Assistant Professional. When all disks and partitions appear on the home interface, right-click the target drive and hit the "APP Mover" option.

Step 2. Choose the drive where the apps you want to migrate are. Here, let’s take the C drive for example. Then, hit the “Next” button to proceed.
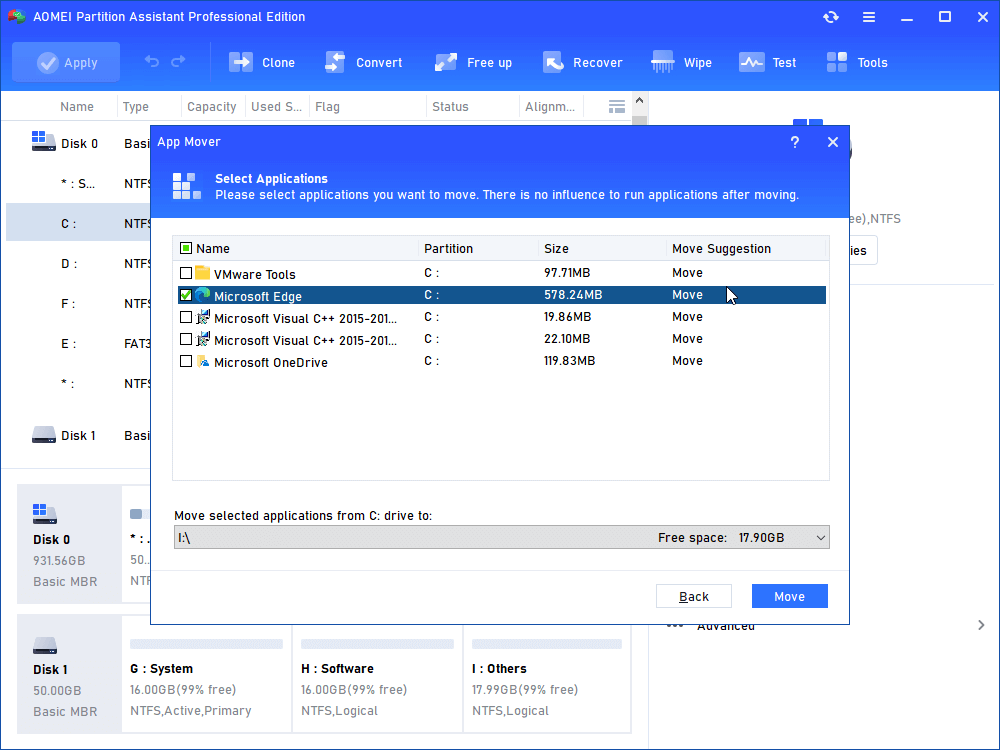
Step 3. Tick the apps and preset a destination drive. Click on “Move”.
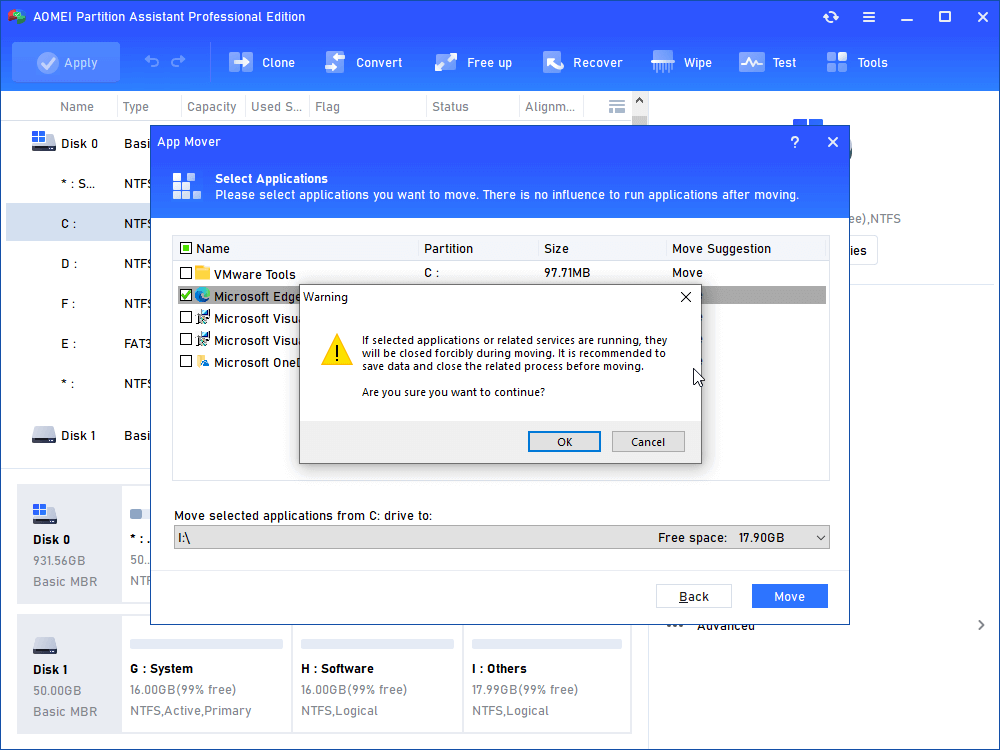
Step 4. Before the app migration starts, you’ll be prompted with a notification saying that you’ll forcibly shut down the currently running apps. Just hit the “OK” button to start the app migration.
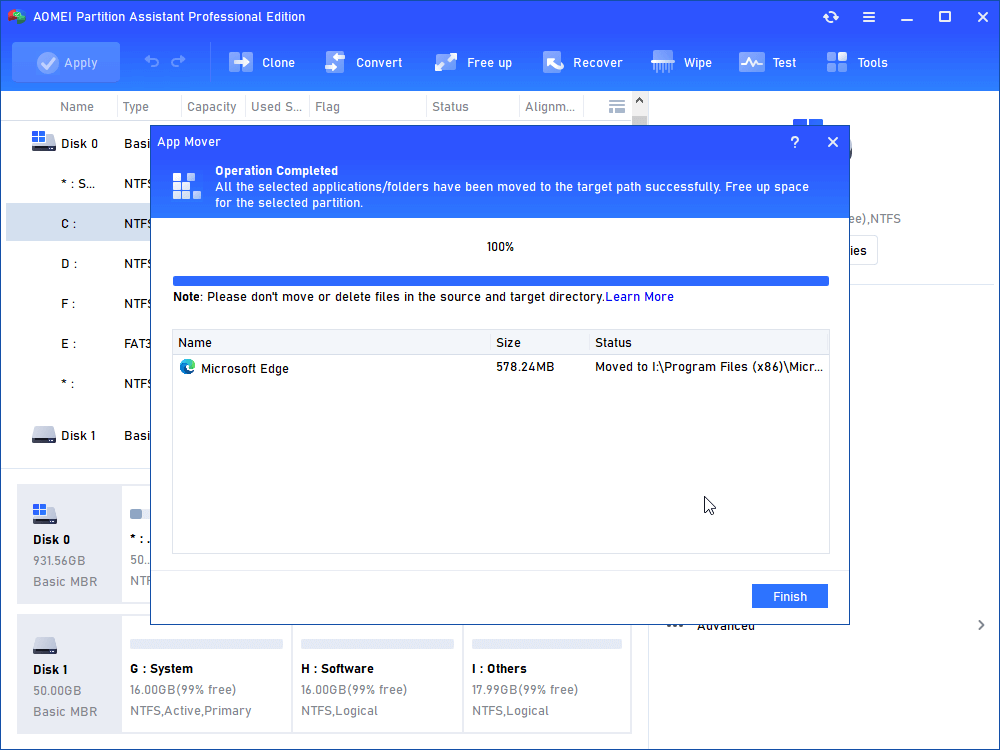
Step 5. Wait until the migration process is totally completed and click on the “Finish” button to quit the program.
Other ways to free up storage for your drives
If you don’t hope to change your apps’ location but you still want to free up the storage space of the C drive or any other drives. Here are some reliable tips you can follow.
Option 1. Use Disk Cleanup
The C drive and other drives get full not only because of too many installed apps and software, but also because of clogged-up junk files like cache and cookies. In this way, you can try the Windows’ own built-in program – Disk Cleanup – to permanently delete them.
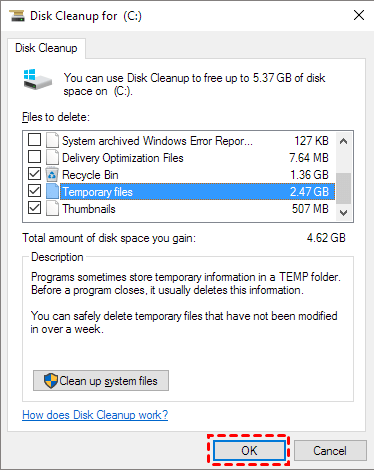
1. In the search box on the lower left of the desktop, type “disk cleanup” and select it under “Best match” to run the program.
2. Select the drive you want to clean and hit “OK”.
3. Tick the files you want to clean and hit “OK”.
4. You’ll then be asked to confirm the operation. Just do it to proceed.
Option 2. Enable Storage Sense
Storage Sense is another Windows built-in program that shares similar features with disk cleanup but is even more powerful. By enabling Storage Sense, you can schedule clean your drives, making cleanup run at intervals. Now, let’s have a look at how it works.
1. In the start menu, hit “Settings”.
2. On the page of Windows settings, hit “System”.
3. Select “Storage” on the left and toggle on “Storage Sense” on the right.
.png)
Option 3. Delete hibernation files
Hibernation files, generated by hibernate mode, can take up much storage space on your computer’s C drive and thus, deleting them should be a good option when the C drive is running out of space.
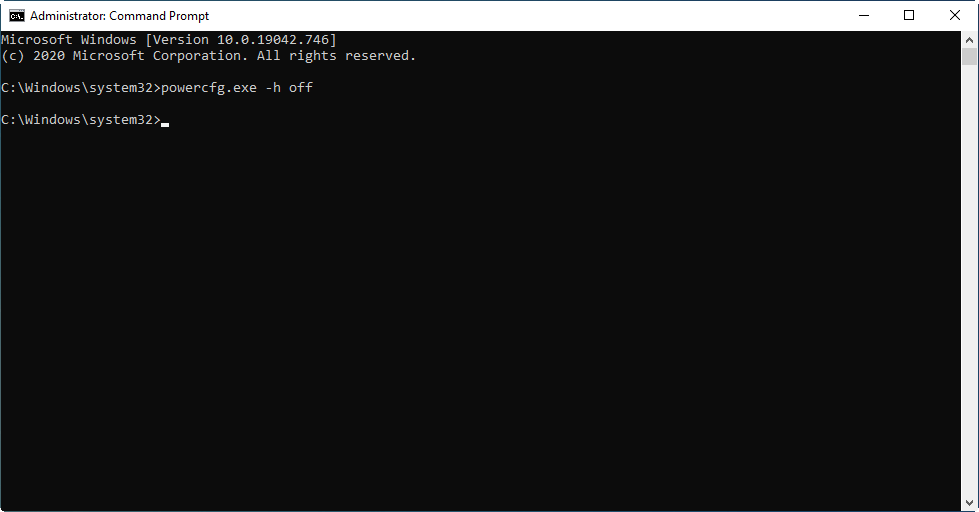
1. Still, go to the search box and type “command prompt”, right-click on the result under “Best match” and select “Run as administrator”.
2. In the black window, type “powercfg.exe -h off” and hit “ENTER” to execute the command.
Now, go to File Explorer and you can find the C drive’s free space has become larger.
Conclusion
How to conduct app migration on Windows 11? In the post above, 3 different ways along with their step-by-step guides are introduced to help with the app migration between drives. Among them, the most secure and reliable tool should be AOMEI Partition Assistant Professional which enables you to complete the app migration without any data loss. Its fast speed literally amazes users as well. Besides the built-in app mover, other features like free space allocation, partition merging, and large files deletion also help you out when you run into issues like the C drive full. To migrate apps on Server computers, you can try the Server edition of this AOMEI product.