Easily Migrate Windows 10 to NVMe SSD without Reinstalling
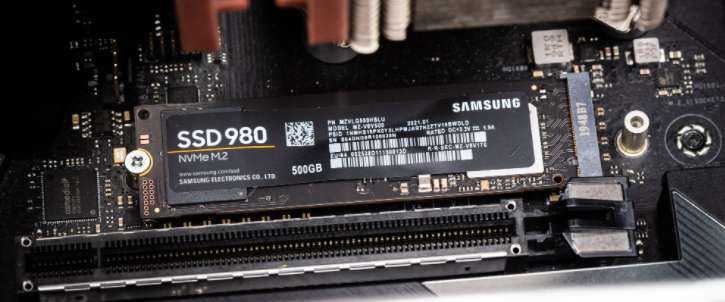
You can migrate Windows 10 to NVME SSD without Windows reinstallation. Thus, you can boot OS from the NVME SSD to experience less boot time and higher read & write speed.
Get NVMe SSD as your boot disk right now!
NVMe (Non-Volatile Memory Express) is a new storage technology that guarantees lightning-fast performance and low latency. NVMe drives are up to 7x faster than traditional SATA drives, making them ideal for gaming, video editing, and other intensive applications. It offers lower latency, higher IOPS (input/output operations per second) and lower consumption than other SSDs using the AHCI (Advanced Host Controller Interface, originally designed for high-latency hard drives) protocol, such as traditional SATA SSDs, M.2 SATA SSDs, etc. And IOPS has a significant impact on boot time.

If you are still using legacy SATA drives, you are missing out on the speed and performance of NVMe. Migrating to NVMe is the best way to take advantage of the latest storage technology and get the most out of your system. Here are some of the benefits of migrating to NVMe:
◥ Faster boot times
◥ Faster application load times
◥ Faster file transfers
◥ Lower latency
◥ Lower power consumption
◥ Higher endurance
To getter better experience of using the computer, it is a nice choice to replace your current boot hard drive with NVMe SSD.
However, migrating a Windows 10 operating system to NVMe can be a daunting task, especially if you are not familiar with the process. That's why we've put together this complete guide to help you through each step of the migration.
Before replacement, confirm that your computer meets the following requirements: new computer hardware, UEFI firmware, M.2 PCI-E x4 slot, and UEFI boot mode.
Preparations for migrating Windows to NVMe SSD
Before transitioning from an SSD to an NVME or M.2 drive, several steps should be taken to ensure a successful migration of Windows 10. To ensure that you are fully prepared for the transfer of Windows 10 to an NVME/M.2 drive:
1. Ensure that your data is backed
Before migrating your operating system, it is imperative that you back up all critical files and user profiles to a distinct device (such as a cloud storage service or external hard drive) to prevent data loss in the event of an unforeseen event.
2. Verify Device Compatibility
Before transferring Windows 10, it is imperative to verify that your NVME or M.2 SSD is compatible with your computer and its BIOS settings. The transfer may be unsuccessful or may even result in device damage if there are any incompatibilities or other issues. Upgrade the BIOS or UEFI firmware of your personal computer to the most recent version that is compatible with NVME or M.2 drives.
3. Confirm the Capacity of Your Target Drive
Ensure that the target drive has sufficient capacity to accommodate all of the data from your current SSD. The move may fail if the device is too small or lacks sufficient disk space, resulting in a damaged system.
4. Configure Windows 10 to operate in AHCI mode
Before migrating to Windows 10, it may be necessary to transition from IDE mode to AHCI mode, contingent upon the brand of your current SSD. If you are uncertain as to whether or not it is enabled. (Device manager > Storage controllers > Intel SATA AHCI Controller" or "AMD SATA AHCI Controller)
5. Select the Appropriate Migration Tool
Numerous disk cloning utilities can assist in the migration of your system from SSD to NVME/M.2, but not all of them are equivalent. Certain tools are superior to others, and some may even cause data loss during the transfer procedure. Consequently, you need to conduct a thorough investigation and select the appropriate tool for the task.
How do I move my operating system to NVMe SSD?
As aforementioned, NVMe SSD is a great option for boot drive. But it’s not a simple process to install Windows 10 from scratch on the NVMe SSD and configure system settings again. At this time, you might consider whether it is possible to move Windows 10 to NVMe SSD from the current HDD or SATA SSD without reinstalling, and it will be successful to boot Windows 10 from NVMe SSD after migration.
In fact, you can easily complete Windows 10 OS migration from the hard drive in use to NVMe SSD through cloning, as long as you turn to proper cloning software for Windows. Here AOMEI Partition Assistant Professional would be my preference out of the following reasons:
▷ Bootable clone: It can clone an entire disk including hidden boot-related partitions, ensuring cloned NVMe SSD bootable.
▷ Flexible: It supports clone only used space, thus you can clone larger HDD to smaller SSD if the used space of HDD is not larger than the capacity of SSD. And you can use it to clone system-related partitions only or a single data partition to NVMe SSD as well.
▷ Compatible: It supports NVMe SSDs of different brands, like Samsung 860 EVO SSD, Intel 660P SSD, and so on; it can clone HDD/SATA/M.2 SATA SSD/NVMe SSD to NVMe SSD.
▷ Easy-to-use: With a sleek interface and guided design, it allows you to complete operation effortlessly.
How to: Migrate Windows 10 to NVMe without OS reinstallation
Before moving Windows from SSD/HDD to NVMe SSD via disk cloning:
✦ Connect the NVMe SSD to your computer and make sure that it can be detected by OS.
✦ Initialize new SSD as GPT partition style.
✦ Install AOMEI Partition Assistant Professional on your machine. Or you can free download its demo version to have a trial!
Tip: It is available to clone MBR Windows 10 disk to GPT NVMe SSD via AOMEI Partition Assistant Professional. But after cloning, you should change boot mode from BIOS to UEFI.
Step 1. Install and launch AOMEI Partition Assistant, click "Clone" in the main interface and select "Clone Disk".
Step 2. Choose the hard disk that you need to clone as the source disk and click "Next".
Step 3. Select the destination disk to store the data on the source disk, and then click "Next".
Step 4. Then, you can check the source and destination disk in the next window or change to “Sector to Sector clone”, and click the "Confirm" button to continue if there is no problem.
Here, you can also click the "Settings" button to adjust the partition size on the destination disk or tick "4k alignment" to improve the reading and writing speed of SSD if the target disk is an SSD drive.
Step 5. At last, click "Apply" and "Proceed" in the main interface to start cloning the hard drive.
Once disk cloning has been completed, Windows 10 OS and all applications on your old disk are copied to the new NVMe SSD and you can boot the computer from it. If you want to clone Windows Server 2019, 2016, 2012 (R2), or 2008 (R2) to NVMe SSD, you can use AOMEI Partition Assistant Server.
How to: boot Windows 10 from cloned NVMe SSD
After cloning Windows 10 to NVMe SSD, if you have no idea about how to boot Windows 10 from the cloned PCIe NVME SSD, shut down your computer and refer to the following content.
If you can and will keep your old drive and new NVMe SSD at the same time, do as follows:
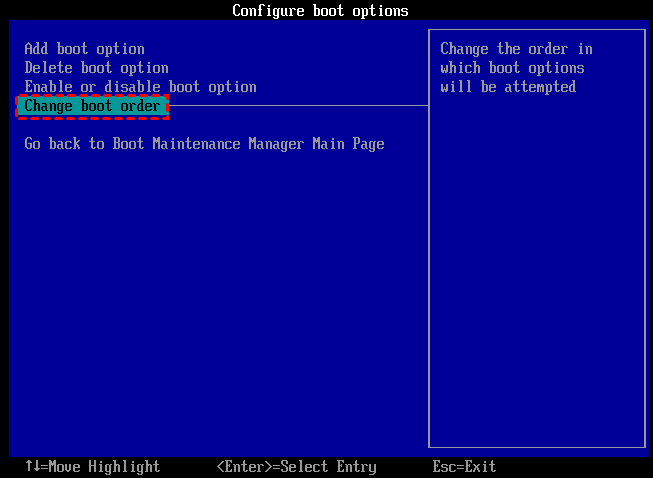
1. To boot from the NVMe SSD, reboot the computer and press a certain key to enter BIOS.
2. Then, set the new NVMe SSD as the first boot device and boot from it.
3. After booting, you can choose to format or wipe the old hard drive to free up disk space and take the old hard drive as data storage.
If there is only one NVMe M.2 slot but is occupied by an old NVMe SSD, you can take out the old NVMe SSD and put in the new cloned M.2 NVMe SSD drive.
FAQs about migrating Windows 10 to NVMe
▶ Is it worth migrating to NVMe?
Absolutely! The difference in performance between a traditional SATA drive and an NVMe drive is like night and day. You'll wonder how you ever managed without it.
▶ Is migrating to NVMe difficult?
It may seem daunting at first, but with our guide, you'll have everything you need to successfully migrate your system to NVMe. Just take it step by step, and you'll be amazed at how easy it can be.
▶ Can I migrate Windows 10 to NVMe without losing my data?
Yes, you can. But it's always a good idea to back up your data before making any major changes to your system, just to be safe. Then, you can migrate Windows 10 with AOMEI Partition Assistant Professional, which is a powerful disk migration expert can migrate OS without losing data.
▶ How long does it take to migrate to NVMe?
The process can take anywhere from 30 minutes to a few hours, depending on the size of your data and the speed of your computer. But the end result is definitely worth the time investment.
▶ Will I need any special tools or software to migrate to NVMe?
You'll need an NVMe disk, of course, and a tool to clone your existing drive onto the NVMe drive. But our guide will walk you through the entire process and recommend the best tools to use.
Conclusion
This passage shows you a detailed tutorial about how to migrate Windows 10 to Nvme SSD with the help of AOMEI Partition Assistant Professional. If you have any need to copy the entire hard drive, migrate only the operating system, or clone a single partition, this software is always a good helper. If you think this post is helpful, you can share it with your friends who have similar needs.

