Change Drive Letter and Paths Greyed Out in Windows 10 [Solved]
This article will help you to fix the Change Drive Letter and Path greyed out in Windows 10/8/7 problem. Read on to know why it happens and how to solve it effectively.
By Cherry / Updated on May 12, 2023
The Change Drive Letter and Paths option in Windows Disk Management
Windows Disk Management is a built-in tool for Windows users to manage the hard disk partitions. In Windows 10, you can open it by clicking on Start and typing in diskmgmt.msc and press Enter key, or right-clicking This PC on the desktop and choosing Manage -> Disk Management. The Disk Management allows you to create/delete/format partition or volume, extend/shrink volume, change drive letter for partitions or volumes, and so on. When you want to change anything on a partition or volume, right-click it, and then, select the option which you need.
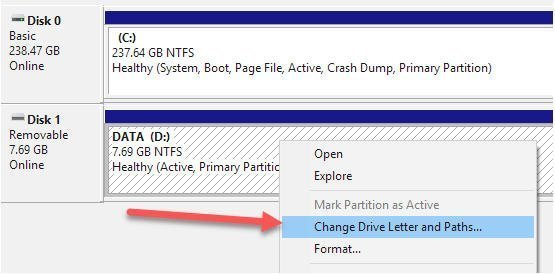
When you right-click a partition and you can see an option Change Drive Letter and Paths, which is used for changing drive letter of an internal/external hard drive, or assigning drive letter to a drive which doesn’t have a drive letter.
For example, if you want to assign or change the drive letter for a disk or partition, right-click on it first, choose Change Drive Letter and Paths.
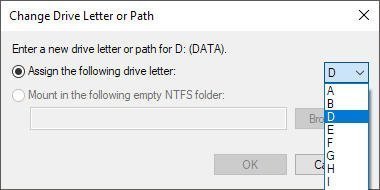
Then, it will pop up a window with the current drive letter, click Change..., if you are going to assign a drive letter, here you need to click Add...
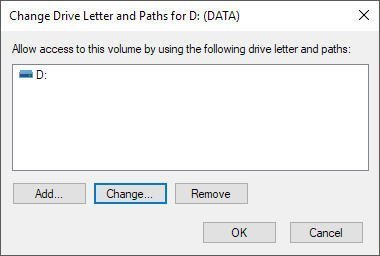
After that, you should choose the new drive letter from the drop list, and then, click OK.
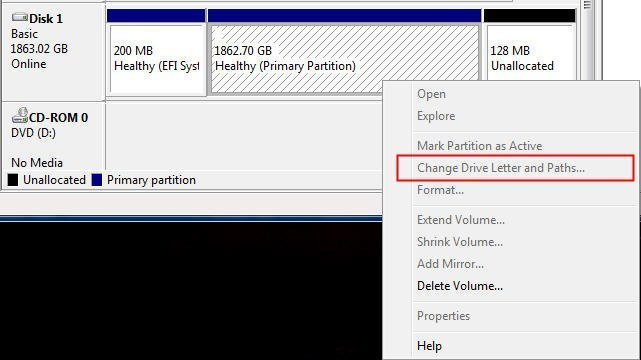
As so far, change drive letter or assign drive letter seems so easy with the Change Drive Letter and Paths option in Windows Disk Management. However, you may face a common problem: Change Drive Letter and Paths greyed out in Windows 10/8/7, like the following screenshot:
Apparently, the Windows could not assign a drive letter to a partition. Here you may confuse why it happens and want to know how to fix it desperately. Fortunately, this article will explain the why and give you a solution for the problem.
Why the Change Drive Letter and Paths greyed out Windows 10?
The Change Drive Letter and Paths option greyed out can occur for a few reasons:
-
The volume is not formatted in FAT or NTFS. For example, if you are attaching a disk from a Mac computer, you will not be able to change the drive letter in Windows unless you format the drive to the FAT or NTFS file system to compatible with Windows OS.
-
The drive is write-protected. If the drive is set to read-only, then you must remove the write protection from the drive first, otherwise, the Change Drive Letter and Paths should be greyed out.
How to fix Change Drive Letter and Paths greyed out in Windows 10/8/7?
If there is no data on the volume or you do not need any of the data on the volume, the question can be fixed simply. Just right-click the volume, select the only available option Delete Volume to delete the volume, and then, right-click it and create a new simple volume, and then, you will be able to change the drive letter.
Otherwise, you need a third-party software to help you to fix the Change Drive Letter and Paths greyed out in Windows Disk Management. AOMEI Partition Assistant is such a great partition manager that can easily help you change drive letter for partition or volume.
Step 1. Free downloard AOMEI Partition Assistant, install it on your Windows 10/8/7 computer. Launch it.
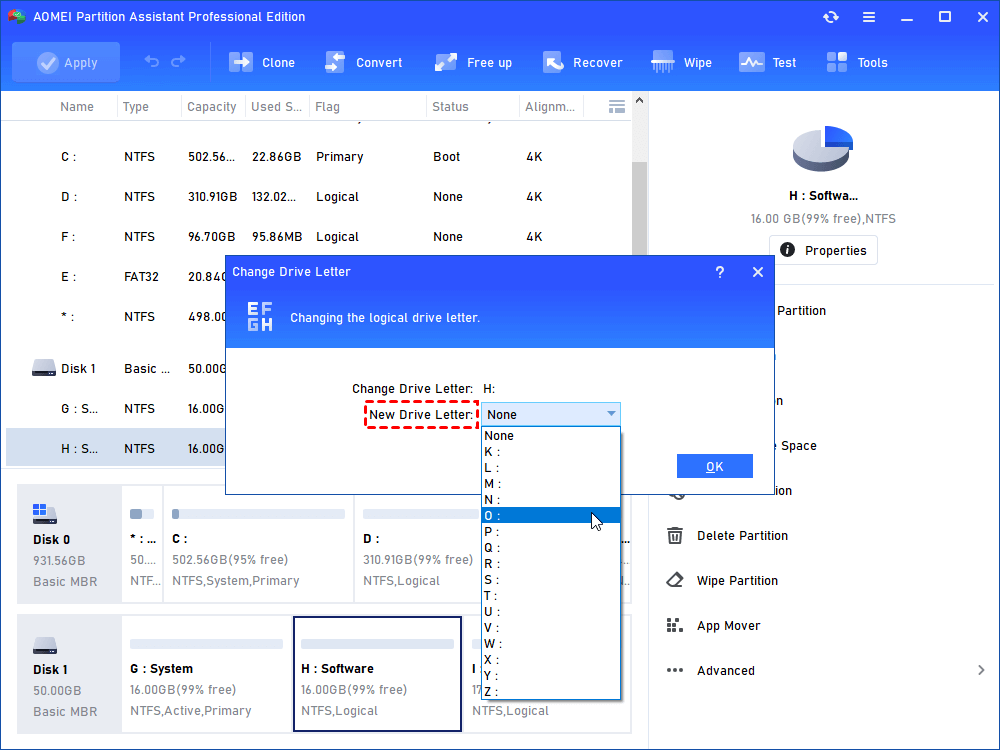
Step 2. It will display you the main interface concluding all disks on your PC. Right-click the partition that you need to change drive letter, in the pop-up menu, select Advanced -> Change Drive Letter.

Step 3. It will pop up a small window where you can choose a new drive letter in the list of the drop-down menu. Choose one and click OK.
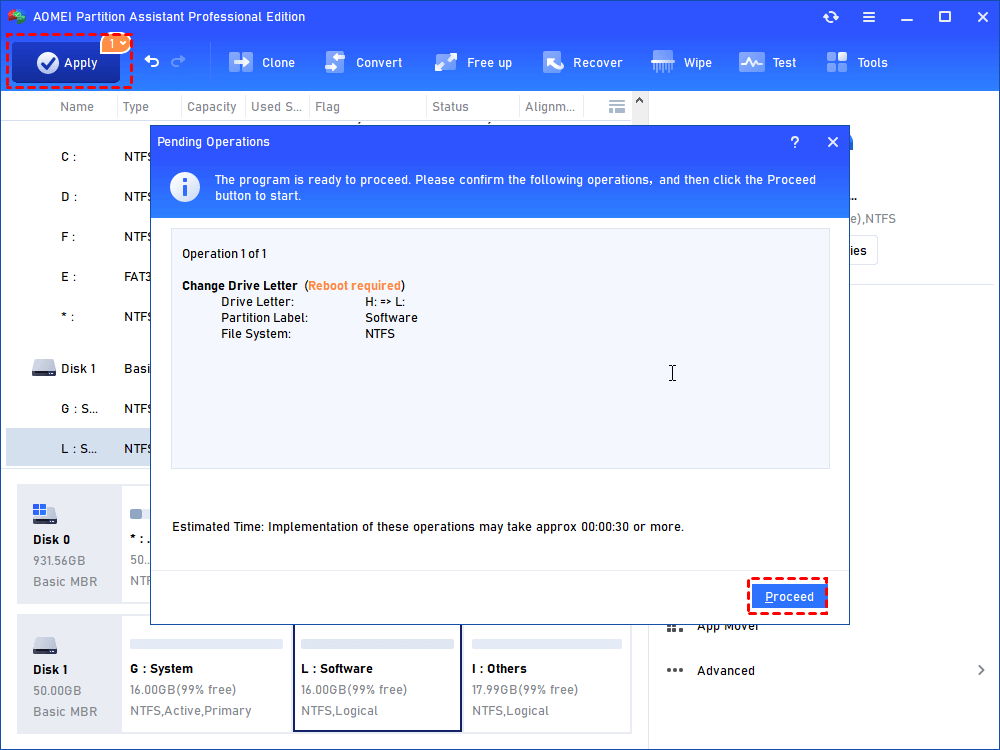
Step 4. When you back to the main interface, click Apply -> Proceed to execute the task.
When the Change Drive Letter and Paths greyed out in Windows 10/8/7’s Disk Management, AOMEI Partition Assistant should be the best alternative that can help you change drive letter successful. Besides, you can upgrade to Professional Edition to get more advanced features like Allocate Free Space, Quick Partition, Command Line, etc.
Extended Content
Actually, sometimes, you may meet the problem that all options on the Disk Management are greyed out, and you can do nothing help. When you get into this trouble, that may be caused by the system disk error. And what you can do is to check and repair system disk error.
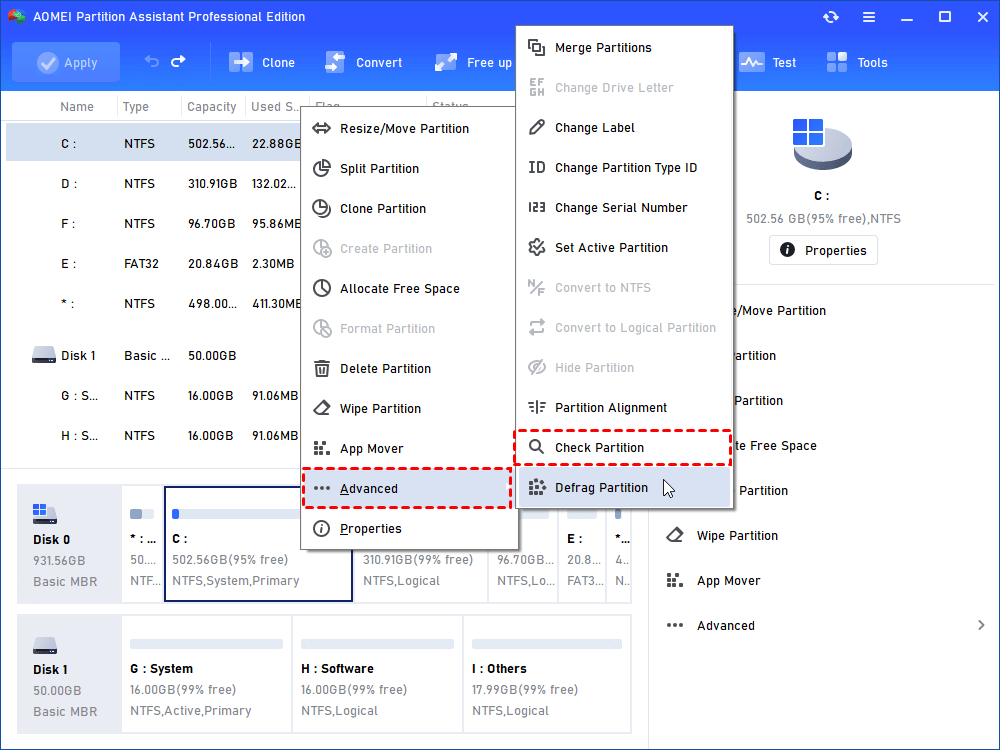
1. Launch AOMEI Partition Assistant and right-click the system partition, select Advanced > Check Partition.
2. Select the way of checking errors to perform, click OK.

Let AOMEI Partition Assistant automatically check partition and fix errors in this partition. If this operation still can’t solve your problem, you can try to perform a system restore (if you backed system up before) or system re-installation to repair Disk Management tool.

