How to Resize VMware Virtual Disk in Windows?
Here you can realize how to resize virtual disk in VMware with detailed process.
By Bryce / Updated on May 12, 2023
Need to Resize VMware virtual disk
When your VMware virtual disk is running out of disk space, you have two ways to add more disk space to your virtual machines: either add a second virtual disk to your virtual machine or expand existing virtual disk size. Generally speaking, it is simple to add a second virtual hard disk. However, many users would rather increase the size of their existing virtual disk in order not to change application or data locations.
In order to resize VMware virtual disk size, first, you need to increase the whole disk size of VMware, which can be done via the "vdiskmanager.exe" command-line tool provided by VMware, then you can extend virtual disk partition within VMware. The following content will explain how to do it step by step.
Steps to expand VMware virtual disk in Windows
To start resizing virtual disk in Windows, please make sure that all the preparatory work has been done:
▪ Remove the snapshots in your VMware, if there is anyone.
▪ Shut down your Windows virtual machine and confirm VMware is powered off.
▪ Find out where your "vmware-vdiskmanager.exe" is. It would typically locate in the installation directory of VMware, e.g. "C:\Program Files\VMware\VMware Server\vmware-vdiskmanager.exe".
▪ Locate the full path to your Windows virtual machine disk (vmdk). For example, "D:\Virtual Machines\Server2003Ent-x64\Windows Server 2003 Enterprise x64 Edition.vmdk".
It is highly recommended that you backup the VMDK in case the operation fails.
Part 1. Resize VMware disk via vdiskmanager.exe tool
1. Open "Run" from "Start" menu. Type "cmd" and hit "Enter" to open the "Command Prompt".
2. In the pop-up "command prompt" window. Type or paste the following command: "C:\Program Files\VMware\VMware Server\vmware-vdiskmanager.exe" –x 31GB "D:\Virtual Machines\Server2003Ent-x64\Windows Server 2003 Enterprise x64 Edition.vmdk".
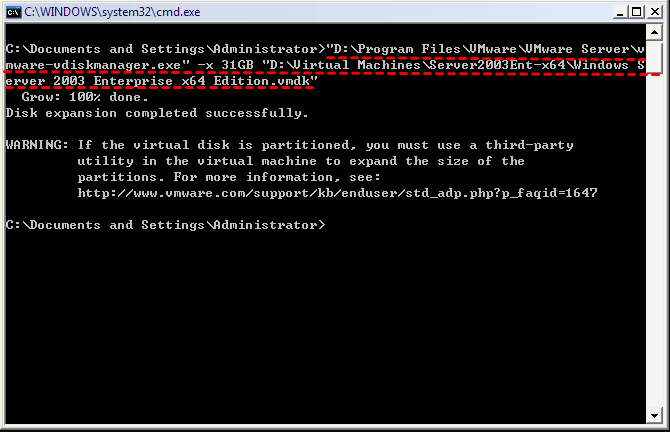
The capacity should be in line with the new size that you want, MB or GB, for example, 31GB will resize virtual disk to 31 gigabytes.
As mentioned above, this command tool can only resize VMware disk, but not virtual partition. After VMware resize disk done, you need to extend system partition (C drive) within VMware. Go for the Part 2, please.
Part 2. Resize VMware disk partition
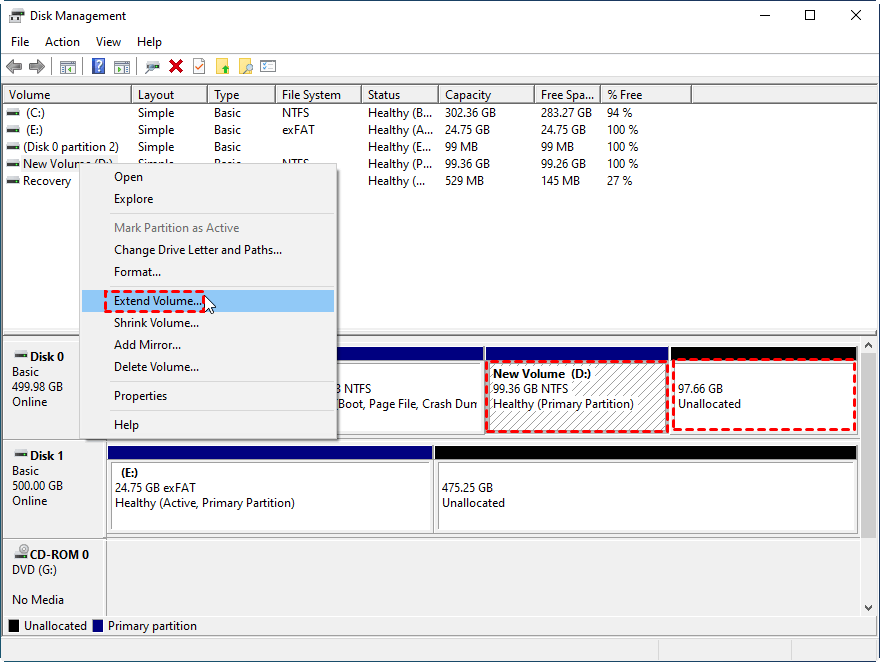
Now, you can power on your VMware machine, go to the Disk Management, and you will see the added disk size is shown as unallocated space after the current partitions. With it, you can only extend the partition on its left adjacent side. For example, if there is C: partition, D partition and unallocated space (located in order), you can only extend D drive with the unallocated space through the “Extend Volume” feature in Disk Management. (Because Disk Management only allows users to extend a partition with a right adjacent unallocated space.)
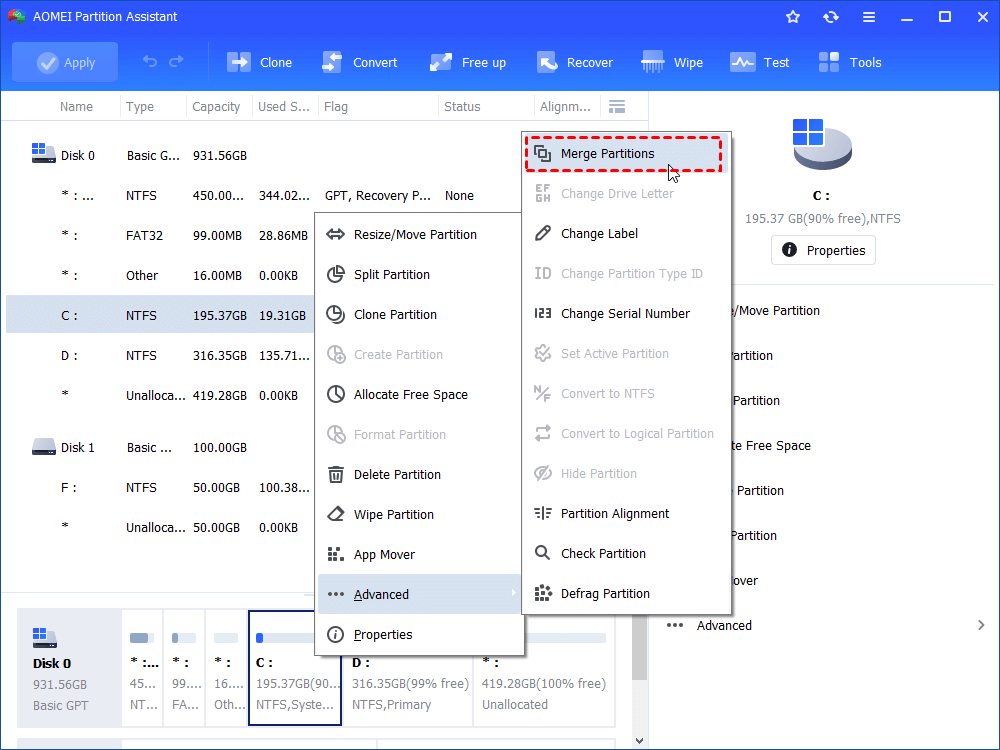
However, if you want to extend C drive with the non-contiguous unallocated space, you can turn to the free partition manager AOMEI Partition Assistant Standard. Its “Move Partition” function can move the middle partition in the C drive and unallocated space to the right side so as to make unallocated space adjacent to the C partition, then you can expand it successfully. Besides, it provides an easier way to extend C drive with non-adjacent unallocated space, which is directly merging C drive with unallocated space via the “Merge Partition” feature.
1. Install and run AOMEI Partition Assistant Standard. Right-click the C drive and select "Advanced" > “Merge Partitions”.
2. Tick the non-adjacent unallocated space and click “OK”.
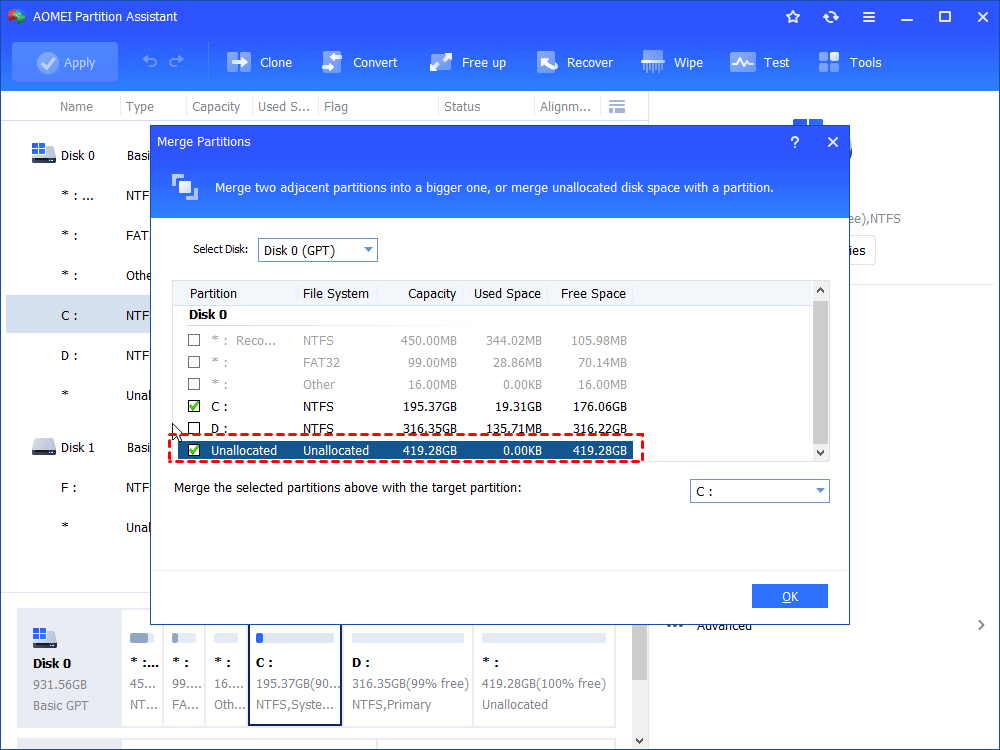
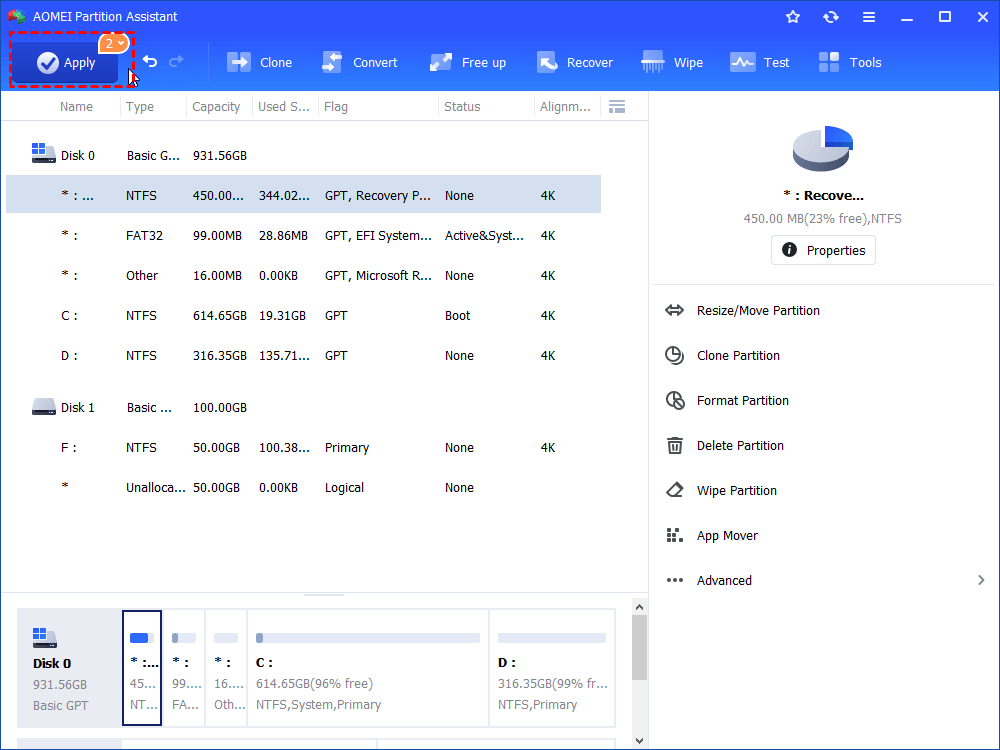
3. Click “Apply” to execute the pending operation.
Wait for it to be done and then you will have resized the VMware virtual disk successfully.
Summary
AOMEI Partition Assistant Standard aims at helping you to manage disk partitions in an easier and effortless way. As an all-in-one partition manager, it enables you to create/delete/format partition, clone partition, clone hard drive, convert MBR and GPT without losing data, etc in Windows 11/10/8/7 and Windows XP/Vista. To enjoy more advanced operations including allocating free space from one drive to another, extending NTFS system drive without reboot, transferring OS to SSD, aligning SSD partitions, and more, you can upgrade to Professional edition.