How to Put or Install Windows 8 on USB Drive [Three Ways]?
This paper shows three ways to put or install Windows 8 on USB drive and you can choose on based on your own situation.
By Bryce / Updated on May 12, 2023
Preparation work before putting Windows 8 on USB drive
No matter which way you pick from below, you need to prepare a Windows 8 installation ISO image file or Windows 8 CD/DVD as well as an at least 4 GB (for 32-bit system) or 8 GB (for 64-bit system) USB flash drive.
Three ways to create Windows 8 bootable USB drive
Way 1. Create a Windows 8 Bootable using Command Prompt
1. Mount Windows 8 image. If the Windows 8 installation image you have is an ISO file, you have to mount it on your computer. Just right-click on it and choose Mount. If the system image is on a CD/DVD, leave it as it is.
Tips: If there is no Mount option after right-click the ISO image, it means that the operating system of your computer does not have the capability to mount an ISO. Then, you have to use a third-party ISO image software to do it.
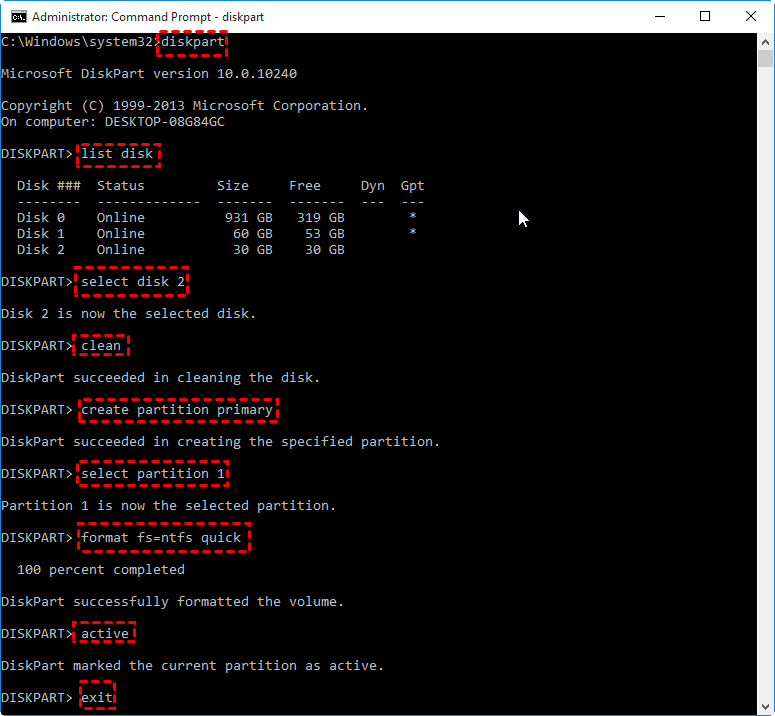
2. Format USB. Insert target USB flash drive into your computer and open Command Prompt. Then, input the following command orders one by one and each with Pressing Enter.
▪ Diskpart (open disk partition command tool)
▪ List disk (show all the disks connected to this machine)
▪ Select disk # (# is the USB disk number)
▪ Clean (clean up all files on the USB; if there are crucial data you’d like to keep, please move or back them out to another device before cleaning)
▪ Create partition primary (create a primary partition on the USB drive for saving Windows 8 system files)
▪ Select partition 1 (select the primary partition you just created; actually, there is only the primary partition on USB flash drive at this situation; this command is optional)
▪ Format fs=ntfs quick (quickly format the selected partition into NTFS file system; if you do not want it be a quick format, just omit “quick”)
▪ Active (active the selected partition; this command is optional)
▪ Exit (exit diskpart)
3. Make external USB bootable. Continue to key in the following commands:
▪ E:\boot bootsect /nt60 q:
"E" is Windows 8 disk drive letter, whether it is a mounted ISO file or CD/DVD; "q" is your external USB drive letter; “E:\boot bootsect /nt60 q:” means to change Windows 8 mount disk as the first boot device and make external USB bootable.
4. Copy Windows 8 ISO to USB. Use XCOPY to copy the Windows 8 system files to target USB
▪ E:\xcopy e:\*.* /s/h/f q:\
Way 2. Burn Windows 8 ISO to USB by Windows USB/DVD Download Tool
If you are not comfortable with command-line tools, this method is much better for you to put Windows 8 setup on USB.
Notes:
▪ The following screenshots are based on Windows 7 USB/DVD Download Tool, yet it is also applied to Windows 8 and Windows 8.1.
▪ The target USB will be erased, be sure to move out or back up important files.
▪ You must use an Administrator account on the computer upgraded.
▪ Windows USB/DVD Download Tool helps you to copy Windows ISO image to the USB. Yet, just copying and pasting the ISO file to USB is not workable. The Download Tool makes the ISO bootable without first running an existing system.
▪ The USB flash drive should have at least 4GB of memory.
Please read the instructions with warnings and notes slowly and carefully in case of any mistakes.
1. Download, install and run Windows USB/DVD Download Tool or Windows 7 USB/DVD Download Tool on your computer.
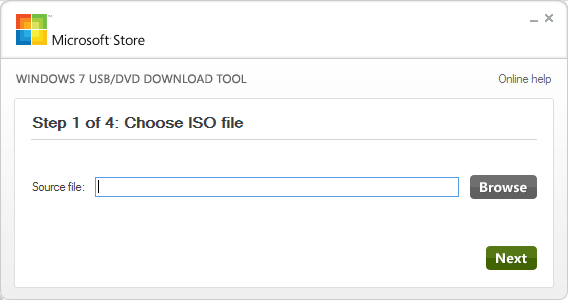
2. In the first screen of the Download Tool, step 1 of 4: Choose ISO file. The correct Windows file should have the extension name of “.iso”. If you currently have Windows 8 installation CD/DVD at hand instead of ISO file, you can make use of a free burning program to create ISO image.
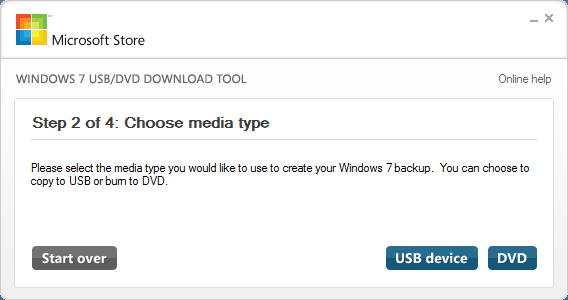
3. Step 2 of 4: Choose media type. Please select the USB drive you would like to set up your Windows 8 on.
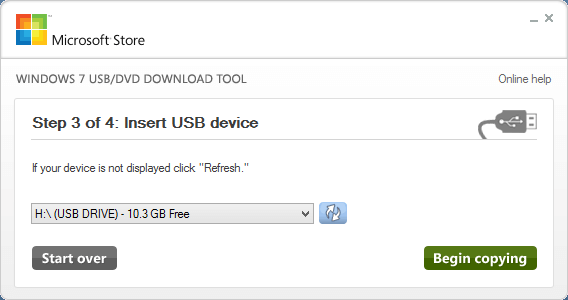
4. Step 3 of 4: Insert USB device. Insert the target USB into your computer and click Begin copying. This will erase your USB, please ensure that the crucial data is backed up or moved out.
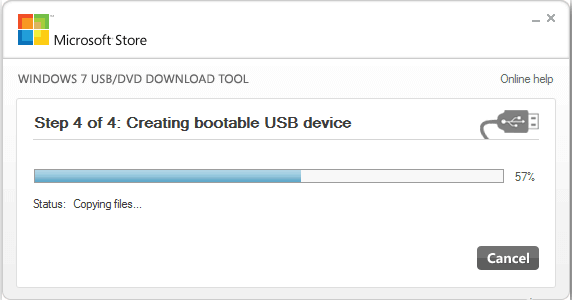
5. Step 4 of 4: Creating bootable USB device. It will automatically carry out the task and just wait until it finishes.
Way 3. Windows 8 Setup on USB Makes Windows To Go
Windows To Go is a portable device that contains your familiar system environment. With it, you are able to boot into the same system you usually working in anytime on any computer.
Create Windows To Go will also put Windows 8 setup on USB. To do it, if you are running Windows 10 Enterprise/Education/Pro or Windows 8/8.1 Enterprise operating system, you can make use of system built-in tool.
Note: To use the self-contained tool, you have to prepare certified USB.
1. Mount Windows 8 ISO image file and insert the certified USB drive.
2. Search out Windows To Go creation tool in Control Panel.
3. Click “Tools” on the top pane. Then choose “Windows To Go Creator” from the drop-down menu.
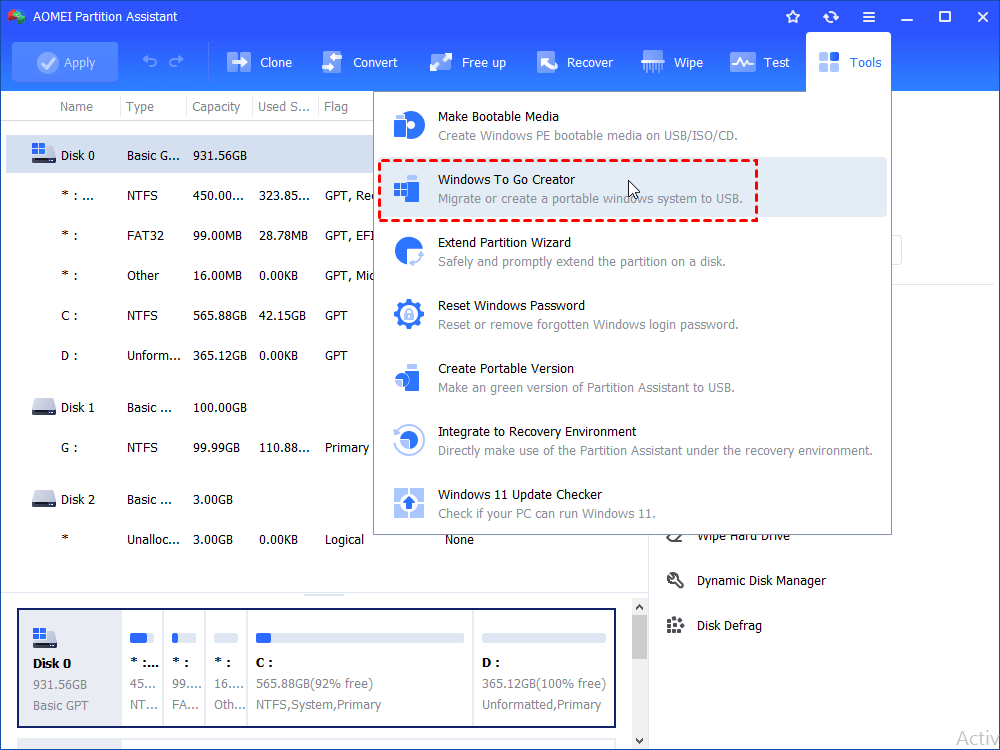
Then, just follow the easy guide to createte a Windows 8 To Go workspace.
If you are running other editions of Windows OS, or if you do not have certified USB, you can rely on a professional and reliable third party software – AOMEI Partition Assistant Standard to set up Windows 8 on USB. And this tool can also help you to create bootable media of Windows 11, 10, 8.1, or 7.
Install Windows 8 from USB
After you successfully install windows 8 on USB, no matter by way 1 or way 2, you are able to continue to set up windows 8 from USB on another computer.
Tips: The Windows To Go created by way 3 cannot be used to install the Windows system.
1. Remove the USB bootable drive from the former computer and insert it into the target machine that you plan to install Windows 8.
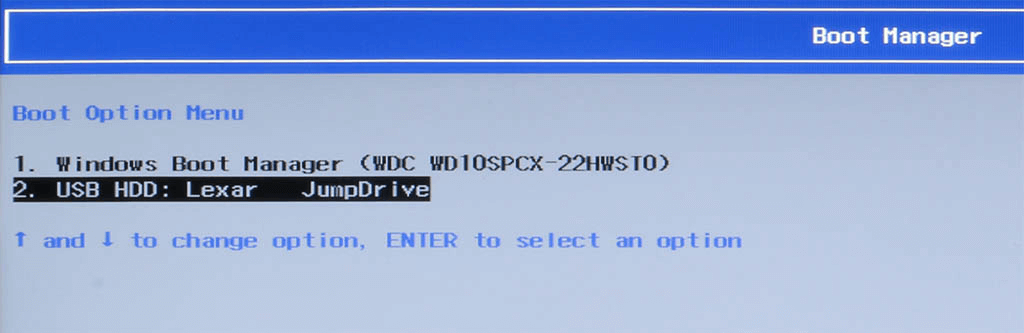
2. Power on the target computer and set it to boot from the connected USB while booting up. You may need to adjust your BIOS settings to make a USB flash drive available as an option for booting up.
3. Then, just follow the guide to setup windows 8 with USB; including the settings of the installed system on the target computer.