How to Install Windows 8 to an External USB Hard Drive?
Using the PowerShell command, one can install Windows 8 to external USB hard drive successfully like using Windows To Go Creator Wizard to do the same thing. This article could be very helpful to you if you don’t have Windows 8 Enterprise edition.
By Michael / Updated on May 12, 2023
Have you ever imagined that to use your own Windows 8 OS wherever you go? To install Windows 8 to external hard drive or USB removable device becomes possible with Windows 8/8.1 Enterprise edition built-in Windows To Go Creator Center. For non-Win 8 Enterprise edition users, they can still create Windows To Go (WTG) USB drive or install Windows to external hard drive with the help of PowerShell command and third-party software – AOMEI Partition Assistant.
Preparations for installing Windows 8.1/8 on External HDD or USB Drive
1. Current host OS should be Windows 7 or Windows 8.
2. An external hard drive formatted with NTFS and has at least 16GB storage, because Windows 8 installation files require more than 14GB space. And for better performance, USB 3.0 is strongly recommended.
3. Windows 8 iso file (choose the corresponding iso file, 32bit or 64bit).
How to Install Windows 8 on External Hard Drive Step by Step?
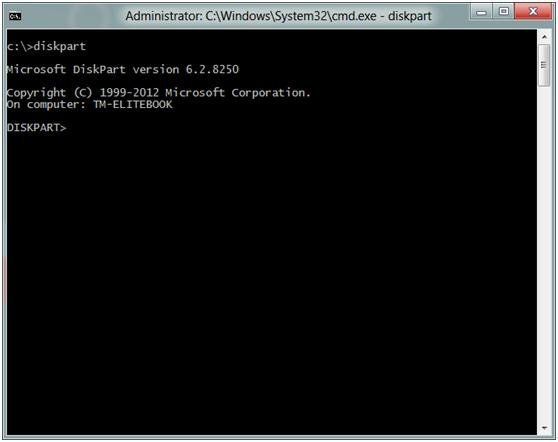
Step1. Connect the qualified USB hard drive to your computer. Use shortcut key Win+R to open Run dialog box. Enter “CMD” to launch the Windows PowerShell prompt. Once the Command prompt window pops up, input “diskpart”.
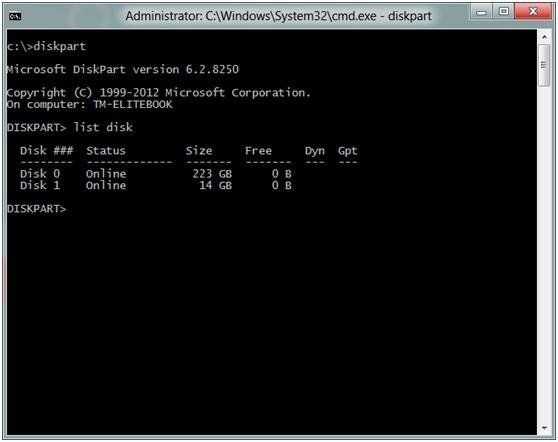
Step 2. Enter the command line “list disk” then press Enter button, so that we can view all the drives of the host computer like in the screen shot picture below. Disk 1 is the destination USB hard drive for WTG in this example.
Step 3. Enter the command lines in the picture below. This will clean the partition first, then a primary partition will be created. After that, the rest of the command lines will format the USB hard drive and activate the partition on it. The last step is to assign the drive letter, here we choose E as the drive letter.

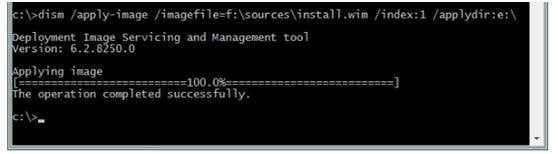
Step 4. Open Dism.exe to extract the install.wim file from drive F and move it to E drive (the destination USB hard drive), please refer to the command line in the picture below.
Step5. Enter the final command line ”bcdboot e:windows /s e: /f ALL” to ensure the USB hard drive bootable. Here ends the whole process.
Note: If you receive this message reads: “Could not open the BCD template store. Status = [c000000f]” which means the boot loader is corrupted, you can try following commands in Windows 8 repair console to rebuild BCD:
-
attrib c:\boot\bcd –h –r –s
-
del c:\boot\bcd
-
bootrec /rebuildbcd
Boot Windows 8 and go to Command Prompt as administrator. Enable hypervisor: bcdedit /set hypervisorlaunchtype auto. Restart your computer.
Install Windows 8 to USB Hard Drive via Powerful Software
AOMEI Partition Assistant Professional has Windows To Go Creator feature embedded that allows you to install Windows 7, 8/8.1, and Windows 10 on USB hard drive and external HDD. There has an easy-to-follow wizard. To learn more detailed steps, please see how to create W2G.

With this software, you can create Windows to go in Windows 7 as well as Windows 10, even with non-certificated USB flash drive. Download to have a try.