Hyper-V: Increase the Virtual Disk Size Step by Step
If you need to increase the Virtual Disk Size in Hyper-V, here we prepare the elabrate tutorial on how to expand Virtual disk size step by step.
By Lucas / Updated on May 12, 2023
About Hyper-V
First, let me make clear that this article is based on Hyper-V 2.0 (Windows Server 2008), these steps may not work for Hyper-V 3.0 (Windows Server 2012). For information on Windows Server 2012 (R2), please visit one of my other posts.
Need to increase the Virtual disk size in Hyper-V
Just like in the physical Servers, the Virtual Machine running Windows Server will also gradually run out of space, especially the system C drive, due to more data being stored. Once that happens, you will experience the “out of Disk Space on Drive C” error message on your Hyper-V. Then, you will have to expand the storage capacity to make sure the VM (virtual machine) function well.
For this task, you have to first increase the virtual disk size at the hardware level – the VMs .vmkd file. Then you can enter the VM to extend the virtual disk size via the Windows Server Disk Management. In brief, this task needs to be done via two main parts: first, make the VHD bigger and then extend the system partition to take advantage of the new space.
Preparations before increasing the virtual disk size in Hyper-V
Before trying to expanding the virtual disk size, you have to finish the following preliminary work:
1. Shut down your Virtual Machine if it is running now because some settings cannot be modified when the machine is running.
2. Remove all the snapshots of the VM if there is any one because all the snapshots will become invalid after the virtual hard disk is modified.
3. You can back up the VMDK in case some improper operations happen in the process.
Steps to increase the virtual disk size in Hyper-V
As mentioned above, expanding the virtual disk size in Hyper-V requires two main parts. Now we will show the details.
▌Part I - Increase Virtual Disk Size
Shut down the server, open Hyper-V Manager, and select ‘Edit Disk’. In the welcome screen click ‘Next’ and then click on the file path of the VHD that you want to increase the size of and then click ‘Next’ again.
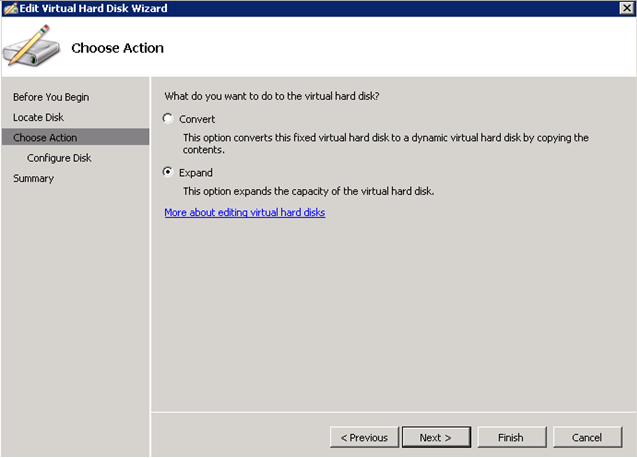
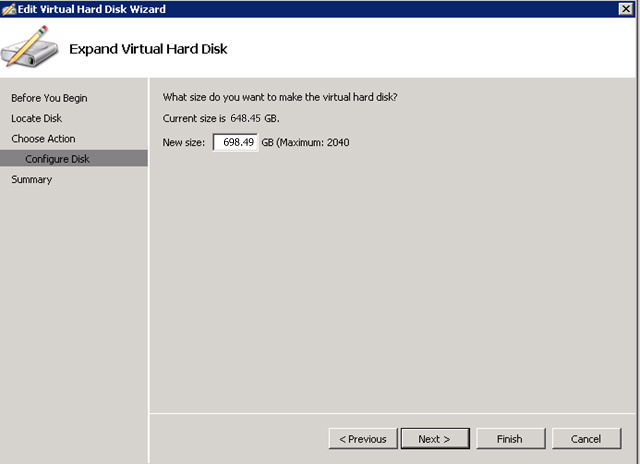
You will now be on the ‘Choose Action’ window, you should select ‘Expand’, and then click ‘Next’. When prompted, enter the new size of the virtual disk, and click "Next" once more. In this example I used a VHD which had 648.45 GB and I increased it to 698.49 GB.
You can also use the command prompt if you need to automate the process. Then you can press Win+R to open Run dialogue. Type "cmd" and hit "Enter" to open the "Command Prompt". Then type or paste the following command: "C:\Program Files\VMware\VMware Server\vmware-vdiskmanager.exe" –x 31GB "D:\Virtual Machines\Server2003Ent-x64\Windows Server 2003Enterprise x64 Edition.vmdk".
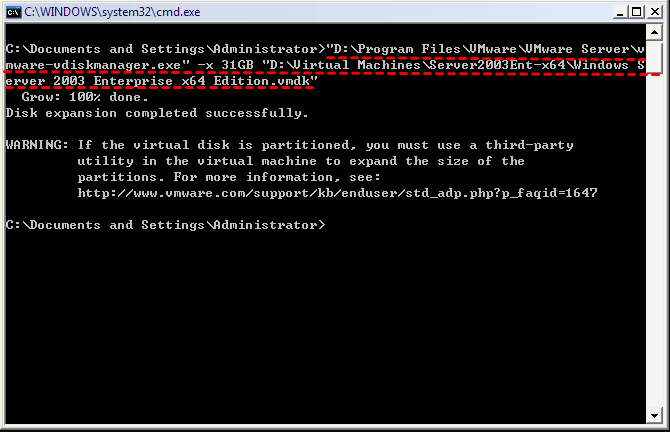
This requires the full path to your Windows virtual machine disk (vmdk). The 31GB in the example means it will resize the virtual disk to 31 gigabytes.
▌Part II –Extend C drive with the unallocated capacity on the VHD
Once the virtual disk size has been increased at the hardware level (as mentioned in the previous part) you will now be ready to extend the system partition through the Windows GUI. Open the Windows Server 2008 built-in Disk Manager and right-click on the ‘C Drive’, unfortunately, you may find that the ‘Extend Volume’ option is invalid.
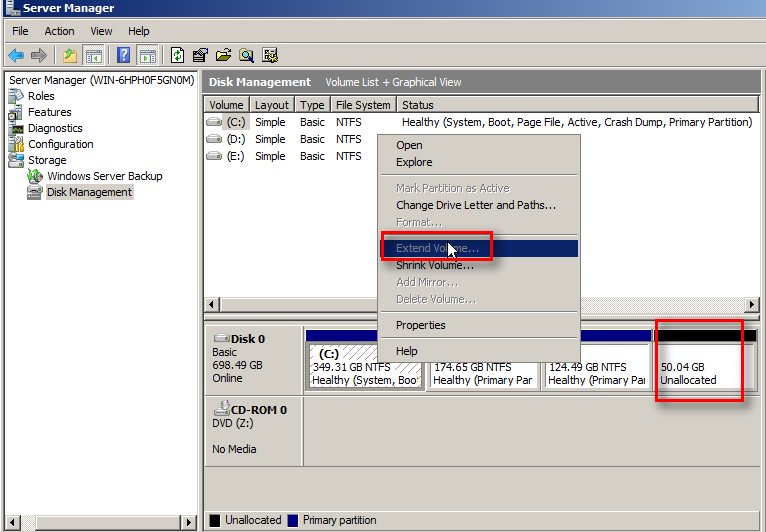
That’s because the Disk Management can only extend the NTFS volume when the unallocated space is adjacent on its right side.
In this situation, you need to turn to a third-party disk partition manager like AOMEI Partition Assistant Server Edition. This software breaks out the limitation and can directly merge the non-adjacent unallocated space into the C drive or other partition.
Only 3 steps can make it completed. Below are the specific steps.
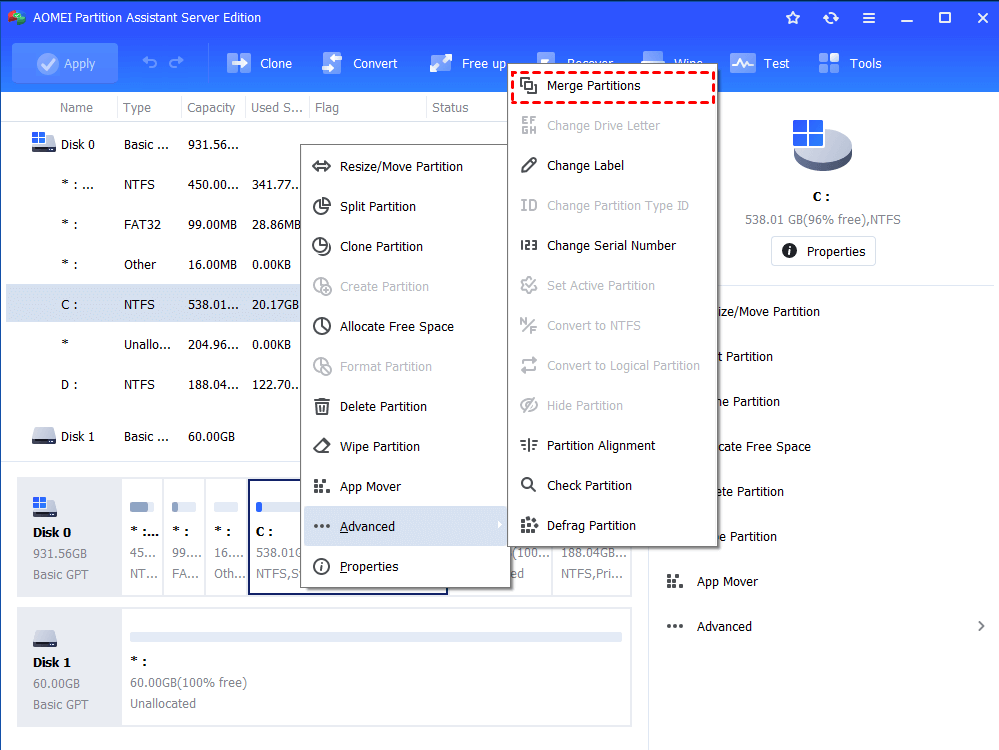
1. Install and run the program. Right-click the "C Drive" choose “Advanced” and select “Merge Partition”.
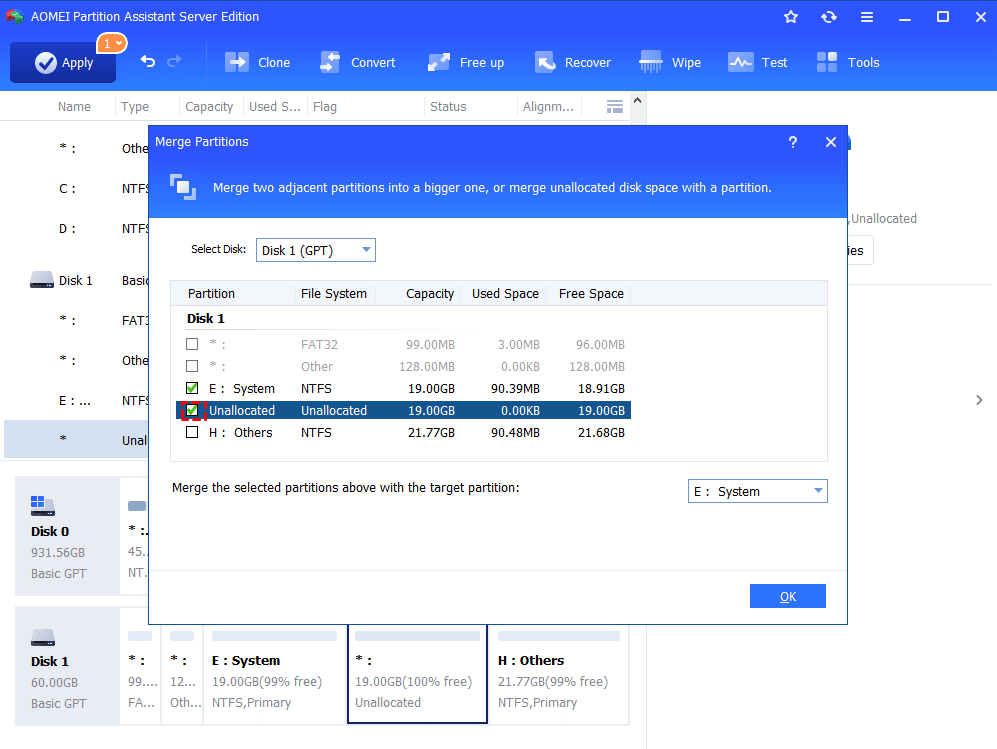
2. In the pop-up window, check the "unallocated space"option and click "OK" to go back the main window.
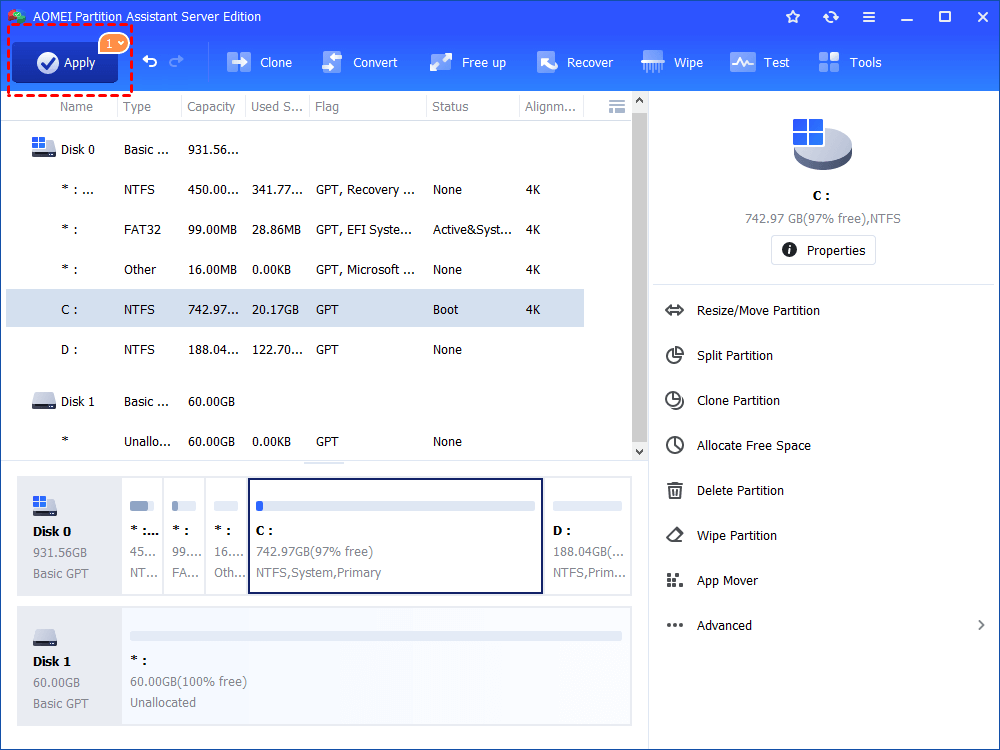
3. Here you can see the partition C has become much larger. To make it take effect, remember to click "Apply" to commit the pending operation.
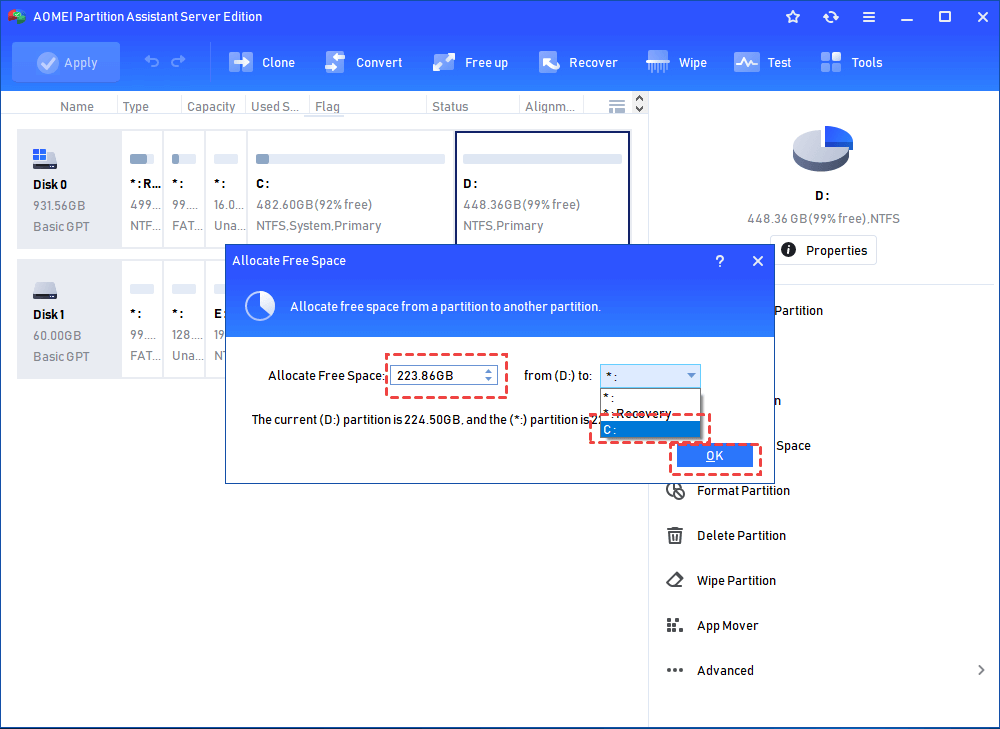
Now, the job of increasing virtual disk size in Hyper-V is finished. If it is only the C drive that runs out of space, and other partitions like D drive has lots of unused space, you can use its “Allocate Free Space” feature to directly assign some free space from one partition to another.
Summary
Now, you should know how to increase Hyper-V virtual disk size. In fact, AOMEI Partition Assistant Server Edition serves as a versatile professional partition tool which works well on all Windows Server operating systems (Server 2019, 2016, 2012 (R2), 2008, 2003) and Windows XP, Window Vista, Windows 7, and Window 8/8.1. It can copy partition, split partitions, convert MBR and GPT without deleting partition, clone hard disk, and more. To install this great software on countless computers, please try the Unlimited Version.

