How to Use USB Tool to Repair Windows 10 Stuck in Boot Loop
When you have met Windows boot loop issues, you can create and use a USB tool to repair Windows 10 stuck in boot loop quickly and easily. Both Windows built-in and third-party USB tools are involved.
By Hedy / Updated on November 14, 2024
Why Windows 10 stuck in boot loop?
A boot loop happens when your computer fails to boot into the operating system and instead restarts repeatedly. During this process, you may see the Windows logo or other startup screens, but the system never fully loads.
Here are some common reasons and solutions for why Windows 10 may get stuck in a boot loop:
✎ Corrupted system files: Corruption in critical system files due to unexpected shutdowns, software conflicts, or malware infections can prevent Windows from booting correctly.
✎ Faulty hardware: Issues with RAM, hard drives, or other hardware components can lead to boot failures.
✎ Driver issues: Incompatible or outdated drivers may cause the operating system to fail during startup.
✎ Windows updates: Failed updates or improper installations can disrupt the boot process.
✎ BIOS settings: Incorrect BIOS configurations or settings can also trigger boot loops.
How to create a Windows 10 boot repair USB tool
Creating a Windows 10 boot repair USB tool is a straightforward process that can help you troubleshoot and repair Windows startup issues. Below is a step-by-step guide to help you through the process.
- Before you begin, gather the following items:✎...
- USB drive: Ensure it has at least 8GB of storage.
- Windows 10 ISO file or Windows 10 media creation tool: You can download it from Microsoft's website.
- A Working Windows PC: You need this to create the bootable USB.
Step 1. Go to the Windows 10 download page. Click on the "Download tool now" button to download the Media Creation Tool.
Step 2. Locate the downloaded file (usually in your Downloads folder) and double-click it to run. Accept the license terms to continue.
Step 3. When prompted, choose "Create installation media (USB flash drive, DVD, or ISO file) for another PC" and click Next.

Step 4. Select the language, edition, and architecture (32-bit or 64-bit) of Windows 10 you want to install.
Step 5. Choose USB flash drive and click Next.
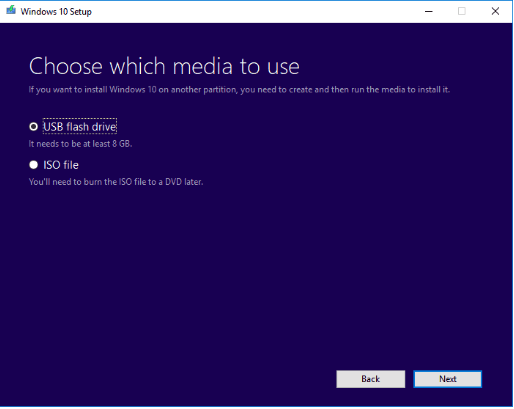
Step 6. Select your USB drive from the list and click Next to begin the download and creation process.
How to repair Windows 10 boot loop using USB drive
After the creation, follow this part to how to use this USB tool to repair Windows 10 stuck in boot loop.
Step 1. Insert the USB drive into the computer that won’t boot.
Step 2. Restart the computer and enter the BIOS/UEFI settings (usually by pressing F2, F12, Delete, or Esc during startup).
Step 3. Set the USB drive as the first boot device.

Step 4. Save your changes and exit BIOS/UEFI. Your computer should boot from the USB drive.
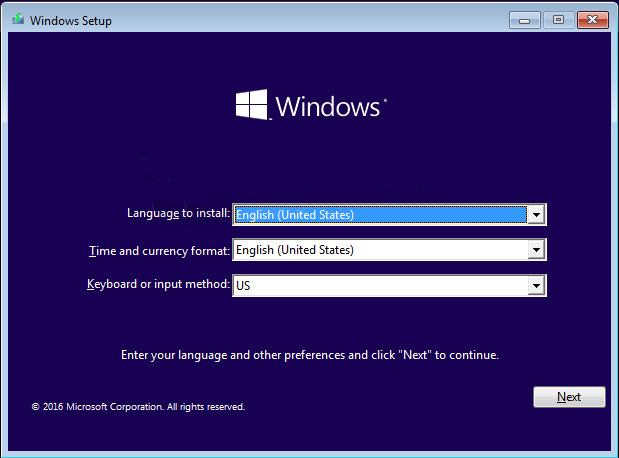
Step 5. On the Windows Setup screen, select "Repair your computer" instead of "Install now".
Then, you will get into boot repair menu, you can give different choice here to fix different issues.
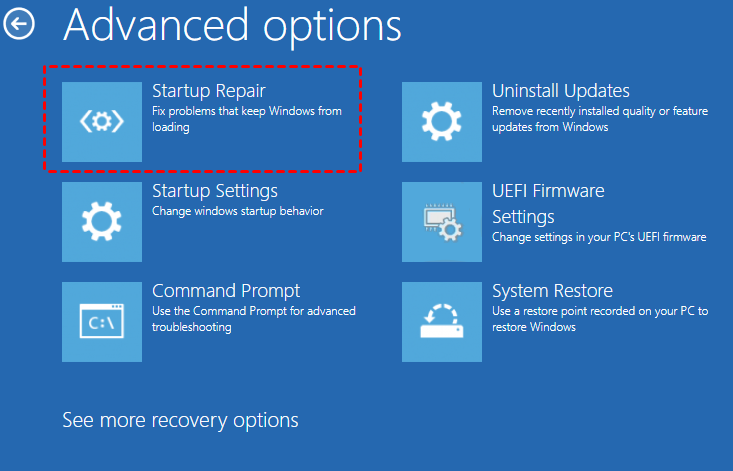
Option1. Run Startup Repair:
Step 1. Choose Troubleshoot > Advanced options > Startup Repair. Follow the prompts to diagnose and fix startup issues.
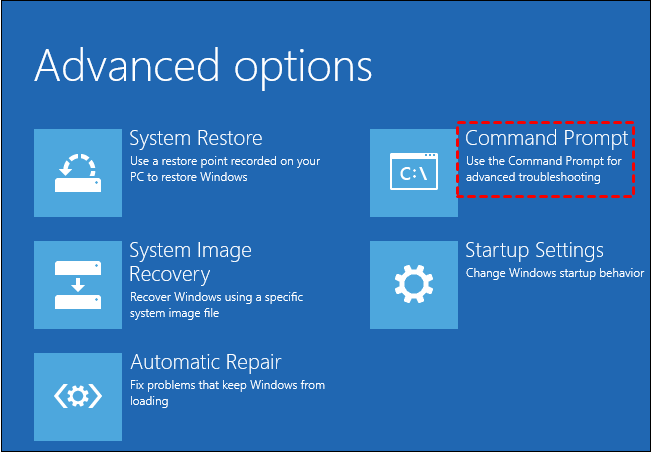
Step 2. If Startup fix is unable to resolve the issue, you can fix Windows 10 by using the "Command Prompt" under "Advanced options".
Option 2. Run System File Checker (SFC) and DISM
These tools can help repair corrupted system files:
Step 1. Open Command Prompt from the Advanced Options menu.
Step 2. Run the following commands:
sfc /scannow

Then, you can type:
Dism /Online /Cleanup-Image /CheckHealth
Dism /Online /Cleanup-Image /ScanHealth
Dism /Online /Cleanup-Image /RestoreHealth

Option 3. Rebuild BCD
If you need to rebuild BCD settings, you can run the following commands:
bootrec /fixmbr
bootrec /fixboot
bootrec /scanos
bootrec /rebuildbcd

The ultimate USB tool to repair Windows 10 stuck in boot loop
AOMEI Partition Assistant is a versatile disk management tool that not only allows you to partition your hard drive but also includes features designed to troubleshoot and repair boot issues in all editions of Windows 11/10/8/7.
✍ Key features of AOMEI Partition Assistant for boot loop issues:
✔ Check Partition: Users can assess partition health and fix errors, which prevents system instability and subsequent boot loops.
✔ Rebuild MBR: This feature repairs the Master Boot Record, restoring the boot process without data loss, especially helpful for corrupted MBR issues.
✔ Boot Repair: This function automatically detects and repairs boot-related issues, providing a quick resolution for boot loops.
With its intuitive interface, even those with minimal tech knowledge can navigate AOMEI Partition Assistant effortlessly. This makes it an ideal choice for both novices and experienced users.
Option 1. Check Partition
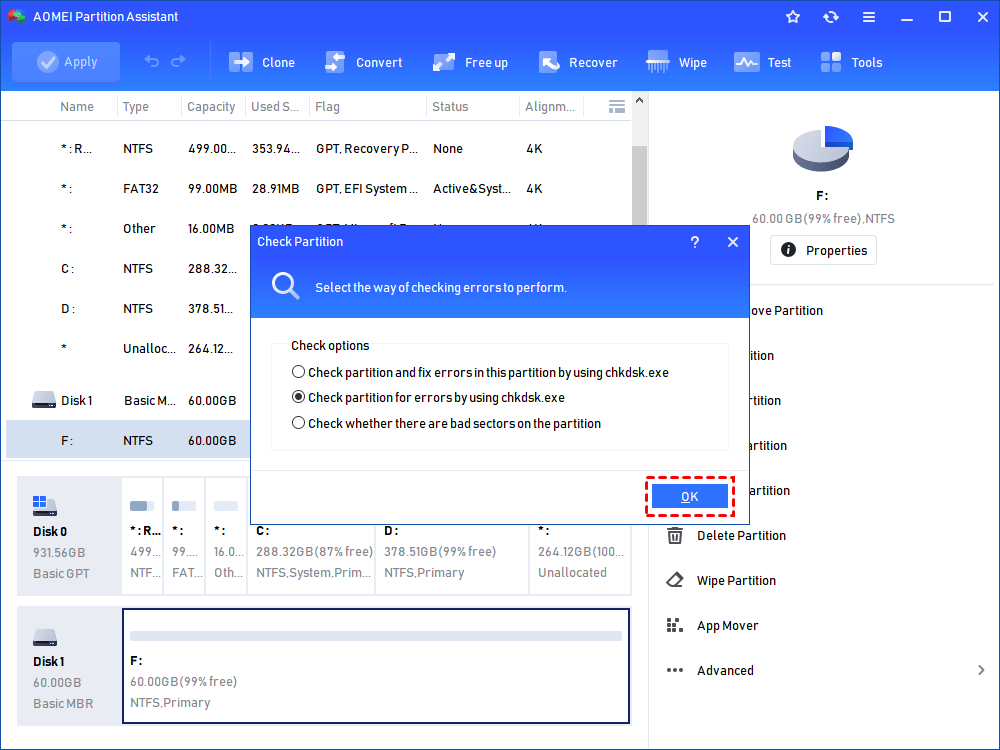
Step 1. Free download the software, install and launch it. It will display to you the basic situation of your hard drives. Select the partition that you want to check for, right-click it, select Advanced -> Check Partition.

Step 2. It will pop up a small window that you can select the way of checking errors to perform. Choose one according to your needs and click OK. It will proceed immediately.
Option 2. Rebuild MBR
Step 1. Install and launch AOMEI Partition Assistant Standard on a working PC. In the main interface, click Tools > Make Bootable Media and follow the wizard to create a Windows 10/11 bootable USB drive.

Step 2. Connect the bootable media created via AOMEI Partition Assistant Standard to the computer with a boot issue and enter BIOS to boot computer from the USB drive.
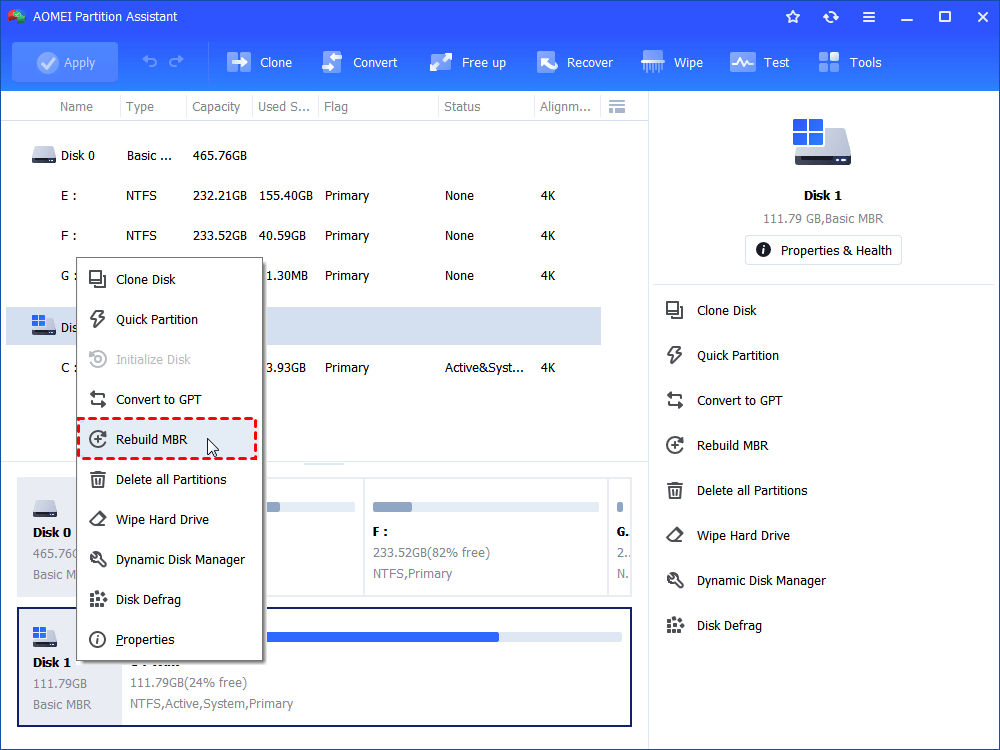
Step 3. Once logged in, the AOMEI Partition Assistant Standard will run automatically. In the main interface, right-click the system disk that contains corrupted MBR and choose Rebuild MBR.
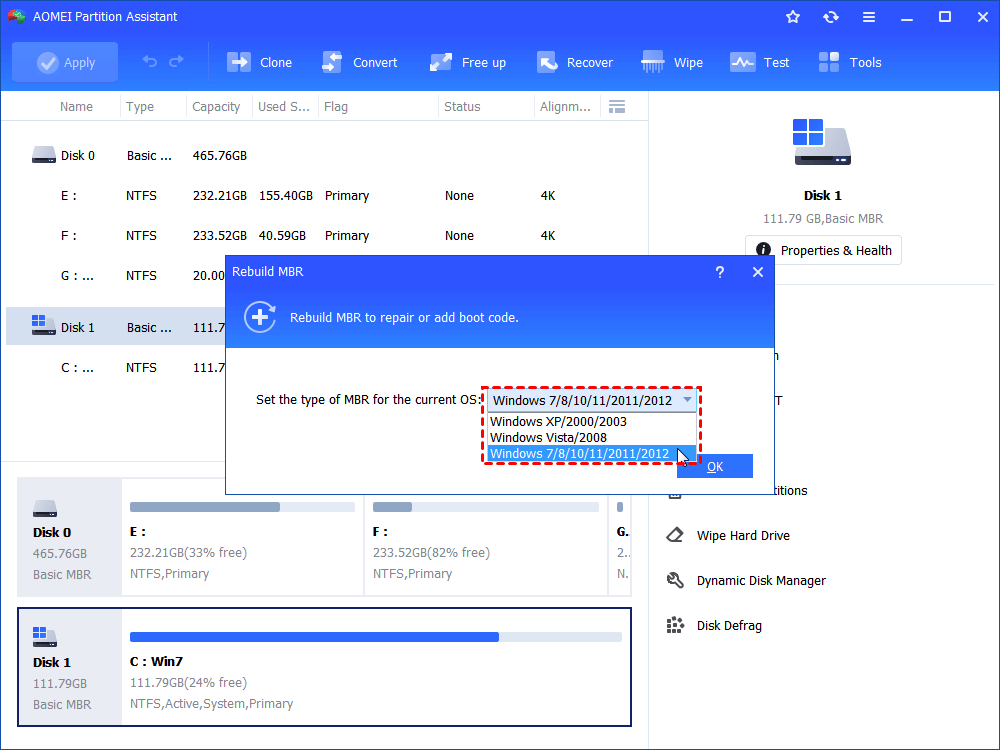
Step 4. Set the type of MBR for Windows 10 in the pop-up window. (Choose a proper MBR type according to your operating system.)
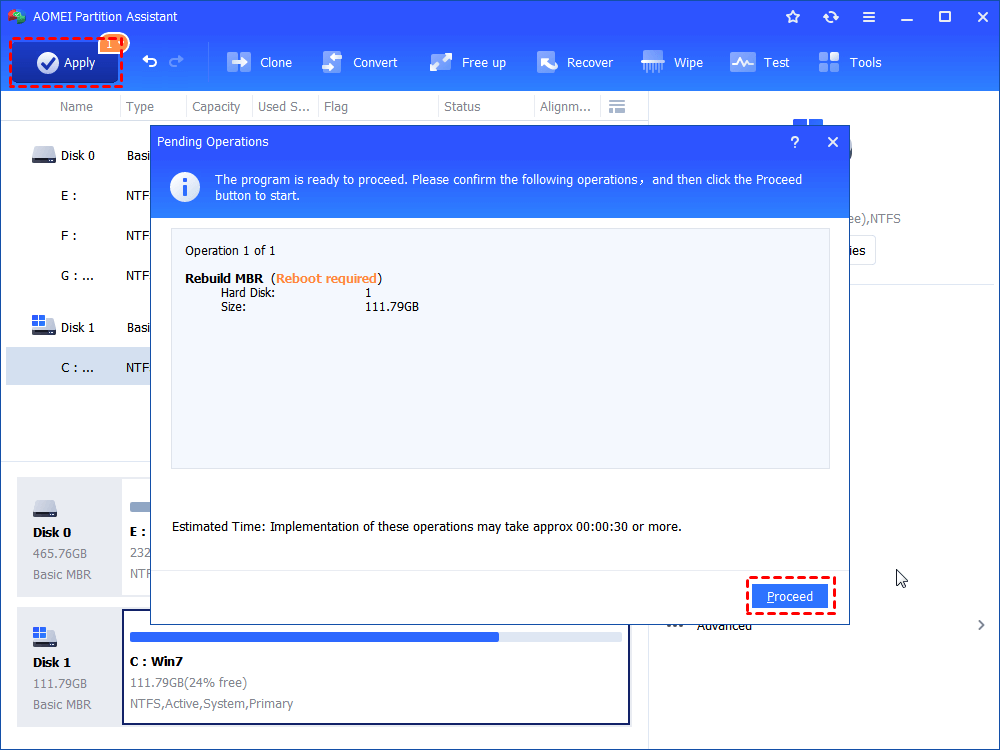
Step 5. Click Apply and Proceed on the toolbar to commit Rebuild MBR operation.
Option 3. Boot Repair
Step 1. Install and launch AOMEI Partition Assistant. In the Main Tab, please click the "Recover" tab and select "Boot Repair".

Step 2. The Boot Repair tool will pop up. Please click "Next" to start the system’s boot entries scan process.

Step 3. After the process is completed, it will display the scan result: system paths, system versions, and boot status. And, all repairable boot entries will be available to select.

Advanced Settings: Select a location to store the repaired boot entry.
◉ Repair to the current disk: The system will boot from the current disk and ensure the boot files are complete and functioning properly. (By default)
◉ Repair to another disk: This operation will repair the boot entry or create a new system boot entry to ensure the system can boot from the disk you select.

Step 4. Select one/multiple repairable boot entries you want to repair and click the "Repair" button to start the boot repair.

Step 5. Wait for the repair process to finish. Once it is finished, you can check the repair result. If it succeeds, you will get a "Repair Successfully" result.

Conclusion
In conclusion, experiencing a boot loop in Windows 10 can be frustrating, but understanding the common causes and having a plan can ease the troubleshooting process. By following the outlined steps, you can access recovery options to repair your system effectively. Additionally, utilizing tools like AOMEI Partition Assistant enhances your ability to diagnose and fix boot problems without data loss. With these strategies in hand, you'll be better equipped to restore your Windows 10 system to full functionality and get back to what matters most.