Stuck At the Login Screen in Windows 10? 5+1 Ways to Fix It!
When you stuck at the login screen in Windows 10, you can perform a boot repair. This passage will help to deal with the situation like Windows 10 stuck on welcome screen after entering password.
By Irene / Updated on April 22, 2025
What causes Windows 10 get stuck at the login screen?
Getting stuck at the login screen in Windows 10 is a common issue. It often happens after you make changes to your system. Sometimes, Windows gets stuck while trying to connect to a wireless network. Faulty hardware, like a damaged hard disk or SD card, can also be the cause. Even external devices—like a USB mouse, keyboard, Bluetooth adapter, or Wi-Fi dongle—can interfere with the startup process and cause the system to freeze on the welcome screen. Other possible reasons include these:
-
Faulty or outdated drivers – These can prevent Windows from starting properly.
-
Broken or corrupted registry files – Important system settings may be damaged.
-
Outdated software – Old or unsupported programs can cause system conflicts.
-
Startup program issues – Some apps set to run at startup might slow down or block the login process. You can change startup programs to fix it.
-
Corrupted user profile – Windows may fail to load your account if the profile is damaged, leading to a login loop.
-
Incorrect password or PIN – Entering the wrong login credentials or dealing with corrupted login files can stop access. And you may encounter Windows 10 stuck on welcome screen after entering password.
How to fix stuck at the login screen in Windows 10?
Here are 5 fixes can help to fix Windows 10 stuck on welcome screen. If you encounter issue like Windows 10 entered correct password loops back to login screen, you can jump to the following section to get the an extra fix.
🔥Fix 1. Perform a boot repair
BCD contains boot information needed to start Windows. If it's missing or corrupted, the system might fail to boot properly and freeze at or before the login screen. How to fix it? Fixing it can be tricky for non-tech users, but with the right tool, it becomes much easier. AOMEI Partition Assistant is a powerful and easy-to-use tool that can help you fix problems when your Windows 10 gets stuck on the login screen or shows a BCD (Boot Configuration Data) error. You don’t need any technical skills—its Boot Repair feature does the hard work for you.
This tool is designed for everyone, whether you’re a beginner or an expert. With just a few clicks, you can repair BCD files, fix boot problems, manage partitions, or even clone your disk. Compared to complicated command-line methods, AOMEI is much faster and more reliable. It works automatically to detect and fix the issues, making the process simple and stress-free.
You can use AOMEI Partition Assistant when:
✔️A recent update or upgrade causes boot failure.
✔️There’s a conflict in boot settings from multiple operating systems.
✔️The boot sector is damaged, possibly from malware or other issues.
It supports Windows 11, 10, 8/8.1, and 7. For server systems, there's also a specific version, AOMEI Partition Assistant Server Edition.
The Best Windows Disk Partition Manager and PC Optimizer
Step 1. Install and launch AOMEI Partition Assistant on a working PC, click "Recover"-"Boot Repair" and then click the "create a bootable disk" option to create a WinPE "Boot Repair" disk.

Step 2. Boot the PC that cannot boot into WinPE. It will automatically load the Boot Repair tool and start the boot entries scan process. All boot entries will be displayed.

- Advanced Settings (Select a location to store the repaired boot entry):
- Repair to the current disk: The system will boot from the current disk and ensure the boot files are complete and functioning properly. (By default)
- Repair to another disk: This operation will repair the boot entry or create a new system boot entry to ensure the system can boot from the disk you select.

You can either repair to the current disk or repair to another disk. Repair to the current disk is recommended for common users.
Step 3. Select one/multiple repairable boot entries you want to repair and click the "Repair" button to start the boot repair.

Step 4. Wait for the repair process to finish. Once it is finished, you can check the repair result. If it succeeds, you will get a "Repair Successfully" result.

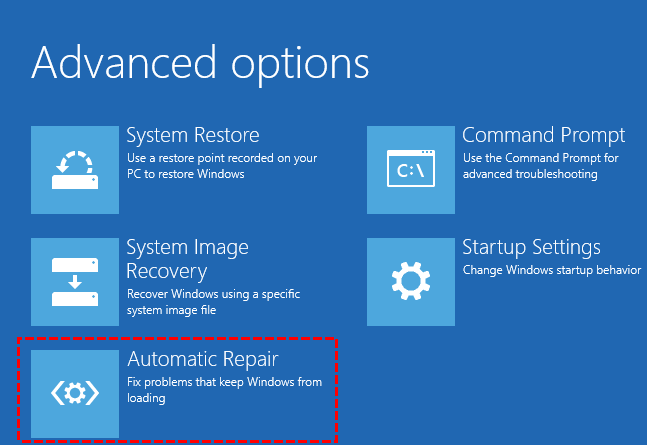
Fix 2. Perform an Automatic Repair
Step 1. Restart your computer a few times during the boot sequence. Click on the Advanced options button once it appears.
Step 2. Now select Troubleshoot > Advanced options > Automatic Repair.
Automatic Repair will now start. Follow the instructions on the screen to complete the repair. If you can’t find the Automatic Repair option, you can use Startup Repair instead. After you complete the repair process, the issue should be resolved. For users who encounter the Automatic repair loop in Windows PCs, here is a tutorial as a reference to help you easily fix the issue.
Fix 3. Disable the wireless WAN adapter in BIOS
If your Windows 10 is stuck on the Welcome screen, try disabling the wireless WAN adapter in the BIOS—this might resolve the issue. For step-by-step guidance, it's best to refer to your motherboard manual, which provides detailed instructions on how to access and change this setting.
Fix 4. Use System Restore
Step 1. Restart your PC a few times during the boot until the Automatic Repair message appears.
Now go to Troubleshoot > Advanced options > System Restore.
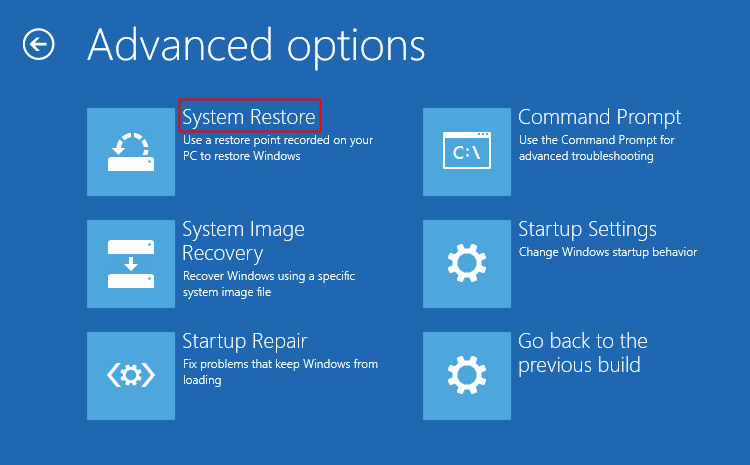
Step 2. Select your username and enter your password. Click on Next, select the desired restore point and follow the instructions on the screen to restore your PC.
After your PC is restored, check if the problem still appears.
Fix 5. Reset Windows 10
If the problem persists, you may want to try resetting Windows 10 as a last resort. This method will clean all data on the C drive, so you’d better back up at first.
You may reset Windows 10 after backing up your files by following these steps:
Step 1. Restart your PC a few times until you start Automatic Repair.
Step 2. Choose Troubleshoot > Reset this PC > Remove everything.
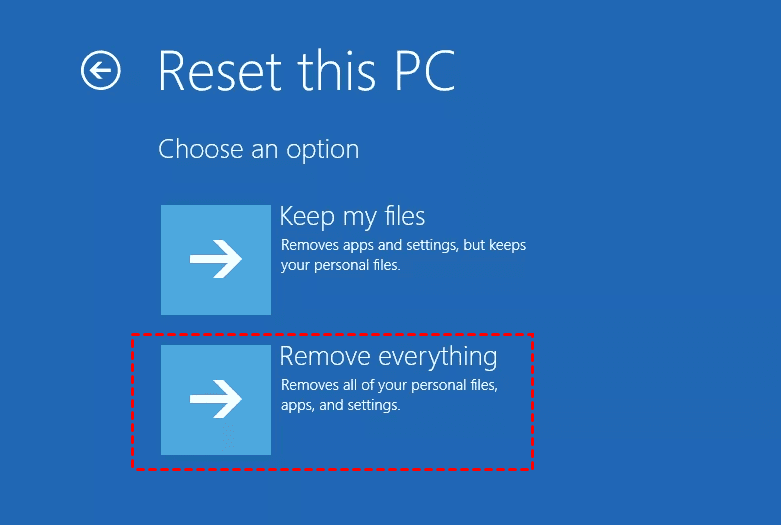
Step 3. For the next step you might be asked to insert Windows 10 installation media, so be sure to have it ready.
Step 4. Now select your version of Windows and click on Only the drive where Windows is installed > Just remove my files. You should now see a list of changes that reset will perform. If you’re ready to start, click on the Reset button. Then you need to follow the rest directions to complete the job.
When the reset is finished, you will have a fresh installation of Windows and the problem should be resolved permanently.
🌟How to fix Windows 10 stuck on welcome screen after entering password?
Sometimes, users report that entering the correct password just loops back to the login screen. This could happen if they remembered it incorrectly or if someone else changed the password. Either way, with AOMEI Partition Assistant, it's easy to reset or remove the password that's causing the Windows 10 stuck on welcome screen after entering password. All you need is to create a Windows password drive on another working Windows computer.
The Best Windows Disk Partition Manager and PC Optimizer
Part 1. Create Windows password reset USB
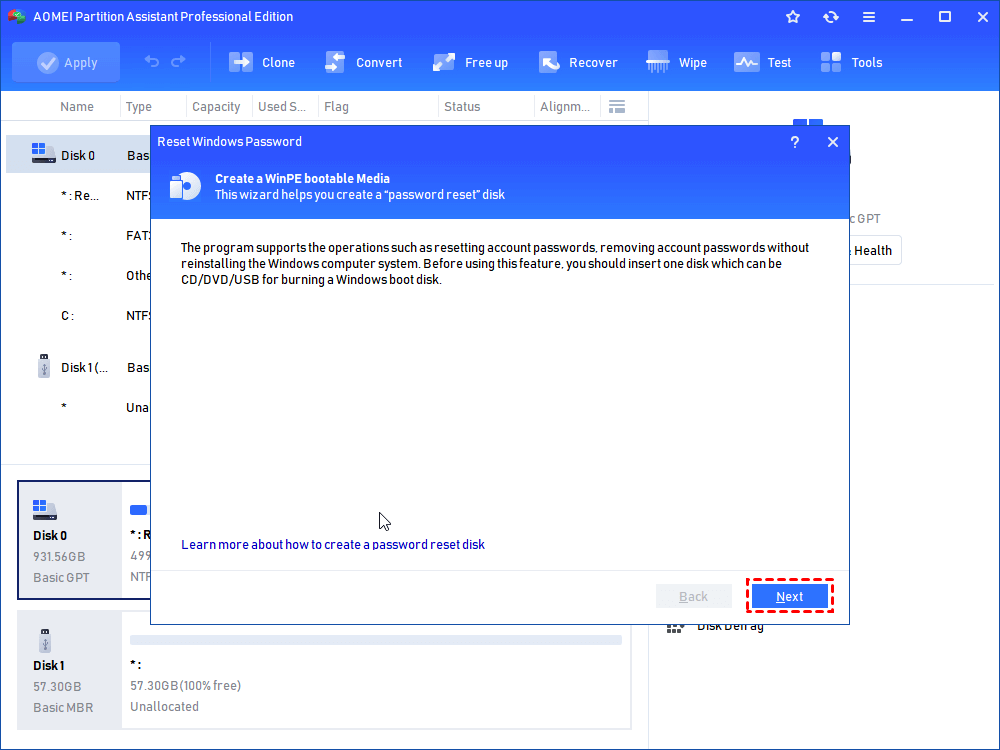
Step 1. On the main interface, click Tools> Reset Windows Password.
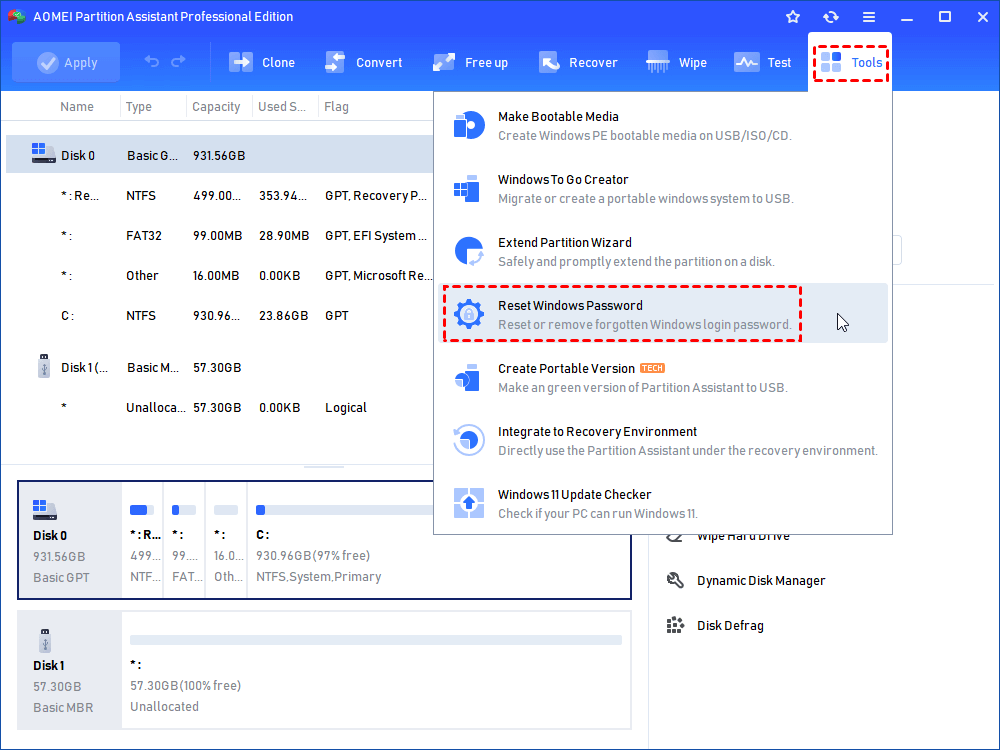
Step 2. Click Next to create a bootable USB.
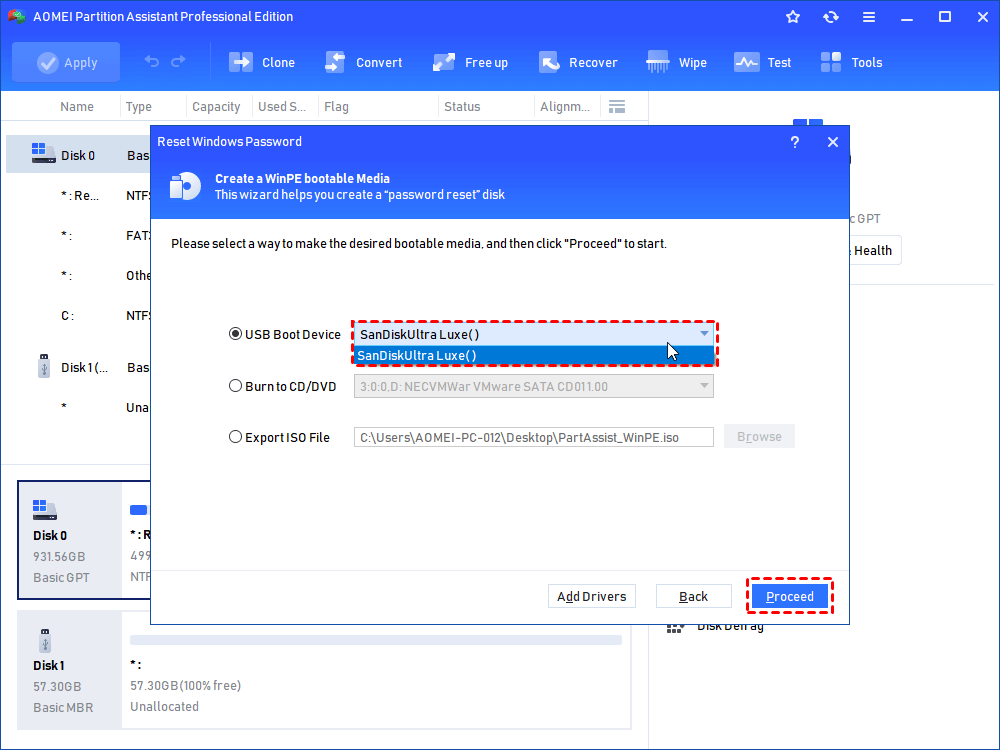
Step 3. Here, choose the target USB drive and click Proceed.
Step 4. Read the information pop out and click Yes.
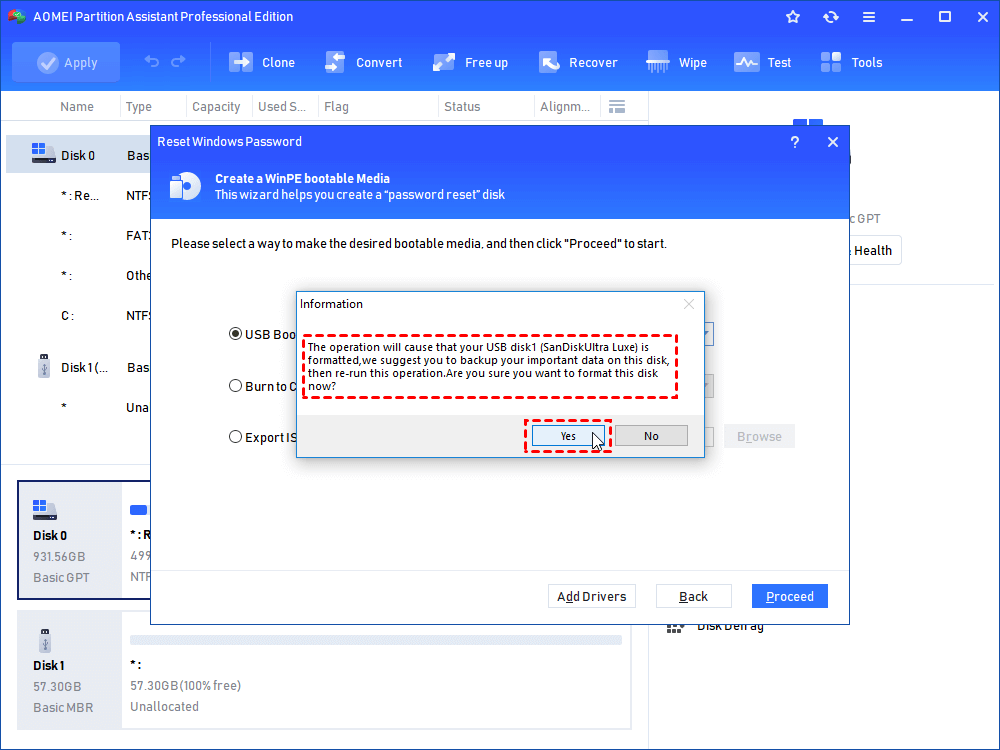
When the creation is successful, plug the USB into the PC where the password needs to be reset or removed.
Part 2. Reset forgot Windows password
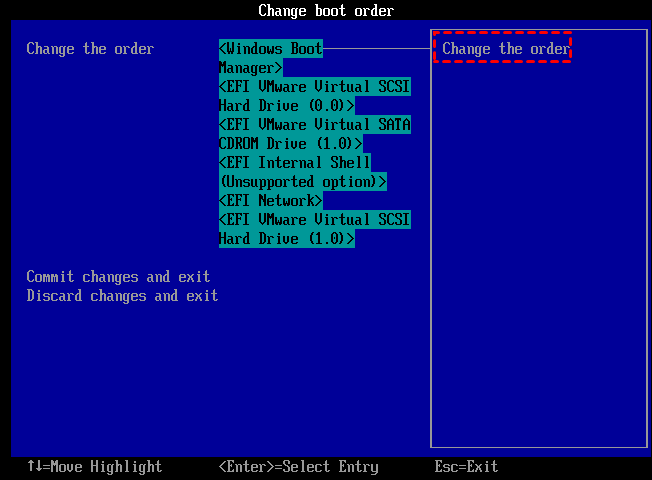
Step 1. Insert the password reset USB created just now and change boot order to make the PC boot from the USB.
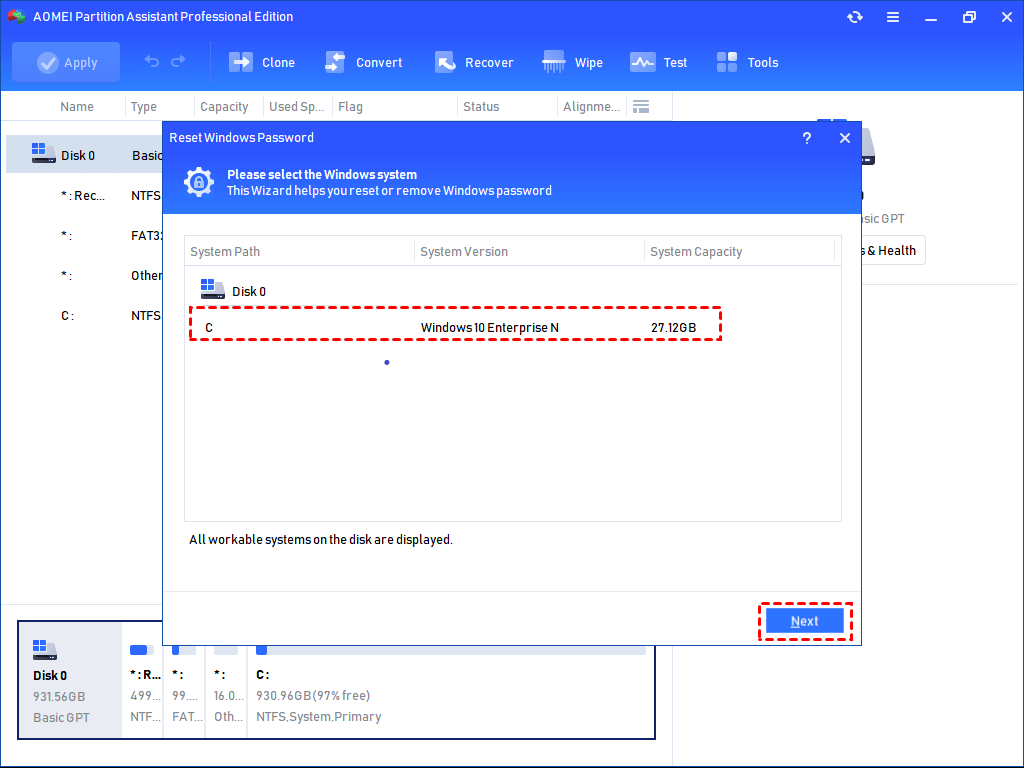
Step 2. After loading, you will see AOMEI Partition Assistant. Click Reset Windows Password and select the OS and click Next.
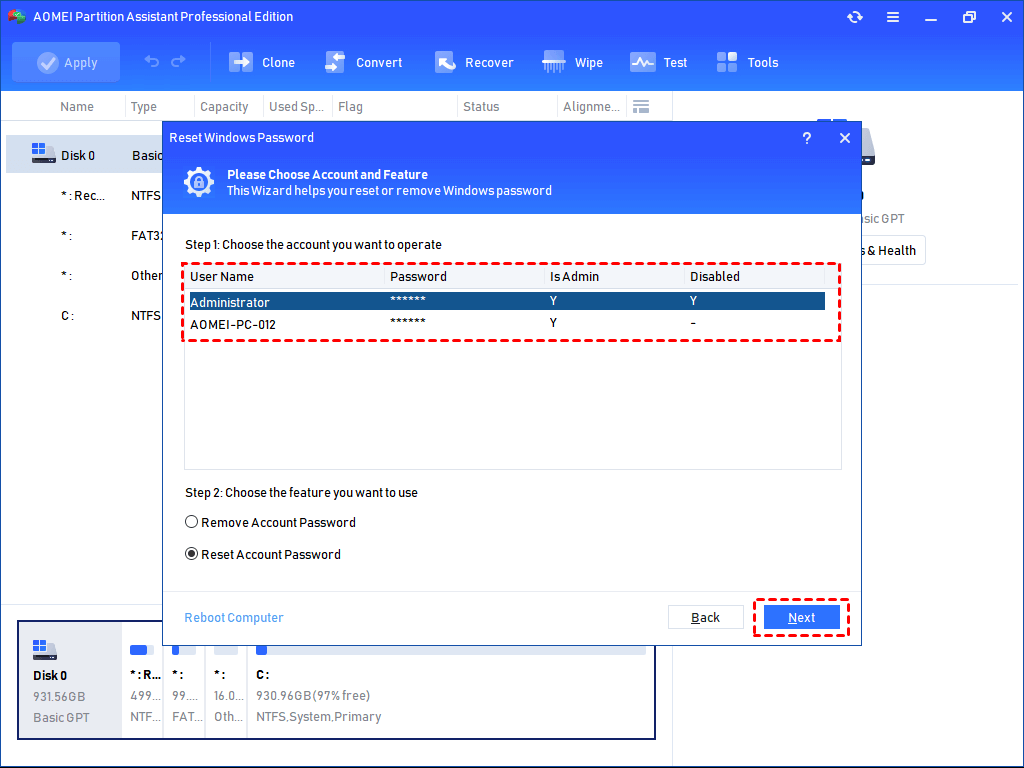
Step 3. Select the account which you want to reset the password, and then select the options you want to perform: Remove Account Password or Reset Account Password. Then, click Next.
Step 4. If you want to reset the password, type the new password in the new window and click Yes to confirm.

Step 5. Finally, restart your computer and log in to Windows 10.
Conclusion
Getting stuck at the login screen in Windows 10 can be caused by various system issues, such as faulty drivers, corrupted files, or hardware problems. Fortunately, there are several effective solutions—from using tools like AOMEI Partition Assistant to performing system repairs, disabling hardware, restoring the system, or resetting Windows. By following the right steps, most users can fix the problem and regain access to their computers without needing advanced technical skills.

