How to Fix Laptop Stuck on Getting Windows Ready
What can you do while laptop stuck on getting Windows ready? You can’t even enter the system to run tools to fix it. Don’t worry, this is a guide to show you how to fix this problem via some skills.
By Lucas / Updated on April 21, 2025
It’s a scenario many users dread: you power on your device, but the laptop is stuck on getting Windows ready. You wait, and wait, and wait—but nothing changes. This issue isn’t just frustrating; it can halt your productivity entirely. Whether it's your personal machine or your laptop stuck on the startup screen, we’re here to help.
In this guide, we’ll break down why this happens and walk you through practical, effective solutions, ranging from simple fixes to advanced boot repair using trusted tools.
Why laptop stuck on getting Windows ready?
Before diving into the fixes, it’s helpful to understand what might be causing this problem.
When a laptop gets stuck on the getting Windows ready screen, it usually means the system is trying to finish an update or complete a background process. Common causes include:
✘ Interrupted Windows Updates: Sudden shutdowns or power loss during an update can cause system corruption.
✘ Background Services Hanging: Some Windows services, like Credential Manager or Update Services may fail to respond.
✘ Corrupted System Files: These can prevent Windows from completing its startup sequence.
✘ Recent Update Gone Wrong: Faulty updates or driver changes can freeze the boot process.
✘ Peripheral Conflict: Connected devices may interfere with system initialization.
5 Ways to fix [laptop stuck on getting Windows ready]
Now, let’s go over tried-and-true solutions to this problem, starting with the easiest and moving toward more advanced techniques.
Method 1. Disconnect external devices & battery
Many people use USB devices, but some errors may occur when Windows chooses the boot media on their computer. Many users offer this solution, reporting that the error disappeared after they unplugged some peripherals. Thus, please unplug any USB devices and try to boot without them.
Step 1. Shut down your laptop completely.
Step 2. Unplug all external devices—USB drives, external keyboards, etc.
Step 3. Simply removing the battery. Shut down your laptop and remove the battery for a few minutes. Then, reconnect the battery to your laptop and see if the problem persists.
Step 4. Restart your computer.
Method 2. Boot into Safe Mode
If the laptop remains stuck, try entering Safe Mode to use built-in troubleshooting tools.
Step 1. Restart your PC while it boots. Repeat this step several times until you see the Preparing Automatic Repair message. When that happens, click on Advanced options.
Step 2. Now choose Troubleshoot > Advanced options > Startup Settings. Click the Restart button.
Once your PC restarts, you’ll see a list of options. Select any version of Safe Mode by pressing the appropriate key.

After you enter Safe Mode, we can try the Windows built-in tools to perform boot repair.
Opt 1: Disable Credential Manager Service
Credential Manager sometimes causes delays during startup.
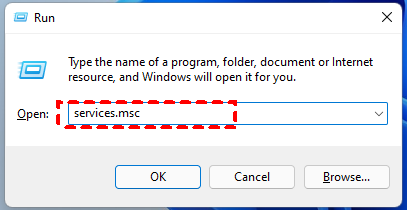
Step 1. Press Windows Key + R and enter “services.msc”. Press “Enter” or click OK.
Step 2. In the Services window, locate “Credential Manager” in the list and double-click it to open its properties.
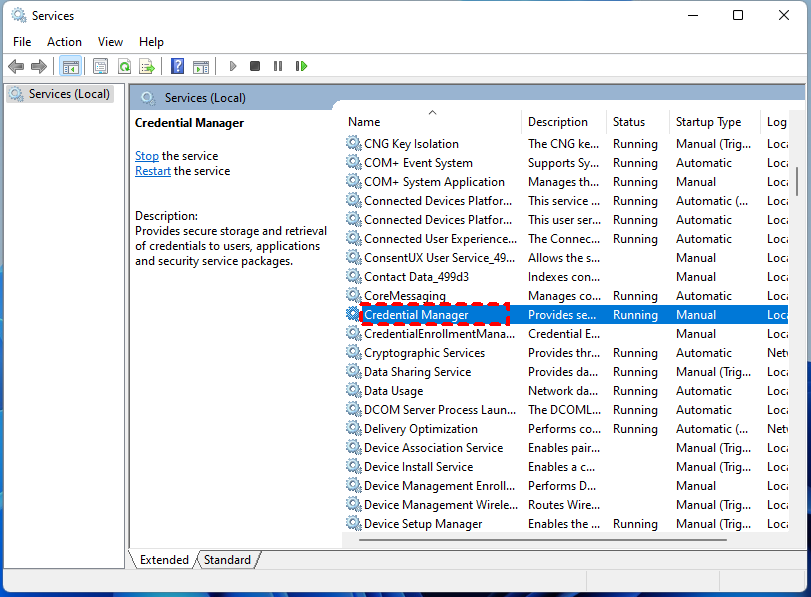
Step 3. When the Properties window opens, set the Startup type to “Disabled” and click “Apply” and “OK” to save changes.

Step 4. Restart your PC and check if the problem still appears.
Opt. 2. Change Windows Update service settings
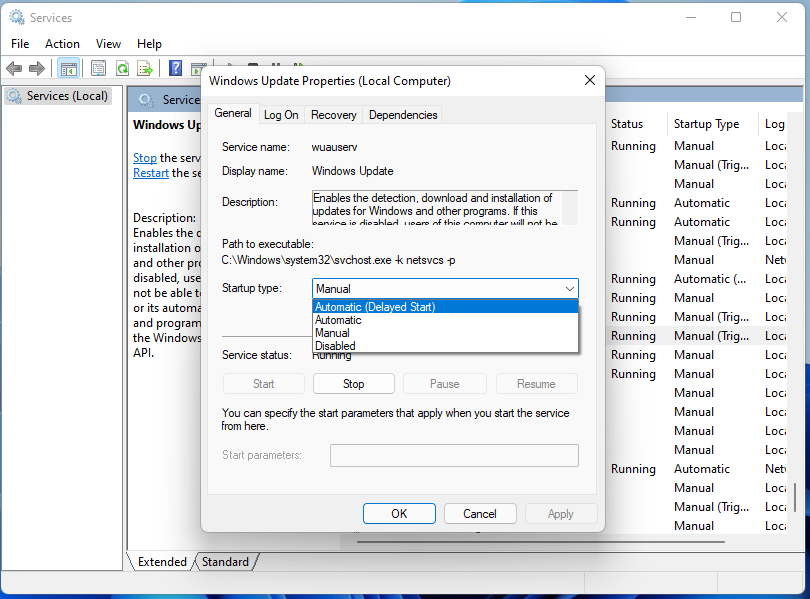
Step 1. Open the Services window as the above. Choose “Windows Update” on the list and double-click it to open its properties.
Step 2. Change the Startup type to “Automatic (Delayed Start)” and click on “Apply” and “OK” to save changes.
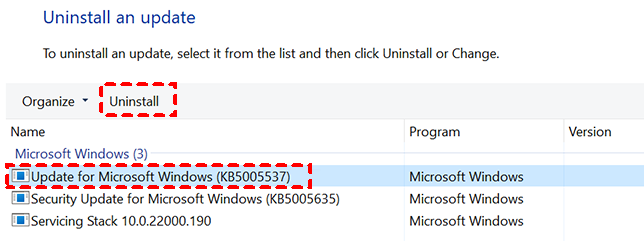
Opt. 3. Remove recently installed updates
Step 1. Press Windows Key + I to open the Settings app.

Step 2. When the Settings app opens, go to Update & security, and Now click on Update history.
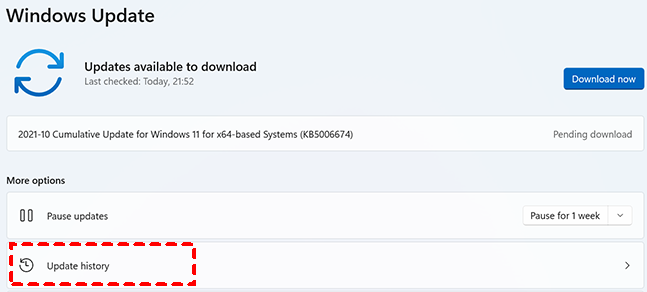
Step 3. A list of all recently installed updates will appear. Memorize the names of the recent updates. Click on Uninstall updates.
Opt. 4. Delete the Ngc directory
Step 1. Open File Explorer, and navigate to this directory: C:\Windows\ServiceProfiles\LocalService\AppData\Local\Microsoft
And click the View tab at the top and check Hidden items.
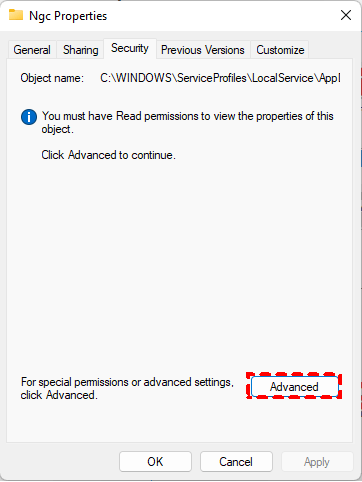
Step 2. Look for the Ngc folder and try to delete it. Right-click the directory and choose Properties from the menu.
Step 3. Go to the “Security” tab and click on “Advanced”.
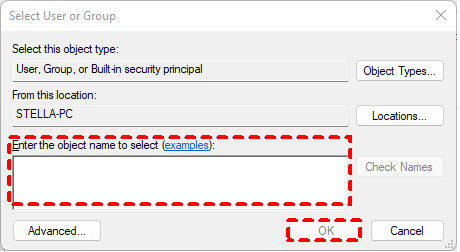
Step 4. When the Advanced Settings window opens, click “Change” in the Owner section.

Step 5. Enter your user name in the Enter the object name to select and click on the Check Names button. If everything is in order, click on OK to save changes.
Step 6. Check Replace owner on subcontainers and objects and click on Apply and OK to save changes.
Step 7. A security warning might appear. Click “Yes”. Once you delete the folder, simply restart your PC and the problem should be resolved.
Opt. 5. Restart Windows Update service
Step 1. Press Windows Key + X to open menu and choose Command Prompt (Admin) from the menu. (If Command Prompt isn’t available, you can also use PowerShell as an administrator.)
Step 2. When Command Prompt opens, you need to enter the following commands:
· net stop wuauserv
· cd %systemroot%
· ren SoftwareDistribution SD.old
· net start wuauserv
After doing that, close Command Prompt and restart your PC. Now check if the problem is resolved.
Method 3. Rub CMD Commands to fix laptop stuck on startup screen
Step 1. Restart your computer a couple of times while your PC boots to start Automatic Repair. Click on the Advanced options button once it appears.
Step 2. Select Troubleshoot > Advanced options > Command Prompt. In the CMD windows, please type the following orders:
· sfc / scannow· chkdsk c: /f /r
When the scan is finished, you can restart the PC to check, if the problem is still here, restart the PC and enter CMD again, and try the following commands:
bootrec /fixmbr
bootrec /fixboot
bootrec /scanos
bootrec /rebuildbcd
bcdedit /export C:\BCD_Backup
C:· cd boot
· attrib bcd -s -h -r
ren c:\boot\bcd bcd.old
bootrec /RebuildBcd
Y
Now you can reboot your computer to check.
Method 4. Choose third-party boot repair tool to fix [laptop stuck on getting Windows ready]
Some users may think that the above methods are a little difficult to perform. Well, you can also try third-party boot repair tool for laptop stuck on getting Windows ready issue. AOMEI Partition Assistant is a robust, user-friendly solution designed to fix serious boot issues. This Windows disk management tool offers powerful features for partition resizing, OS migration, MBR/GPT conversion, and most importantly, boot error repair. It’s suitable for all levels of users and supports all major Windows versions.
Step 1. Install and launch AOMEI Partition Assistant on a working PC, click "Recovr"-"Boot Repair" and then click the "create a bootable disk" option to create a WinPE "Boot Repair" disk.

Step 2. Boot the PC that cannot boot into WinPE. It will automatically load the Boot Repair tool and start the boot entries scan process. All boot entries will be displayed.

✍ Advanced Settings(Select a location to store the repaired boot entry):
1. Repair to the current disk: The system will boot from the current disk and ensure the boot files are complete and functioning properly. (By default)
2. Repair to another disk: This operation will repair the boot entry or create a new system boot entry to ensure the system can boot from the disk you select.

You can either repair to the current disk or repair to another disk. Repair to the current disk is recommended for common users.
Step 3. Select one/multiple repairable boot entries you want to repair and click the "Repair" button to start the boot repair.

Step 4. Wait for the repair process to finish. Once it is finished, you can check the repair result. If it succeeds, you will get a "Repair Successfully" result.

Now you can unplug the USB and reboot your laptop to have a check.
Method 5. Try an Automatic Repair
Step 1. Restart your computer a few times during the boot sequence. Click on the Advanced options button once it appears.
Step 2. Now select Troubleshoot > Advanced options > Automatic Repair.
Automatic Repair will now start. Follow the instructions on the screen to complete the repair.
If you can’t find the Automatic Repair option, you can use Startup Repair instead.
Method 6. Use System Restore
Step 1. Restart your PC a few times during the boot until the Automatic Repair message appears.
Now go to Troubleshoot > Advanced options > System Restore.
Step 2. Select your username and enter your password. Click on Next, select the desired restore point and follow the instructions on the screen to restore your PC.
Ending
When your laptop is stuck on getting Windows ready, don’t panic. This common issue can stem from software conflicts, recent updates, or bootloader problems. By following the step-by-step fixes above—from Safe Mode tweaks to full-on bootloader repair—you can usually get your system running smoothly again.
AOMEI Partition Assistant is an excellent tool for more complex cases. It’s a great long-term companion for anyone who manages or repairs Windows PCs. It not only simplifies boot repair but also offers advanced functions like:
Check Partition
Disk Speed Test
Data recovery
OS migration without reinstalling Windows
Partition resizing without data loss
...

