How to Use Boot Startup Repair for Windows 7?
This post introduces how to use boot startup repair for Windows 7. It also shares what to do if the startup repair in Windows 7 not working or looping.
By Irene / Updated on October 28, 2024
What is boot startup repair in Windows 7?
On Windows 7, if your computer isn't starting properly, you can use the Windows Recovery Environment (WinRE) to fix the problem quickly. Startup Repair is a tool that helps solve common issues that stop your computer from booting up. It can address problems like corrupted or broken registry entries, missing or damaged system files or drivers, corrupted disk metadata, boot configuration errors, and hardware issues with memory or the hard disk.
However, Startup Repair cannot fix hardware failures, such as a failing hard disk or incompatible memory. It also cannot recover personal files like photos or documents. It is an easy-to-use tool for diagnosing and fixing problems when Windows 7 fails to start properly and you can't access Safe Mode.
How to use boot startup repair in Windows 7?
If you want Windows 7 boots into startup repair, here is a comprehensive guide.
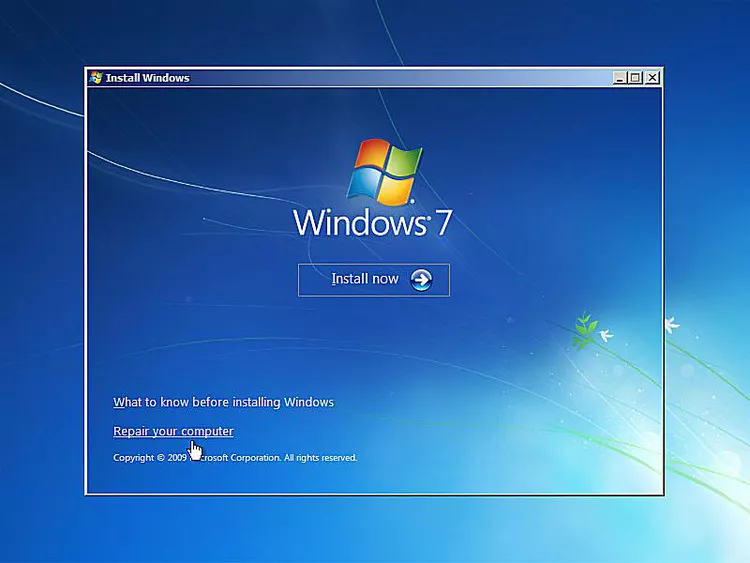
Step 1. To begin the Windows 7 Startup Repair process, please boot from the Windows 7 DVD. Look for the message "Press any key to boot from CD or DVD..." and press a key to continue. If you don't press a key, your computer will attempt to start from the installed operating system. In that case, you can restart your computer and try again.

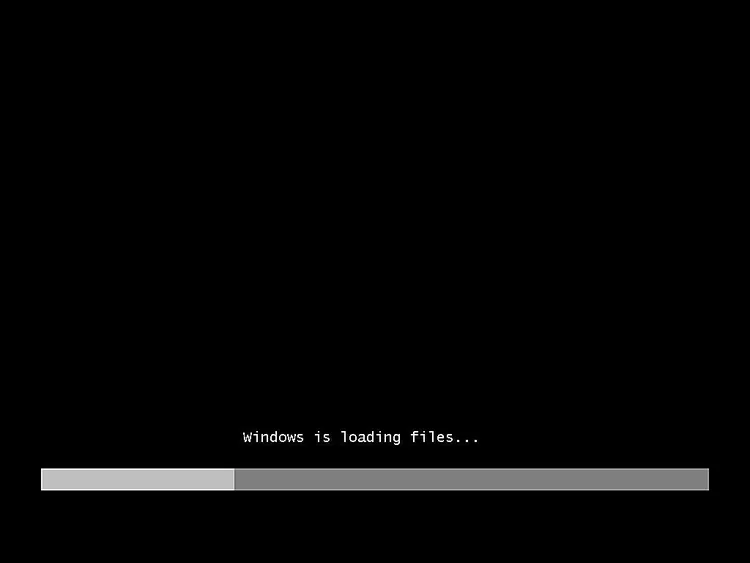
Step 2. Wait for the Windows 7 setup process to load the necessary files for the task you want to perform.
Step 3. Configure the Windows 7 language and other settings, and then click "Repair Your Computer"
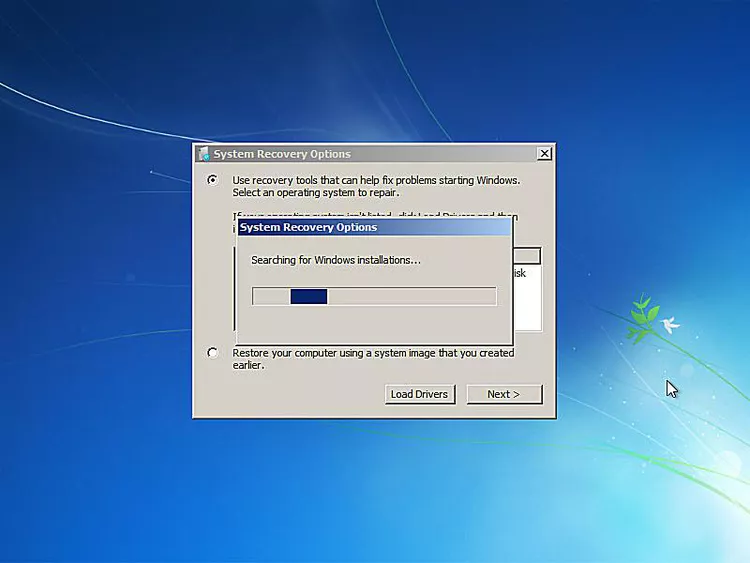
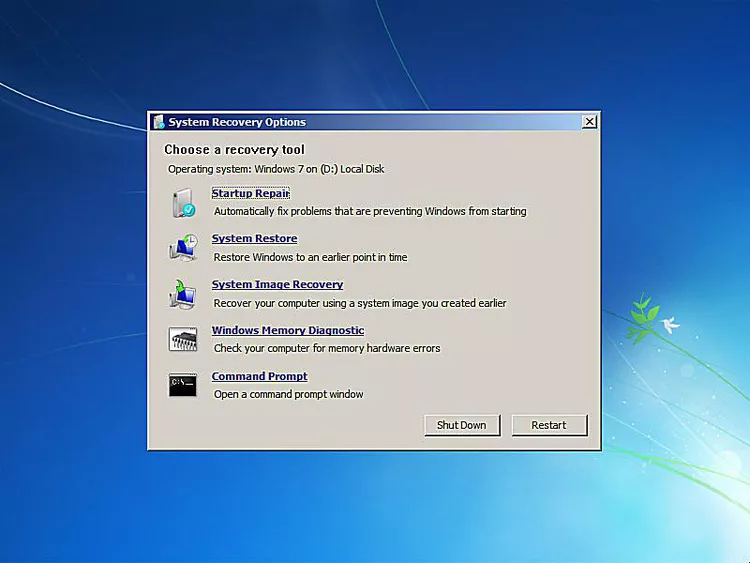
Step 4. Wait for the System Recovery Options to locate Windows 7 on your computer. This set of tools, which includes Startup Repair, will search your hard drive(s) for any Windows 7 installations. You don’t need to take any action at this stage; just wait. The search for Windows installations should take only a few minutes at most.
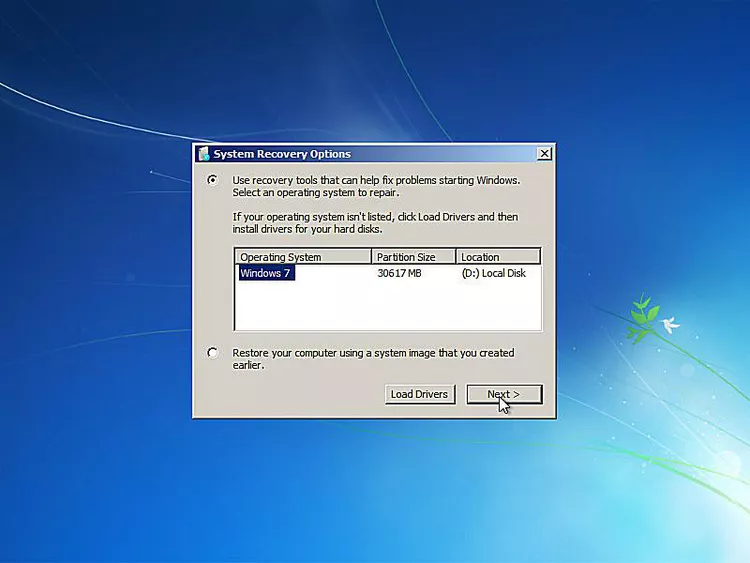
Step 5. Choose the Windows 7 installation you want to repair with Startup Repair and click "Next."
Step 6. Select the Startup Repair tool from the list of recovery options in the System Recovery Options menu.
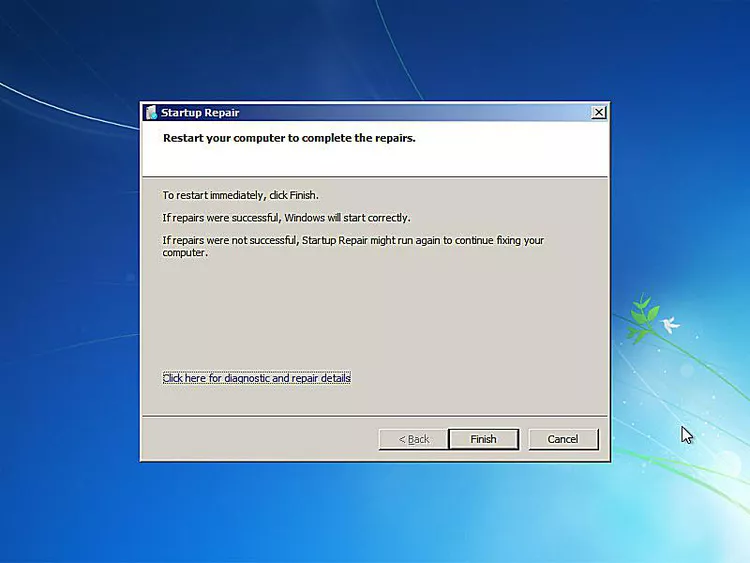
Step 7. Wait while Startup Repair searches for problems with the Windows 7 files. After it attempts to repair any issues, you can choose "Finish" to restart your computer and return to Windows 7.
What to do when Windows 7 startup repair not working
The boot startup repair in Windows 7 is practical for fixing issues. But sometimes you may find your Windows 7 computer stuck on the Startup Repair loop.
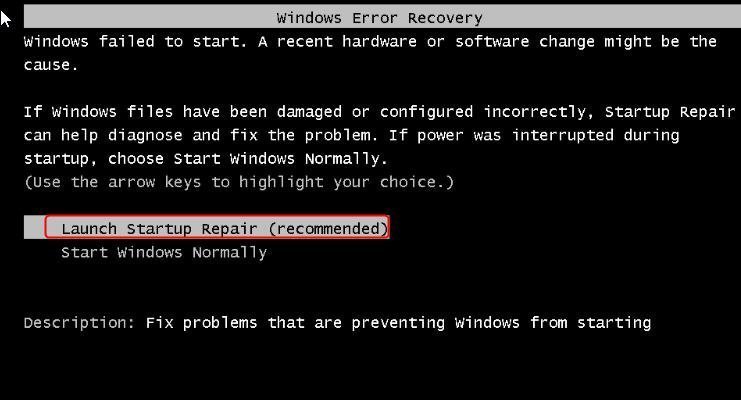
Or the Windows 7 Startup Repair not working issue appear.
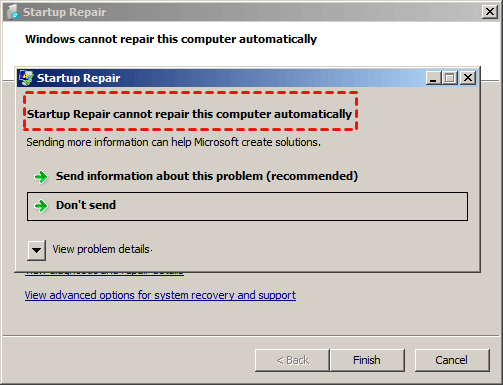
At this time, you can use the best alternative for fixing Windows 7 boot issues. AOMEI Partition Assistant is a professional disk manager that can solve many disk issues. It specially focuses on repairing damaged or missing Boot Configuration Data (BCD) files, allowing users to restore normal boot functions quickly. You can use this tool if the system fails to boot and shows errors like "Boot Configuration Data file is missing" or "Boot Configuration Data file is corrupted," if the boot configuration is corrupted after an update, in cases of conflicts in a multi-OS setup, or if there’s boot sector corruption due to a virus or other issues.
The Best Windows Disk Partition Manager and PC Optimizer
Step 1. Prepare a blank USB and connect it to a working PC that has installed AOMEI Partition Assistant, click "Recover" >"Boot Repair" and then click the "create a bootable disk" option to create a WinPE "Boot Repair" disk.

Step 2. Boot the PC that cannot boot into WinPE. It will automatically load the Boot Repair tool and start the boot entries scan process. All boot entries will be displayed.

Step 3. Select the repairable boot entries you want to repair and click the "Repair" button to start the repair.
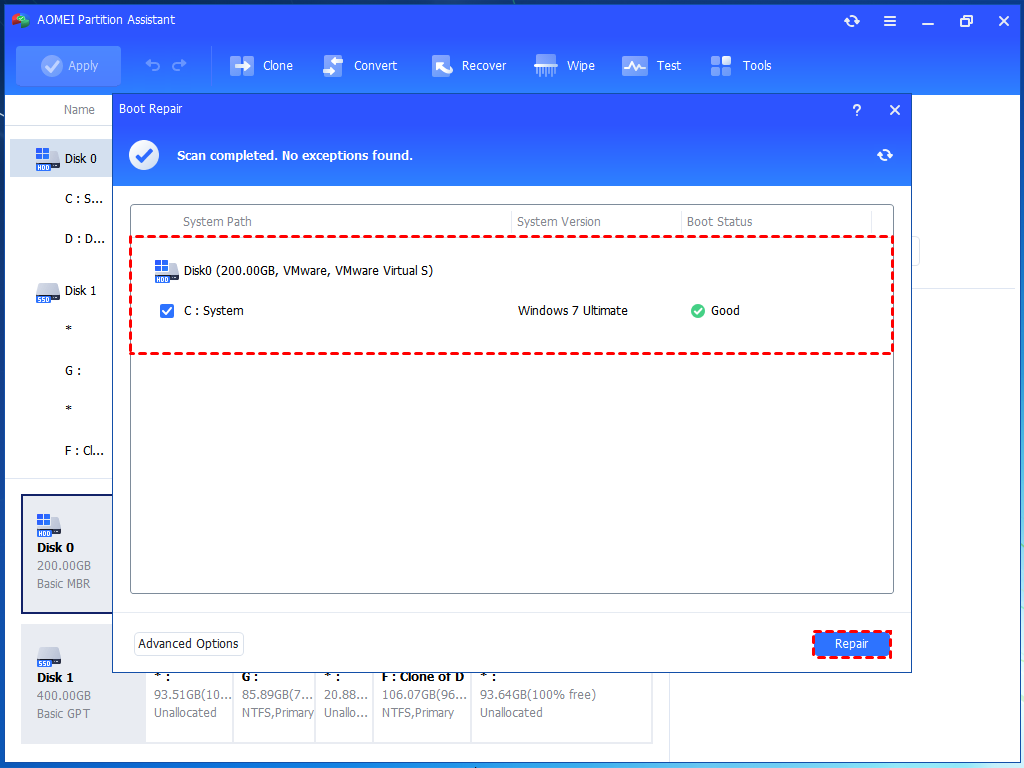
Step 4. Once the repair is repaired successfully, you can remove the bootable disk and boot the PC from the original system drive.

Conclusion
The boot Startup Repair in Windows 7 will be helpful when you encounter boot issues. However, if you meet the problem Startup Repair not working or looping, it is time to use the handy tool, AOMEI Partition Assistant. It also lets you shred file with random data in Windows 7, free up space, speed up Windows 7, fix issues like C drive NTFS error in Windows 7, and so on. If you are using Windows Server, you can choose its Server edition.

