Why Dose Safe Mode Require A Password Windows 10?
“Why does Safe Mode require a password on Windows 10 computer?” If you can’t enter Safe Mode because of Windows password, you can try the methods from this post and quickly remove password for your PC.
By Lucas / Updated on April 21, 2025
When booting into Safe Mode on Windows 10, users are often surprised to find they need to input a password—especially when they normally log in using a PIN or even no credentials at all. This article explains “why does Safe Mode require a password Windows 10”, explores workarounds to enter Safe Mode without a password, and introduces useful solutions to remove password from Windows PC.
What is Safe Mode on Windows computer?
Safe Mode is a diagnostic startup mode in Windows that loads only essential drivers and services. If a problem doesn’t occur while the system is in Safe Mode, it typically indicates that the issue isn’t related to the default system settings or basic hardware drivers.
While Safe Mode might not always reveal the exact source of the problem, it’s a valuable step for narrowing down potential causes and troubleshooting errors on Windows devices.
There are two types of Safe Mode: the standard Safe Mode and Safe Mode with Networking. The latter includes additional network drivers and services, enabling access to the internet and other networked devices. Depending on what you need to do, you can choose the appropriate version to assist with your troubleshooting.
Why does Safe Mode require a password?
Due to increased security protocols, Safe Mode disables most third-party authentication tools, including Windows Hello (PIN, fingerprint, or facial recognition). Windows prioritizes security over convenience in Safe Mode. Since PINs are stored locally and linked to TPM (Trusted Platform Module), they are unavailable in this minimal boot environment. That’s why Safe Mode insists on the Microsoft account or local user password instead, which also means you must enter the actual account password. This prevents unauthorized access in a recovery environment.
How to enter Safe Mode without password
If you've forgotten your password or only use a PIN, you might feel locked out. But don’t worry—here are three reliable fixes to help you enter Safe Mode without a password.
Method 1. Try your password not PIN
When accessing Safe Mode, you’ll need to enter your actual Windows account password—not your PIN. This often confuses users, as the two are easily mistaken. A PIN is usually a short 4-digit number, while a password is typically longer and more complex.
If you receive a message stating that your Safe Mode credentials are incorrect on Windows 10 or 11, try entering your full password again carefully to ensure it's accurate.
Sometimes, users forget they’ve recently changed their password. If the one you usually use doesn’t work, try an older password—you might have better luck logging in with that.
Method 2. Enter Safe Mode with Networking
If your password is tied to a Microsoft account, you may need internet access to authenticate.
Step 1. Press and hold the Shift key, then, click the Start button, select the Power button, and click Restart.
Step 2. Your computer will restart and boot into the troubleshooting screen. Then, you need to go to Troubleshoot > Advanced options.
Step 3. Select the Startup Settings option to continue.

Step 4. On the next page, click the Restart button.
Step 5. Then, you will see the Startup Settings screen. You can see the Enable Safe Mode with Networking option is on the fifth line. You need to press the F5 button to enable this option.
Method 3. Remove password via bootable drive
In this method, we’ll show you 2 tools for removing password via a bootable drive or USB.
Option 1. Create a Windows installation media to remove password
Step 1. On another working PC, go to the Windows 10/11 software download page to download a Windows media creation tool.
Step 2. Prepare a USB drive that has at least 8GB of space and connect it to your computer.
Step 3. Open your downloaded Windows 10 or Windows 11 media creation tool.
Step 4. Agree with the license terms by clicking the Accept button.
Step 5. On the next What do you want to do? Page, select Create installation media for another PC and click the Next button to continue.
Step 6. Select the language, edition, and architecture for Windows 10 or Windows 11 on the next screen.
Step 7. Select USB flash drive and click Next to continue.
Step 8. Select your plugged USB flash drive on the next page and click Next. Then, this tool will begin to create a Windows 10 or Windows 11 bootable drive. You need to wait patiently until the whole process ends.
After you make sure the Windows 10 or Windows 11 bootable drive is prepared, it’s time to remove the password to help you access safe mode without password.
Step 1. Boot your computer from the Windows 10/11 bootable drive. (You’ll need to enter BIOS to change the boot drive)
Step 2. After you enter the setup window, follow the instructions, and click the Repair button from the bottom-left corner.
Step 3. Go to Troubleshoot > Advanced options > Command Prompt to continue.
Step 4. Type the following commands and press Enter to run them one by one:
C:
bcdedit /deletevalue {default} safeboot
Or, you can run this command instead:
bcdedit /deletevalue safeboot
Step 5. When the commands run completely, you need to restart your computer. Then, you can boot your PC into safe mode and see if the issue is solved.
Option 2. Create a Windows password drive to remove password
If you don’t want to create a Windows installation media and use CMD via complex steps and commands, another way to fix this problem is to try a third-party tool to make a password drive. AOMEI Partition Assistant Professional is a reliable disk management and Windows repair tool. One of its advanced features is resetting or removing Windows local passwords without logging in.
No CMD or technical skills needed
Works on all Windows 11/10/8/7
Easy to use interface
Also offers partition recovery, disk cloning, and SSD management
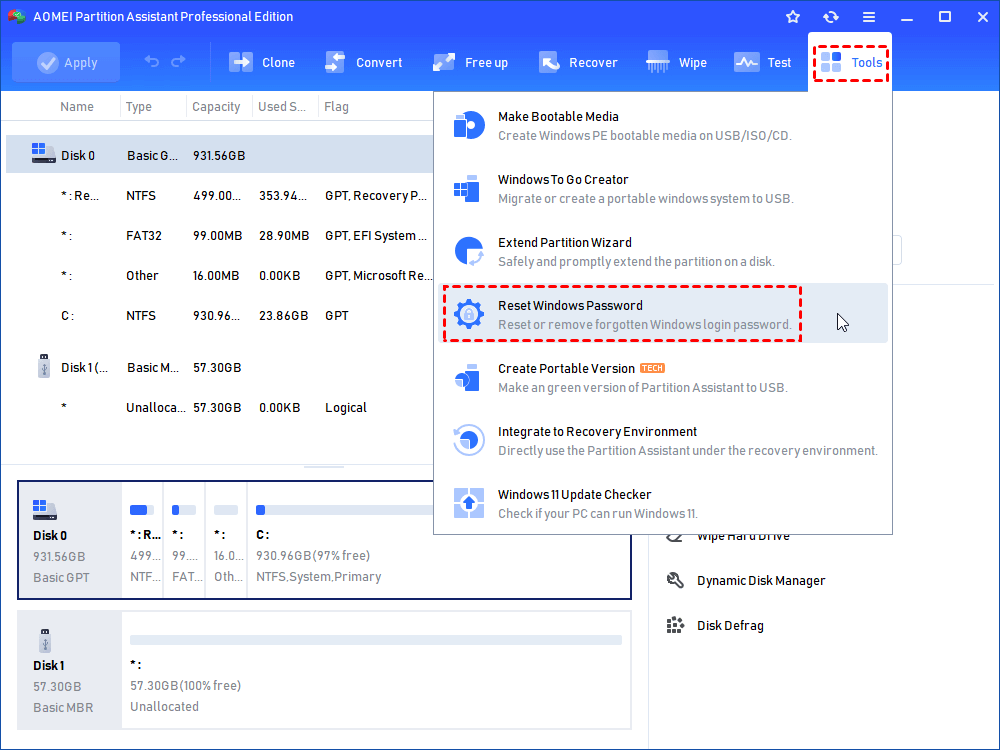
Step 1. Plug a USB into your computer and launch the installed AOMEI Partition Assistant. Select “Tools” on the top side and click “Reset Windows Password” from the menu.
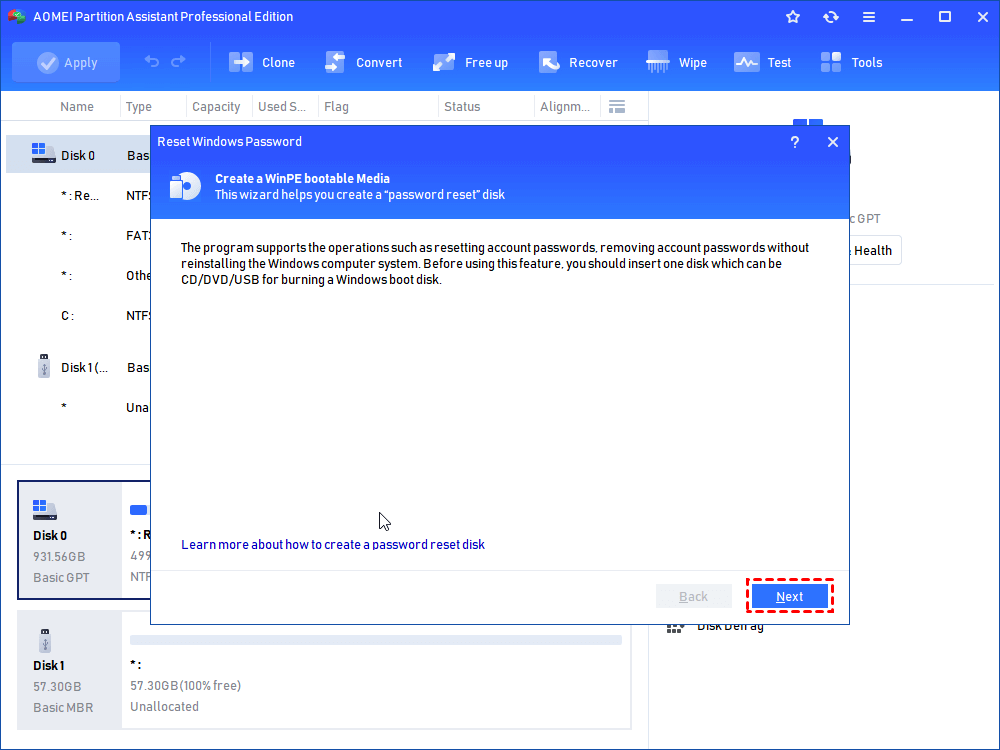
Step 2. There will be pop-up window that notice you to create a WinPE bootable media. Read the guidance and then click “Next”
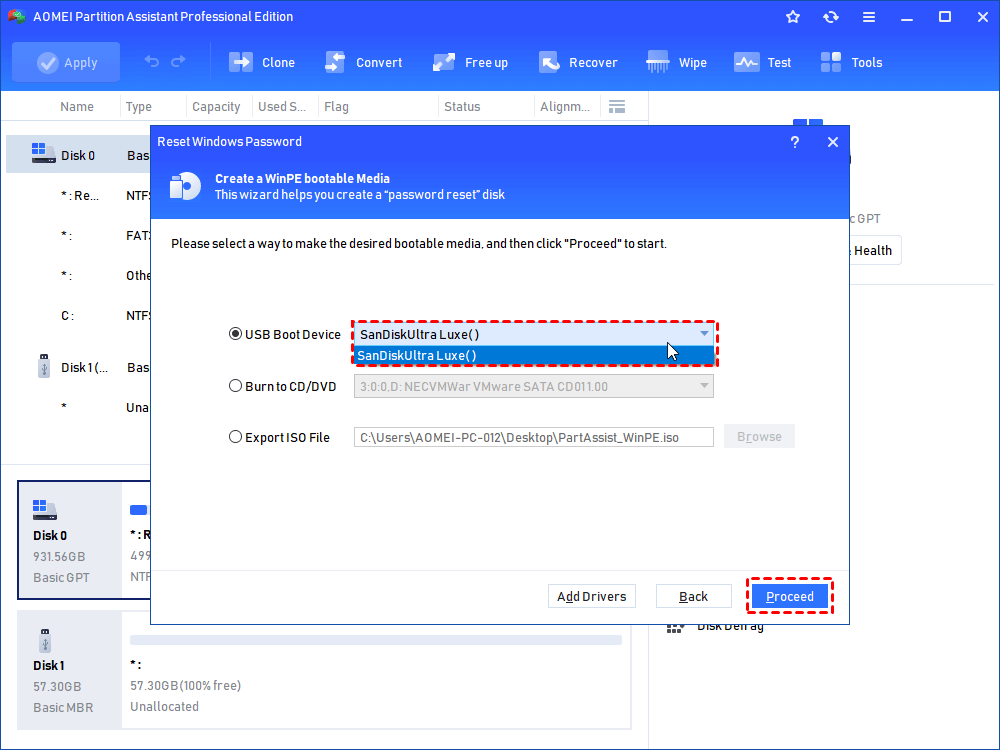
Step 3. Three ways are available to create bootable media based on Windows PE.
•USB Boot Device: To create bootable USB Device.
•Burn to CD/DVD: To create bootable CD/DVD.
•Export ISO File: Use this method to make a bootable ISO file.
Choose one of the needed ones and select “Proceed”. Selecting USB Boot Device is recommended because you can directly use bootable USB to boot into WinPE. What’s more, please notice that the "Add Drivers" button allows you to add additional drivers into the bootable media.
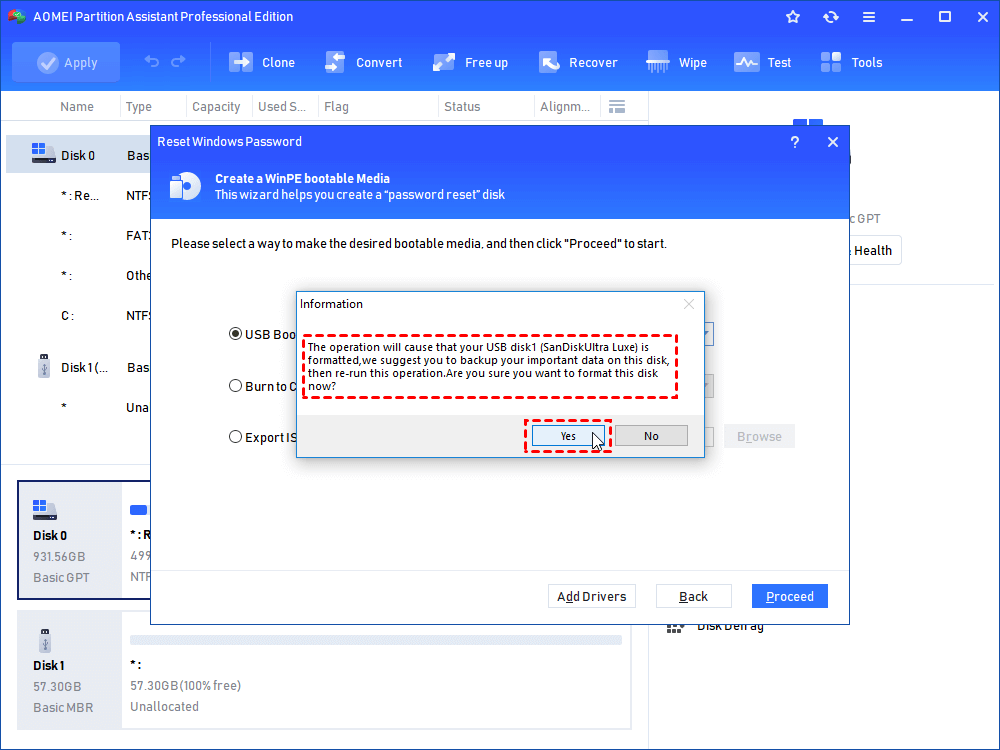
Step 4. The USB flash drive requires to be formatted, and all the data will be erased in this step. Please make a backup on your important data.
Step 5. After the process finishing, please start the PC that you hope to remove the password from the flash drive. Choose the Windows system and click “Next”.
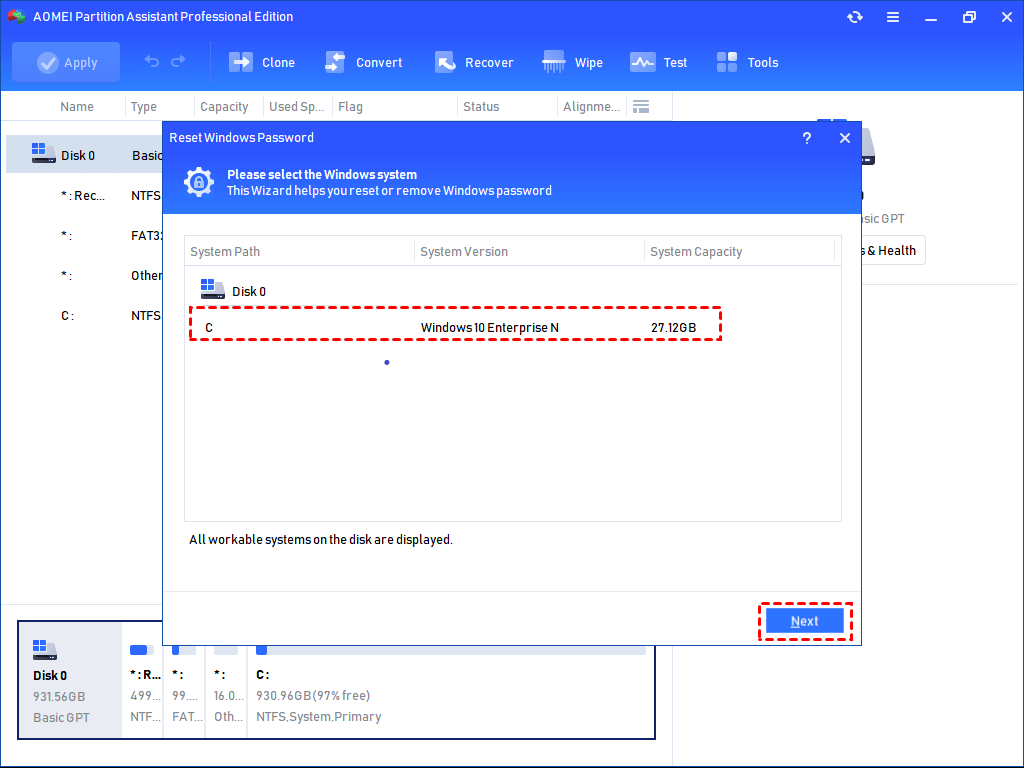
Notice: You need to enter BIOS to change boot order under the menu, and then you can boot from the Windows PE USB flash drive, CD, or DVD
Step 6. Choose the target account, and select the choice you hope to operate.
You can see two choices here: Remove Account Password and Reset Account Password
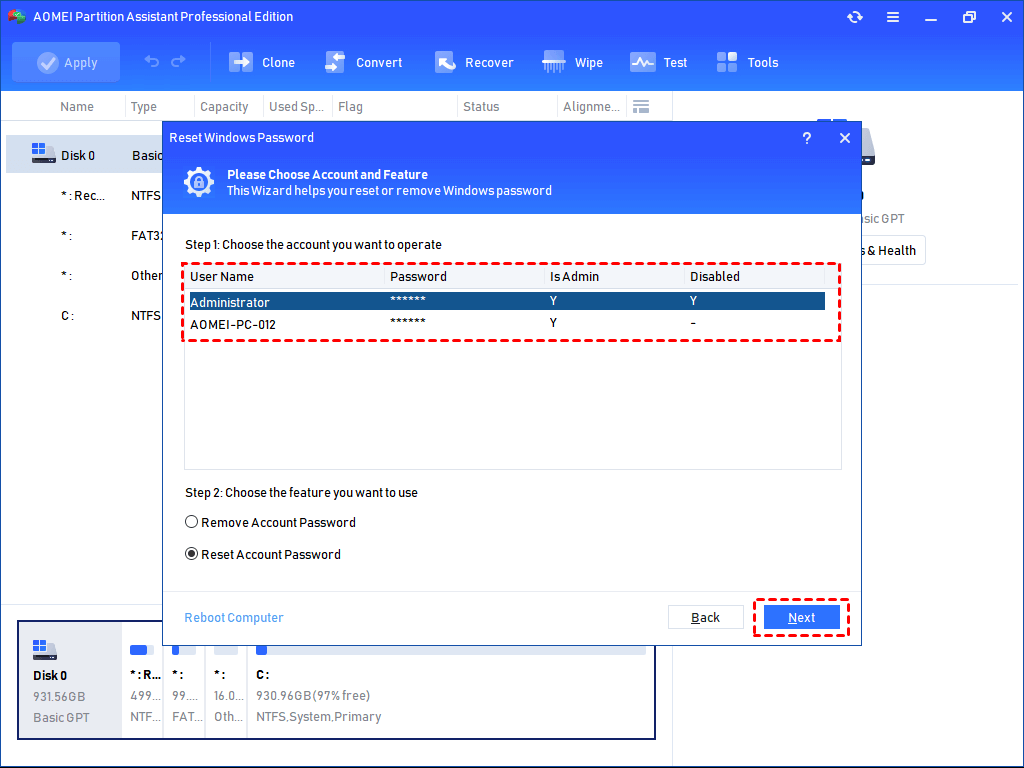
Notice:
· You can select “Remove Account Password” and click “Next” to have the operation to remove Windows 10 password.
· You can select “Reset Account Password” if you would like to reset. After clicking, you can input the new password and confirm it to reset. And then select “Yes” to start the operation.
To sum up
Now you know why does Safe Mode require a password Windows 10 and what to do when you can’t get in. From simply entering your password instead of PIN, to using Microsoft’s CMD method or the easier route through AOMEI Partition Assistant, you're now equipped with multiple solutions. It’s a powerful all-in-one toolkit for any Windows user looking to manage their computer effectively.
Beyond password recovery, AOMEI Partition Assistant Professional offers:
- Migrate OS to SSD
- Convert MBR to GPT without data loss
- Resize/move partitions
- Clone disks and partitions
- Check disk errors and wipe drives
...

