3 Ways to Remove Password From Word Document
You can use 3 ways to remove password from Word document. Follow our guide to unprotect the Word document with ease.
By Irene / Updated on January 7, 2025
Password protection in MS Word is a handy feature for safeguarding your documents or controlling access for authorized users. However, what happens if you forget the password, need to access the document, or decide you no longer want the document to be password-protected? How to remove password on a Word document? If you’re facing any of these challenges, this guide is here to help. It covers various methods to remove passwords from Word documents. Read on to explore multiple solutions for unlocking your files
How to remove password from Word document?
How do I remove password from Word document? Based on different situations, there are diverse solutions. If you are also interested in how to recover a corrupted Word file, you can click to get the methods as well.
Case 1. Remove password from Word document when you don't need it anymore
It's simple to remove the password protection of your Word document if you already know the password.
Method 1. Remove full locked Word document password
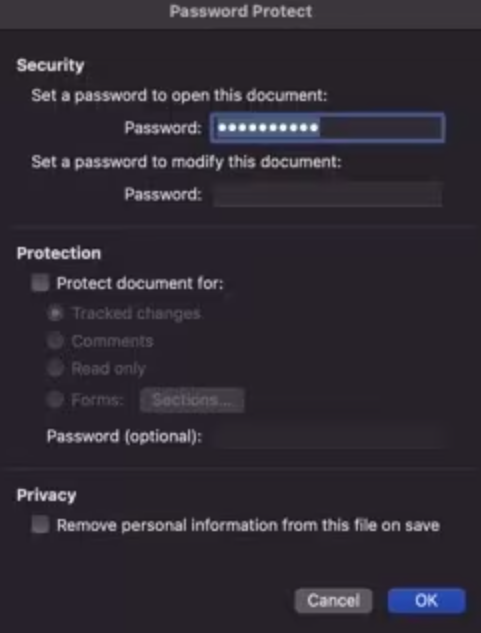
Step 1. Open the Word document and enter the password. Go to File > Info > Protect Document > Encrypt with Password.
Step 2. Delete the password in the Password box, and then click OK.
Method 2. Remove password from Word document of Editing Restriction
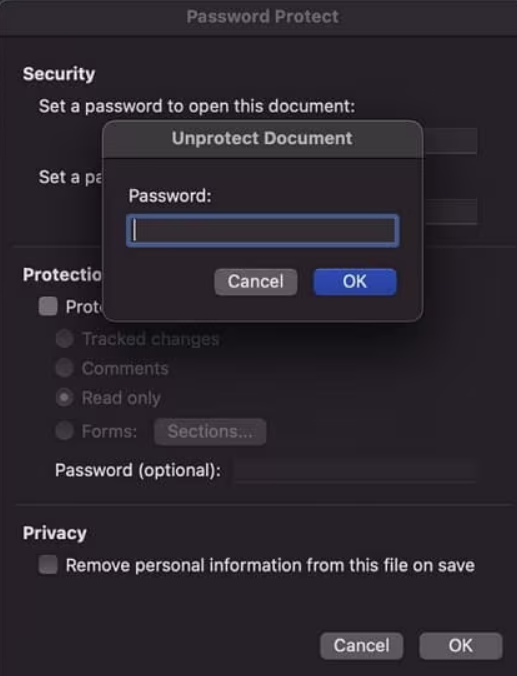
Step 1. Open the password-protected Word file. Go to Review > Protect > Restrict Editing.
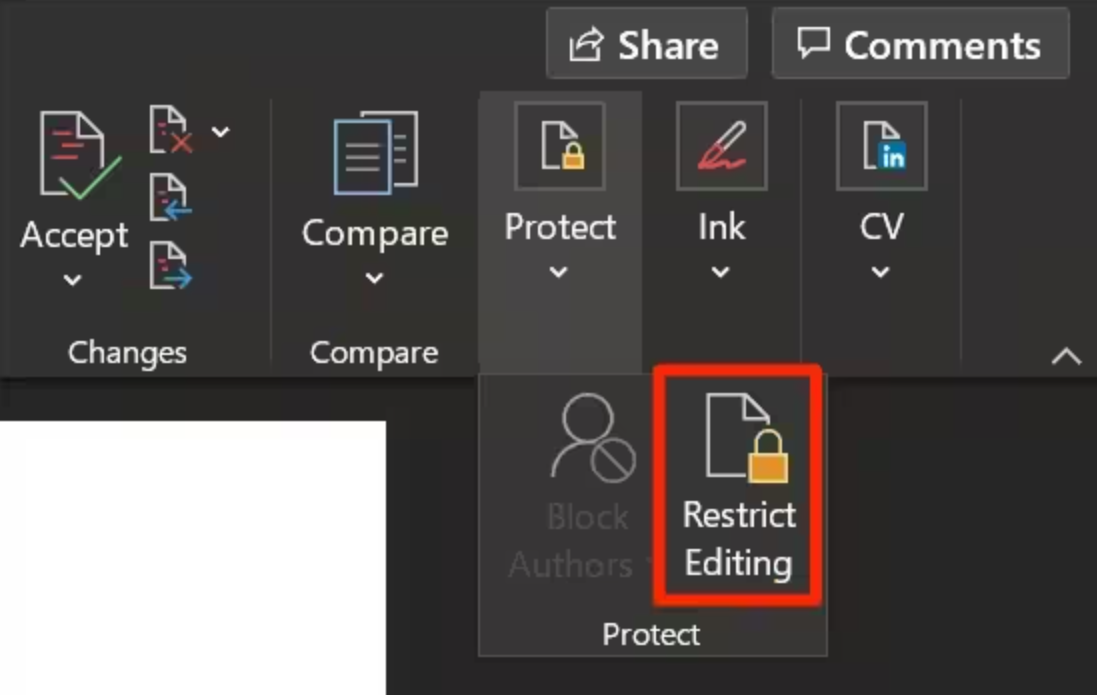
Step 2. By turning off Restrict Editing, Word will ask for your password from you, and after you enter it, it will unprotect your file.
Case 2. Remove password on a Word document if you lost or forget the password
Step 1. Try Google Docs to unlock your file. Google Docs is a free online text editor with features similar to MS Word. This method is also suitable for unprotecting documents on Mac OS. Sign in to your Google account. If you don’t have one, you can create it.

Step 2. Open your web browser and go to https://doc.google.com to access Google Docs. Then click the folder icon located on the right side of the screen.
![]()
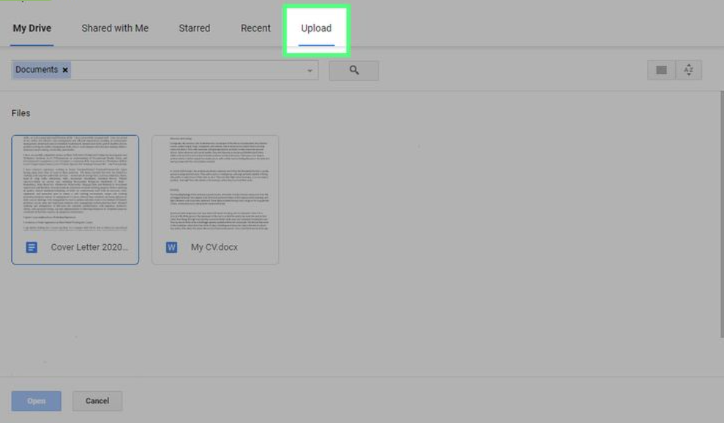
Step 3. In the "Open a file" menu, click Upload. Then click the Select button to choose the file you want to unprotect. Alternatively, you can drag and drop the file into the outlined rectangular area on the screen.
Step 4. To download the unprotected file, click File > Download > Microsoft Word (.docx). If you’re fine with editing the document directly in Google Docs, you can skip this step, as the protection is removed once the file is uploaded.

Bonus tip: How to manage passwords for your Windows PC?
Many people set a Windows password to protect their privacy, but it’s common to forget or lose it. In Windows system, the usual solutions are reinstalling the system or using a Password Reset Disk if you’ve created one beforehand. If you want an easier option, you can use AOMEI Partition Assistant. This tool lets you reset, recover, or remove Windows passwords without logging in.
If you’ve tried using a disk created on another computer and found it doesn’t work on your device, you can use AOMEI Partition Assistant to create a bootable USB on any computer running Windows 11, 10, 8.1, 8, or 7. Then, insert it into your computer to reset the password. For Windows Server users, the Server Edition can also help manage passwords and devices efficiently.
The Best Windows Disk Partition Manager and PC Optimizer
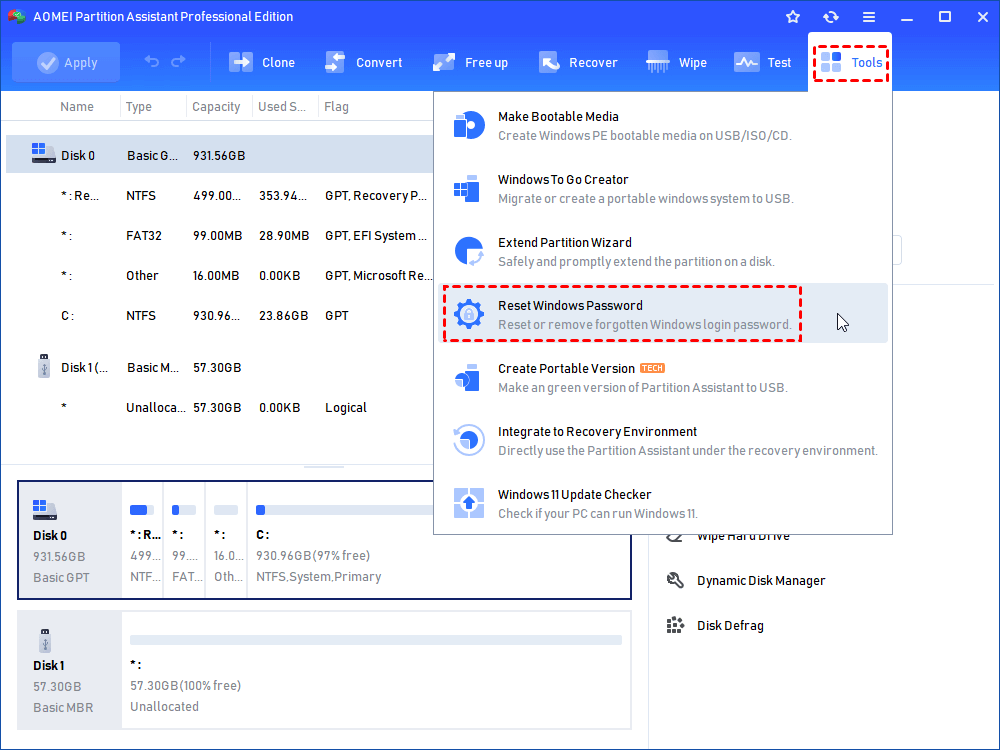
Step 1. Plug a USB into your computer and launch the installed AOMEI Partition Assistant. Select “Tools” on the top side and click “Reset Windows Password” from the menu.
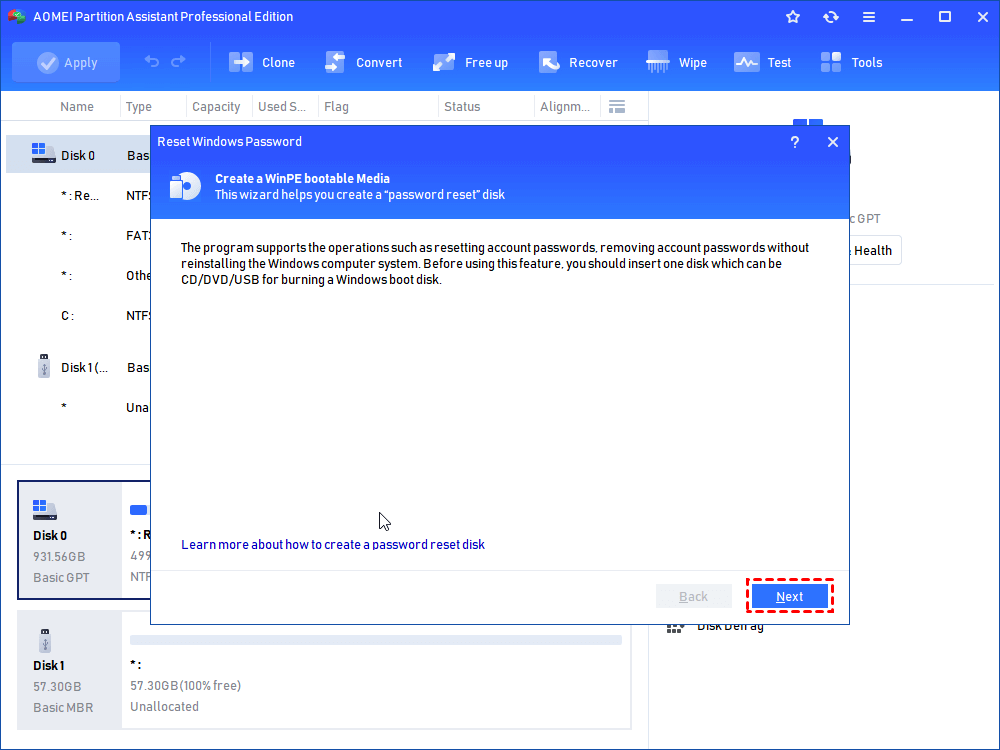
Step 2. There will be pop-up window that notice you to create a WinPE bootable media. Read the guidance and then click “Next”
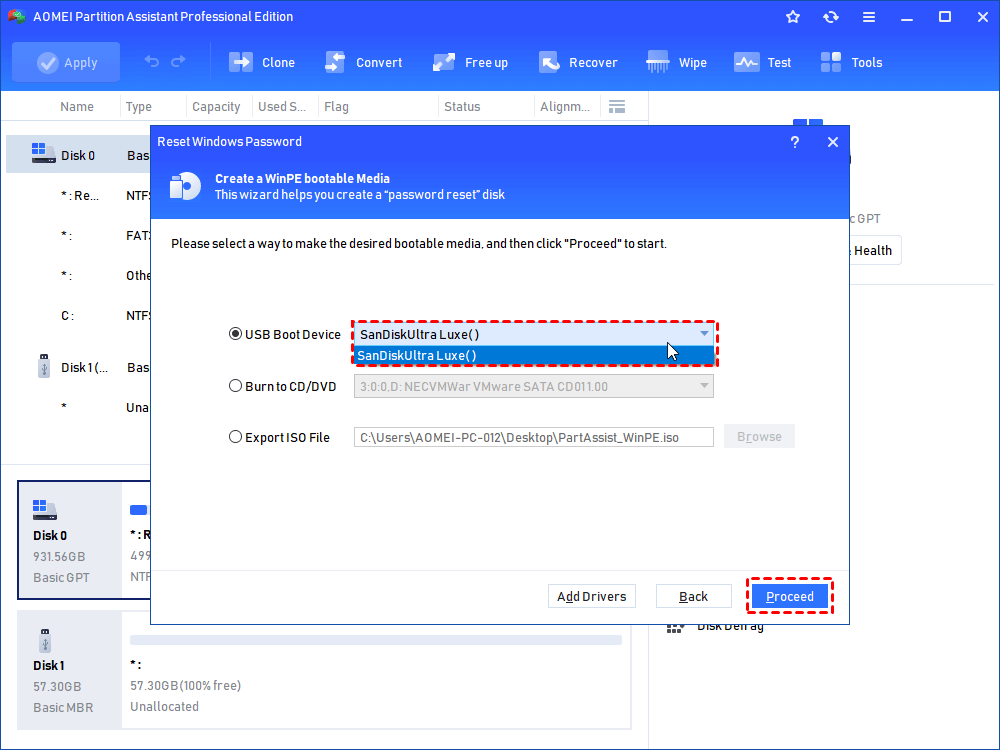
Step 3. Three ways are available to create bootable media based on Windows PE.
•USB Boot Device: To create bootable USB Device.
•Burn to CD/DVD: To create bootable CD/DVD.
•Export ISO File: Use this method to make a bootable ISO file.
Choose one of the needed ones and select “Proceed”. Selecting USB Boot Device is recommended because you can directly use bootable USB to boot into WinPE. What’s more, please notice that the "Add Drivers" button allows you to add additional drivers into the bootable media.
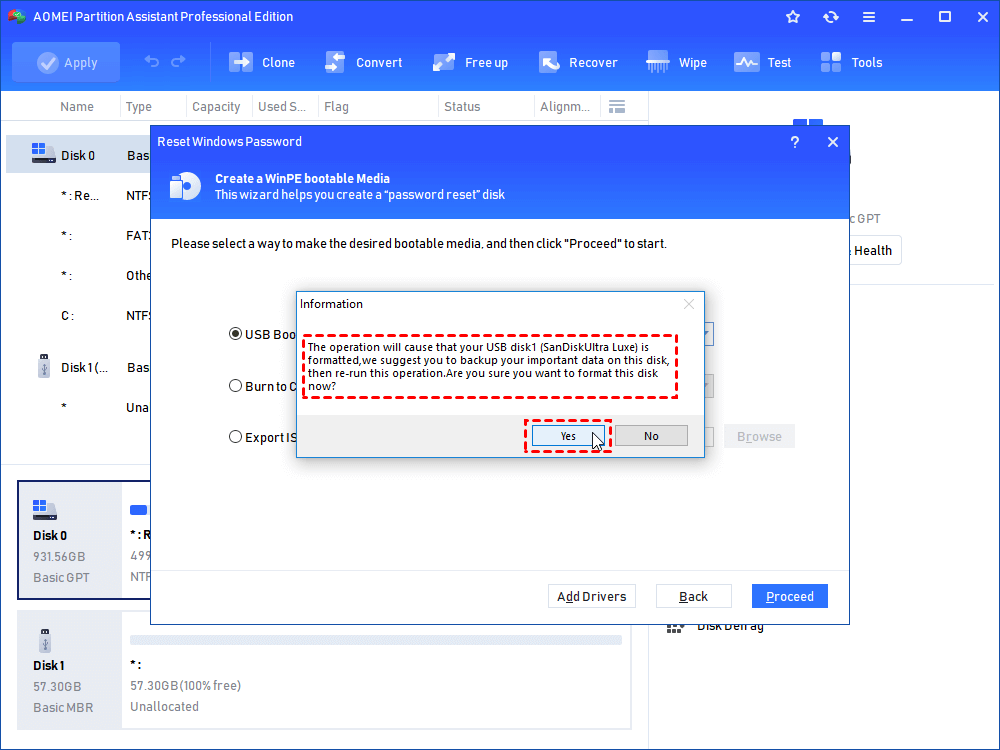
Step 4. The USB flash drive requires to be formatted, and all the data will be erased in this step. Please make a backup on your important data.
Step 5. After the process finishing, please start the PC that you hope to remove the password from the flash drive. Choose the Windows system and click “Next”.
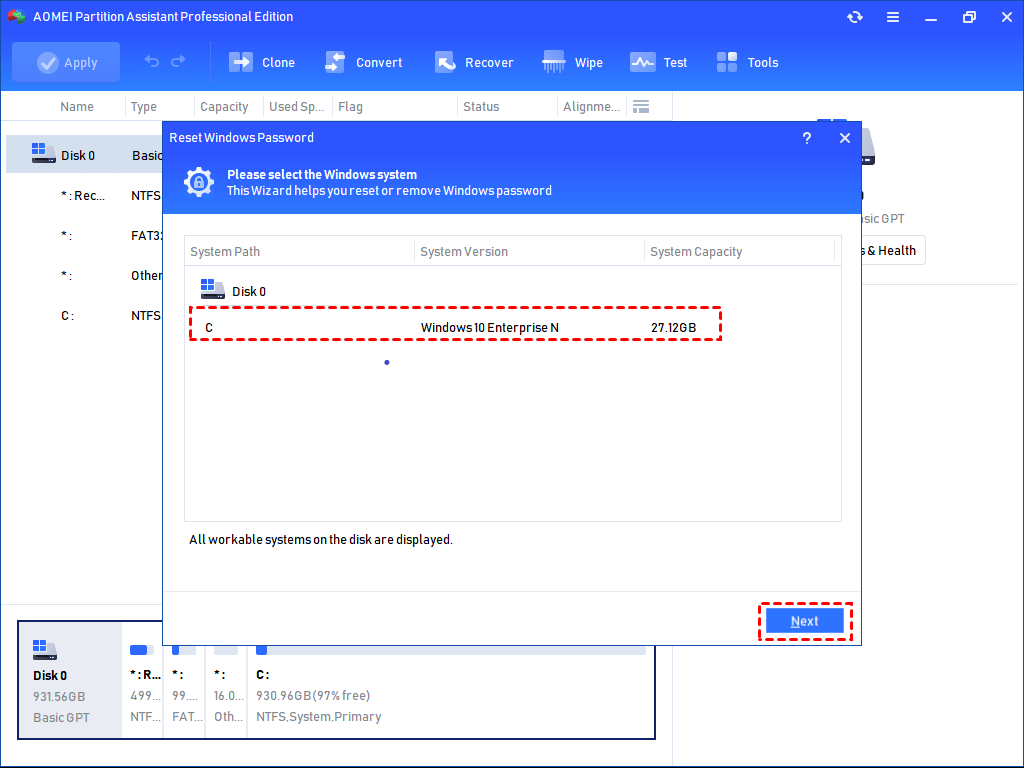
Notice: You need to enter BIOS to change boot order under the menu, and then you can boot from the Windows PE USB flash drive, CD, or DVD
Step 6. Choose the target account, and select the choice you hope to operate.
You can see two choices here: Remove Account Password and Reset Account Password
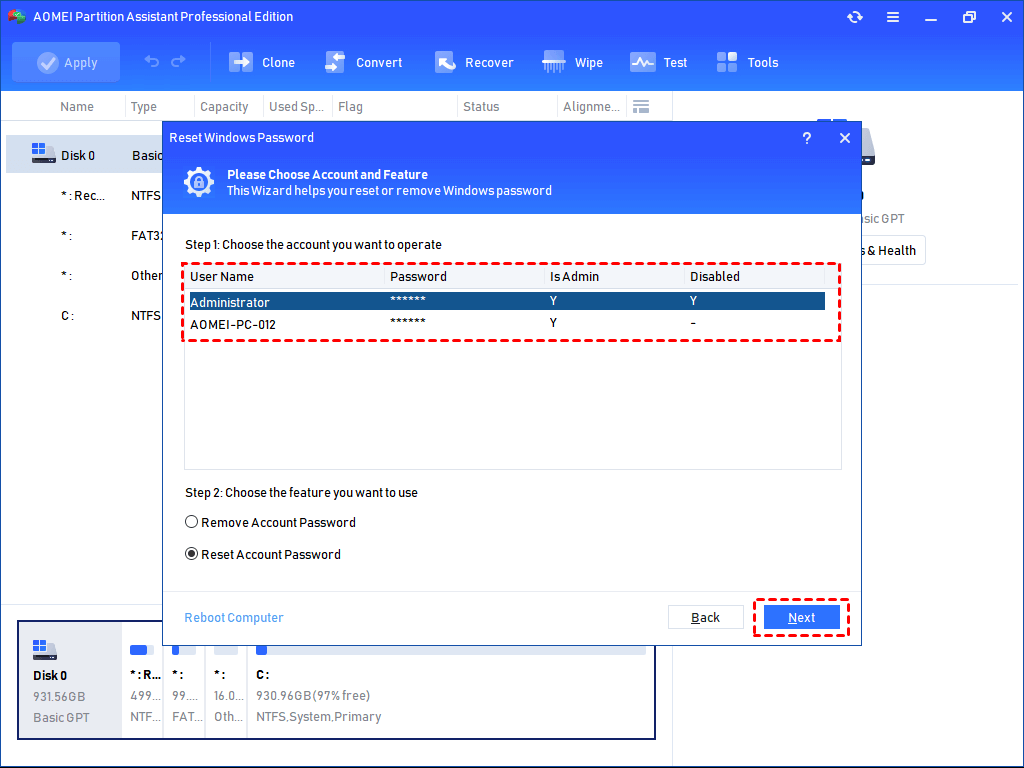
·You can select “Remove Account Password” and click “Next” to have the operation to remove Windows 10 password.
·You can select “Reset Account Password” if you would like to reset. After clicking, you can input the new password and confirm it to reset. And then select “Yes” to start the operation.

When you complete the operations, you can click “Reboot Computer” to restart.
Conclusion
Removing passwords from Word document and Windows account doesn’t have to be complicated. Whether you need to unlock a protected Word document or reset a forgotten Windows password, there are practical tools and methods available to help. From using built-in Word features to unlock documents, trying Google Docs for quick unprotection, or leveraging powerful software like AOMEI Partition Assistant for password management, you can find a solution that fits your needs. By following this guide, you can access to your Word files and devices with ease, ensuring a smoother and more secure experience.

