How to Install Windows 11 on VMware Step by Step
Installing Windows 11 on VMware is like creating a virtual playground where you can test the latest features of Windows without affecting your main operating system. Whether you're a developer, IT professional, or just a tech enthusiast, you can follow this guide to run Windows 11 on VMware.
By Hedy / Updated on September 2, 2024
What Are Minimum System Requirements for Windows 11
Before diving into the installation process, it's crucial to ensure that your hardware meets the minimum system requirements for Windows 11. These include:
A compatible 64-bit processor with at least 1 GHz clock speed and 2 or more cores
4 GB of RAM (8 GB recommended for better performance)
64 GB or larger storage device
DirectX 12 compatible graphics with WDDM 2.0 driver
TPM version 2.0
UEFI firmware with Secure Boot capability
To run VMware Workstation Player, your system should meet the following criteria:
A 64-bit processor with Intel VT-x or AMD-V support
At least 2 GB of RAM (4 GB or more recommended)
1.2 GB of available disk space for the application
Operating system: Windows 8 or later, or Linux distributions
Preparing for Installation
Downloading VMware Workstation Player
First, you'll need to download VMware Workstation Player, which is free for personal use. Head over to the VMware website and download the latest version compatible with your operating system.
Downloading Windows 11 ISO File
Next, you need the Windows 11 ISO file. You can download this from the official Microsoft website. Make sure to choose the correct edition and language that suits your needs.
Installing VMware Workstation Player
Step-by-Step Installation Guide
1. Open the downloaded VMware Workstation Player installer.
2. Follow the on-screen instructions to complete the installation. This includes accepting the license agreement and selecting the installation directory.
3. Choose whether to enable product updates and user experience settings.
4. Click "Install" and wait for the installation to complete.
Configuring VMware Workstation Player
Once installed, open VMware Workstation Player and familiarize yourself with its interface. You'll be using this to create and manage your virtual machines.
Creating a New Virtual Machine
Setting Up a New Virtual Machine
1. Click on "Create a New Virtual Machine".
2. Select "Installer disc image file (iso)" and browse to the location of your downloaded Windows 11 ISO file.
3. Click "Next" to proceed.
Allocating Resources
1. Assign a name to your virtual machine and choose a location to save it.
2. Allocate the desired amount of RAM (at least 4 GB) and CPU cores (2 or more) to the virtual machine.
3. Create a virtual disk with at least 64 GB of storage space.
Installing Windows 11 on VMware
Loading the Windows 11 ISO
With the virtual machine configured, it's time to install Windows 11. Start the VM, and it will boot from the ISO file you provided.
Installation Process
1. Follow the Windows 11 installation wizard.
2. Select your language, time, and keyboard preferences.
3. Click "Install Now" and enter your product key (or choose to skip this step if you don't have one).
4. Accept the license terms and choose "Custom: Install Windows only (advanced)".
5. Select the virtual hard disk you created and click "Next" to start the installation.
Initial Setup and Configuration
After the installation is complete, you'll need to go through the initial setup process, which includes:
1. Creating a user account.
2. Setting up your preferences.
3. Connecting to a network.
How to Create a Windows 11 Bootable USB?
If you want to enjoy the Windows 11 system without the limitations of time and place, you can create a Windows 11 bootable USB. It will make the Win 11 portable and available. To create such a tool, it's highly recommended to use a professional creator like AOMEI Partition Assistant. This utility comes with a useful feature called "Win To Go" that is straightforward and workable for you to create a Windows bootable USB. Below is a step-by-step guide on how to do it:
The Best Windows Disk Partition Manager and PC Optimizer
Requirements:
1. A USB drive with at least 16GB of storage (preferably 32GB or more).
2. A Windows 11 ISO file (you can download it from the official Microsoft website).
3. AOMEI Partition Assistant software (ensure you have the latest version installed).
Steps to Create a Windows 11 Bootable USB Using AOMEI Partition Assistant’s "Win To Go" Feature:
Step 1: Download and install AOMEI Partition Assistant on your computer from the official website. Launch the software after installation.
Step 2: Insert your USB drive into your computer. Make sure to back up any important data on the USB drive, as the process will format the drive.
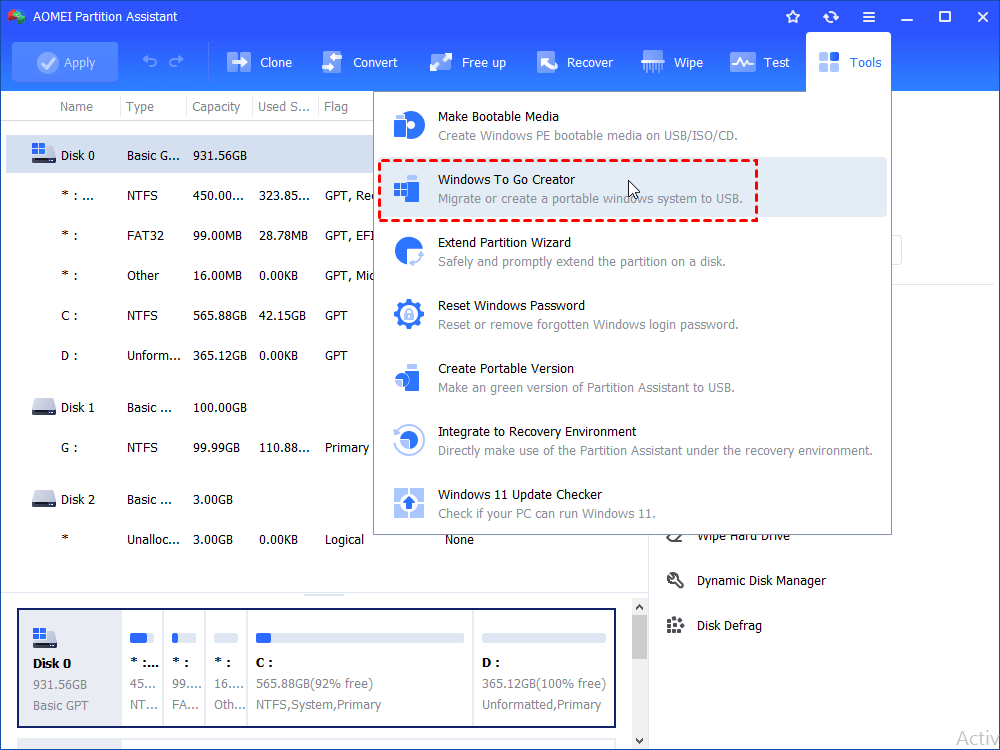
Step 3: In AOMEI Partition Assistant, click on “All Tools” on the left panel. Select “Windows To Go Creator” from the tool options.
Step 4: In the "Windows To Go Creator" window, select “Create Windows To Go for personal computer” and click Next. Click on the Browse button to select the Windows 11 ISO file from your computer.
Step 5: The software will automatically detect the connected USB drive. Select your USB drive from the list. Click Next to proceed.
Step 6: Review the information and click Proceed. You will be warned that all data on the USB drive will be deleted. Click Yes to confirm.
Step 7: The software will now create the Windows 11 bootable USB. This process may take some time, depending on the speed of your USB drive and computer. Once completed, you will see a success message.
Step 6: Using the Bootable USB:
1. Insert the bootable USB into the computer where you want to install or use Windows 11.
2. Restart the computer and enter the BIOS/UEFI settings (usually by pressing F2, F12, DEL, or ESC during boot-up).
3. Change the boot order to prioritize the USB drive.
4. Save and exit BIOS/UEFI settings. The computer should now boot from the USB drive.
Following these steps will allow you to successfully create a Windows 11 bootable USB using AOMEI Partition Assistant’s "Win To Go" feature. Let me know if you need any more assistance!
Configuring Windows 11 on VMware
Installing VMware Tools
VMware Tools enhance the performance and manageability of your virtual machine. To install VMware Tools:
1. Click on "Player" in the VMware Workstation Player menu.
2. Select "Manage" > "Install VMware Tools".
3. Follow the on-screen instructions to complete the installation.
Optimizing Performance
To ensure smooth performance:
1. Allocate more RAM and CPU if your host system allows.
2. Adjust the display settings for optimal resolution and performance.
3. Enable 3D acceleration if needed.
Conclusion
Installing Windows 11 on VMware is a straightforward process that offers numerous benefits, from safe testing environments to enhanced flexibility. By following the steps outlined in this guide, you can enjoy the latest features of Windows 11 without any risks to your primary operating system.
FAQs
Can I run Windows 11 on VMware with 4GB RAM?
Yes, you can, but it's recommended to have at least 8GB of RAM for better performance.
How do I improve the performance of Windows 11 on VMware?
Allocate more RAM and CPU cores, close unnecessary applications on the host machine, and ensure VMware Tools are installed.
Is it safe to use Windows 11 on VMware for daily tasks?
Yes, it's safe, but ensure you have adequate resources allocated and follow security best practices.
Can I upgrade my Windows 10 VM to Windows 11?
Yes, you can upgrade your Windows 10 VM to Windows 11 by following the standard upgrade process.
What should I do if VMware Tools fail to install?
Ensure that your VMware Workstation Player is up-to-date and that the ISO file for VMware Tools is not corrupted. Re-download if necessary.