Windows 11 Failed to Install: How to Fix Error 0xc1900101
In this guide, we'll walk you through the steps to resolve the Windows 11 installation error 0xc1900101, ensuring your upgrade goes as smoothly as possible.
By Hedy / Updated on October 11, 2024
What Is Error 0xc1900101?
Error 0xc1900101 is a common issue that occurs during the installation or upgrade of Windows 11. This error usually pops up during the setup process and stops the installation, leaving users frustrated. It’s often related to incompatible drivers, insufficient disk space, or conflicting software.
Common Causes of Error 0xc1900101
Understanding why this error occurs is the first step to fixing it. Here are some common causes:
- Outdated or incompatible drivers: Drivers that are not up to date can cause conflicts during installation.
- Insufficient disk space: Not having enough space on your system drive can halt the installation process.
- Antivirus interference: Security software can sometimes block critical installation files.
- Corrupted system files: Damaged or missing files can trigger the error.
- External hardware issues: Peripherals like USB devices or external drives can cause interruptions.
Methods to Fix Windows 11 Installation Error 0xc1900101
1. Update Device Drivers
One of the primary causes of error 0xc1900101 is outdated or incompatible drivers. Updating your drivers can often resolve the issue.
How to Update Drivers Manually:
1. Open Device Manager by typing it into the search bar.
2. Expand the categories and look for any devices with a yellow triangle icon.
3. Right-click on the device and select "Update driver."
2. Free Up Disk Space
A lack of disk space can prevent Windows 11 from installing correctly. You need to ensure there's enough room on your system drive.
Clearing Temporary Files:
1. Open Settings > System > Storage.
2. Click on "Temporary files" and delete unnecessary items.
Uninstalling Unnecessary Programs:
Removing unused programs can also free up valuable space. Navigate to Control Panel > Programs > Programs and Features, then uninstall any unneeded applications.
3. Disable Antivirus Software
Sometimes, antivirus software can interfere with the installation of Windows 11. Temporarily disabling it can help.
Temporarily Disable Antivirus:
1. Open your antivirus program and look for an option to turn it off temporarily.
2. Be sure to re-enable it once the installation is complete to protect your PC.
4. Disconnect External Devices
External devices can sometimes cause conflicts during installation. Disconnect anything unnecessary, like external hard drives, printers, or USB devices.
Remove Unnecessary Peripherals:
Only keep essential devices connected, such as your mouse and keyboard, to minimize potential issues.
Impact of External Hardware on Installation:
External devices can sometimes interfere with driver installation, leading to errors.
5. Run Windows Update Troubleshooter
The Windows Update Troubleshooter is a handy tool that can detect and fix issues related to Windows Update.
How to Use Windows Update Troubleshooter
1. Go to Settings > Update & Security > Troubleshoot > Additional troubleshooters.
2. Select "Windows Update" and click "Run the troubleshooter."
6. Perform a Clean Boot
A clean boot starts Windows with a minimal set of drivers and startup programs, which can help eliminate software conflicts during installation.
Steps to Perform a Clean Boot
1. Press Win + R, type "msconfig," and press Enter.
2. Go to the Services tab, check "Hide all Microsoft services," and then click "Disable all."
3. Go to the Startup tab and click "Open Task Manager." Disable all startup items.
7. Check Disk Health
Hard drive issues can cause installation errors. Checking your disk's health can help identify any underlying issues.
Using CHKDSK Command
1. Open Command Prompt as an administrator.
2. Type chkdsk /f /r and press Enter. Restart your PC to let the scan run.
8. Repair Corrupted System Files
Corrupted files can hinder the installation process. Running the SFC (System File Checker) and DISM (Deployment Imaging Service and Management Tool) commands can help.
Running SFC and DISM Commands:
1. Open Command Prompt as an administrator.
2. Type sfc /scannow and press Enter.
3. After that, run DISM /Online /Cleanup-Image /RestoreHealth.
Advanced Solutions for Persistent Errors
1. Modify BIOS Settings
BIOS settings can sometimes interfere with Windows installation. Updating your BIOS and checking specific settings might help.
How to Update BIOS
Visit your motherboard manufacturer’s website for instructions on updating your BIOS.
Importance of BIOS Settings During Installation
Incorrect BIOS settings can prevent Windows from detecting essential hardware components.
2. Perform an In-Place Upgrade
An in-place upgrade reinstalls Windows without removing your files. It’s a good option if all else fails.
Steps to Perform an In-Place Upgrade:
1. Download the Windows 11 installation media from Microsoft.
2. Run the setup file and choose the option to keep your files and apps.
Resort to a professional third-party tool
The error code 0xc1900101 on Windows usually occurs during Windows updates or system upgrades and is related to problems with system files or partition issues. You can use AOMEI Partition Assistant to resolve partition-related issues that might be causing the error. Here's how to fix the issue:
Step 1: Download and Install AOMEI Partition Assistant
1. Go to the official AOMEI Partition Assistant website.
2.Download the software and install it on your computer.
3. Launch the AOMEI Partition Assistant once installation is complete.
Step 2: Check Partition Health
1. Open AOMEI Partition Assistant and locate the partition that contains your Windows installation (usually the C: drive).
2. Right-click on the C: drive and select "Advanced" > "Check Partition".
3. Choose the option "Check partition and fix errors in this partition by using chkdsk.exe".
4. Click "OK" and let the process run to check for any errors on the partition.

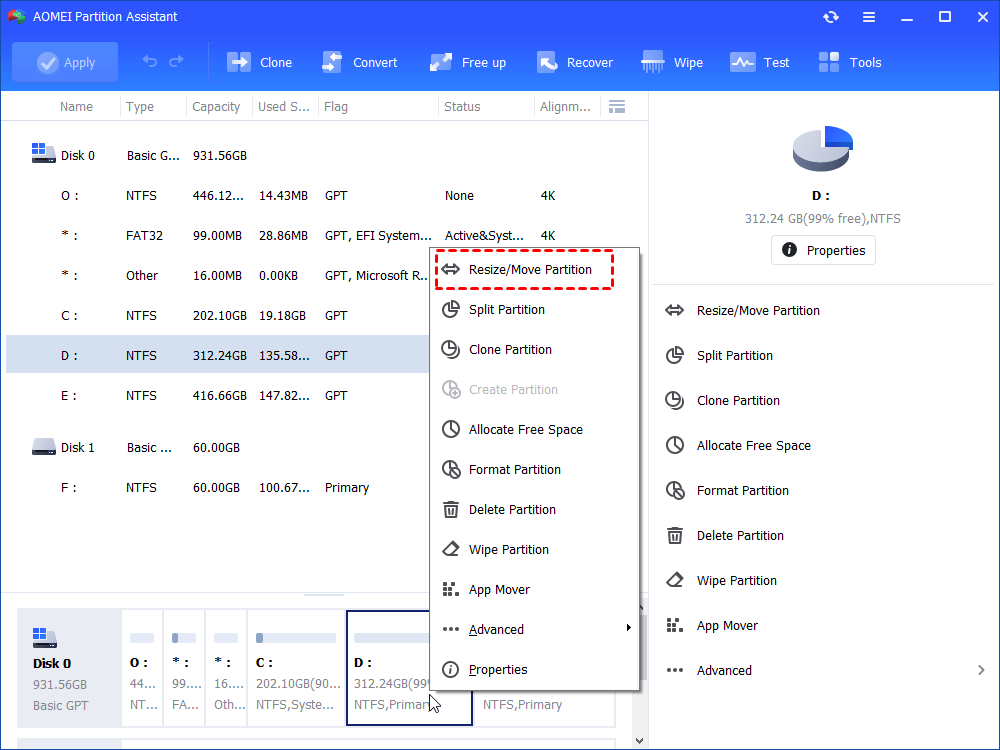
Step 3: Resize/Merge Partitions (If Necessary)
1. If your C: drive is running low on space, you can extend it using unallocated space or by shrinking another partition.
2. Right-click on the C: drive and select "Resize/Move Partition".
3. Drag the partition boundary to extend the C: drive using available unallocated space.
4. Click "OK" and then click "Apply" in the toolbar to execute the operation.
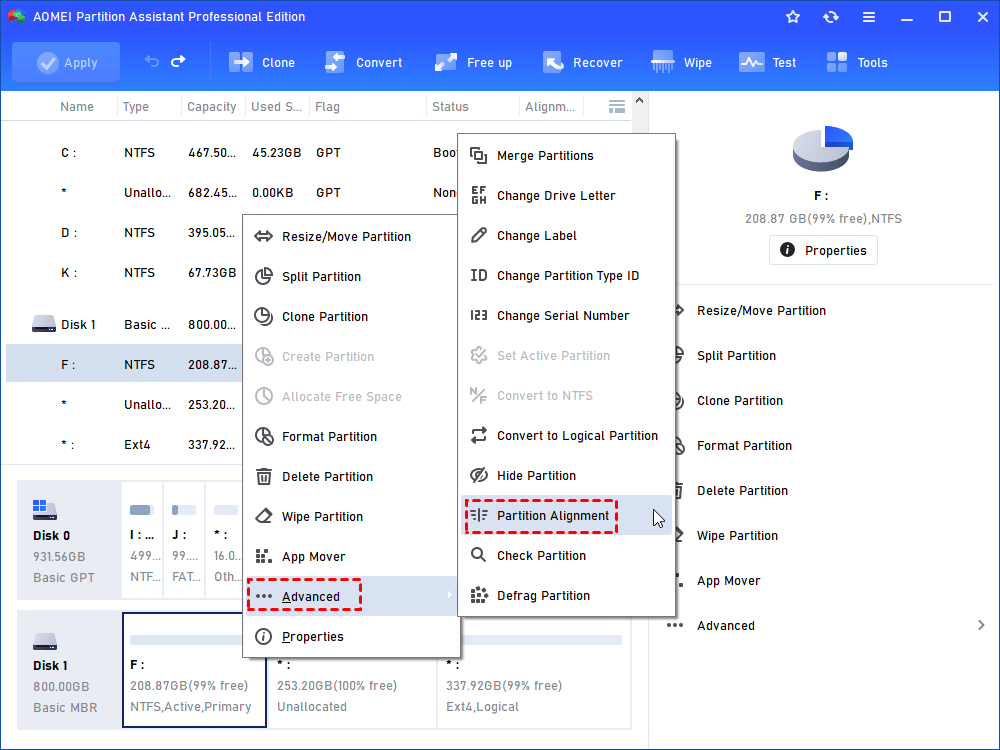
Step 4: Align Partitions (Optional)
1. Misaligned partitions can sometimes cause issues.
2. To align partitions:Right-click on the C: drive.
3. Select "Advanced" > "Partition Alignment".
4. Follow the on-screen instructions to align the partition.
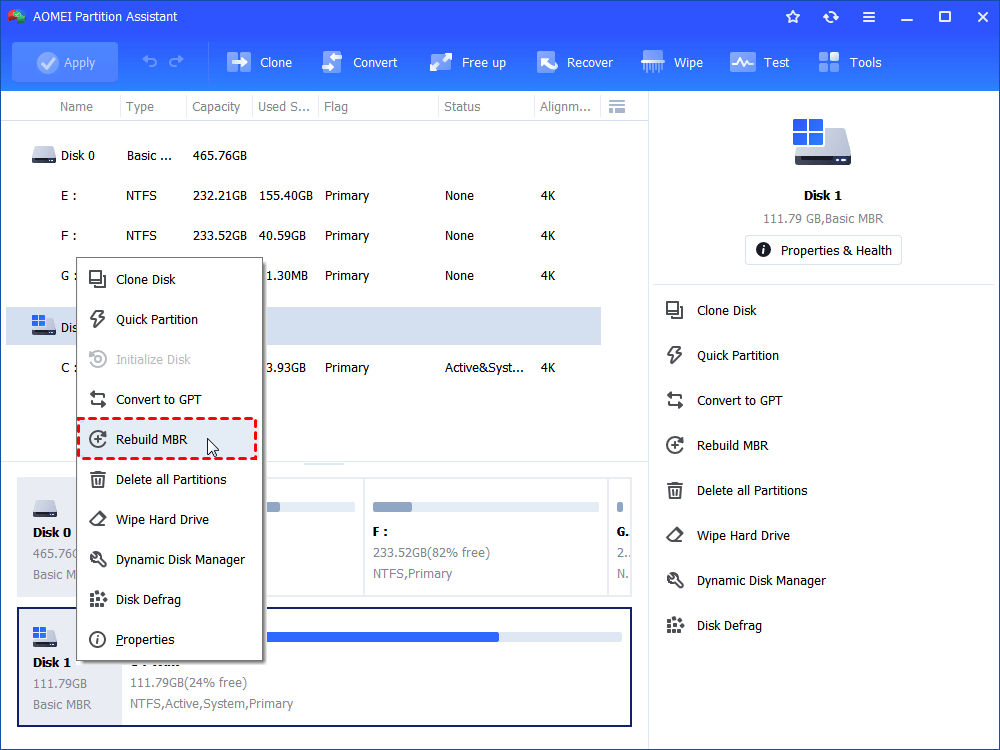
Step 5: Rebuild MBR (Master Boot Record)
1. If you suspect the issue might be related to the MBR:Right-click on the system disk (usually Disk 0).
2. Select "Rebuild MBR" from the context menu.
3. Choose the correct type of MBR based on your system (e.g., Windows 10/11 for most systems).
4. Click "Apply" to commit the changes.
Conclusion
Error 0xc1900101 during a Windows 11 installation can be frustrating, but it's not the end of the road. With the steps outlined above, you can troubleshoot and resolve the issue, getting your system updated smoothly. Always ensure your drivers are up to date, your PC is prepared for installation, and you're following best practices to avoid conflicts.
FAQs
What should I do if none of the fixes work?
If none of these methods resolve the issue, consider consulting Microsoft Support or performing a fresh installation.
Can outdated drivers cause installation errors?
Yes, outdated drivers are one of the most common causes of installation errors like 0xc1900101.
Is it safe to disable antivirus software during installation?
Temporarily disabling antivirus software can help, but ensure you re-enable it immediately after to keep your system protected.
What is the difference between a clean boot and safe mode?
A clean boot starts Windows with minimal drivers and services, while safe mode starts Windows in a basic state with limited files and drivers.
How do I know if my hardware is compatible with Windows 11?
You can use Microsoft’s PC Health Check tool to ensure your hardware meets Windows 11’s requirements.