How to Install PowerToys: A Step-by-Step Guide
In this guide, you can learn how to install PowerToys and how to upgrade your system to Windows 11 to employ PowerToys.
By Lucas / Updated on September 2, 2024
If you're looking to enhance your Windows experience with powerful utilities, Microsoft PowerToys is the way to go. In this guide, we'll explain what PowerToys is, how it can help users, and provide detailed instructions on how to install PowerToys using various methods. We will also cover the system requirements and introduce a handy tool to upgrade your Windows OS efficiently.
What is Microsoft PowerToys?
Microsoft PowerToys is a set of utilities designed to optimize and enhance your Windows experience. Originally developed in the 1990s for Windows 95, PowerToys has made a comeback with modern versions for Windows 10 and 11. These tools provide users with advanced features that streamline daily tasks and improve productivity.
Some of the most popular utilities in PowerToys include:
- FancyZones: A window manager that makes it easier to arrange and manage multiple windows on your desktop.
- PowerRename: A bulk renaming tool that lets you rename files quickly and efficiently.
- Keyboard Manager: A tool that allows you to remap keys and create custom shortcuts.
- PowerToys Run: A quick launcher that lets you start applications or search for files faster.
- Color Picker: A tool that allows you to pick colors from any running application.
PowerToys is open-source and regularly updated, making it a valuable addition for anyone looking to maximize their Windows capabilities.
How to Install Microsoft PowerToys
There are several ways to install Microsoft PowerToys on your computer. Below are four different methods you can use:
Method 1: Install Microsoft PowerToys From the Microsoft Store
The easiest way to install PowerToys is through the Microsoft Store. This method is straightforward and ensures you have the latest version without needing to download files manually.
-
Open the Microsoft Store: Click on the Microsoft Store icon in your taskbar or search for it in the Start menu.
-
Search for PowerToys: In the search bar, type "PowerToys" and press Enter.
-
Select PowerToys: Click on the Microsoft PowerToys app from the search results.
-
Install the App: Click the "Get" or "Install" button to download and install PowerToys on your computer.
-
Launch PowerToys: Once the installation is complete, you can launch PowerToys from the Start menu or the Microsoft Store.
This method is ideal for users who prefer a simple installation process and want automatic updates from the Microsoft Store.
Method 2: Install Microsoft PowerToys from GitHub
For users who prefer downloading the installer directly, GitHub offers a reliable source for the latest PowerToys releases.
-
Visit the GitHub PowerToys Releases Page: Go to the Microsoft PowerToys GitHub Releases page.
-
Download the Installer: Scroll down to the "Assets" section of the latest release and download the
.exefile. -
Run the Installer: Once the file is downloaded, double-click it to start the installation process.
-
Follow the Installation Instructions: The installer will guide you through the installation steps. Click "Next" to proceed through each step.
-
Launch PowerToys: After the installation is complete, launch PowerToys from the Start menu or by searching for it in the Windows search bar.
Installing from GitHub gives you more control over the installation process and allows you to access previous versions if needed.
Method 3: Install Microsoft PowerToys Through the Command Prompt
Advanced users who are comfortable with command-line interfaces can install PowerToys using the Command Prompt.
-
Open Command Prompt as Administrator: Press
Win + Xand select "Command Prompt (Admin)" or search for "cmd" in the Start menu and right-click to choose "Run as administrator." -
Run the Installation Command: Type the following command and press Enter: winget install Microsoft.PowerToys
-
Wait for the Installation to Complete: The Command Prompt will display progress messages as it downloads and installs PowerToys.
-
Launch PowerToys: Once the installation is finished, you can launch PowerToys from the Start menu.
This method is perfect for those who enjoy using command-line tools and want to automate the installation process.
Method 4: Install Microsoft PowerToys Using Windows PowerShell
PowerShell provides another way to install PowerToys for users who prefer scripting and automation.
-
Open PowerShell as Administrator: Press
Win + Xand select "Windows PowerShell (Admin)" or search for "PowerShell" in the Start menu and right-click to choose "Run as administrator." -
Run the Installation Command: Enter the following command and press Enter: winget install Microsoft.PowerToys
-
Monitor the Installation: PowerShell will display installation progress as it downloads and sets up PowerToys on your system.
-
Start PowerToys: After installation, open PowerToys from the Start menu or by searching for it in the Windows search bar.
PowerShell is ideal for users who want a more scriptable environment or need to deploy PowerToys across multiple machines.
System and Hardware Requirements for Microsoft PowerToys
Before installing PowerToys, it is essential to ensure your system meets the minimum requirements:
- Operating System: Windows 10 version 1809 (build 17763) or newer, including Windows 11.
- Processor: 64-bit Intel or AMD processor.
- Memory: At least 1 GB of RAM.
- Storage: 200 MB of free disk space.
- .NET Core: The latest .NET Core version is required, which is installed automatically with PowerToys.
While PowerToys can run on Windows 10, upgrading to Windows 11 can provide additional features and improved performance. If you're considering an upgrade, make sure your hardware supports Windows 11.
Upgrade to Windows 11 with AOMEI Partition Assistant
If you are looking to upgrade your operating system to Windows 11, it's crucial to prepare your computer for the transition. This includes ensuring enough disk space on your C drive and converting your system disk from MBR to GPT, which is a requirement for Windows 11.
AOMEI Partition Assistant Professional is a powerful tool that can help manage your partitions and optimize your system for an upgrade. Here’s how AOMEI Partition Assistant can assist:
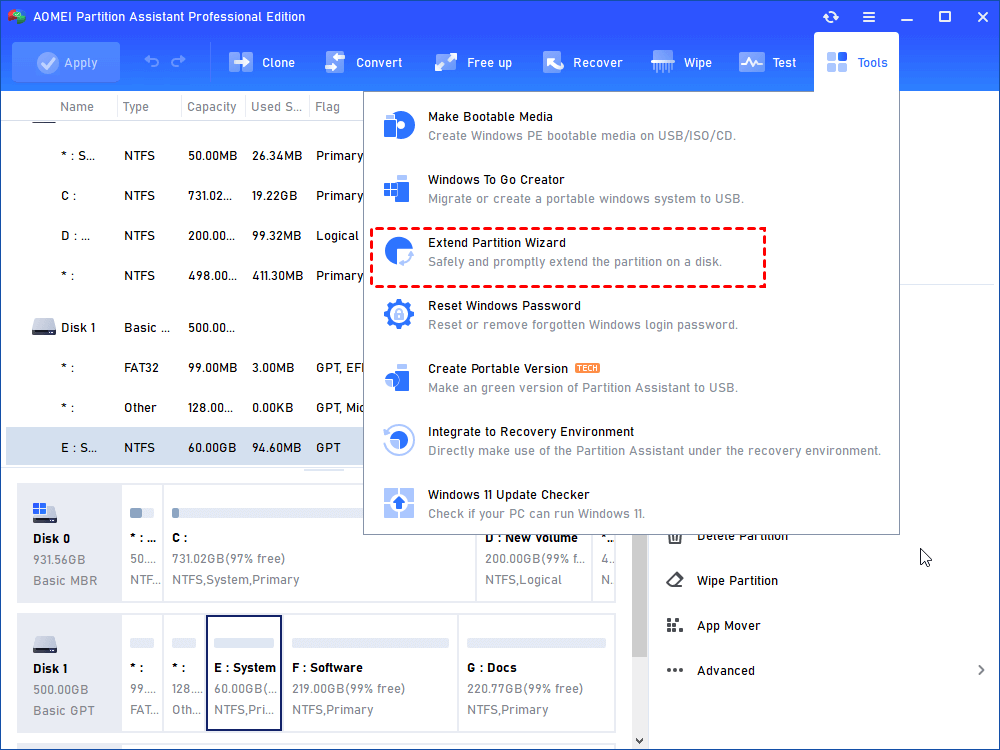
- Extend C Drive Space: If your C drive is running low on space, AOMEI Partition Assistant can easily extend it without losing data. This is particularly useful for preparing your system for a Windows 11 upgrade, which requires more disk space than previous versions.
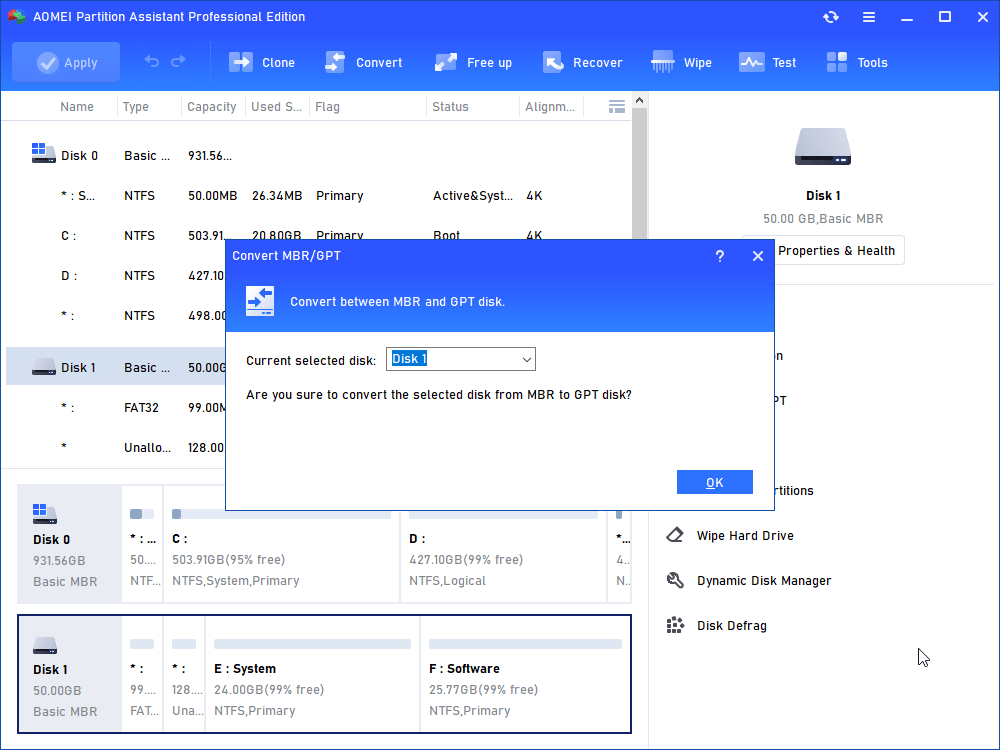
- Convert MBR to GPT Disk Without Data Loss: Windows 11 requires a GPT disk to support UEFI boot mode. AOMEI Partition Assistant can convert your disk from MBR to GPT without losing any data, making the upgrade process smooth and risk-free.
To use AOMEI Partition Assistant for your Windows 11 upgrade:
- Download and Install AOMEI Partition Assistant: Visit the website to download the tool and follow the installation instructions.
- Launch AOMEI Partition Assistant: Open the application after installation.
- Extend C Drive Space: Right-click on the C drive and select "Resize/Move Partition." Drag the partition to extend its size, and click "Apply."
- Convert MBR to GPT: Right-click on your system disk and choose "Convert to GPT Disk." Click "Apply" to start the conversion.
Upgrading to Windows 11 with AOMEI Partition Assistant is straightforward and ensures your system meets all requirements without the risk of data loss.
Conclusion
Microsoft PowerToys is a valuable toolset that can greatly enhance your productivity on Windows. Whether you're a casual user or a power user, PowerToys offers features that make everyday tasks more efficient. By following the abovementioned methods, you can easily install PowerToys and take advantage of its capabilities.
If you plan to upgrade to Windows 11, ensure your system is ready with AOMEI Partition Assistant, a reliable tool for managing disk space and converting disk formats without losing data. This preparation will ensure a smooth transition to the latest Windows OS, allowing you to enjoy all its new features and improvements.
By keeping your system updated and optimized, you can make the most of Microsoft's powerful tools, enhancing your overall computing experience.

