Where Can You Get Documents Scanned in Windows PC?
Where can you get documents scanned? What to do if you lost them? This article will offer three effective ways for you to find scanning documents.
Why document scanning is important?
1. Improved accessibility and organization
One of the main advantages of document scanning is the ability to access files instantly, from anywhere. With digital files, you can organize and retrieve documents quickly, eliminating the need to sift through paper archives or storage boxes.
2. Enhanced data security
Digital files offer a higher level of security compared to physical documents. With document scanning, sensitive files can be encrypted, password-protected, and stored on secure servers, reducing the risk of data breaches.
3. Remote work compatibility
With the rise of remote work, having digital documents is crucial. Document scanning supports remote work by enabling cloud-based document storage, allowing team members to collaborate effectively from anywhere in the world.
4. Easier document sharing
With digital documents, sharing is a breeze—documents can be sent via email, uploaded to secure portals, or shared through collaboration platforms instantly.
Where can you get documents scanned?
Losing track of scanned documents can be frustrating, but with a few simple steps, you can quickly locate or recover them. Here are some effective ways to find or retrieve scanned documents.
Way 1. Check the documents or pictures folder
On Windows 11 or 10, scanned documents are typically saved in This PC > Documents > Scanned Documents. After connecting your scanner and completing a scan, this is where you can find the scanned files.
Windows scanning applications allow you to save files in formats like JPEG, bitmap, or PNG. When saved in these formats, the files may instead be located in the Pictures folder.
If your scanned documents aren’t in these locations, try the following methods to locate them.
Way 2. Search for the scanned documents
When numerous files make it challenging to find specific ones, use the Windows search box or File Explorer to locate them.
Step 1. To find your scanned documents, enter the file name in the Windows search bar or in the File Explorer’s search field.
Step 2. In File Explorer, selecting This PC from the left panel displays all drives on your computer.
Step 3. Type the relevant keyword or full file/folder name in the search box, press Enter, and let the system search for it.
Step 4. You can then review the results to see if your scanned files are among them.
Way 3. Use AOMEI Partition Assistant for Recovery to recover lost scanned documents
If your scanned documents still don’t appear after trying the previous methods, they may be lost. File loss can happen for various reasons, including viruses that prompt Windows to automatically delete files or accidental deletions from simple clicks.
In such situations, AOMEI Partition Assistant for Recovery offers an effective solution. This free data recovery tool is designed to recover lost or deleted files, including documents (DOC/DOCX, XLS/XLSX, PPT/PPTX, PDF, etc.), images, videos, emails, and more. It supports nearly all Windows versions, including Windows 11, 10, 8, and 7.
Advantages of AOMEI Partition Assistant for Recovery:
▶ High recovery success rate: AOMEI Partition Assistant for Recovery is engineered to maximize the chances of retrieving lost files.
▶ Easy-to-use interface: AOMEI Partition Assistant for Recovery’s simple, intuitive interface makes it accessible to both novice and advanced users.
▶ Compatibility with various file types: Whether you’ve lost images, documents, videos, or system files, AOMEI Partition Assistant for Recovery supports a wide range of file formats.
▶ Fast and deep scan modes: AOMEI Partition Assistant for Recovery offers two scanning options: Quick Scan and Deep Scan. Quick Scan rapidly checks for recently deleted files, while Deep Scan thoroughly examines the storage device for files lost due to formatting, corruption, or other complex issues.
▶ Preview before recovery: AOMEI Partition Assistant for Recovery allows users to preview files before recovery. This feature ensures that you can confirm the quality and content of each file before proceeding, saving time and storage space by selectively recovering only what you need.
▶ Support for various storage devices: From hard drives to USB flash drives, memory cards, and SSDs, AOMEI Partition Assistant for Recovery is compatible with an array of storage devices.
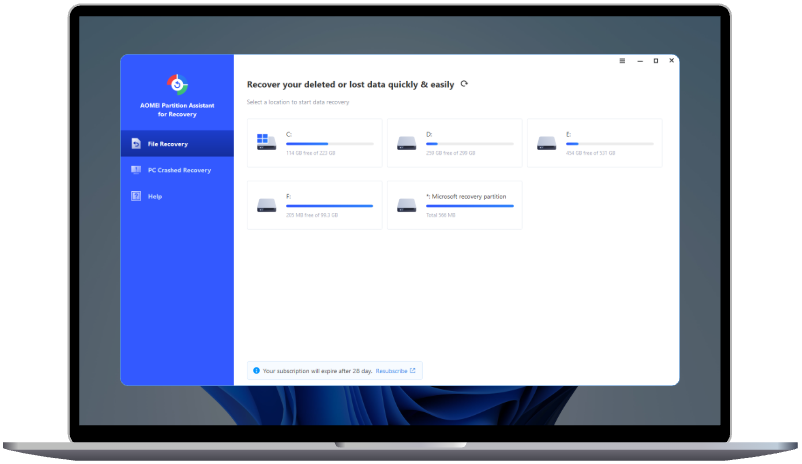
Step 1. Install and launch AOMEI Partition Assistant for Recovery. Choose the exact partition or disk where your data lost and click Scan.
Step 2. Then, the recovery tool start to scan and search. lt will execute the “Quickly Scan" first for finding your deleted data fast, and then execute the “Deep Scan" for searching other lost data.
Step 3. Once the scan is completed, all deleted files, recycle bins and other missing files will be displayed. Please select the file you would like to recover and then click "Recover".
Step 4. Then, select a folder path to save your recovered files.
Step 5. Wait patiently for this process of recovery to end.
Conclusion
Document scanning is more than a trend; it's a strategic move toward efficiency, security, and sustainability. Embrace document scanning to streamline your operations and keep pace with the digital era—doing so could transform the way you manage information and enhance your ability to respond to future challenges.
AOMEI Partition Assistant for Recovery simplifies the process of recovering lost scanned documents, combining user-friendly design with advanced features to maximize recovery success. Whether you’re dealing with accidental deletion or a more complex data loss scenario, AOMEI Partition Assistant for Recovery provides a reliable, efficient way to get your files back.

