How to Recover Data from Damaged Hard Drive [5 Ways]
What to do if you lose data on a damaged hard drive? Don’t worry, it’s possible to recover data from damaged hard drive with the methods provided in this article.
Can data be retrieved from a damaged hard drive?
Yes, data can often be retrieved from a damaged hard drive, but it depends on the extent and type of damage. When a hard drive is physically damaged, such as from a drop or exposure to water, there can be significant risks to the data. However, in cases where the damage is more logical—like corrupted files, accidental deletion, or bad sectors—data recovery can be more straightforward.
The possibility of successful data recovery depends on factors such as the severity of the damage, the specific components affected, and whether the drive is still able to power up. If the drive is still functioning, there may be a chance to recover the data using software tools or by transferring the drive to a new enclosure.
In cases of severe physical damage, professional data recovery services may be required, as they have specialized equipment to handle such situations. However, there is no guarantee of recovery, and the chances decrease as the damage becomes more extensive.
5 ways to recover data from damaged hard drive
Recovering data from a damaged hard drive can be a daunting task, but there are several effective methods to attempt recovery. Here’s a step-by-step guide on how to recover your lost files:
Method 1. Check the Recycle Bin
Before diving into more complicated recovery methods, start with the simplest one: checking the Recycle Bin. Often, deleted files are temporarily stored here and can easily be restored.
Step 1. Open the Recycle Bin on your desktop.
Step 2. Browse through the files to see if the deleted data is there.
Step 3. Right-click on the file(s) you want to recover.
Step 4. Select Restore to return the file to its original location.
Method 2. Restore from a Backup
If you regularly back up your data, you may be able to restore your files from a previous backup. Many operating systems and cloud services offer automatic backup options.
Step 1. Open the backup software or service you use (Windows Backup, Time Machine, or a cloud service like Google Drive or Dropbox).
Step 2. Locate the backup that contains your lost files.
Step 3. Choose the files or folders you want to restore.
Step 4. Follow the prompts to restore the files to their original location or a new folder.
Method 3. Using data recovery software
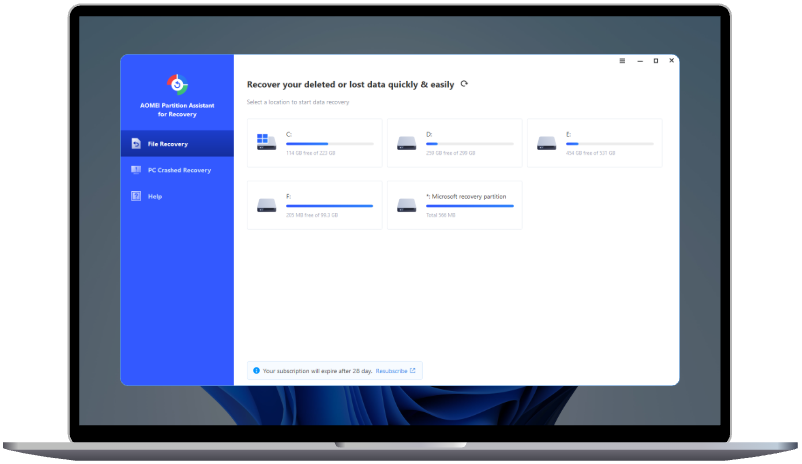
If the above methods don’t work, data recovery software can help recover files from a damaged or corrupted drive. AOMEI Partition Assistant for Recovery is a powerful and user-friendly tool designed to retrieve lost data from damaged or corrupted hard drives efficiently in Windows 11/10/8/7 and Server. Known for its intuitive interface and robust recovery algorithms, it ensures quick and accurate results, making it a top choice for both novices and professionals.
✎ Advantages of AOMEI Partition Assistant for Recovery:
» High recovery rate: Recovers various file types, including lost documents, photos, and videos.
» Ease of use: Simple steps guide users through the recovery process without requiring technical expertise.
» Wide compatibility: Supports various storage devices, including HDDs, SSDs, and USB drives.
To recover data from a damaged hard drive using AOMEI Partition Assistant for Recovery, follow the steps below:
Step 1. Install and launch AOMEI Partition Assistant for Recovery. Choose the exact partition or disk where your data is lost and click Scan.
Step 2. Then, the recovery tool starts to scan and search. lt will execute the “Quickly Scan" first to find your deleted data fast, and then execute the “Deep Scan" for searching other lost data.
Step 3. Once the scan is completed, all deleted files, recycle bins and other missing files will be displayed. Please select the file you would like to recover and then click "Recover".
Step 4. Then, select a folder path to save your recovered files.
Step 5. Wait patiently for this process of recovery to end.
Method 4. Use CHKDSK tool
The CHKDSK (Check Disk) tool can fix file system errors on a damaged drive. It’s a built-in tool in Windows that helps identify and resolve issues that may prevent data from being accessed.
Step 1. Open Command Prompt as an administrator by searching for "cmd" in the start menu, right-clicking it, and selecting Run as administrator.
Step 2. Type the following command:
chkdsk C: /f /r (Replace "C" with the letter of the damaged drive)
Step 3. Press Enter and allow CHKDSK to scan and fix the drive.
Step 4. After the scan finishes, check if your files are accessible or if data has been restored.
Method 5. Connect to a different computer
Sometimes, a damaged hard drive may not be recognized due to issues with the current computer’s hardware or settings. Connecting the damaged drive to a different computer may help access the files.
Step 1. Turn off both computers.
Step 2. Disconnect the damaged drive from the original computer.
Step 3. Connect the drive to a different computer using a USB-to-SATA adapter or directly as a secondary drive.
Step 4. Turn on the new computer and check if the damaged drive is recognized.
Step 5. If it is, attempt to copy the files to a safe location.
Conclusion
Recovering data from a damaged hard drive is often possible with the right approach. Minor issues like corrupted files or bad sectors can be resolved using tools like AOMEI Partition Assistant for Recovery, CHKDSK, or restoring from backups. If the damage is severe, professional recovery services may be necessary.
To maximize your chances, act quickly and avoid using the damaged drive to prevent data overwriting. Regularly backing up your data remains the best defense against loss.

