How to Use PowerShell to Delete Folder and Contents?
PowerShell offers a straightforward way to manage files and folders on your Windows PC. This article will show you how to use PowerShell to delete folders and contents as needed. Here's how to do that.
By Gia / Updated on January 7, 2025
Overview of PowerShell
PowerShell is a powerful command-line tool and scripting language that allows IT professionals and system administrators to automate repetitive tasks. With its ability to work with the operating system and third-party applications, PowerShell has become an essential tool for managing a variety of tasks across different platforms.
The PowerShell environment includes commands, scripts, and modules that allow users to perform a wide range of system operations, including file and folder management. This article will show you how to use PowerShell to delete folders and contents on Windows PCs, providing you with a simple yet effective way to manage your files.
How to use PowerShell to delete a folder and its contents?
Deleting files or folders can be time-consuming, especially when dealing with multiple files or when performing the task across multiple devices. Fortunately, PowerShell allows you to complete these tasks quickly with just a few simple commands. This section provides a step-by-step guide to doing that. Let's explore three common scenarios for deleting folders and contents using PowerShell.
Fix 1. Use PowerShell to Delete a Folder
Wondering how to remove a specific folder using PowerShell? It's easy to do with just a simple command. Here's how you can delete a folder via PowerShell on Windows PCs:
Step 1: Click the Start button, type PowerShell in the search bar, and select Windows PowerShell from the search results.

Step 2: Get the full path of the folder that you want to delete from File Explorer.
Step 3: Type the following command and press Enter. Replace Path with the full path of your folder.
Remove-Item Path
The command removes the folder itself, but it does not delete the contents inside the folder. If the folder contains files or subfolders, PowerShell will prompt an error.
Fix 2. Use PowerShell to Delete a Folder and Its Contents
To use PowerShell to delete the contents of a folder, you need to use the -Recurse parameter. This ensures that all subfolders and files within the specified directory are deleted. Follow these steps to delete a folder and its contents using PowerShell:
Step 1: Click the Start button, type PowerShell in the search bar, and select Windows PowerShell from the search results.
Step 2: Get the full path of the folder that you want to delete from File Explorer.
Step 3: Type the following command and press Enter. Replace Path with the full path of your folder.
Remove-Item Path-Recurse
If the folder contains read-only files or if you want to bypass any prompts, you can add the -Force parameter to forcefully delete it:
Remove-Item Path-Recurse -Force
Fix 3. Use PowerShell to Delete a Specific File
If you only need to delete a specific file within a folder rather than the entire folder, you can target individual files by specifying the file names.
Step 1: Click the Start button, type PowerShell in the search bar, and select Windows PowerShell from the search results.
Step 2: Get the full path of the folder that you want to delete from File Explorer.
Step 3: Type the following command and press Enter. For example:
Remove-Item "C:\Users\YourName\Documents\MyFolder\example.txt"
For read-only files or files that are protected, run the commands:
Remove-Item "C:\Users\YourName\Documents\MyFolder\example.txt" -Force
Bonus Tip: Recover Accidentally Deleted Files or Folders
While PowerShell is a powerful tool for deleting files and folders, it is easy to accidentally delete crucial files. Is it possible to restore deleted files or folders? Sure! This section provides two practical solutions. Select the one that best suits your needs.
Fix 1. Recover Files and Folders from the Recycle Bin
When you realize that crucial files have been deleted by mistake, first check the Recycle Bin. By default, recently deleted items are moved to this folder. And you can easily recover them if you change your mind. Follow these steps to recover deleted items from the Recycle Bin:
Step 1: Double-click the Recycle Bin icon from your desktop.
Step 2: Browse the folder to locate the files or folders you want to recover.
Step 3: Right-click on the selected items and choose Restore. Then they will be returned to their original locations.
Fix 2. Recover Deleted Files or Folders Using Software
Recovering files or folders from the Recycle Bin is straightforward, but it doesn't always work. If the files have been permanently deleted or the Recycle Bin has been emptied, they can no longer be retrieved through this method. In such cases, professional data recovery tools are required. One of the best options for this is AOMEI Partition Assistant for Recovery.
AOMEI Partition Assistant for Recovery is a powerful, all-in-one data recovery solution designed to restore a wide range of files from various devices, including HDDs, SSDs, USB drives, SD cards, and more. Whether files were accidentally deleted or lost due to other issues, this software can help you recover lost data with ease on both Windows PCs(11, 10, 8, 8.1, 7)and Servers. Feel free to download this excellent tool from the link below and give it a try:
Here’s how to recover recently deleted photos using AOMEI Partition Assistant for Recovery:
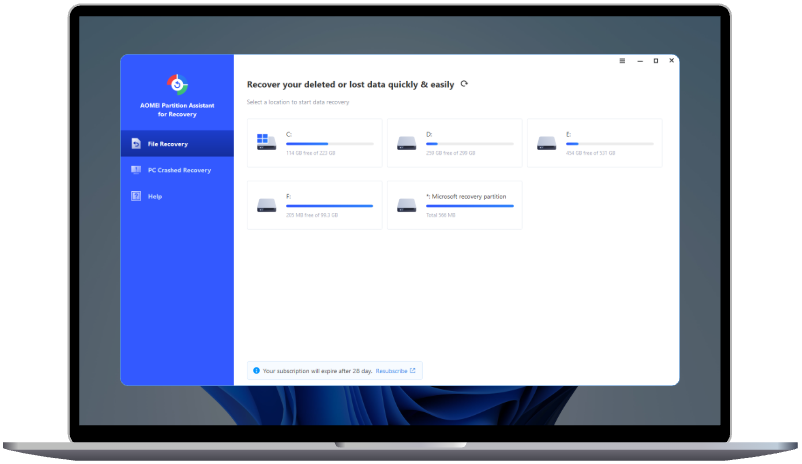
Step 1: Launch AOMEI Partition Assistant for Recovery on your computer and select the exact partition or disk where your photos are stored.
Step 2: Scan the specific disk to find the deleted photos. You have two scan modes to choose from:
- Quick Scan: Quickly searches for recently deleted files.
- Deep Scan: Thoroughly scans your storage device to find lost data from more complex loss situations.
Step 3: Once the scan is complete, all missing files will be displayed. Select the photos you want to restore and click Recover.
Step 4: Specify a saving path for your photos and wait for the process to complete.
- Using Tips:
- You can start recovering files or folders as soon as they appear during the scan.
- It is advised to preview files before recovery to ensure you're selecting the correct ones.
- To avoid overwriting existing data, save the recovered files or folders to a different location.
FAQs
Q1. Is it possible to delete folders and files using PowerShell without confirmation?
Sure! You can use the -Force parameter in conjunction with the Remove-Item cmdlet to bypass confirmation prompts when deleting files or folders. For example: Remove-Item "Path" -Recurse -Force
Q2. Can I delete files and folders from network drives using PowerShell?
Yes, you can delete files and folders on network drives by specifying the network path, for example: Remove-Item "\\NetworkDrive\SharedFolder\*" However, make sure you have the necessary permissions to delete files from those drives.
Q3. What should I do if I accidentally delete important files?
Don’t panic if you've deleted important files or folders; the Recycle Bin or professional recovery software can help restore them. For data integrity, it is advised to back up critical files regularly during daily life.
Final Words
PowerShell is a powerful command-line tool used to automate repetitive tasks, including file management. This article shows you how to delete a folder and its contents via PowerShell on Windows PCs. If you accidentally delete important files with these commands, consider restoring them from the Recycle Bin or using professional recovery software like AOMEI Partition Assistant for Recovery.