NVMe SSD Not Detected and Lost Data: How to Fix That?
When the NVMe SSD not detected in BIOS or Windows, you can read this post to get solutions. It will tell you how to recover lost data due to the problem.
Why is my NVMe SSD not detected in BIOS or Windows?
NVMe (Non-Volatile Memory Express) is a high-performance protocol for SSDs, widely valued for its top throughput and fast response times in handling workloads. Despite its popularity, some users face a peculiar issue: the NVMe SSD is connected but not detected by the system. This can occur in two main cases:
2. The NVMe SSD shows in BIOS or Device Manager but is missing from File Explorer/This PC.
This NVMe SSD not detected issue can arise for several reasons, including an unconfigured BIOS setting, improper connection of the SSD, outdated drivers, missing drive letters, or hard disk troubleshooting needs. How to fix SSD not detected in BIOS or Windows? You can move to the next part to get the solutions.
Case 1. How to Fix NVMe SSD not detected in BIOS?
If your SSD disk is not detected in BIOS, try the following steps.
Fix 1. Check the power and cables
Step 1. Remove the computer power supply. If it is a laptop, remove the battery.
Step 2. Open the PC's case or disassemble your laptop's shell. Re-plug your NVMe SSD.
You can find the NVMe connector on the lower middle of the motherboard and there’s a horizontal slot labeled SATA or PCIe. Please remove the mounting screw opposite the slot and Insert the NVMe SSD. In a laptop, you need to open slot > Slide SSD to the slot
Fix 2. Check BIOS settings
Step 1. Restart your computer and press the F2 key or any key according to your PC to enter the BIOS interface.
Step 2. Check if the SATA port to which the NVMe SSD is connected is turned OFF in System Setup. If it is OFF, turn it ON. Restart your computer and enter BIOS again to see if the NVMe SSD is detected now.
Fix 3. Check SSD
The NVMe SSD not recognized in BIOS might also be caused by a faulty or damaged SSD. In this scenario, you can use diagnostic tools such as a professional SSD error check tool, S.M.A.R.T or CHKDSK to troubleshoot the problem. If you cannot fix the NVMe SSD, you may check the return policy if it is a new one or replace the old drive.
Case 2. How to Fix NVMe SSD not detected in BIOS in This PC/Computer
If your NVMe SSD not detected in "This PC," it might be due to old drivers, the SSD not being set up, a missing drive letter, or a damaged file system. You can update drivers using Device Manager.
Fix 1. Update device drivers
Step 1. Right-click on the Start icon and select Device Manager.
Step 2. Find your NVMe SSD, right-click on it, and select “Update Driver Software”.
Step 3. Select “Search automatically for updated driver software” in the pop-up window. This will update the device drivers automatically. If it doesn’t work to update the driver, just right-click the M.2 SSD and select “Uninstall”. Then restart your computer, and Windows will reinstall the driver by itself.
Fix 2. Use hardware and devices troubleshooter
Step 1. Type Hardware and Devices on the search box and click to start.
Step 2. Click "Next" and wait for scanning.
Tip: What to do when encountering data loss when fixing NVMe SSD not detected?
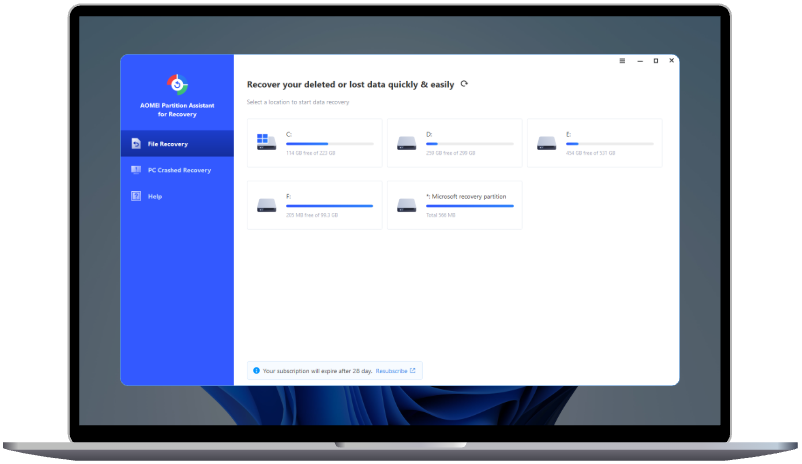
When the NVMe SSD not detected in BIOS or Windows, it is risky to suffer data loss when fixing it or due to other reasons. If you unfortunately lost important data, AOMEI Partition Assistant for Recovery will help you easily and effectively retrieve back the data.
This tool is compatible with Windows 11/10/8/8.1/7 and Windows Server. It can recover lost documents, photos, emails, and other more than a thousand file types from USB drives, hard disks, SD cards, SSDs, and other storage devices.
The Best Windows Disk Partition Manager and PC Optimizer
Step 1. Install and launch AOMEI Partition Assistant for Recovery. Choose the exact partition or disk where your data lost and click Scan.
Step 2. Then, the recovery tool start to scan and search. lt will execute the “Quickly Scan" first for finding your deleted data fast, and then execute the “Deep Scan" for searching other lost data.
Step 3. Once the scan is completed, all deleted files, recycle bins and other missing files will be displayed. Please select the file you would like to recover and then click "Recover".
Step 4. Then, select a folder path to save your recovered files.
Step 5. Wait patiently for this process of recovering ends.
Conclusion
When the NVMe SSD not detected in BIOS or Windows, you can choose the methods that we share in this passage. AOMEI Partition Assistant for Recovery can effectively recover data from SSD, and other storage devices. You can also use it to recover files when the Excel file disappeared after saving, restore permanently deleted files, or fix RAW flash drive, and so on.

