How to Retrieve Pictures from Google Backup/Cloud
"How to recover pictures from Google?” This article provides techniques for restoring photos from both Google Backup and Google Cloud. Besides, it includes guidance on recovering photos from storage media and local devices.
Google Backup and Google Cloud are popular utilities for backing up. However, if you accidentally delete photos from them, you might wonder how to get them back.
If you've faced this situation and want to restore your deleted photos, don't worry! We have simple and effective methods to help you retrieve your precious photos from Google Backup and Google Cloud. By the way, you can also click here to recover deleted emails in Gmail. Just keep reading to learn how to easily do it.
About Google Backup and Google Cloud
Google Backup, also named Google Backup and Sync, can securely store and back up your data, such as photos and contacts, to the cloud. It ensures your important information is safe and easily accessible across devices.
Google Cloud is a platform that provides cloud-based services for individuals and businesses. Users can store data, run applications, and use computing resources on Google's servers. With that, you can create, launch, and expand apps and services easily and reliably using cloud technology.
In short, Google Backup securely backs up and restores personal data from mobile devices, while Google Cloud is a comprehensive platform that provides various cloud-based services for data storage, processing, and application deployment to individuals and businesses.
As the 2 programs are quite widely used by people, the demands of retrieving lost files, especially photos are also surging. In the next part, we will separately share how to retrieve pictures from Google Backup and Google Cloud.
How to retrieve pictures from Google Backup/Cloud
“How do I retrieve pictures from Google Cloud and Google Backup?” If you accidentally deleted important or cherished pictures like this help-seeker from Google Backup or Google Cloud. Here we prepare clear guidance to help you retrieve them back.
Case 1. Retrieve pictures from Google Backup
It is easy to retrieve photos from Google Backup, follow the step-by-step guidance below:
Step 1. To begin, log in to your Google account, where the images were originally stored, and open Google Photos.
Note: You can also access the Google Trash by clicking the three horizontal bars on the top-left side of the screen and selecting "Trash" from the pop-out menu.
Step 2. Next, open Google Photos Trash by clicking on the menu icon located on the left-hand side.
Step 3. Once you're in the Google Photos Trash, locate the photos or videos you wish to retrieve. Click the small checkmark within a circle at the top left of each image or video you want to restore. Then, select the "Restore" link located in the top-right corner of the screen.
Case 2. Retrieve deleted pictures from Google Cloud
Step 1. Sign in to your "Google Admin Console" and click on the "Users" icon.
Step 2. Select the user's name from the list whose photos you wish to retrieve, then click on the ellipsis (three dots) icon on the right.
Step 3. From the menu options, choose "Restore Data".
Step 4. Provide the necessary date range for the restore operation, select "Drive" under Applications, and click on "Restore".
By following these steps, all your photos stored in the cloud will be restored successfully.
Case 3. Restore lost photos with AOMEI Partition Assistant
Apart from Google Backup and Google Cloud, still many users will also choose to save pictures in local or storage media. What to do if you lost photos in these places? AOMEI Partition Assistant for Recovery is a computer management expert, which can offer the most desirable solution.
This data recovery tool is highly capable and can retrieve lost files from any storage media or format. It works swiftly and reliably on Windows devices, including hard drives, USB drives, and memory cards. Moreover, it supports over 200 types of data, including text documents, pictures, videos, music, emails, compressed files, and more.
Functions of AOMEI Partition Assistant for Recovery:
✔ Recover deleted or lost files from HDD, USB, SD card and various storage devices.
✔ Retrieve Word, Excel, PPT, photos, videos, audio, emails, zipped files, and over 200 other file types.
✔ Keep the original format of recovered files.
✔ Search for target Word files by typing the file name during the scan, or wait for automatic discovery with Quick Scan and Deep Scan.
✔ Supports NTFS, exFAT, FAT32 and ReFS file systems.
✔ Compatible with Windows Server and Windows 7, 8, 10, 11 64-bit and 32-bit.
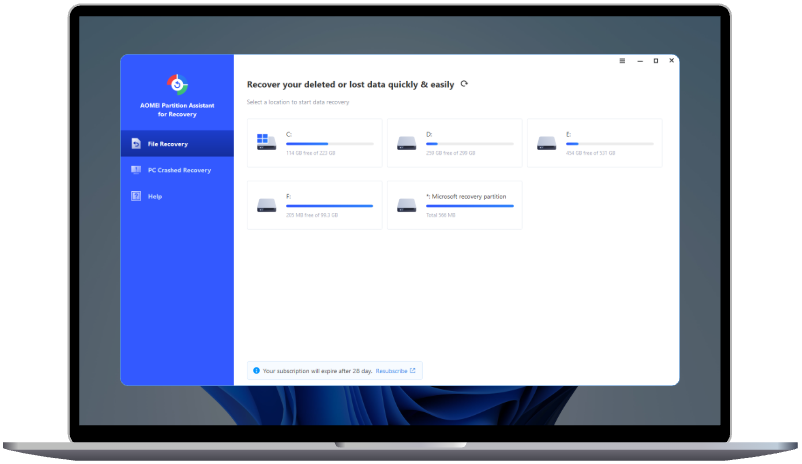
Step 1. Install and launch AOMEI Partition Assistant for Recovery. Choose the exact partition or disk where your data lost and click Scan.
Step 2. Then, the recovery tool start to scan and search. lt will execute the “Quickly Scan" first for finding your deleted data fast, and then execute the “Deep Scan" for searching other lost data.
Step 3. Once the scan is completed, all deleted files, recycle bins and other missing files will be displayed. Please select the file you would like to recover and then click "Recover".
Step 4. Then, select a folder path to save your recovered files.
Step 5. Wait patiently for this process of recovering ends.
Final words
In summary, we share how to retrieve pictures from Google Backup and Google Cloud separately. As you can see, follow the guidance, you can easily get the accidentally deleted online photos back. And with AOMEI Partition Assistant for Recovery, it is also simple to recover the photos in local or other storage devices.
You can use AOMEI products like AOMEI Partition Assistant. This versatile software can also play a big part in moving installed programs to another drive for extending drive space, migrating OS to a better SSD for performance enhancement, and regularly cleaning your space for PC health. Windows Server users can choose the Server Edition to manage your device conveniently.

