[Step-by-step Guide] How to Clone Steam Deck SSD
Upgrading the Steam Deck SSD might seem like a difficult job for many users. Don’t worry, you’ll learn how to clone a Steam deck SSD and how to replace new SSD on your Steam deck step by step.
By Lucas / Updated on February 26, 2025
Why is it the best choice to upgrade via cloning Steam deck SSD?
When you insert a new SSD into your Steam Deck, it won't automatically come preloaded with Steam OS, your login details, or your games. Cloning is the optimal solution if you're looking to effortlessly connect your new SSD to your Steam Deck without going through the hassle of setting up the device from the beginning.
By cloning your previous SSD, you can cleverly deceive your Steam Deck into recognizing it as the original one, only with a larger storage capacity. Your Steam Deck will seamlessly recognize all your files, Steam Deck settings, login information, games, and more.
If you want to upgrade the SSD on your Steam Deck, it's a good idea to clone your existing one onto the new SSD. This way, you can quickly start downloading and playing new games without wasting time installing Steam OS from scratch.
Preparations for Steam deck SSD upgrade
For Steam deck, the 64GB model of the Steam Deck operates on the PCIe Gen 2 x1 protocol, while the 256GB and 512GB models utilize either the PCIe Gen 3 x4 or PCIe Gen 3 x2 protocol. It is important to make sure that the purchased M.2 SSD is compatible with the correct protocol.
Here are the preparations before starting:
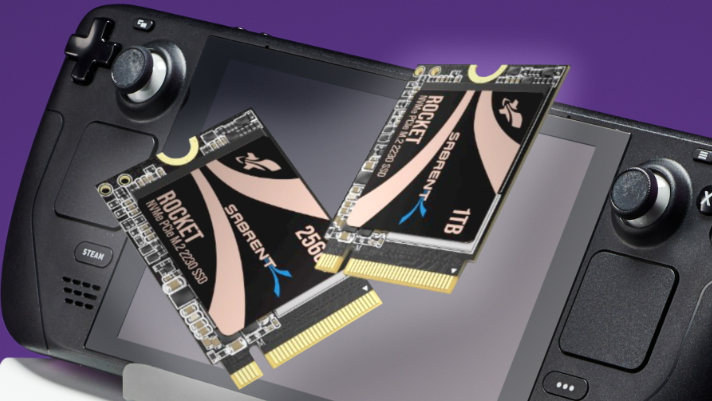
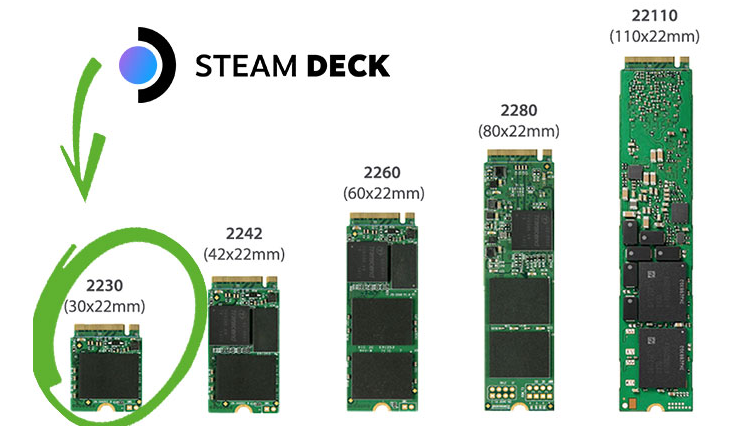
• A 2230 form factor NVMe SSD
• Steam Deck having a 25% charge or less remaining
• A pair of tweezers and a plectrum
• A PH1 or PH0 screwdriver
• A Windows PC
• A reliable cloning utility
It is a more efficient and convenient method to copy the utilized sectors when compared to reimaging, which can be time-consuming and may require several hours. Therefore, in this tutorial, we will be utilizing AOMEI Partition Assistant Professional to efficiently clone the Steam OS and other game data to the new SSD. We suggest downloading this tool ahead of time to your Windows PC. In addition, alternative methods exist to expand your Steam Deck's storage capacity.
The Best Windows Disk Partition Manager and PC Optimizer
How to clone Steam deck SSD for disk upgrade
Now, let’s see how to remove the old SSD from Steam deck.
Stage 1: Remove the Original SSD
For optimal safety, it is advisable to ensure that the battery of your Steam Deck is discharged below 25% before attempting to open it. This precaution helps minimize the risk of inadvertently puncturing the Li-Ion battery. Before engaging in any modding activities, we highly advise activating the battery storage mode for your Steam Deck. Alright, let's begin.
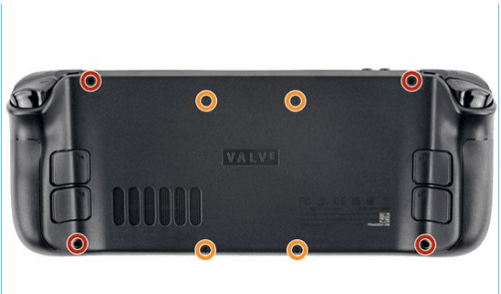
Step 1. You'll need to take out the screws on the back cover. After that, gently unclip the back cover and carefully remove it.
Step 2. Locate the concealed shield screw and carefully extract the shield.
Step 3. Please disconnect the battery.
Step 4. Unscrew the SSD and carefully remove it.
Step 5. Carefully remove the SSD shielding and extract the original SSD.
Stage 2. Clone Steam deck SSD without data loss
To perform the disk cloning process for upgrading the Steam Deck SSD, you need to connect both the existing SSD and the new SSD to a Windows PC. This allows you to clone and transfer all game data from the old SSD to the new one. However, if the new SSD is unused, you may encounter an "SSD not initialized" error. In this scenario, you must initialize the new SSD before proceeding with the data transfer. AOMEI Partition Assistant Professional also enables you to initialize a new SSD and effortlessly clone the used sectors from the old SSD to the newly initialized SSD.
▶ Part 1. Initialize new SSD for Steam deck
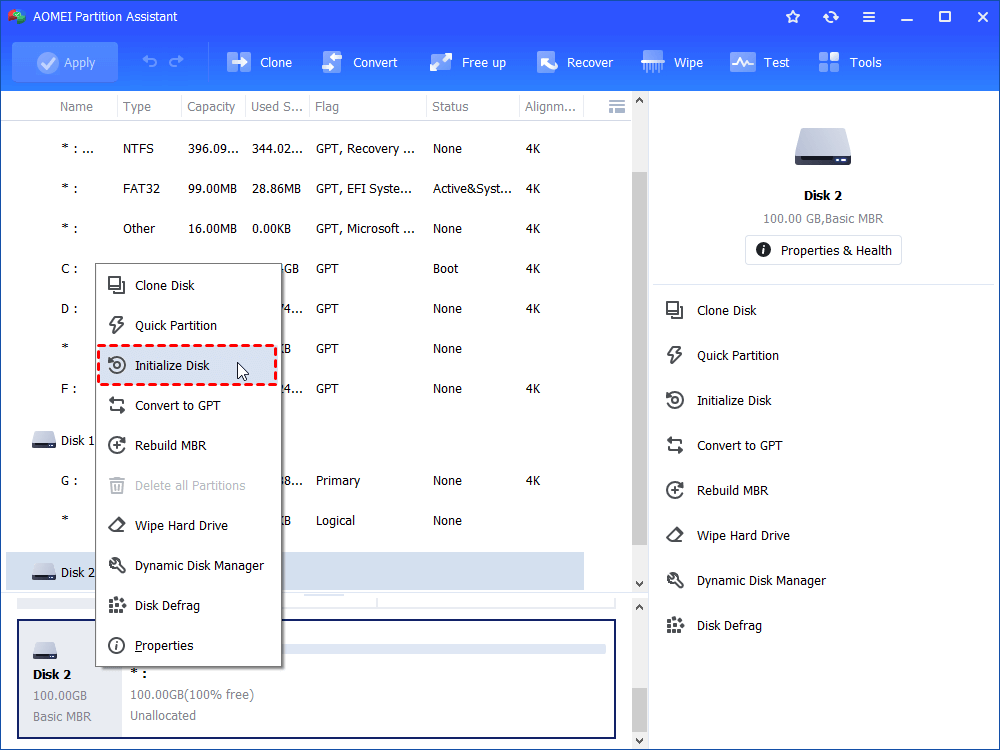
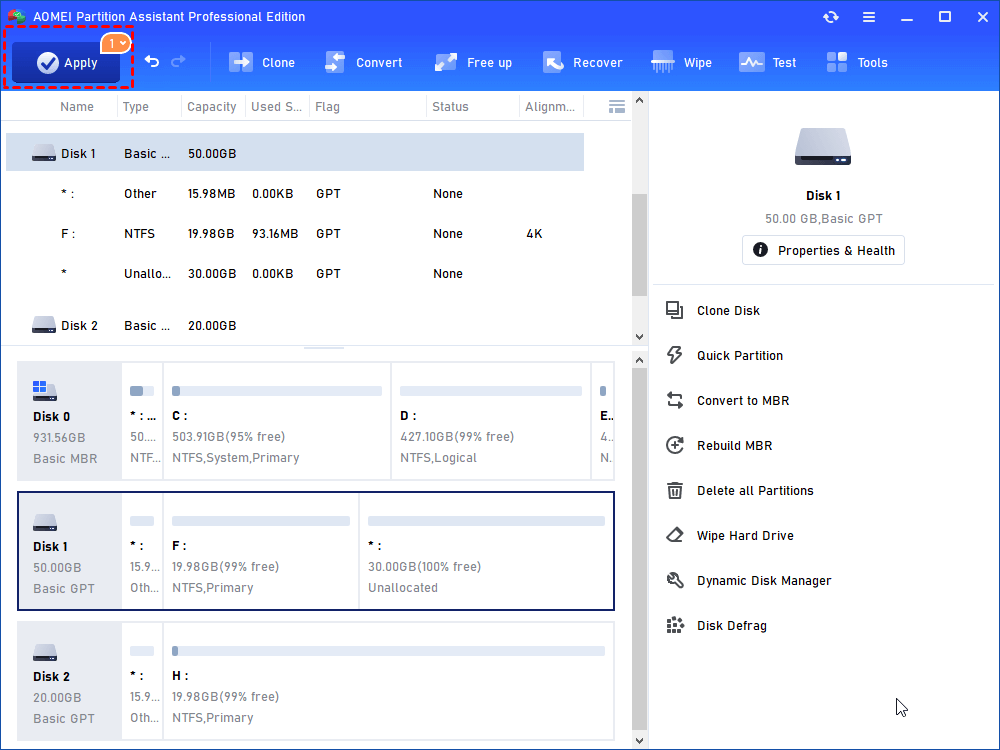
Step 1: Launch AOMEI Partition Assistant and right-click on the raw disk which you want to initialize, let's take Disk 2 as an example. Choose "Initialize Disk" in the pop-up menu.
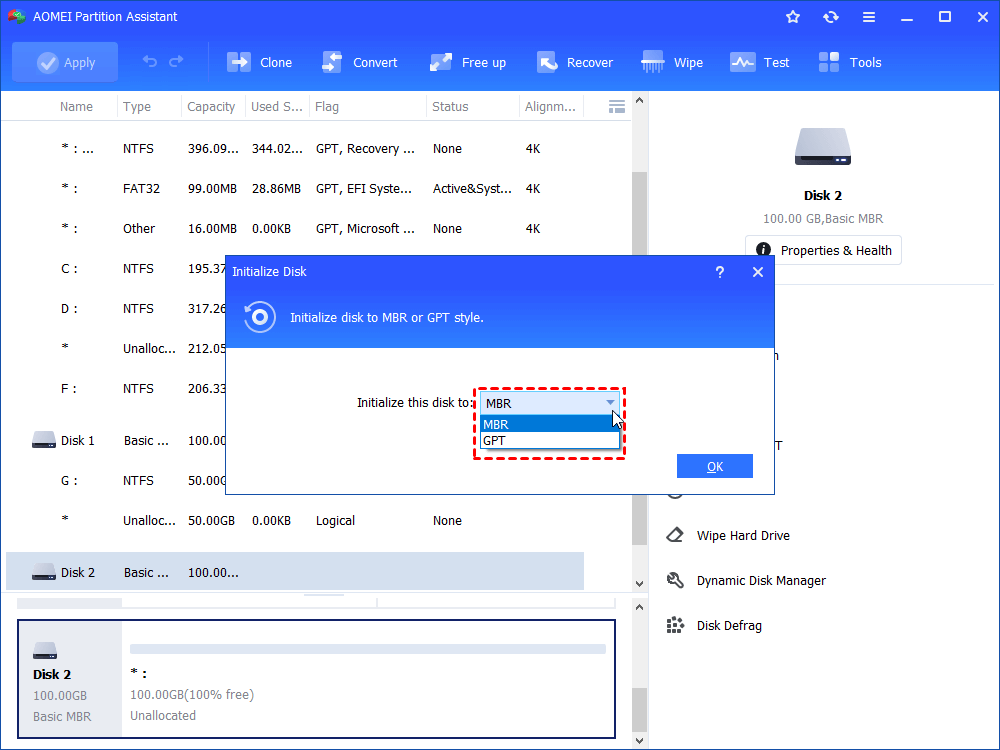
Step 2: In the pop up window, there will be two options for you to choose. You can initialize the disk to MBR or GPT style. Click "OK" to continue.
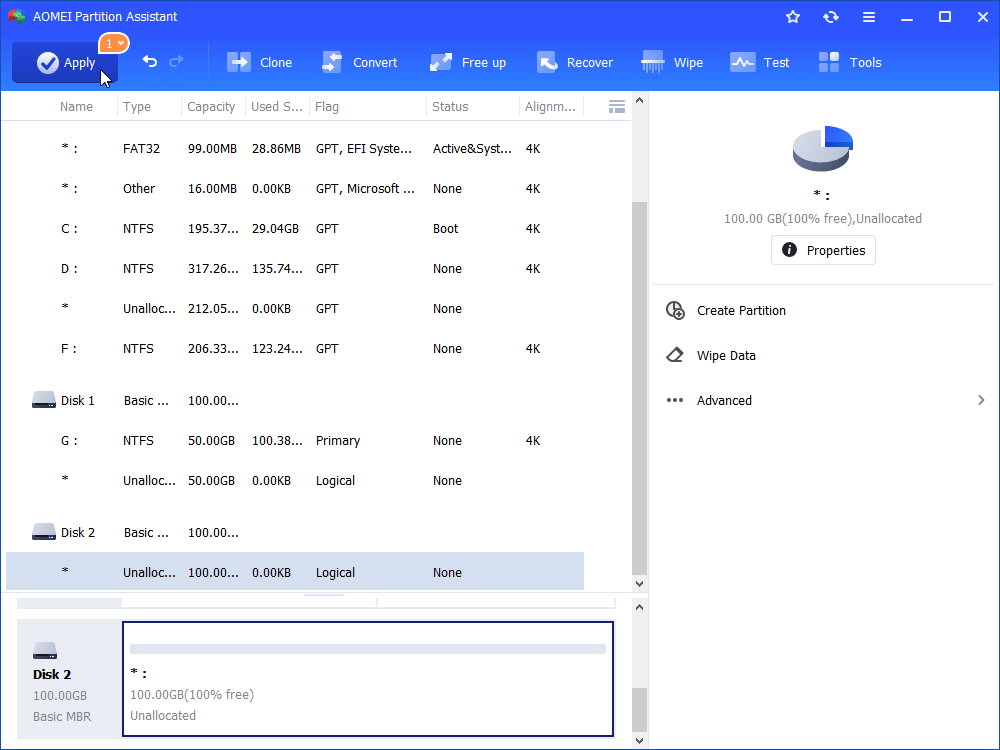
Step 3: Click "Apply" to wait for process to complete.
▶ Part 2. Clone original Steam deck SSD to the new one
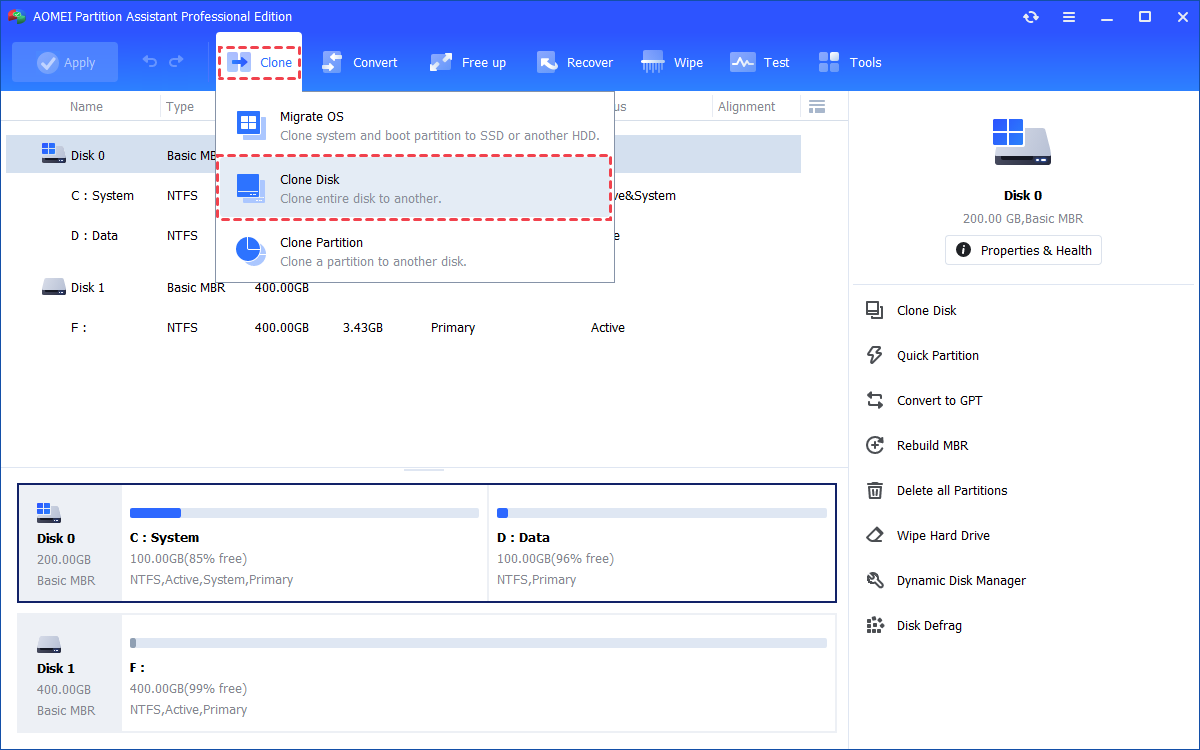
Step 1. Click the "Clone" main tab and select "Clone Disk". (You can also right-click the Disk you want to clone and select the "Clone Disk" tool to run disk clone.)
Step 2. Choose the hard disk that you need to clone as the source disk and click "Next".
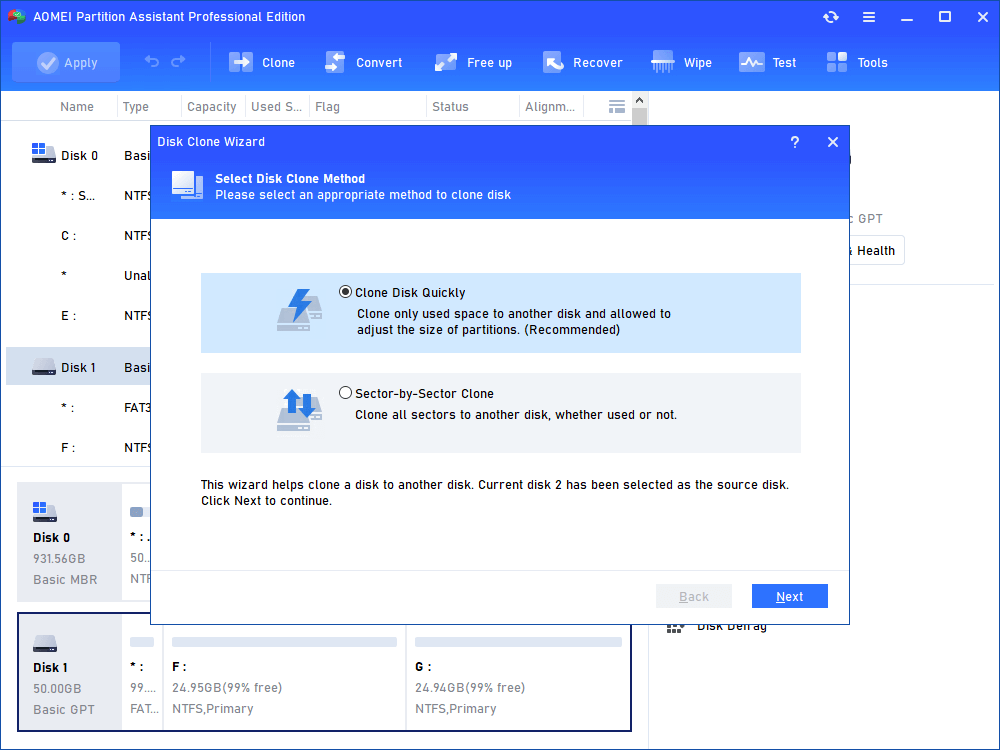
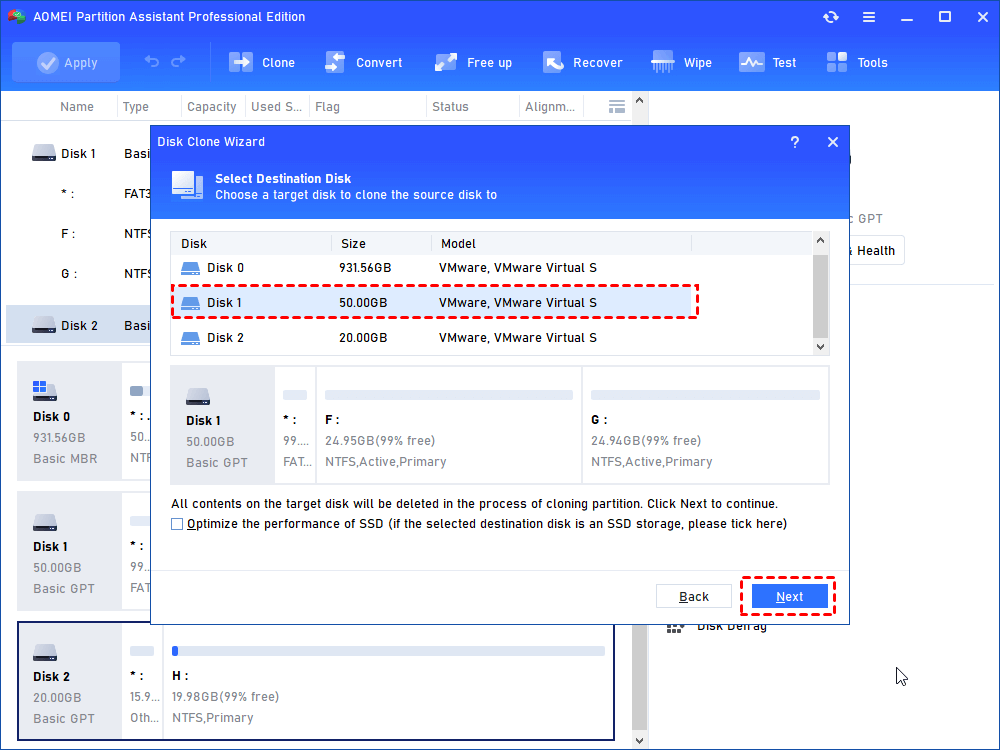
Step 3. Select the destination disk to put the data of the source disk on, and then click "Next".
Step 4. Then, you will enter the Confirm interface where you can check the source and destination disk. After all is set, you can click the "Confirm" button to continue.
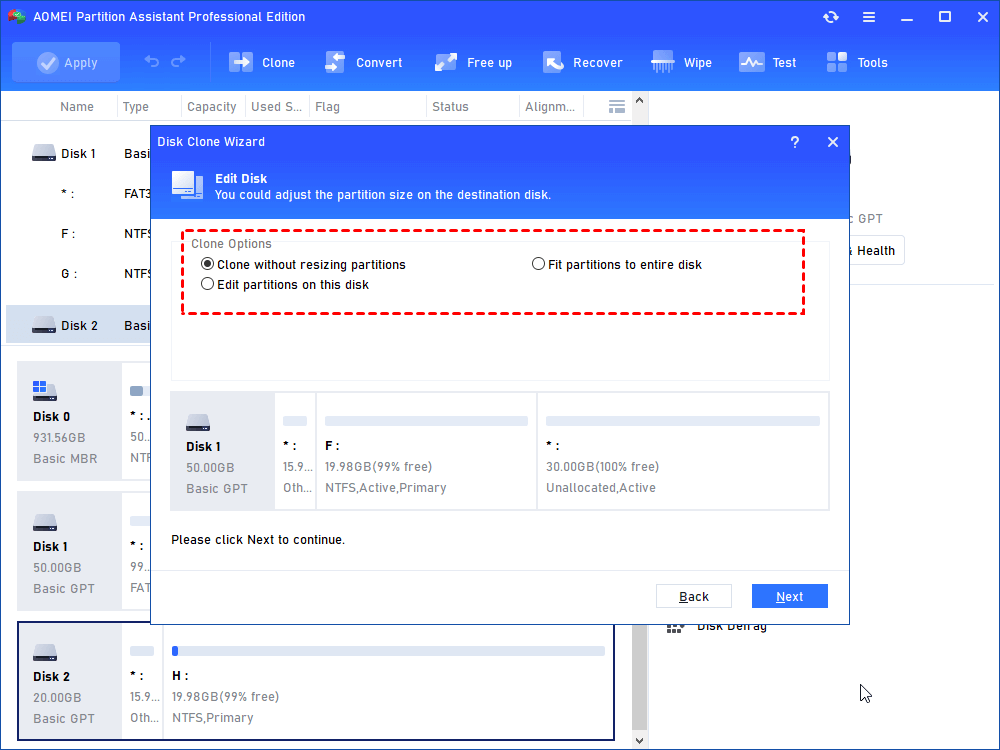
In lower left corner of the window, you can click the "Settings" button to adjust the partition size on the destination disk. There are three options for you:
- Clone without resizing partitions: all partitions will be cloned to the target disk as the original partition size. It is available when the target disk is larger than the source disk. If it is smaller, this option will be grayed out.
- Fit partitions to entire disk: all partitions will be cloned to the target disk and take up its full capacity according to the original partition size proportion.
- Edit partitions on this disk: you can change every partition size on the target disk as you need.
After finishing the adjustment, please click "Save".

Notes:
- You can tick "4k alignment" to improve the reading and writing speed of SSD if the selected destination disk is an SSD storage.
- All data on this selected destination disk will be wiped out after you save the operation to physical disk. If there is important data on the destination drive, please make a backup in advance.
- If you clone to a smaller SSD, the first option is grayed out. If you select Sector-by-Sector Clone, it is unable to adjust the size on the destination disk.
Step 5. You can preview the disk cloning operating by viewing the "Pending Operations". To commit the "Pending Operations", please click "Apply" and "Proceed".
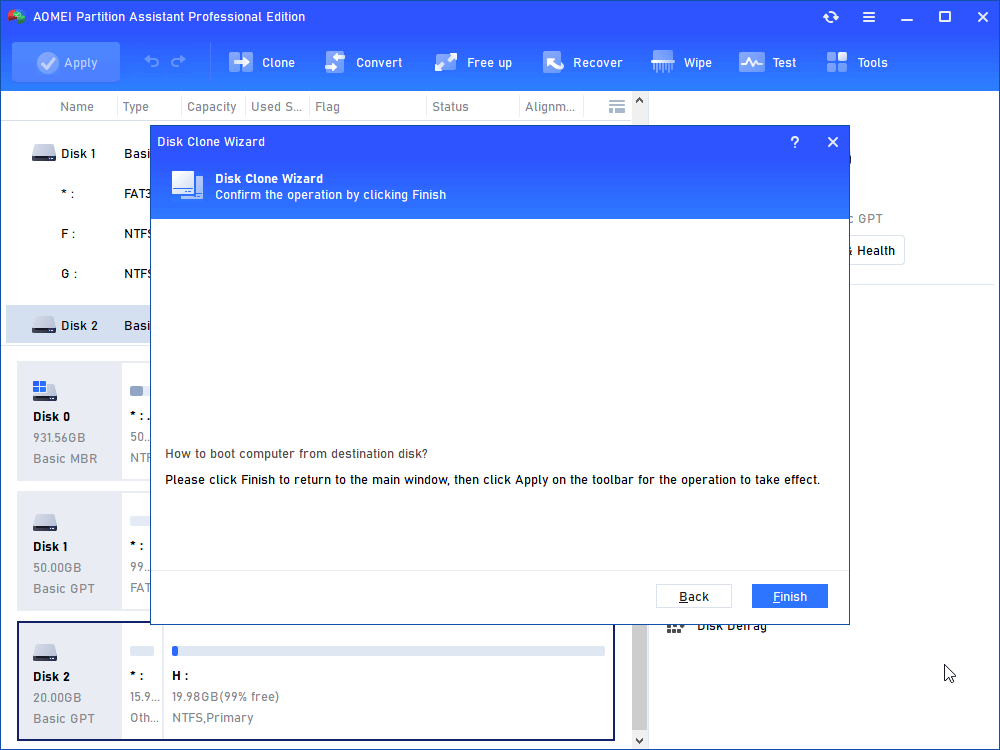
Step 6. The cloning process will start and you can check the cloning process.
Stage 3. How to replace Steam deck SSD after cloning
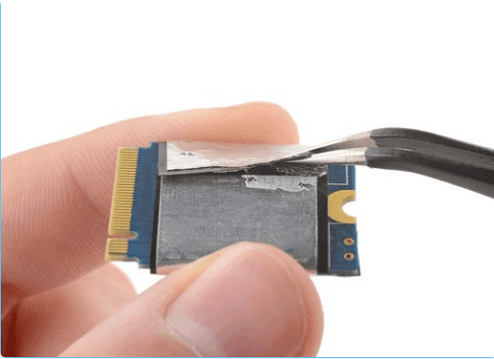
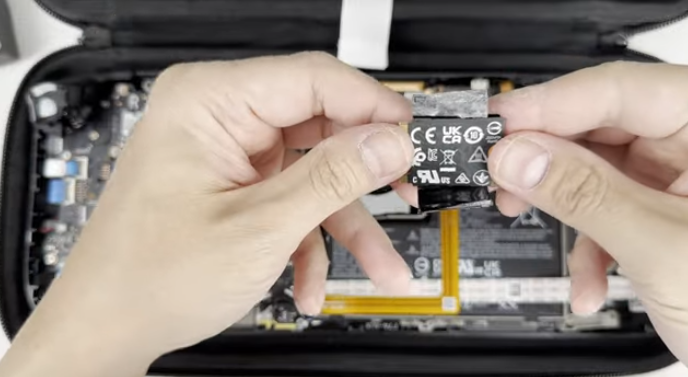
Step 1. Carefully transfer the foil shielding from the old SSD to the new one.
Step 2. You need to carefully insert the new SSD into the designated slot and securely fasten it with screws.
Step 3. Reconnect the battery by gently inserting the fabric strip into the battery port. Once connected, the power light will flash briefly in white, indicating successful completion.
Step 4. Reattach the shielding by sliding it back into its original position. Make sure to align it with the screw holes underneath. After ensuring that all components are properly set up, it is important to verify that the fan wires are positioned above the shield for optimal functionality.
Step 5. Reattach and secure the back plate. Take hold of the backplate and carefully position it onto the Steam Deck. Then tighten it securely.
If you encounter issues with your Steam Deck not starting up, there's no need to worry. It's possible that there was an issue with the reassembly. To address this issue, it is recommended to carefully disassemble the Steam Deck once more and proceed with detaching the battery connector and SSD. These two components are probably the source of any problems. The Steam Deck will not power on to prevent any potential damage to the device if these two components are not properly installed.
To sum up
For a foolproof approach, we recommend going back to the guide and carefully following the correct order when disassembling the Steam Deck. This tutorial offers a method to upgrade the Steam Deck SSD without relying on Rufus or creating any bootable images.
By cloning a Steam Deck SSD, you can avoid the inconvenience of having to re-download games, switch settings, and navigate through the complexities of the Linux-based Steam OS. AOMEI Partition Assistant is capable of initializing a new SSD and facilitating the cloning of Steam OS and other game data from the old SSD to the new one.

