How to Successfully Zero Fill Hard Drive from Bootable USB for Free?
Need to zero fill hard drive without booting system? You can download AOMEI Partition Assistant to zero fill hard drive from a bootable USB.
Content
Necessary to zero-fill hard drive via bootable USB
The answer is “yes”. And many users may have already known low-level formatting can’t delete data on a hard drive completely and zero filling a hard drive is an efficient method to wipe the data completely and permanently. But how can you do that when you are not allowed to boot into Windows for some reasons?
Actually, you can zero-fill your hard drive from a bootable USB flash drive. It sounds incredible and complicated, but you can turn to the disk wiping freeware called AOMEI Partition Assistant, which can help you to create a bootable USB drive to boot your PC and zero-fill your HDD/SSD with ease. And it is compatible with most Windows systems, including Windows 11/10/8/7.
The following content will give you a detailed demonstration of how to zero-fill hard drive from bootable USB stick.
1. Create a bootable USB
First of all, you need a USB stick that doesn’t have any important data, because it will be formatted after being a bootable drive. Or you can back up files on the USB beforehand.
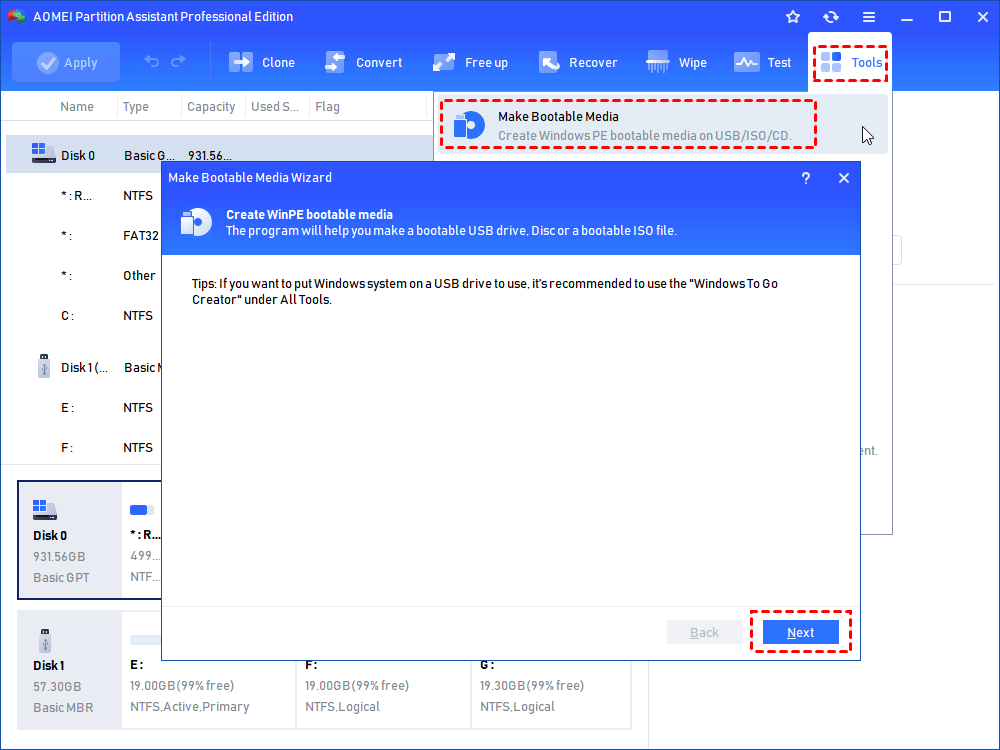
Step 1. Insert USB into another working Windows computer, free download and open AOMEI Partition Assistant. Click "Tools” from the top toolbar and select “Make Bootable Media”.
Step 2. Here choose “USB Boot Device” as bootable media. And click “Proceed”.
✍Note:
-
Add drivers: It permits you to manually add additional drivers into the bootable media.
-
Burn to CD/DVD: If you have a CD or DVD, you can also choose "Burn to CD/DVD" to make bootable CD.
-
Export ISO File: Using this method, you can make bootable ISO file.
Step 3. Then you will be warned that your USB stick will be formatted. Ensure you have anything valuable backed up. Then click “Yes”.
Step 4. When the operation is finished successfully, then click “Finish”.
Now, the AOMEI Partition Assistant is installed in the bootable USB, and you can zero-fill hard drive with it.
2. Boot from the bootable USB
Now, insert the bootable USB into computer, and set the USB as the boot drive.
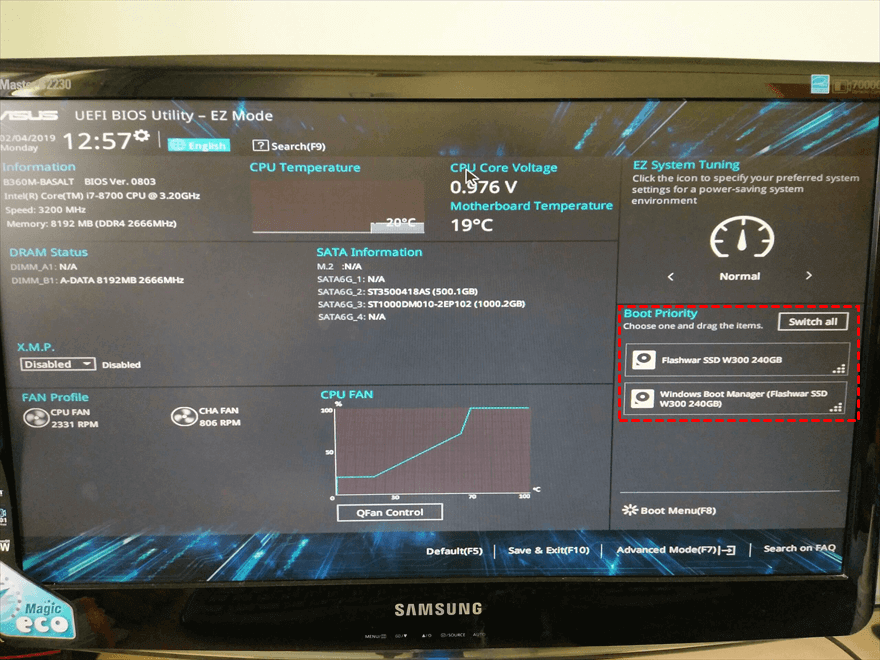
1. Turn on the computer, when first screen shows up, press and hold the F1, F2, F3 or Esc to enter BIOS. The key to enter BIOS depends on system. If you don’t know it, consult the computer manually.
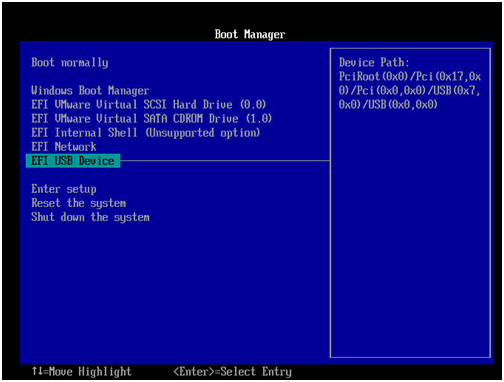
2. When you enter the BIOS, you can use arrow keys to select the bootable USB as boot drive, and press Enter to boot from it. Refer to the following image:
3. Start zero filling hard drive from bootable USB
Now, follow the steps below to wipe your hard drive by zero-filling from the bootable USB.
Step 1. Install and launch AOMEI Partition Assistant, click the "Wipe" main tab and select "Wipe Hard Disk" option. (You can also right-click the Disk you want to wipe and select the "Wipe Hard Drive" option.)
Step 2. Select the disk you want to wipe and click "OK" to continue.
In this stage, you can also select a wiping method to wipe the selected hard drive according to your requirements and click "OK". (By default, the wiping method is Fill in 0.)
Notes:
- Fill in 0: Overwrite all sectors with zeros. It is common to wipe a personal hard drive. It is safe and fast.
- Fill in random information: It overwrites the hard drive with random data. It is more secure than the first one.
- DoD 5220.22-M: It will overwrite addressable locations on the hard disk with binary 0's, binary 1's, and a random bit pattern from once to seven times. The more times you choose to overwrite, the longer the process will take. Three times to five times are recommended. It is more secure than "zero-filling" and "random data filling" and faster than the Guttman. Thus it is often adopted by companies and organizations.
- Gutmann: It overwrites a hard drive with 35 passes. It is the safest way here, but it also takes the longest time.
Step 3. You can preview the shrink operation by viewing the "Pending Operations". To commit the "Pending Operations", please click "Apply" and "Proceed".
Conclusion
This is about how to zero-fill hard drive with bootable USB. As you can see, when your computer can’t boot into Windows, you can use AOMEI Partition Assistant to create a bootable USB, and boot your computer from it to wipe your HDD/SSD.
Moreover, if you upgrade to professional edition, you can unlock more great and practical functions, such as Windows to go, migrate OS from MBR disk to GPT or from GPT to MBR, SSD secure erase.


