How to Fix Windows Working Slow? Speed Up Your Computer in 10 Ways!
Why is Windows working slow? This article will explain it and share how to fix the Windows 11, 10, 8, and 7 sluggish issue.
By Irene / Updated on February 27, 2025
Why is Windows working slow?
Many computer users complain that their system lags, takes too long to respond, or freezes when running multiple programs, which has become a common issue. Even new computers can experience slow performance. Several factors can cause these problems. While not all reasons are covered here, this list provides a good starting point for understanding why your Windows system may be running slow or freezing. Once you figure out which one is the problem, you can apply the right fix:
● Excessive temporary files.
● Dust buildup inside the PC.
● Windows and drivers are outdated.
● C drive is full or lacks free space for running.
● Hard drive corruption or fragmentation.
● Malware or viruses.
● Too many installed programs consume memory.
● Use a small or outdated disk.
How to fix the Windows working slow issue?
If you prefer to use Windows built-in tools, here are 6 ways can help to fix the Windows 10 and 11 sluggish issue. To save time and effort, you can also choose to use a professional tool, which gives an all-in-one solution to speed up your computer.
The Best Windows Disk Partition Manager and PC Optimizer
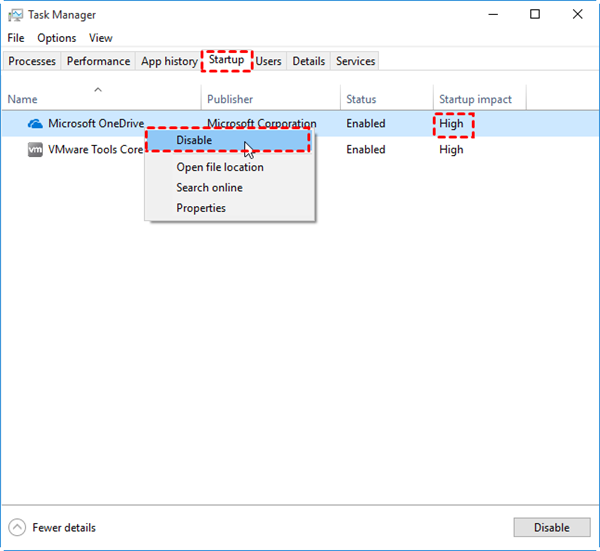
Way 1. Disabling unnecessary startup programs
Some programs are set to start automatically every time your computer boots up. These background processes use up memory and slow down your system. Disabling them can significantly boost your Windows 10 performance.
Press "Ctrl+Alt+Del" to open "Task Manager," then go to the "Startup" tab to see the list of startup programs. You can also check the "Startup Impact" for each program—those marked as "High" can severely slow down your system. Simply right-click on any unwanted program and choose "Disable" to stop it from launching at startup.
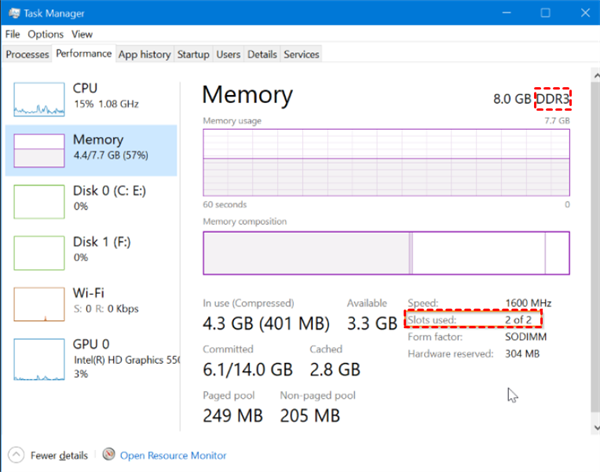
Way 3. Add more RAM
If your Windows computer is running slowly, it might be because there isn’t enough RAM (random access memory). To fix this, you can add more RAM. The easiest way is to install new RAM chips, but first, you need to check what type of memory your computer is using. Open Task Manager, then click "Performance". This will show you the current memory type and how many slots are being used. After that, buy a compatible RAM and install it on your computer.
Way 3. Change the size of virtual memory
Virtual memory allows the operating system to manage memory by temporarily moving data from RAM to disk storage, helping compensate for low physical memory. If virtual memory is too low, your computer’s performance may slow down. Here’s how to fix Windows sluggish by increasing the virtual memory size.
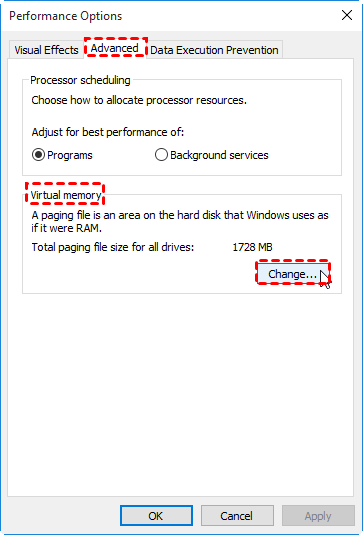
Step 1. Right-click "My Computer" or "This PC" and choose "Properties". In the left panel, click "advanced system settings".
Step 2. On the "Advanced" tab, click "Settings" under "Performance". Click the "Advanced" tab, and then click "Change" under "Virtual memory".
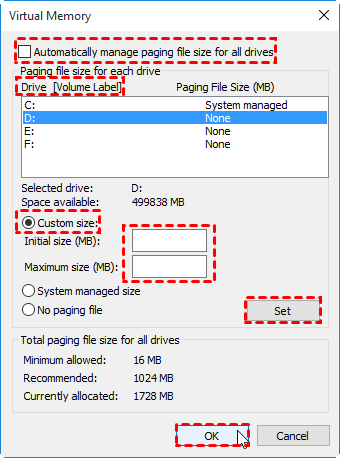
Step 3. Uncheck "Automatically manage paging file size for all drives." Then, under the "Drive" column, select the drive with the paging file you want to change. Click "Custom size," enter a new size in megabytes for Initial size and Maximum size, then click "Set" and "OK" to save the changes.
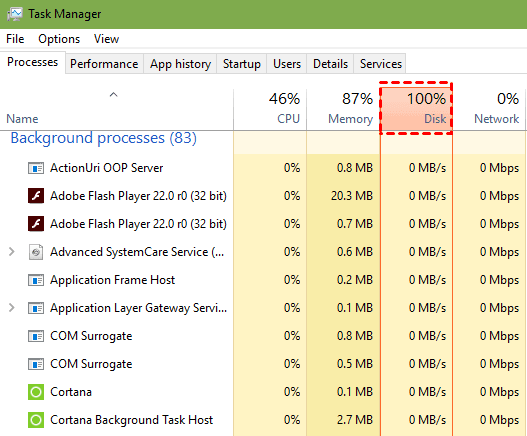
Way 4. End background program
A slow computer is often caused by too many programs running at once, using up processing power and lowering performance. Even after closing some programs, they may keep running in the background or start automatically when you turn on your computer.
To see which background programs are running on your PC and how much memory and processing power they occupy, please open the "Task Manager", which you can access by pressing CTRL + ALT + DELETE.
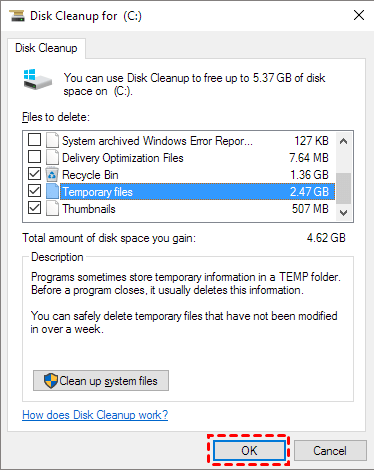
Way 5. Run Disk Cleanup
As we mentioned in the reasons why is Windows working slow, low disk space on the system C drive is one of the major causes. Thus, if you find your computer is still running at a low speed, you can clean up your C drive to make it faster.
Disk Cleanup is an integrated tool in Windows that can help you free up space from disks. Type "disk cleanup" in the search box, and select C drive to open Disk Cleanup for C drive window. After ticking the files you do not need and click "OK" to continue.
To deep delete all unnecessary files from your computer, switching to a PC cleaner program is a smart move. It helps you get more space on the hard drive with no effort.
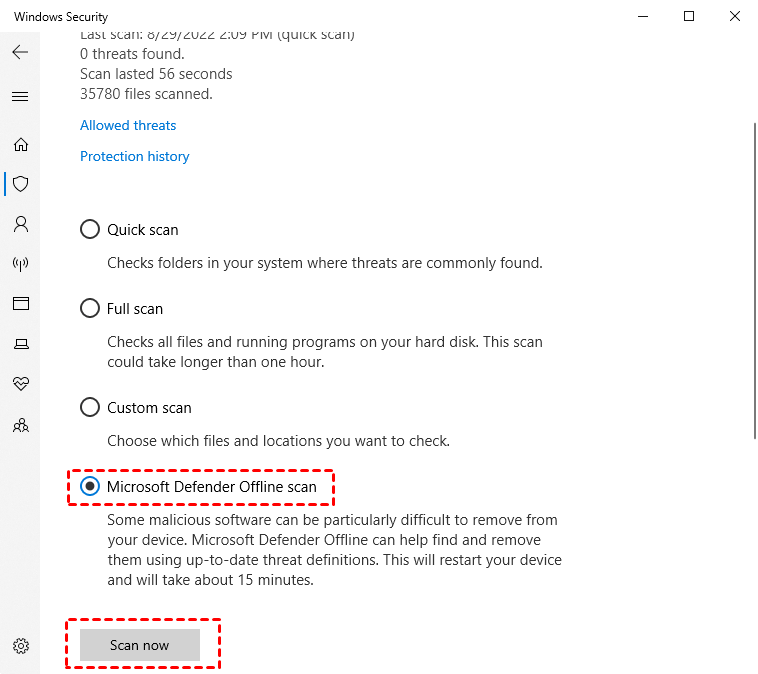
Way 6. Scan for malware or viruses
If none of the above solutions work, your computer may be infected with malware or viruses. If you don’t have reliable anti-virus software, you can use Windows Defender to scan and remove threats.
Press "Windows + I" to open "Settings" > "Update & Security" > "Windows Security" > "Open Windows Security" > "Virus & threat protection" > "Scan options". Select "Microsoft Defender Offline scan", then click "Scan now".
After your PC restarts, check whether it runs faster than before. If not, keep reading.
An all-in-one solution for speeding up Windows computers
When your Windows working slow, built-in tools often have limited support. AOMEI Partition Assistant is an all-in-one solution that simplifies the process. This powerful disk management tool works on Windows 11, 10, 8, and 7, offering a variety of easy-to-use solutions to quickly fix sluggish performance and improve your device’s speed.
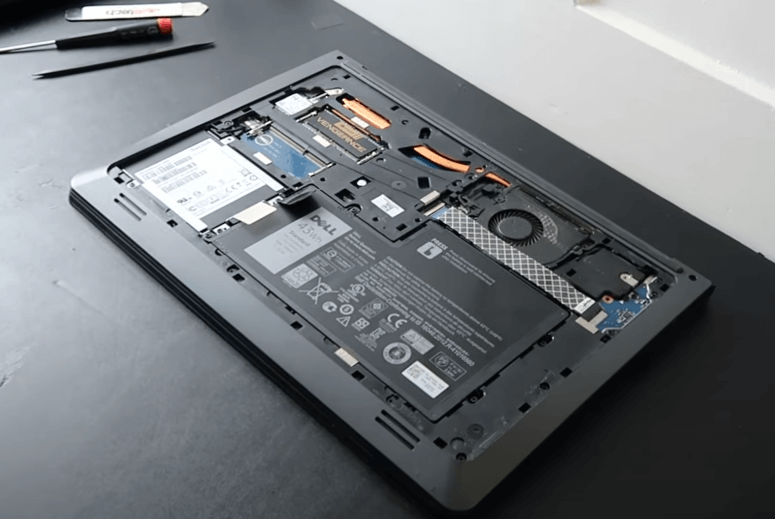
Way 7. Upgrade your disk
If you’ve been using your HDD for a long time, its performance may slow down as it ages. At this point, upgrading to an SSD can boost performance, especially for gamers. SSDs offer faster read speeds, lower temperatures, and better durability.
To upgrade your hard drive, AOMEI Partition Assistant can help. Its "Disk Clone" feature allows you to transfer everything from your HDD to the SSD without needing to reinstall anything. After the transfer, you’ll be able to boot Windows system from the SSD.
The Best Windows Disk Partition Manager and PC Optimizer
Preparations:
✍ Prepare a SATA to USB adapter to connect the SSD to the laptop.
✍ The partition style must be compatible with the boot mode (UEFI and Legacy BIOS). In order to avoid changing the boot mode after cloning, you’d better make the partition style of the SSD as the same as the partition style of the HDD. So, please convert the SSD to MBR or GPT if necessary.
Step 1. Click "Clone" in the main interface, and select "Clone Disk".

Step 2. Choose the Windows 11 hard disk as the source disk and click "Next".

Step 3. Select the SSD drive as the destination disk, and then click "Next".

Step 4. Then, you can check the source and destination disk in the next window or change to "Sector to Sector clone", and click the "Confirm" button to continue if there is no problem.

Here, you can also click the "Settings" button to adjust the partition size on the destination disk or tick "4k alignment" to improve the reading and writing speed of the SSD.

Step 5. After returning to the main interface, check the pending operation and click "Apply" and "Proceed" to commit the operation.

After successfully cloning the old HDD to the SSD, now you can install the SSD on the laptop and boot it.
Way 8. Schedule defrag partition on your HDD
Too many fragmentations can cause slow PC performance. Thus, it's not a bad idea to defrag your HDD partition to make your computer run faster and scheduling defrag partition can keep your HDD always in a good state.
Warning: Never defrag your SSD. If your hard drive is an SSD, turn to making 4K SSD alignment.
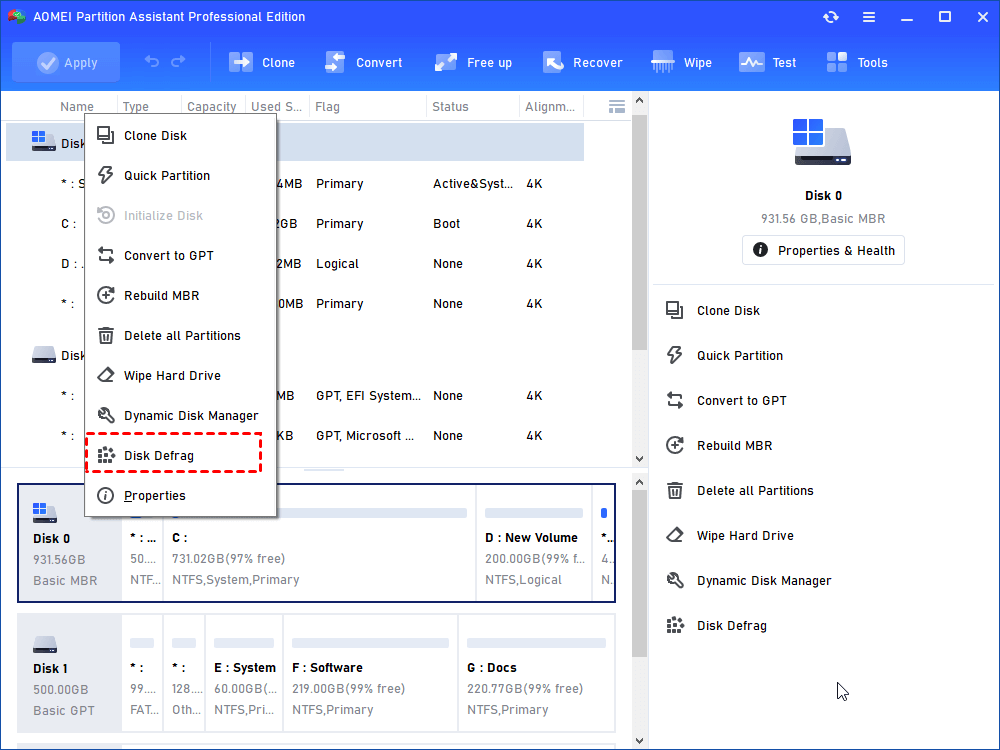
Step 1. Launch AOMEI Partition Assistant Professional, select the target disk or partition, and choose "Disk Defrag" or "Advanced" > "Defrag Partition".
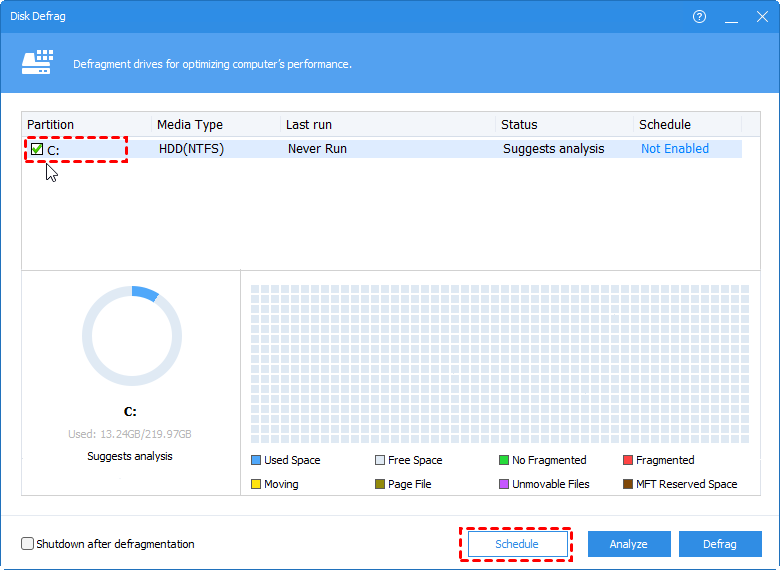
Step 2. In the pop window, you can see all your used drives. Because we need to set a schedule, you need to click the button "Schedule", but you can also directly defrag the disk or partition if you want.
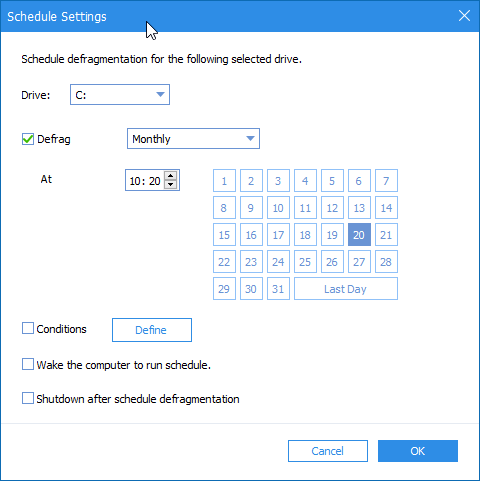
Step 3. In the schedule settings, you can select drives, the specific date and time to defrag the target drives, then click "OK" to save the settings.
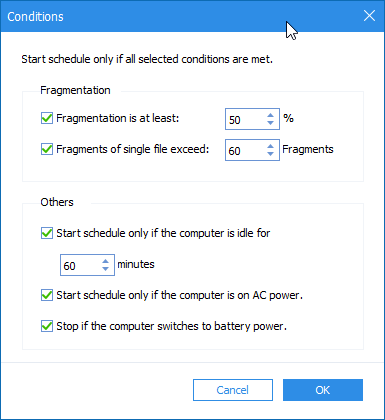
Step 4. Click "Conditions", you can set the rate of fragmentation to trigger the schedule to defrag your disk and tick other options to help you make a detailed schedule based on your needs. Then click "OK" to save the settings.
Way 9. Extend system drive
The space on your system drive can affect your PC’s speed. You can extend the system drive with AOMEI Partition Assistant. Here’s how:
Step 1. Install and launch AOMEI Partition Assistant. Then, all disks and partitions will appear on the main interface.
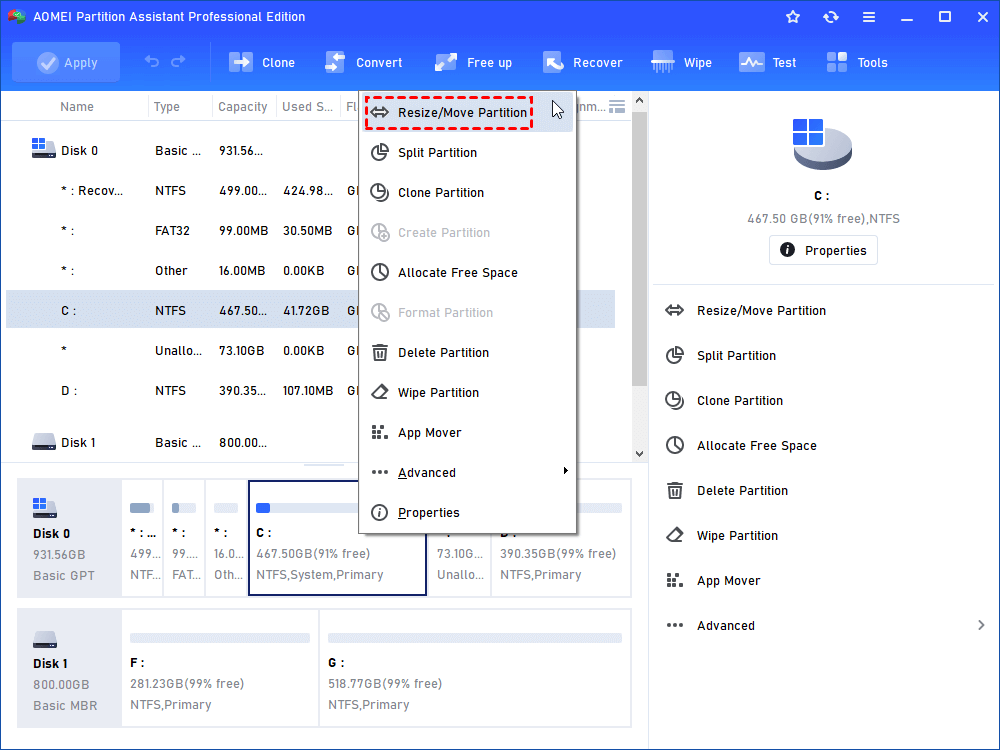
Step 2. In this demonstrator, there is unallocated space behind the C drive. Then, right-click the partition (here is C drive) you want to extend and select "Resize/Move Partition".
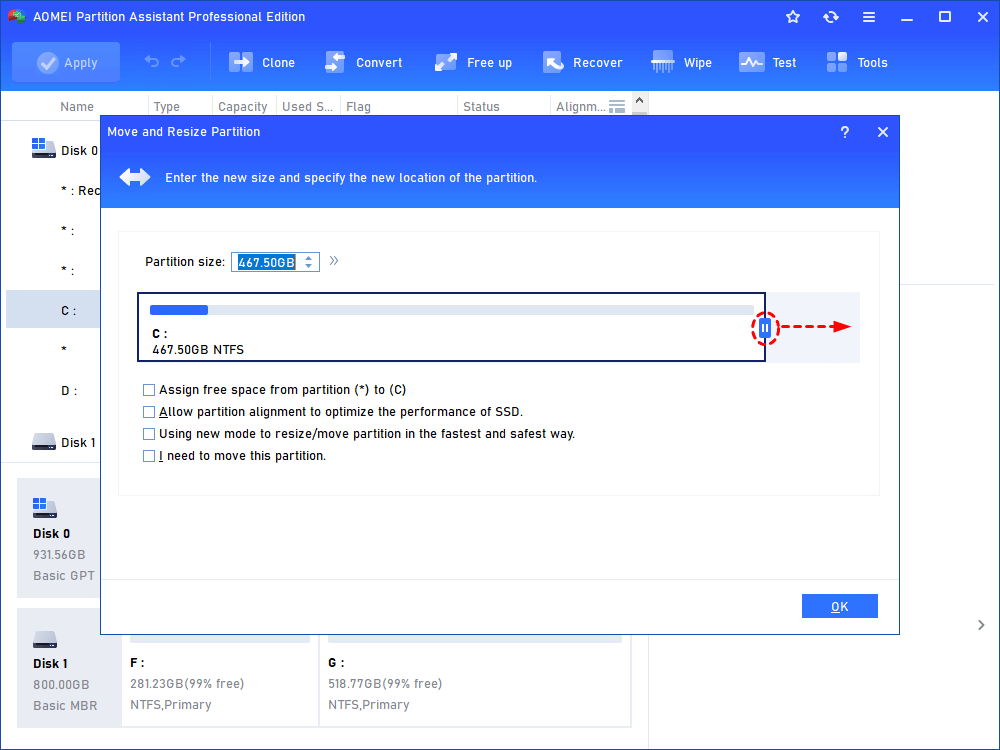
Step 3. In the pop-up window, position the mouse pointer on the right border of the partition and drag the border rightwards to extend the partition. Then click "OK". (If there's no unallocated space beside the partition, you could not drag the border).
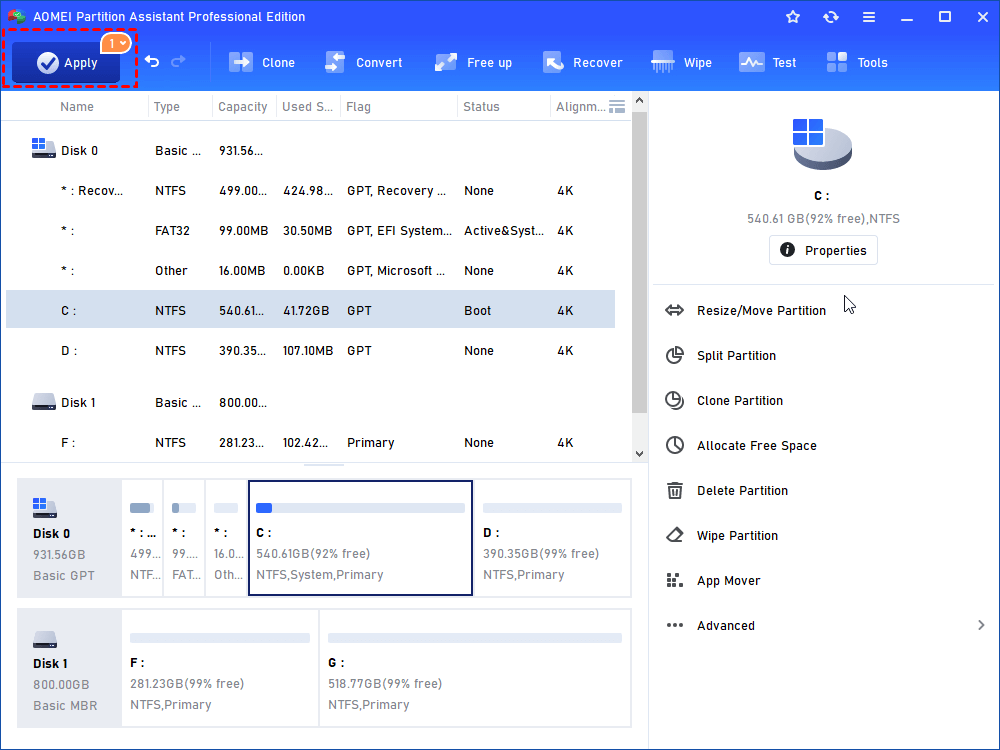
Step 4. Then it will be back to the main interface and you could preview the C drive that has been being extended. Click the "Apply" on the toolbar to commit the operation.
Note: If there is no unallocated space on the system hard drive or adjacent unallocated space behind the system partition, please refer to how to allocate free space or how to merge partitions.
At this step, you have successfully extended the space of the system drive. Make your PC run faster. However, if you still want to pursue a faster read and write performance, please continue reading.
Way 10. App Mover
If you don't want to uninstall programs to free up space, you can transfer all programs without reinstalling or missing any files with AOMEI Partition Assistant.
The Best Windows Disk Partition Manager and PC Optimizer
Step 1. Install the application, click the drive that you want to move the apps. Then choose “App Mover” in the right pane.

Step 2. In the new window, select the partition with the game you need to transfer.
Step 3. In the popup, those transferable programs on C drive will be listed. You can choose one or multiple games which you want to transfer.
Step 4. While you finish the selection, please choose the destination drive, like D drive. Then choose “Move”, don’t click “Cancel” during this process.
Step 5. Click “Finish”, then try your game to check if it’s going well or not.
Warnings: Please make sure your destination drive has enough space for your games. If it doesn’t, you’ll see a message saying: "D drive has insufficient space, can’t move applications." To fix this, either free up space or extend your D drive, then try again. You can also choose an external drive or USB flash drive for your game. However, keep in mind that the drive letter may change when it’s reconnected, which could prevent the apps from running.
Conclusion
Windows working slow can be caused by various factors, such as too many background programs, low disk space, outdated drivers, or even malware. By following the solutions above—disabling startup programs, adding more RAM, adjusting virtual memory, cleaning up disk space, and scanning for viruses—you can improve your PC’s performance.
For an all-in-one solution, AOMEI Partition Assistant offers powerful tools to optimize your system, including disk cloning, defragmentation, and partition management. If your computer is still slow, upgrading to an SSD or extending your system drive can make a big difference. Try these methods to speed up your Windows PC and enjoy a smoother experience.

