Solved: Windows Setup Select The Driver To Install in Windows 11 and 10
Read to know why does the Windows setup select the driver to install issue happen in Windows 10 and 11. The quick 6 fixes will help you solve Windows setup missing driver issue.
By Irene / Updated on February 18, 2025
Why does Windows setup select the drive to install appear?
Getting the “select the driver to install” error while installing Windows 10 and 11 from a USB? Don’t worry, it’s a common issue. Here’s why it happens and how to fix it.
Common causes of the error "Windows select the driver to install":
● Wrong USB port: USB 3.0 ports (blue) might not work well with older systems. Try a USB 2.0 port (black) instead.
● Faulty or mismatched ISO file: If your Windows 10 file is corrupted or doesn’t match your system’s architecture (e.g., 64-bit vs. 32-bit), the installation won’t work.
● BIOS/UEFI settings: Outdated BIOS/UEFI settings, like incorrect boot order or hard drive settings, can confuse the installer.
● Missing BCD files or a corrupted MBR: if the BCD or MBR is corrupted, it can prevent the system from booting correctly or interfere with the proper detection of the hard drive during installation, which might cause the error as well.
Once you find the cause, fixing it is easy. We’ll introduce simple steps to get everything working again. Your system will be up and running in no time!
How to fix driver missing in Windows 10 and 11 install?
If you encounter no device drivers were found in Windows 11/10 installation USB, you can follow the 6 fixes to solve the problem.
Fix 1. Reinsert the USB drive
If you see the “Windows 10 select the driver to install” error, try removing and then reinserting your USB drive. Start by clicking Cancel to return to the setup screen. Next, unplug the USB drive and plug it back into your PC. After that, restart the Windows installation and check if the error is fixed.
Fix 2. Change the USB port
If you’re facing the “Windows 10 setup select the driver to install” error, the USB port you're using might be the problem. Try plugging your USB drive into a different port, preferably a USB 2.0 port instead of USB 3.0. Many users have found this switch helpful in resolving the issue. However, keep in mind that while USB 2.0 might solve the problem, it does come with slower transfer speeds compared to USB 3.0. If this doesn't fix the issue, don’t worry—there are other solutions to try. Keep reading for more fixes.
Fix 3. Change BIOS settings
Improper BIOS settings can cause the "Windows setup select the driver to install" issue. To fix this, try resetting the BIOS to factory defaults. Here’s how:
Step 1. Reboot your PC press specific keys to enter BIOS. However, the keys to enter the utility varies by computer brand. Below are the common keys for different brands:
- Keys of different brands for accessing BIOS in Windows 10 and11
- Dell: F2/F12
- HP (Hewlett-Packard): Esc or F10
- Lenovo: F1/ F2, Fn + F2, or Enter followed by F1
- Acer: Del/F2
- Asus: Del/F2/F10
- Microsoft Surface: Press and hold the Volume Up button on the device while pressing the Power button.
- Toshiba/Samsung/Intel/ASRock/Origin PC: Esc, F1, F2, or F12
- MSI/Gigabyte/EVGA/Zotac/BIOStar: Del
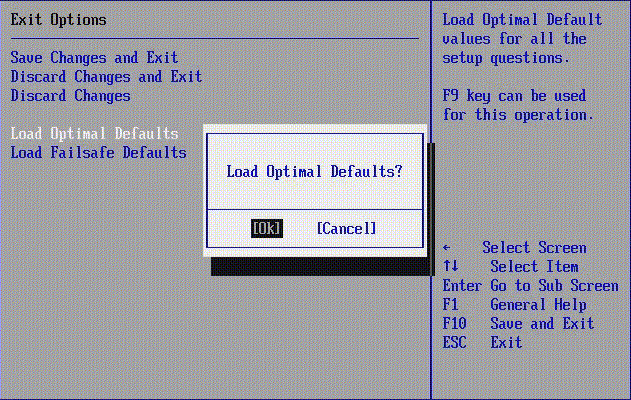
Step 2. Locate the Setup Defaults option. It might be named Load Default, Load Setup Defaults, Load Default Settings, Load BIOS Defaults, or Load Optimal Defaults depending on your motherboard brand. Select the option and press Enter to open the Setup Confirmation window. From there, confirm the action, save the changes, and exit BIOS. Your settings will be reset to default.
If the error persists, try entering BIOS again and manually adjusting the SATA mode. If the current mode is set to AHCI, change it to IDE, or if it’s set to IDE, switch it to AHCI.
Fix 4. Add a suitable driver to the USB
Typically, the error occurs when the Windows installation setup cannot find a suitable driver for the storage controller, which could be due to missing or incompatible drivers for your disk or storage controller.
Step 1. Check if you're using RAID, AHCI, or another mode (e.g., NVMe SSD). Verify in BIOS or motherboard docs.
Step 2. Get the necessary storage drivers (RAID, SATA, NVMe) from the manufacturer’s website and save them to a USB drive.
Step 3. Boot from the Windows installation media, select language/region, and click Install Now.
Step 4. When prompted for a partition, click Load Driver. Browse to your USB drive and select the correct driver (RAID or NVMe).
Step 5. Once the driver is loaded, Windows should detect the disk, allowing you to continue with installation.
Fix 5. Repair BCD files or MBR
If the BCD or MBR is corrupted, it can prevent the system from booting correctly or interfere with the proper detection of the hard drive during installation, which might cause the error to select the driver to install Windows 10 and 11 as well. To make the process easy and safe, it is recommended to use a professional tool like AOMEI Partition Assistant. This disk manager will automatically repair the BCD or MBR. Besides, it offers more options to fix driver missing in Windows 10 and 11 issue.
The Best Windows Disk Partition Manager and PC Optimizer
Step 1. Install AOMEI Partition Assistant. Click the "Recover" tab and select "Boot Repair".

Step 2. Boot Repair tool will pop up. Please click "Next" to start the system’s boot entries scan process. On this window, you can see the scan result: system paths, system versions, and boot status. And, all repairable boot entries will be available to select.

- Advanced Settings: You need to select a location to store the repaired boot entry.
- Repair to the current disk: The system will boot from the current disk and ensure the boot files are complete and functioning properly. (By default)
- Repair to another disk: This operation will repair the boot entry or create a new system boot entry to ensure the system can boot from the disk you select.

Step 3. Select one/multiple repairable boot entries you want to repair and click the "Repair" button to start the boot repair.

Step 4. Wait for the repair process to finish. Once it is finished, you can check the repair result. If it succeeds, you will get a "Repair Successfully" result.
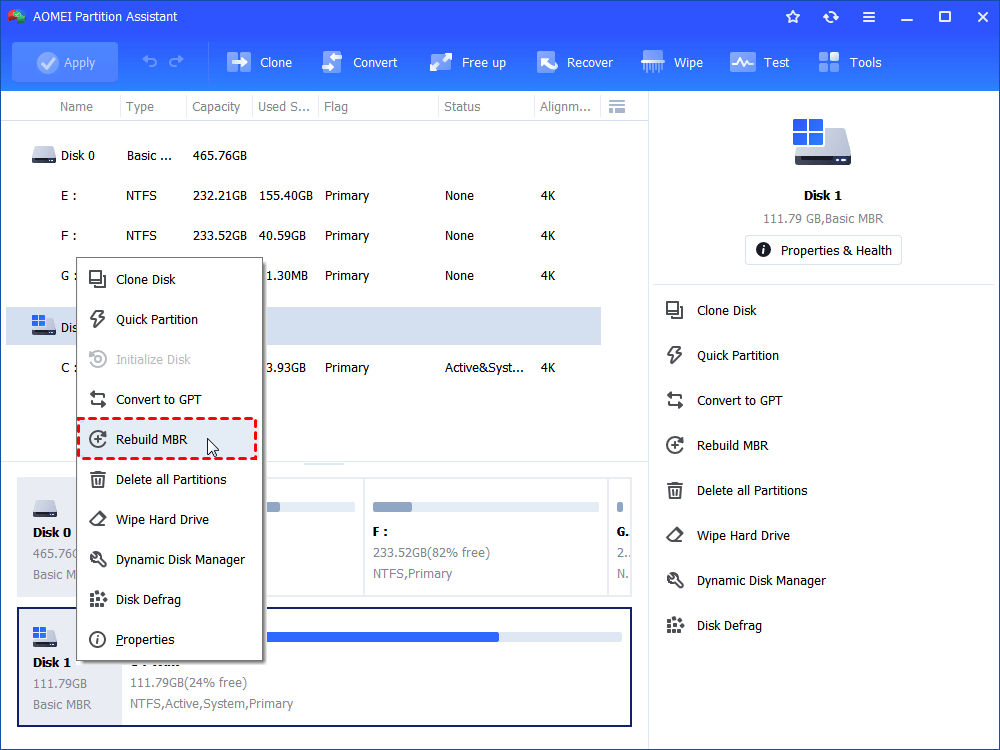
To repair the corrupted MBR, you can right-click the disk which need to be repaired and select “Rebuild MBR” in the pop-up window.
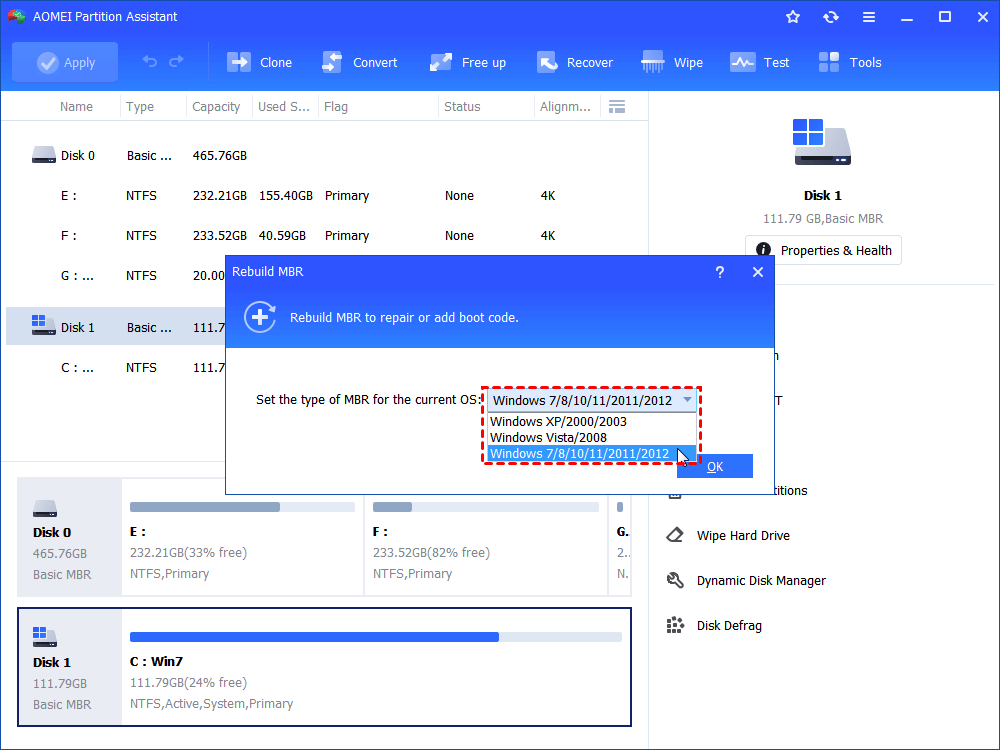
In the next window, set the type of MBR for the current OS. (Choose a proper MBR type according to your operating system.) Then, click “OK” to continue. After that, click “Apply” on the toolbar to commit the Rebuild MBR operation.
Fix 6. Redownload the ISO
If there’s an issue with the ISO file download, it may become corrupted, causing missing files and leading to the Windows select the driver to install error. To resolve this, it's best to re-download the ISO file and manually recreate the Windows installation USB drive. This process can be broken down into three steps. Follow these steps to create a new Windows installation USB drive and use it for installation.
Part 1. Format the USB Drive to FAT32
First, format the prepared USB drive to FAT32 so it can boot both BIOS-based and UEFI-based PCs.
Windows provides built-in tools, like Disk Management and diskpart, to format a USB drive. However, you might encounter issues such as format fs=ntfs stuck at 0% or the Format option in Disk Management being greyed out. Additionally, Windows tools can only format USB drives up to 32GB to FAT32. To avoid these limitations and possible issues, it's best to use AOMEI Partition Assistant.
With AOMEI Partition Assistant, you can easily format USB drives larger than 32GB to FAT32. Here's a simple guide on how to format your USB drive using this software.
The Best Windows Disk Partition Manager and PC Optimizer
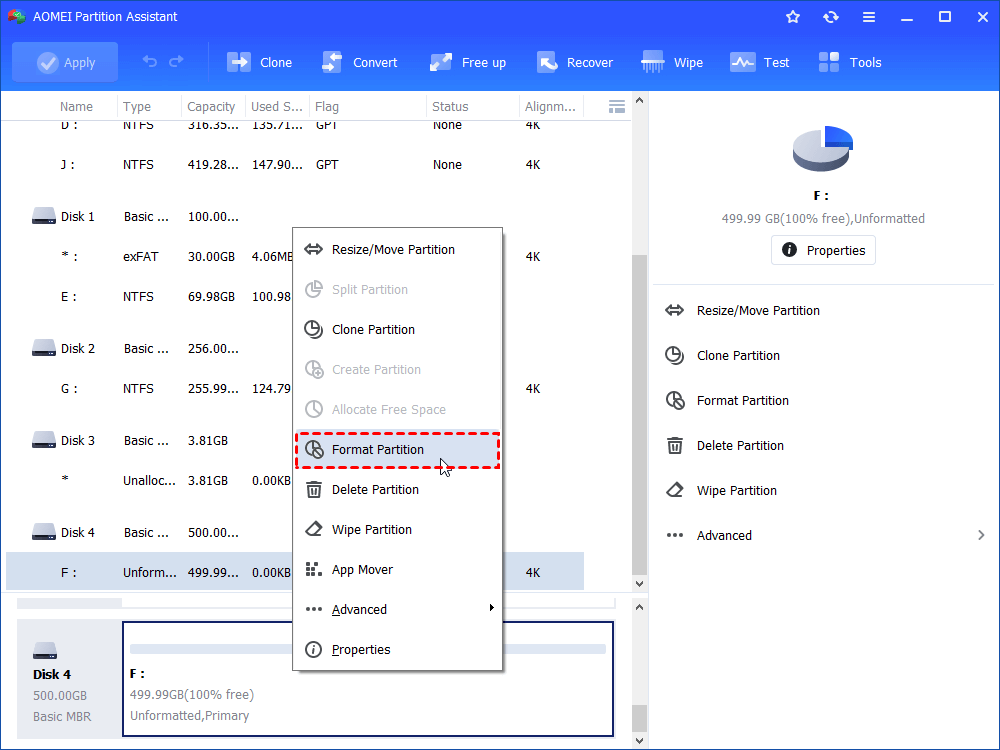
Step 1. install AOMEI Partition Assistant. Run it, the disk that you need to format to NTFS will be displayed in main interface. Right-click it and choose “Format Partition”.
Step 2. In the pop-up window, choose NTFS among listed file systems and click “OK”.
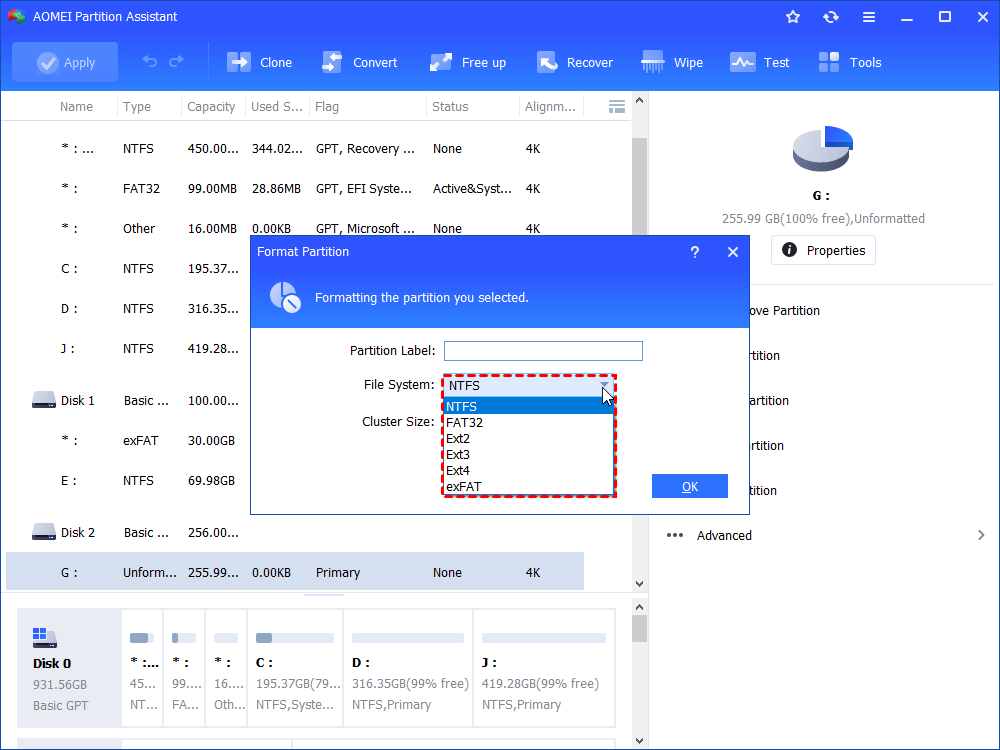
PS.: Here you are also allowed to add partition label to or change cluster size of this partition.
Step 3. You’ll return to the main interface. Confirm your operation and click “Apply”>“Proceed” to perform it.
Part 2. Download the Windows ISO File to the USB Drive
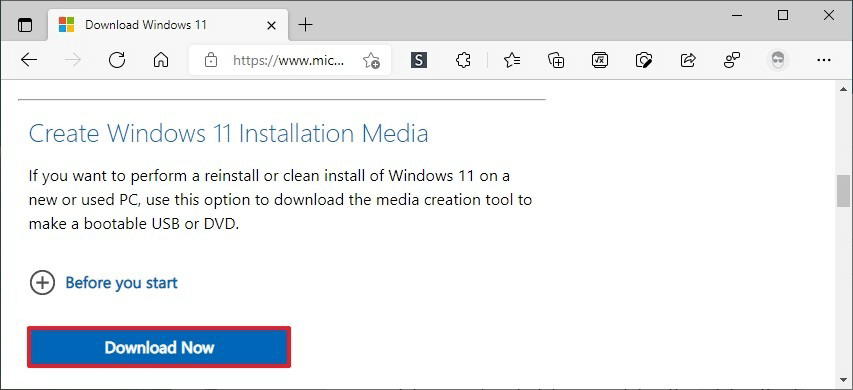
After getting the FAT32 USB drive, you can now download the ISO file by following the steps below.To create the installation media, you should first go to the official website of Microsoft where you can download the media creation tool.
Step 1. Connect the USB flash drive to your PC, wait until it’s detected by the OS, and then, download the media creation tool.
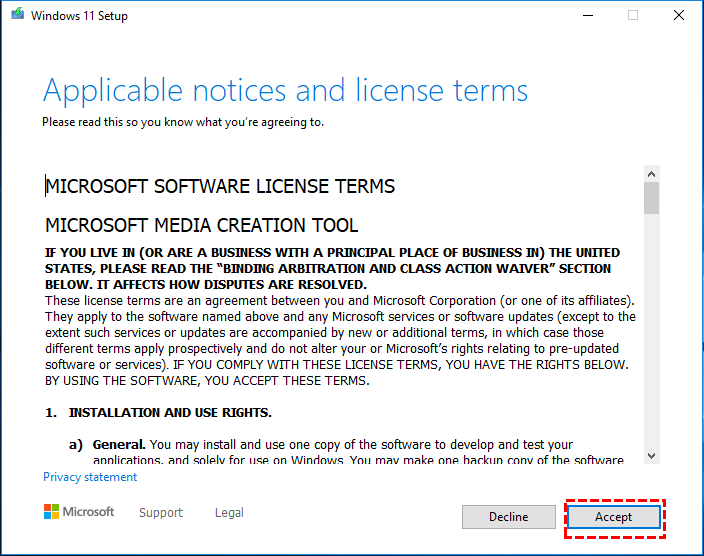
Step 2. When the download is completed, open the exe. File. Click on “Accept” at the start of the Windows 11 Setup window.
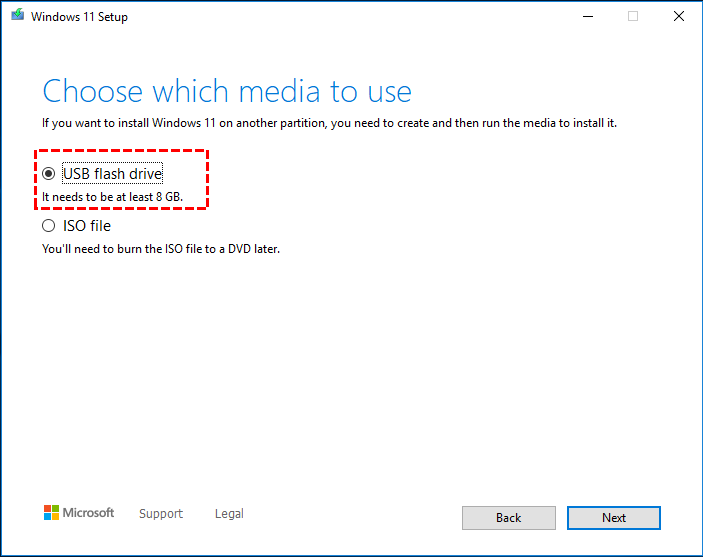
Step 3. Select “Create installation media for another PC” and hit “Next”. Select language, edition, and hit “Next”. Choose a media you want to use. Here, we choose “USB flash drive”.
Step 4. Select the USB flash drive and start the downloading process.
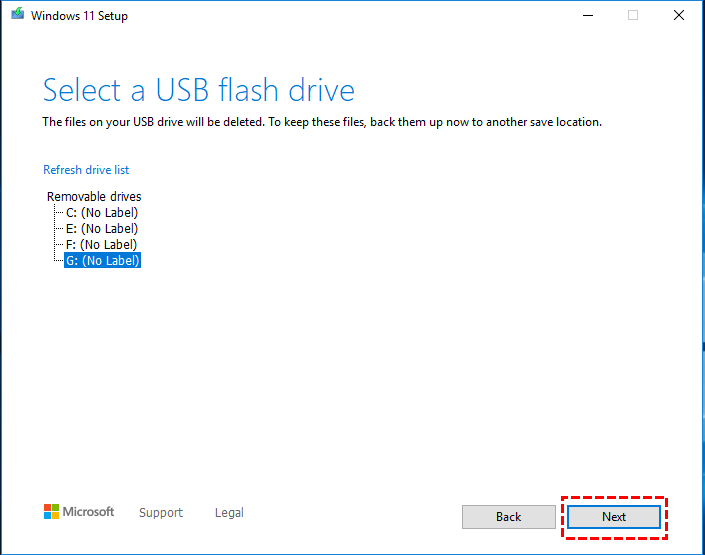
In a few minutes, a Windows installation USB will be successfully created.
Part 3. Set the USB Drive as Active
To ensure you can install Windows using the USB drive, you need to set the target drive as active. Here’s how to do it:
Step 1. Right-click the Start icon and choose Disk Management. Then, right-click the target USB partition and select Mark Partition as Active. If you encounter marking a partition as active greyed out, you can also click to get the solutions.
Step 2. After that, you will get a Windows installation USB drive. Just use this drive to install Windows and check if the error is repaired.
To sum up
To sum up, the “Windows setup select the driver to install” error is a common issue that can arise during the Windows installation process. Several factors, such as software glitches, incorrect USB ports, corrupted ISO files, or improper BIOS settings, can cause this problem. Fortunately, there are multiple ways to fix it, including changing BIOS settings, updating drivers, repairing corrupted system files, or re-downloading the ISO. By following the steps provided, you can easily resolve this issue and proceed with the Windows installation smoothly.

