Windows 10 System Interrupts 100 CPU? 7 Solutions to it!
If you're struggling with the Windows 10 system interrupts 100 CPU usage, you've come to the right place. This article will explain what system interrupts are, what causes them, and how you can fix the issue.
By Hedy / Updated on April 25, 2025
What are System Interrupts on Windows 10?
System Interrupts is a core component of the Windows operating system that constantly runs in the background. Though it appears in Task Manager as a process consuming CPU resources, it’s not an actual process—it's a placeholder used to report the CPU usage caused by hardware interrupts.
These interrupts are signals sent by hardware devices to the processor, requesting attention for tasks like data transfers or device communication. The System Interrupts service plays a vital role in managing these interactions, ensuring smooth communication between hardware and software components on your PC.
However, while essential, it can sometimes lead to unusually high CPU usage. This often signals underlying issues with device drivers or hardware malfunctions that need to be addressed.
What causes System Interrupts 100% CPU usage?
System interruptions serve as an alert system for the CPU, notifying it when immediate attention is required. When such an interruption occurs, the processor halts its current task, saves its state, and addresses the priority task. Once completed, it resumes its previous operations.
Typically, system interruptions consume between 0.1% and 2% of CPU resources. However, occasional spikes up to 7% are normal. A significant concern arises if system interrupts consistently push CPU usage to 100%, signaling potential issues. If these interruptions use over 10% of the CPU, it often points to underlying hardware problems that need attention.
How to fix System Interrupts 100 CPU in Windows 10
Now that you understand what system interrupts are and why they occur, it's time to explore how to resolve the issue of system interrupts causing 100% CPU usage. Below are seven effective solutions to help fix this high CPU usage problem.
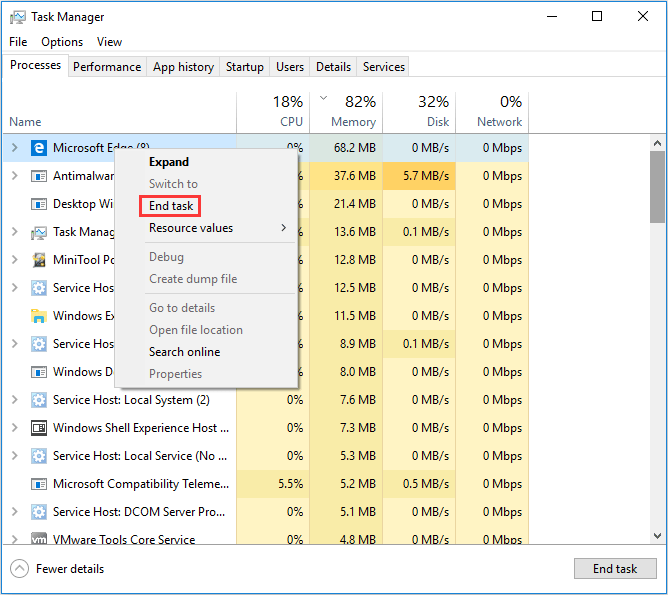
Solution 1. End the process causing high CPU usage
If a program is consuming all of your processor’s resources, it’s likely malfunctioning. To address this, try closing the problematic program by following these steps:
Step 1. Press Ctrl + Shift + Esc to open Task Manager, then go to the Processes tab and click on the CPU column.
Step 2. Locate the process that is using the most CPU power.
Step 3. Select the program and click End Task to close it.
Solution 2. Update Device Driver
A malfunctioning hardware driver can cause system interrupts to consume excessive CPU resources. To resolve this, follow these steps to update your device drivers:
Step 1. Press Win + X and select Device Manager.
Step 2. In the Device Manager window, expand the list and right-click on the driver. Then select Update Driver.
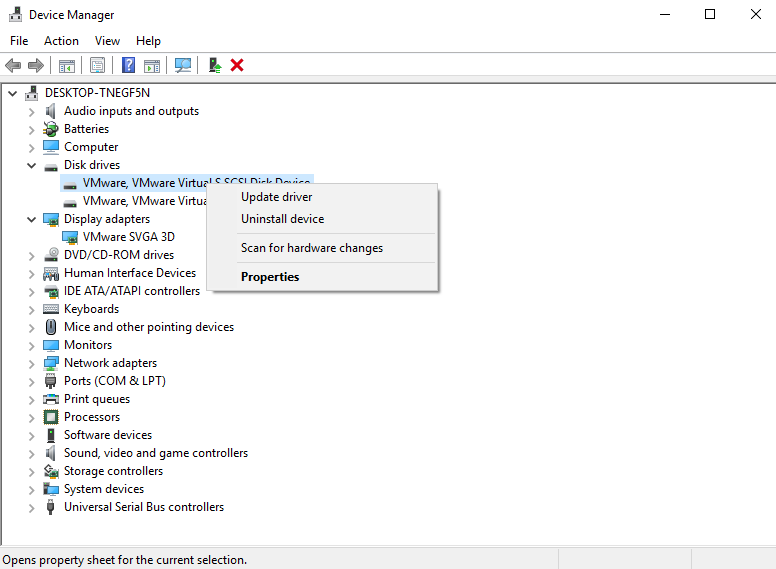
Step 3. Then choose Search automatically for updated driver software.

Solution 3. Disable USB Root Hub
The USB Root Hub is not a physical device but a software driver that facilitates the connection of multiple USB peripherals to your computer. Since most systems include several USB root hubs, they allow multiple devices to share the data bus simultaneously.
Step 1. Press Win + X and select Device Manager.
Step 2. Locate and expand the Universal Serial Bus Controllers section.
Step 3. Right-click on the USB Root Hub and select Properties.
Step 4. Go to the Power tab and check if your mouse or keyboard is using that root hub. If it’s not, you can disable it. Make sure to disable all root hubs except for the one that your keyboard and mouse are connected to.
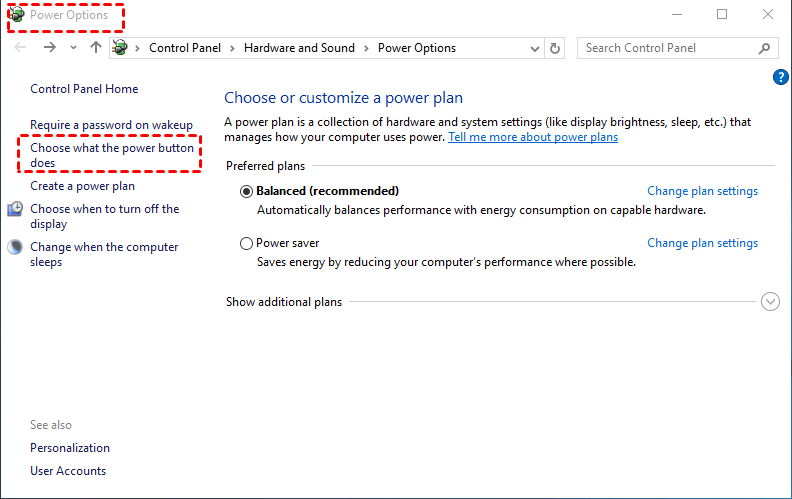
Solution 4. Disable Windows Fast Startup
Disabling Windows Fast Startup can help resolve the issue of high CPU usage caused by system interrupts. Fast Startup speeds up boot times by saving a hibernation file, but it can sometimes lead to conflicts. If it’s enabled on your PC, follow these steps to turn it off:
Step 1. Type Control in the search box and click on Control Panel to open it.
Step 2. In the Control Panel, click Power Options.
Step 3. Click on Choose what the power buttons do.
Step 4. Select Change settings that are currently unavailable.
Step 5. Uncheck the box next to Turn on fast startup (recommended), then click Save changes and exit.
Solution 5. Check failing hardware
Errors on your hard drive can sometimes lead to high CPU usage caused by system interrupts. To check for hard drive issues, follow these steps:
Step 1. Open File Explorer, right-click on the disk you want to check, and select Properties.
Step 2. Go to the Tools tab and click Check.
Step 3. Click Scan drive to begin the scan.
Step 4. If Windows detects any errors on the hard drive, it can repair them automatically.
Solution 6. Check disk errors
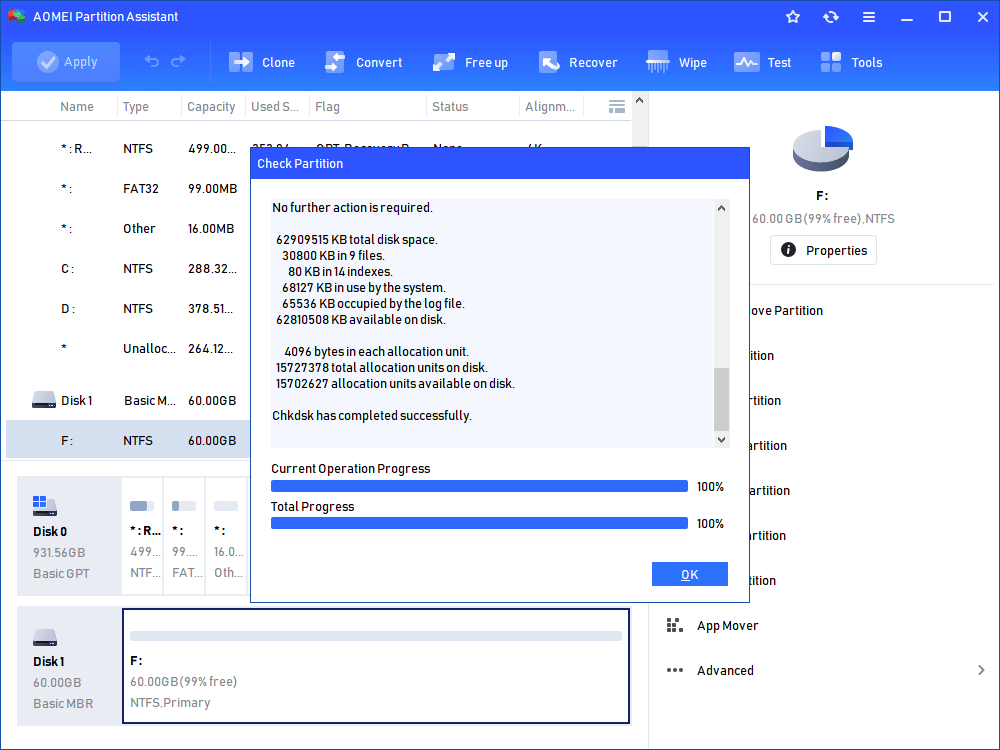
Disk errors can lead to high CPU usage from system interrupts, as your computer might be struggling to read or write data from a corrupted disk. Running a disk check can help identify and repair these errors, potentially reducing the CPU load.
AOMEI Partition Assistant, a powerful disk management tool, offers a reliable and user-friendly way to check and repair disk errors, ensuring your system runs smoothly.
Step 1. In the main interface, right-click the target drive and then click "Check Partition".

Step 2. Choose the "Check partition and fix errors in this partition by using chkdsk.exe" option, then click "OK".
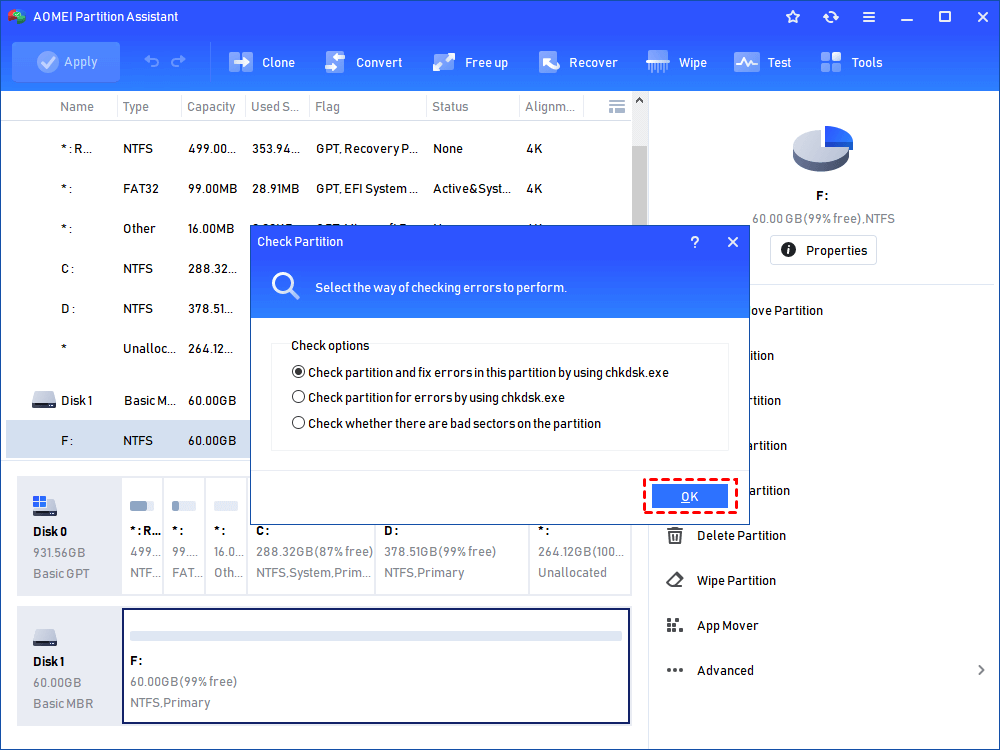
Step 3. Wait for a while and click "OK" when it's finished.
Solution 7. Update BIOS
The BIOS is the first software that runs when your Windows system boots up, and it plays a key role in the boot process. However, an outdated BIOS can contribute to high CPU usage from system interrupts. To address this, consider updating your BIOS.
Step 1. Type cmd in the search box to open Command Prompt.
Step 2. Enter the following commands one by one and press Enter after each:
systeminfo | findstr /I /c:bios
wmic bios get manufacturer, smbiosbiosversion
Step 3. After identifying your BIOS version, visit the manufacturer's website for any available updates and follow their instructions to update it.
Bonus tip: How to recover lost data from the issue
If you're dealing with a frustrating 100% CPU issue caused by system interrupts in Windows 10, you're not alone. System interrupts are processes that manage hardware and software communication. However, when they consume excessive CPU resources, it can lead to sluggish performance and even cause data loss due to system instability.
Fortunately, AOMEI Partition Assistant for Recovery is a powerful tool that allows users to easily manage their hard drives and recover lost or deleted data. Whether you are troubleshooting boot issues, resizing partitions, or recovering lost data due to system errors, this tool provides a user-friendly interface to get your system back to normal.
Step 1. Install and launch AOMEI Partition Assistant for Recovery. Choose the exact partition or disk where your data is lost and click Scan.

Step 2. Then, the recovery tool starts to scan and search. It will execute the “Quickly Scan" first for finding your deleted data fast, and then execute the “Deep Scan" for searching for other lost data.
Step 3. Once the scan is completed, all deleted files, recycle bins, and other missing files will be displayed. Please select the file you would like to recover and then click "Recover".
Step 4. Then, select a folder path to save your recovered files.
Step 5. Wait patiently for this process of recovery to end.
Conclusion
That covers how to resolve the issue of 100% CPU usage caused by system interrupts on Windows 10. Keeping your CPU’s background consumption low is essential, no matter the performance level of your processor. If you experience this issue, try any of the solutions provided in this article to resolve it.
Additionally, creating regular backups of your system is a wise precaution. In the event of any problems, you can easily restore your data. AOMEI Partition Assistant for Recovery is a reliable tool to help with this process—give it a try!