Free Western Digital FAT32 Formatting Tool Download for Windows PCs
On this page, you can free download the Western Digital FAT32 formatting tool, with which you can easily format WD My Passport Ultra or other external hard drives to FAT32/exFAT and other types.
By Lucas / Updated on May 12, 2023
Why need Western Digital FAT32 formatting tool?
Western Digital (WD) hard drives, especially portable hard drives, are always formatted with NTFS (Windows) or HFS/FAT/exFAT+ (Mac) by default so that they can be better compatible with that operating system. Well, why need you to format WD hard drive to FAT32?
Although FAT32 performs more slowly than NTFS in Windows, it has inherent advantages. And the most outstanding one should be its mighty compatibility. If you want to connect the NTFS-formatted My Passport Ultra to Mac OS, or need to switch the WD hard drive between Windows OS and Mac OS frequently like dual boot OS on a PC, formatting the hard drive to FAT32 is a wise choice since it has higher compatibility and can work well in both operating systems
Besides, if you have to share some information or files on WD external drive with other consoles like XBOX ONE, PS3, PS4, Android, etc. NTFS is definitely not the proper file system that those consoles can read. Naturally, changing from NTFS to FAT32 ahead of time is a wise move. In either situation, you can use a Western Digital FAT32 formatting utility for Windows 7, Windows 8, Windows 10, or Windows 11 to finish the formatting task.
Format Western Digital Passport to FAT32 with WD Quick Formatter
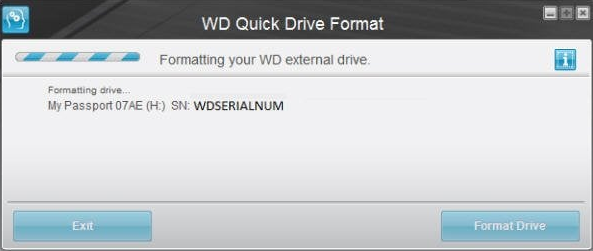
WD Quick Formatter, also known as WD Advanced Format Drivers (AFDs), is an external hard drive format utility for Windows and Mac, developed by Western Digital Technologies, Inc. External drive like WD Elements, My Book and My Passport can be formatted to FAT32 via this tool. In addition, other brands' external hard drives like Seagate external drives can be formatted by this utility as well. To use WD Quick Formatter:
First, connect WD external hard drive to your computer and make sure it can be detected. Download and install WD Quick Formatter. In most cases, you need to unzip it before you can install it.
Second, start WD Quick Formatter. Read the warning and click on Continue. Next, accept the End User License Agreement.
Third, let the utility scan the external hard drive. Select the WD drive when it completes.
Finally, wait for the formatting progress completes patiently.
Tips:
▶If the external drive is 2TB in size or less, you can directly format it. If it is greater than 2TB, you have Factory Default and XP Compatible two options to select. Choose the appropriate one according to your situation.
▶If WD Quick Formatter says it cannot mount the volume, close all applications on your Western Digital drive or whatever may use the drive and retry. Please note that software like auto-backup programs, anti-virus, and remote access applications have a great possibility to take up your drive.
As a matter of fact, WD Quick Formatter is a handy application for formatting WD portable hard drive to FAT32. Nevertheless, users search for help online because WD Quick Formatter failed or not working now and then. What’s worse, this application does not allow 4K to 512 sector format, which may reduce the performance of portable solid-state drives. Also, as covered, it only applies to external hard drives. What if you want to format WD internal HDD to FAT32 or exFAT someday?
Format WD drive to FAT32 in Command Prompt
Windows brings you internal formatting utilities as well. Command Prompt is an effective formatting utility that can help you format Western Digital drive to FAT32 on the condition that the partition is not bigger than 32GB in size, otherwise, you’ll receive the error: The volume is too big for FAT32.
Here are detailed steps on how to format the small partition to FAT32 with Diskpart. Note that all data will be overwritten after formatting, so please back up important files ahead of time.
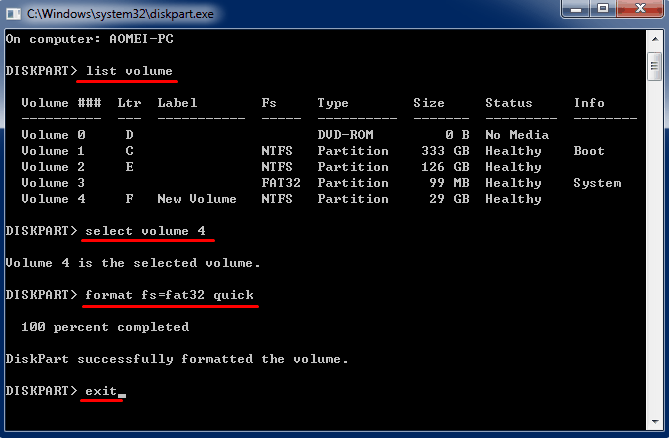
1. Press the Windows+R key combo to start Run. Then type “diskpart” in the box and press "Enter" to open Command Prompt.
2. Input the following commands in order and each command is followed by.
• list volume
• select volume X (X is the partition on the WD drive)
• format fs=fat32 quick
• exit
Tips:
▶you can run format f: /fs:fat32 directly in CMD, which may take more time to complete formatting. Replace the letter “f” with the drive letter of the device you wish to format and hit Enter.
▶Diskpart to format Western Digital drive with the FAT32 file system is quite easy. Nevertheless, the 32GB limit prevents large drives from being formatted. In that case, you may need to turn to other professional tools to achieve the goal.
Better Western Digital FAT/exFAT/FAT32 formatting utility for Windows 7/8/10/11
To format WD hard drive for Mac, you actually have a better choice. AOMEI Partition Assistant Standard is professional and easy-to-use hard drive formatting software that can do you a big favor. It allows you to format WD hard disk to FAT32, exFAT, NTFS, EXT2, EXT3, etc. with ease in Windows 7/8/10/11/XP/Vista.
Providing that you don’t want to perform the formatting under a Windows environment, you can create a bootable device with a WinPE environment on and format Western Digital drive (Elements or Passport) to FAT32/exFAT there. For instance, you need to format the internal WD HDD where the system is installed sometimes. Now, have the Western Digital FAT32 formatting utility download freely and have a try.
Steps to format 1TB Western Digital FAT32 in Windows
Step 1. Connect the 1TB WD drive to your computer and make sure it is detected by Windows. Install and run the free WD FAT32 formatting tool AOMEI Partition Assistant Standard on your Windows.
Step 2. Right-click the WD external drive and select Format Partition.
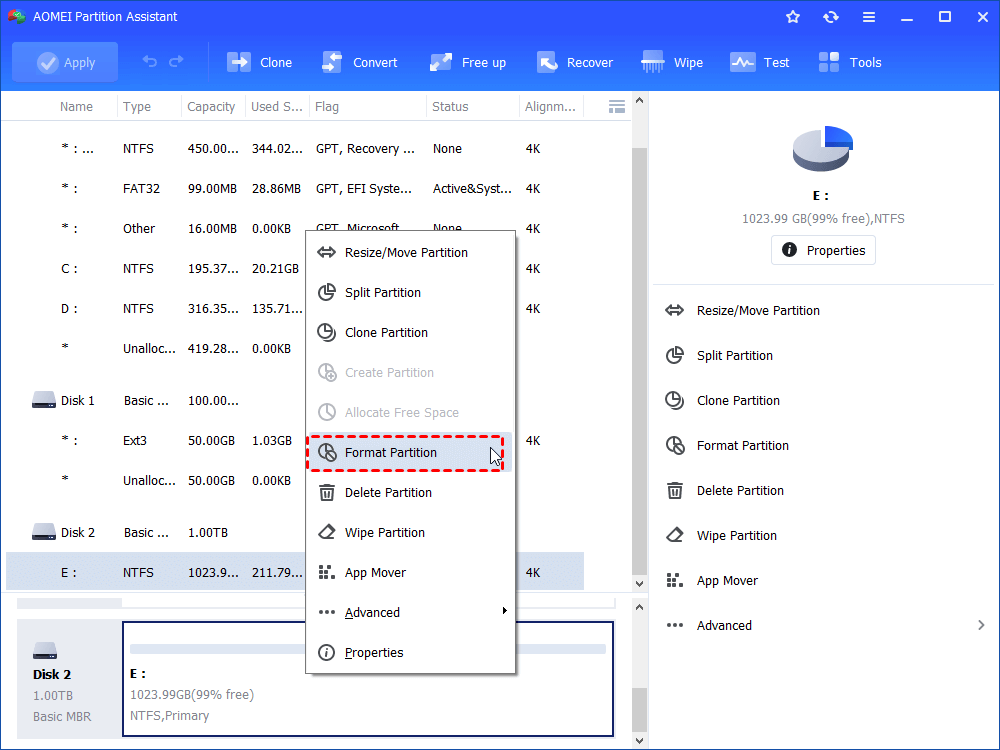
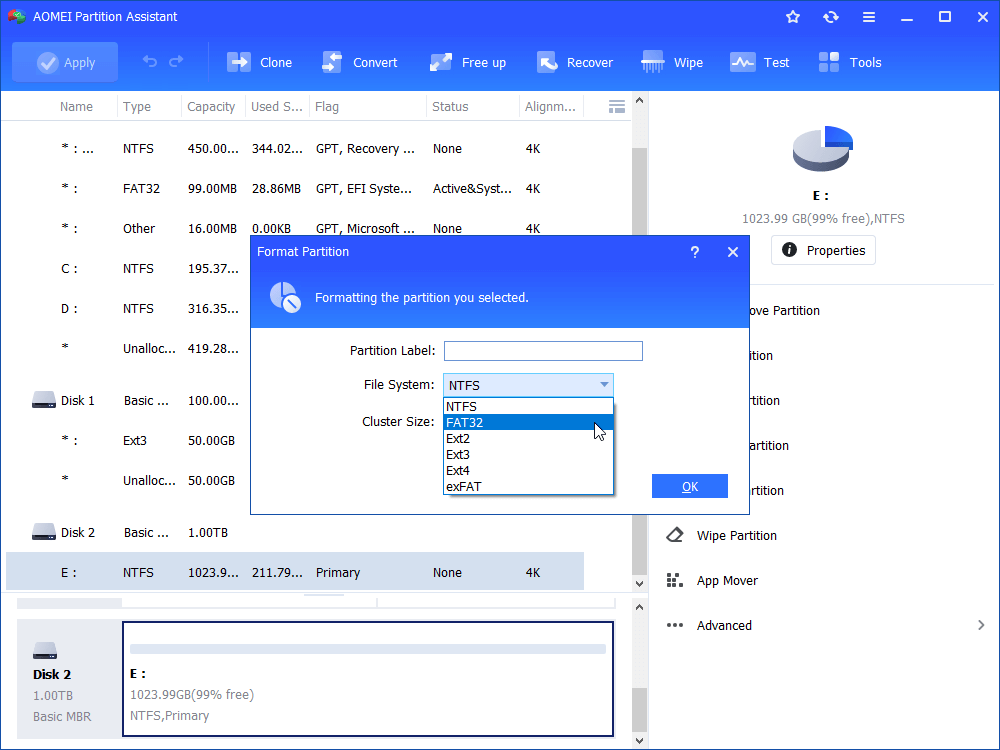
Step 3. On the prompt page, specify partition information. This is the place where you select FAT32 File System, edit Partition Label, and choose Cluster Size. As you can see, you can also format the Western Digital hard drive to exFAT if you need to.
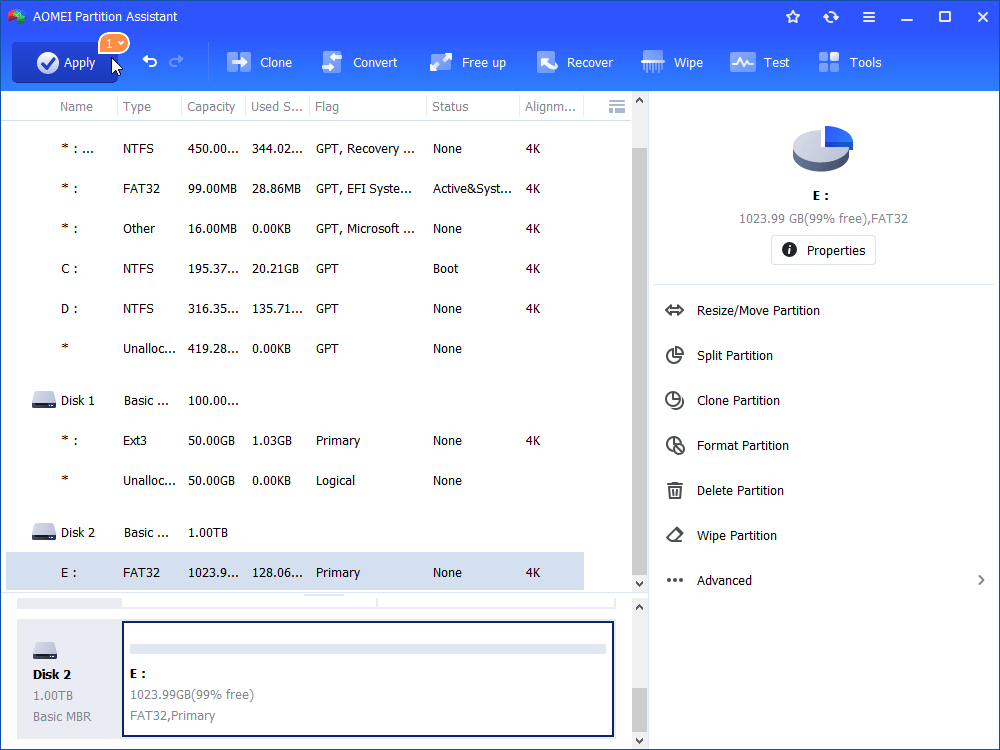
Step 4. Preview the result. Click Apply to execute the formatting.
Then you can install the WD drive to the target devices to store data.
Tips:
▶If Western Digital showing up as Unallocated, please right-click it and select Create Partition to create a new simple volume with FAT32 formatted.
▶With the guide of the above steps, you can use AOMEI Partition Assistant Standard as a Western Digital FAT32 formatting utility for Windows 8 as well.
▶To format WD internal hard drive, go "Create Bootable Media" to create a bootable USB drive or CD/DVD. Then, shut down your computer and boot from the USB drive. You’ll see AOMEI Partition Assistant the moment you log on to Windows. Do formatting there. Please note that your system cannot boot anymore after formatting, so take it with caution.
Conclusion
Certainly, except for WD Quick Formatter and AOMEI Partition Assistant Standard, there are other Western Digital FAT32 formatting tools. Among these, the Disk Management and Diskpart of Windows 7 are useful tools as well. However, to search for an all-around and powerful formatting tool that is totally free, AOMEI Partition Assistant could be the one.
Apart from formatting WD disk to FAT32 file system, the software does great in wiping external hard drive in Windows 10. A higher version of AOMEI Partition Assistant Standard, the Professional Edition, provides advanced features such as command line partitioning, allocating free space, securely erasing SSD in Windows 11/10/8/7 and quick partition, and so on.

