[Solved]We Can't Find a USB Flash Drive Error in Windows 10 Setup
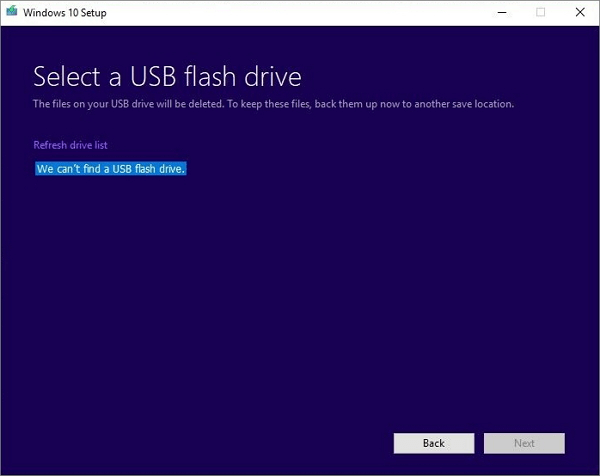
If you received a message that “we can’t find a USB flash drive” during the process of creating a Windows 10 creation tool, refer to this post that will analyze the issue, and offer 5 methods to solve it.
Scenario
Why the USB flash drive can’t be found
“We can’t find a USB flash drive” issue is not rare when people try to create a Windows creation tool to install system or to upgrade Windows 7, 8 to Windows 10. We may not tell the exact reason why your USB drive can’t be found, but there are some common possible causes that may give you a clue to figure out this issue.
1. Connection problem or hardware issue making the USB drive inaccessible.
2. USB 2.0 or 3.0 port issues: PC USB interface is not compatible with the USB flash drive.
3. The USB flash drive includes bad sectors
4. The USB drive was recognized as the primary drive.
How to solve “we can’t find a USB flash drive” issue?
In terms of these causes, the next part, which will demonstrate several fixes for this issue, keep your Windows media attached to your computer and find a solution to help you out.
Method 1. Check if the USB drive is detected by your PC
This first method you should try is to check if the USB flash drive is accessible for your computer. Just double-click on the “This PC” to open File Explorer, and see if the USB flash drive is listed on the window. You can reconnect the USB drive if it is not shown on the File Explorer.
Method 2. Choose a correct USB port
A USB with 3.0 port cannot be recognized by 2.0 port devices. Although, in most conditions, 3.0 port interface can read USB 2.0 port, it may also the cause of the problem. Try another USB with correct port, and connect it with your PC. An USB with 3.0
Method 3. Check bad sectors on the USB flash drive
If you can see the USB flash drive on the File Explorer, you may consider if it contains some bad sectors. It can be the reason why the USB drive can’t be found during Windows setup. You turn to a powerful repairing tool-AOMEI Partition Assistant Standard. It is able to run CHKDSK.exe checking program that will scan the whole USB sectors and repair it automatically. Here are the steps of how to perform it.
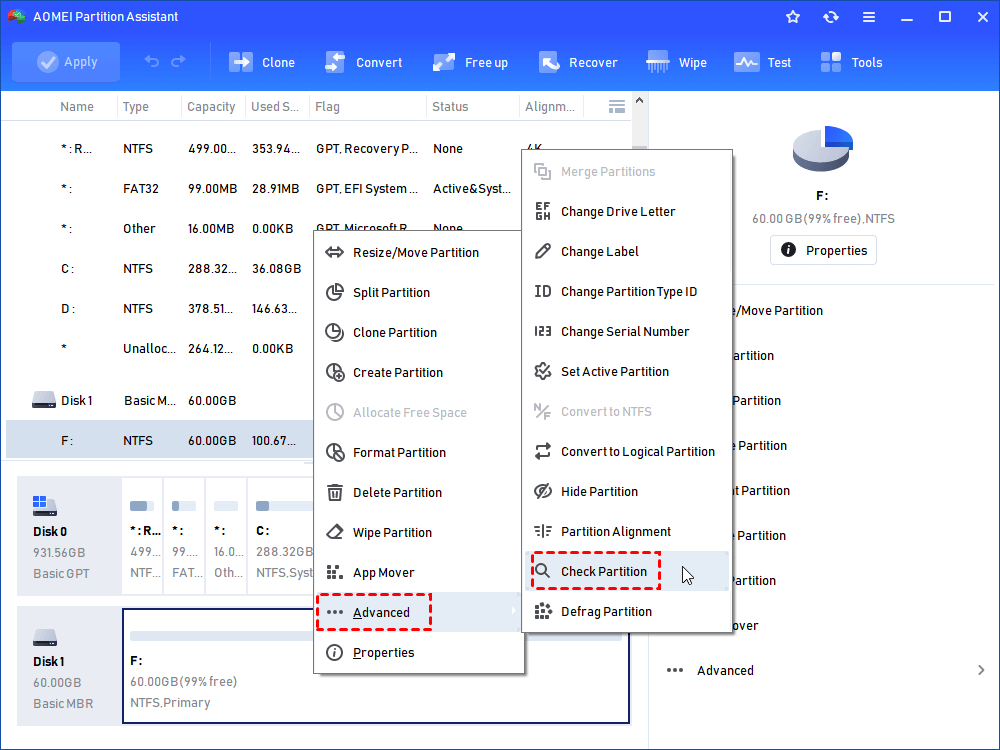
Step 1. Ensure the USB is detected by your computer. Then install and open AOMEI Partition Assistant, right-click the target partition, and click “Advanced” > “Check Partition”.
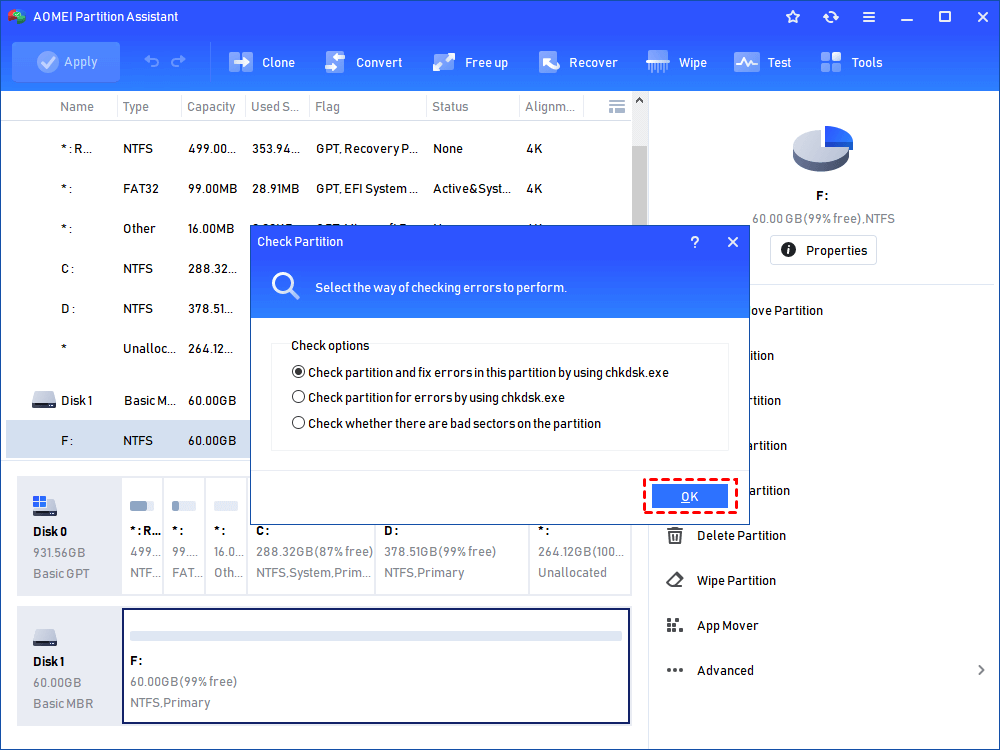
Step 2. Tick “Check partition and fix errors in this partition by using chkdsk.exe.” and click “OK”.
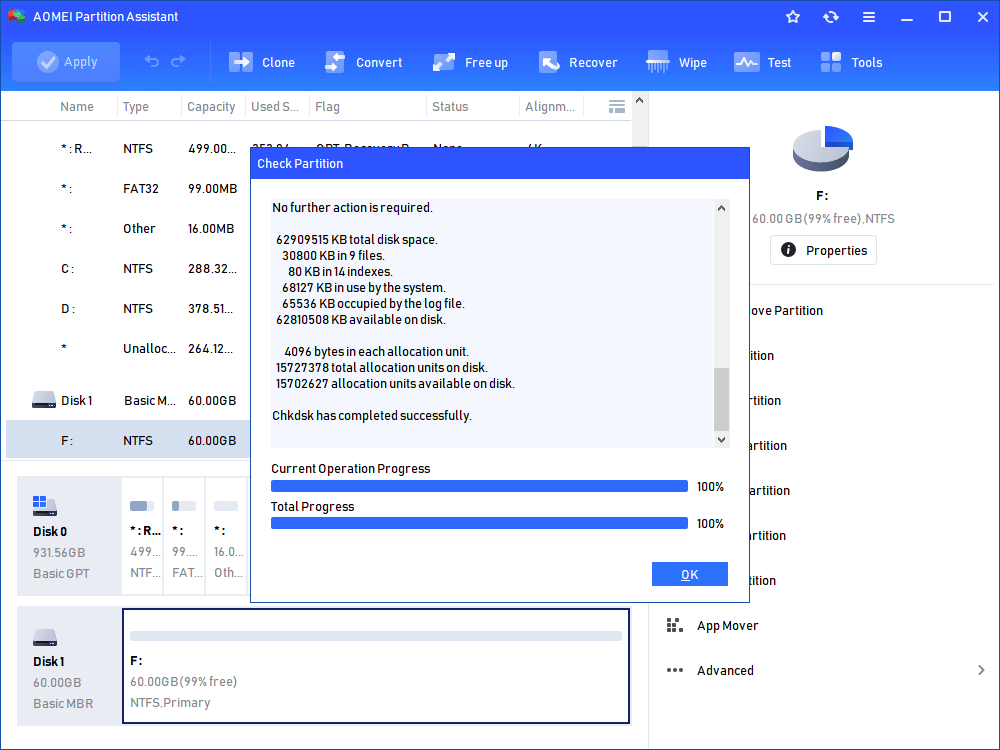
Step 3. This tool will scan the selected USB drive and fix errors automatically. And click “OK” to close the checking window.
Method 4. Format the USB drive
It is an uncommon condition that the USB flash drive was recognized as primary drive, instead of removable media. You will need to delete the partition and reformat the USB drive to solve it. And AOMEI Partition Assistant standard assist you formatting your USB media
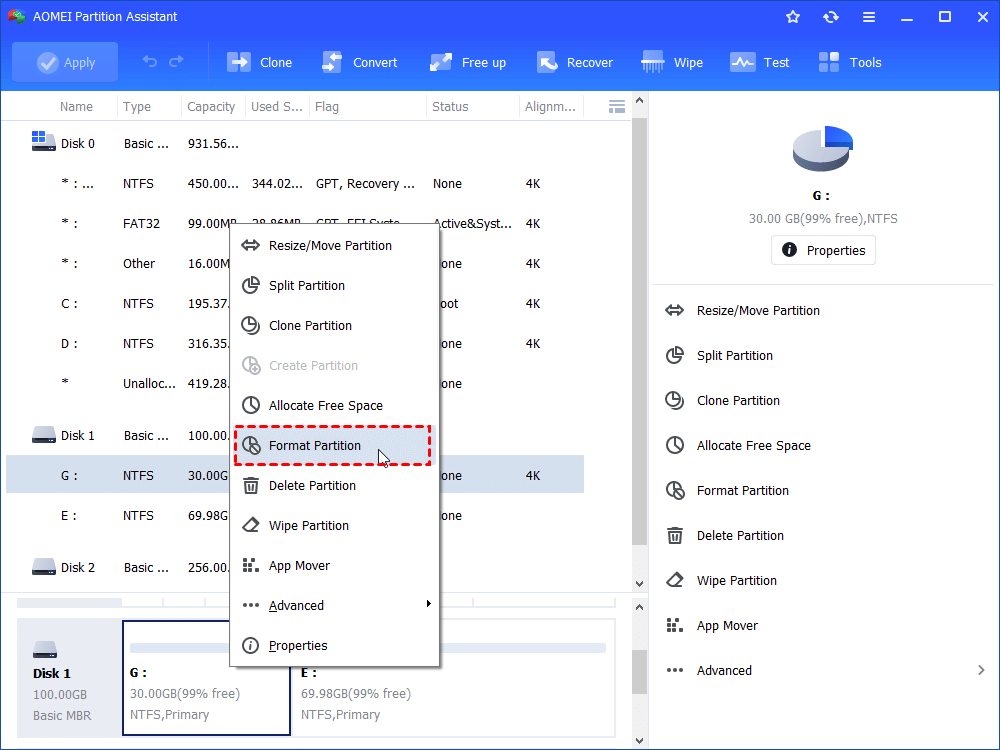
Step 1. On the AOMEI Partition Assistant main interface, right-click on the USB drive, and click “Format Partition” from the drop-down menu.
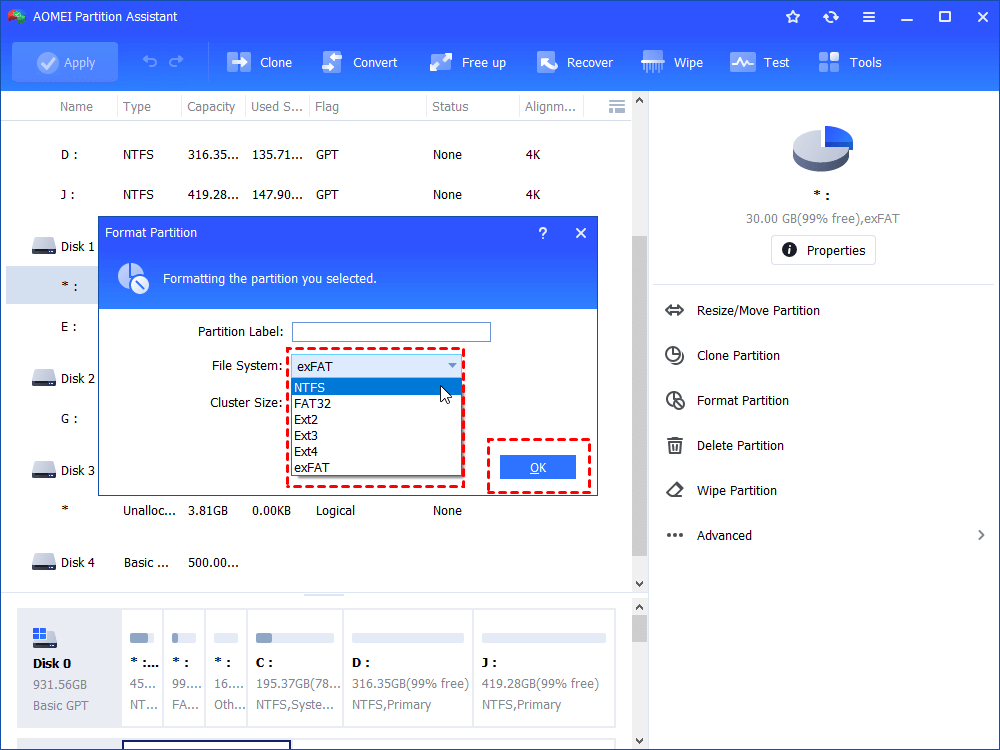
Step 2. Choose a correct file system. Usually a USB flash drive is formatted with FAT32 or NTFS. And click “OK”.
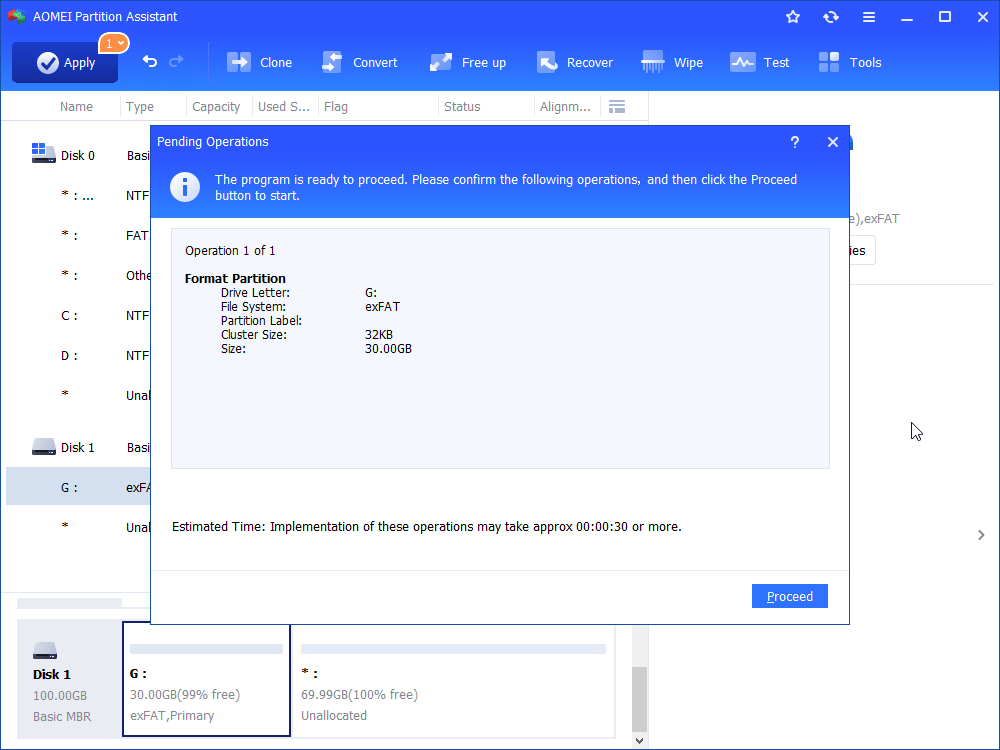
Step 3. At last, you can see the USB drive is formatted. Ensure every steps are right, click “Apply” > “Proceed” to commit the operation.
Conclusion
With these methods, hope you will not see the “We can’t find a USB flash drive” message when you try to create Windows media again.
Besides, AOMEI Partition is more than a repairing software, it is storage device manager. It helps you to manage your disk and partition with its various features, like create partition, resize partition, delete partition, clone disk and partition.
You can upgrade to Professional Edition to have more advanced feature. For instance, it assists you wiping your USB flash drive or hard drive completely to protect your personal data when you don’t need it anymore.
