Sloved: System Partition Is Not Allowed to Be Formatted
How to solve format C system partition is not allowed to be formatted in Windows 7/8/10? Here will show you how to format system partition step by step.
By Michael / Updated on September 1, 2023
Not allowed to format system partition
When your computer is running into issue, instead of cleaning the whole hard drive to start over, you can also format the system partition keeping all the data on other partitions untouched and Reinstall Windows. If you use Diskpart to format your system partition, you will receive the message that system partition is not allowed to be formatted.
As you know, format a hard drive partition will erase all the data on it. Formatting Windows system partition will delete everything on C: drive including installed Windows operating system, which clearly will cause the computer unbootable, so to delete is not allowed on the current boot while Windows running. The thing is, you can format C drive (system partition) as long as the installed Windows are not loaded.
How to solve "system partition is not allowed to be formatted"?
Method 1. Format system partition with installation disc
If you have a Windows installation disc, you can boot from the disc and then open Diskpart to format system drive. See the step by step guidance below:
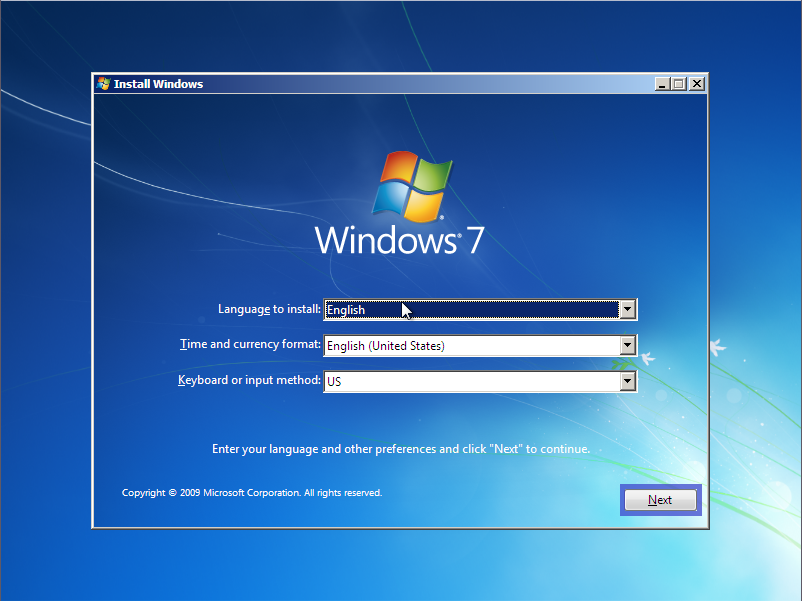
1. Insert your Windows installation disc, and change boot option to boot from CDROM.
2. Picking an install language and click”Next” to continue.
3. At the next screen, click “Install Now” and follow the instruction to move on.
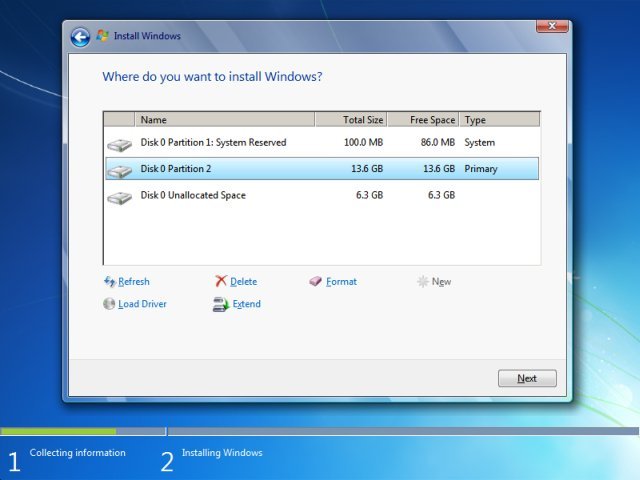
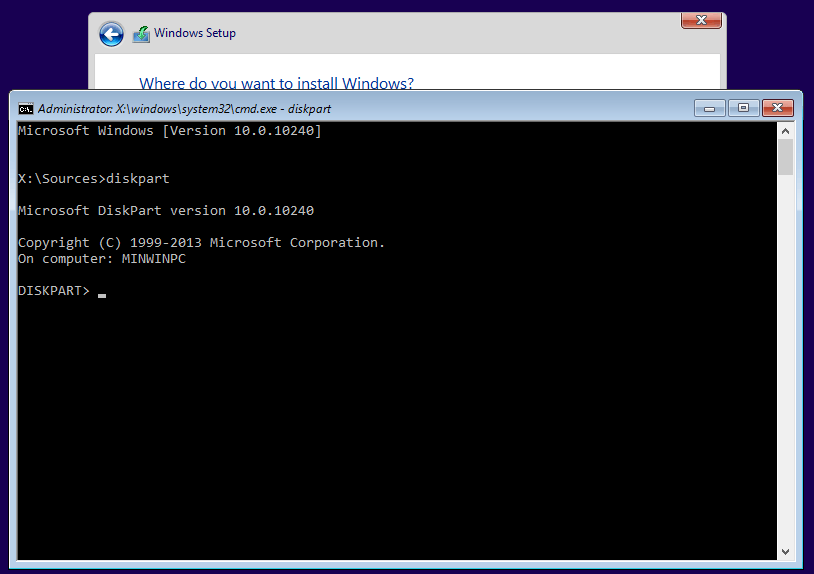
4. At the screen where it ask you where do you want to install Windows, you can click C: drive and click “Format” button to format the system drive. You can also press Shift+F10 simultaneously to open a command line prompt to use Diskpart for partition format.
If however, you do not have an installation disc, you can also use third party free partition manager software to do this in an easier way
Method 2. Format sytsem partition with AOMEI Partition Assistant
AOMEI Partition Assistant Standard is a free disk partition management software that allows you to format or delete system partition. It allows you to create bootable media and then you can format the system volume with the AOMEI bootable disk. You need to preapre a USB drive, or CD/DVD, and another working computer. Then back up the USB drive if there are data on it, because it will be formatted.
Just download the software and insert the USB, CD or DVD to a working computer.
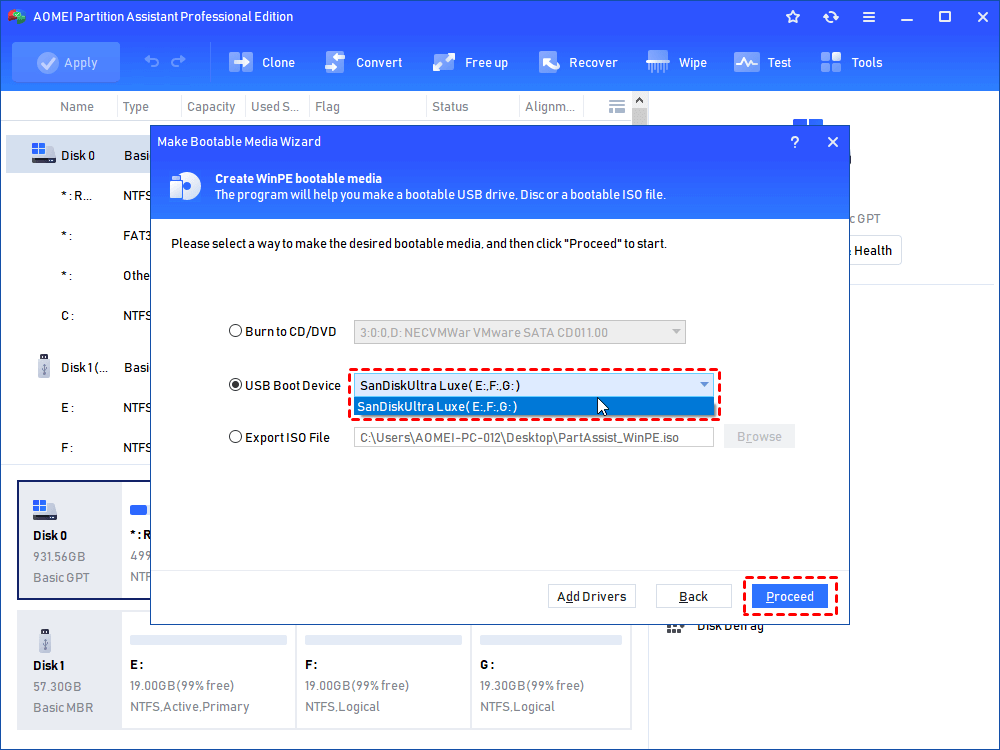
1. Run the installed software. In the top toolbar, click "Tools" and then select "Make Bootable Media".

2. Choose "USB Boot Device" or "Burn to CD/DVD" according to your device. and follow prompts to finish the process.
3. Once the bootable device is created, insert it to your computer. And enter BIOS to boot up your PC.
4. Then you will see AOMEI Partition Assistant, right-click on the system C drive, and choose "Format Partition".
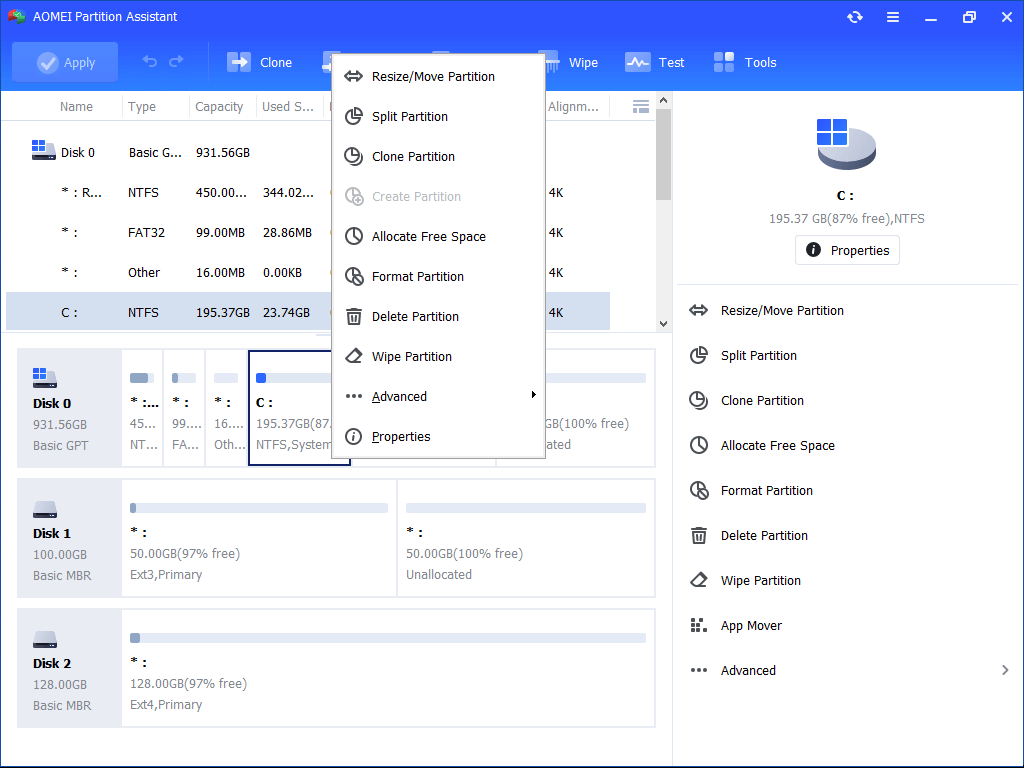
5. Choose a file system. Here, we choose "NTFS" file system.
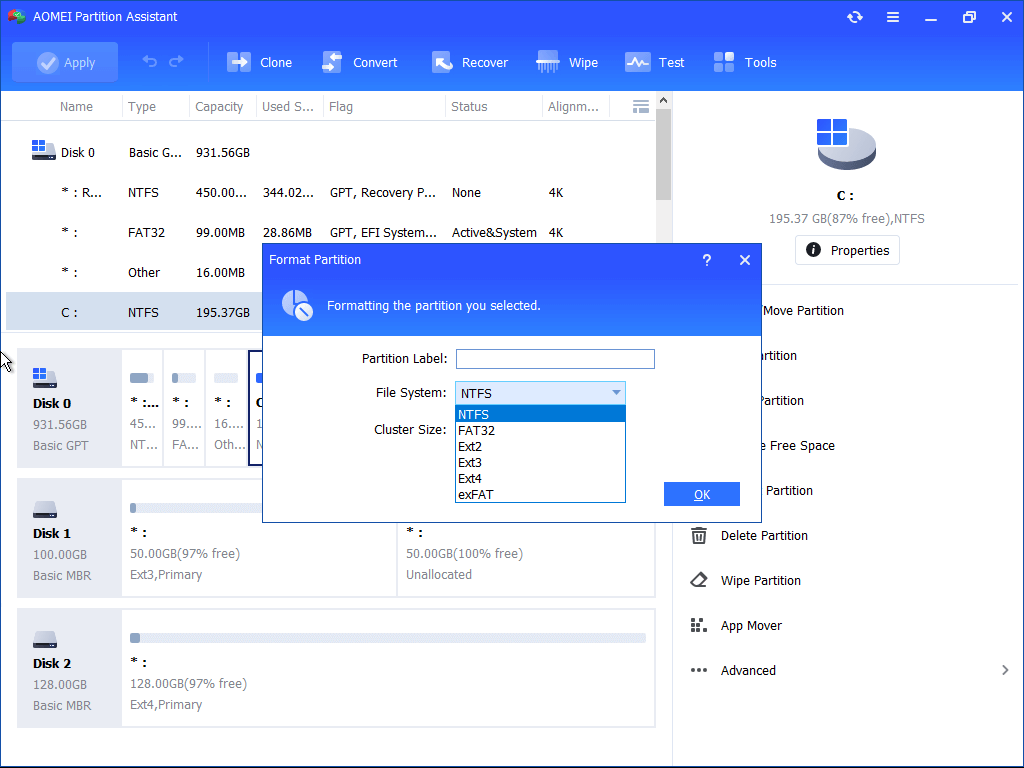
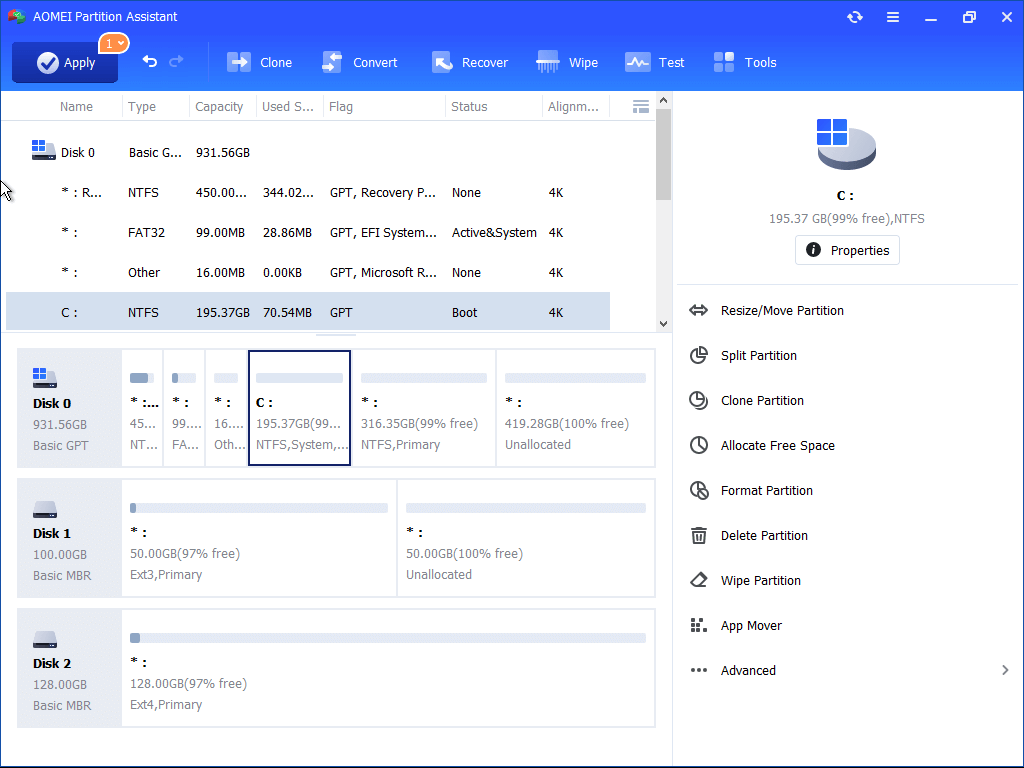
5. Click “Apply” to apply this operation.
Final words
Besides solving the problem that system partition is not allowed to be formatted, AOMEI Partition Assistant also gives you the ability to migrate OS to SSD, resize partition, convert MBR to GPT disk without data loss and many more. Furthermore, AOMEI Partition Assistant offers Professional version to easily manage your system partition, you can allocate free space from other partitions to system partition, convert system disk between MBR and GPT, and more. If you're a server user, you can try AOMEI Partition Assistant Server.