How to Solve SSD Write-Protected Issue in Windows 11, 10, 8, 7?
An error message prompt you that SSD is write-protected when you access or change data on the SSD. Relax, this article will demonstrate 4 methods of how to remove write protection from an SSD.
By Michael / Updated on May 12, 2023
Why is a SSD write protected?
Write protection, or read-only mode is used for protecting important data and files from being accidentally deleted or modified. However, once your SSD or another storage device is write-protected, you are not allowed to delete or move data or files on them. Usually, there are 3 reasons why an SSD is write protected.
● Your SSD card has a write protection tab. If the tab can be turn on, you can't change the data on the drive.
● You SSD card is hacked by virus.
● Your SSD card is set to be write-protected manually.
● Bad sectors on the solid-state drive.
Write protection brings troubles. It does not allow you to modify write any data to the drive until it is removed. Fortunately, whether you are using Sandisk, Samsung, West Digital SSD, you can refer to the following methods to remove write protection in Windows 11, 10, 8, 7.
How to solve SSD write-protected issue with 4 methods?
Firstly, run anti-virus to check whether your SSD is affected by virus. If your SSD being read-only isn’t related with virus infection, you can check the following 3 ways about how to change SSD from read-only status to normal. You should choose one or more methods according to your specific situation.
Method 1. Remove write protection from SSD using CMD
If your SSD has been set to be read-only in Diskpart accidentally, you can disable it for the SSD using CMD. Here are the steps below.
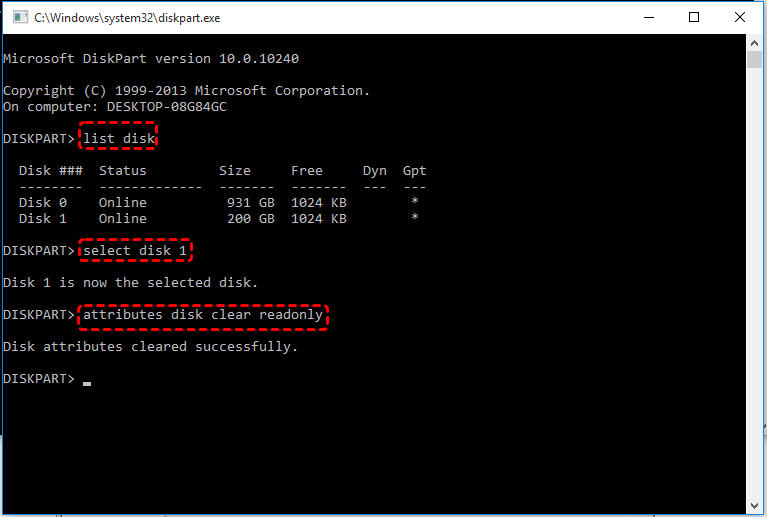
Step 1. Press "Win+R" to open Run dialogue and type "CMD" press "Enter" to open Diskpart.
Step 2. Type "list disk" and hit Enter to get information of every disk.
Step 3. Type "select disk n" and press "Enter" ("n" is the number of your SSD drive on your computer).
Step 4. Type "attributes disk clear readonly" and hit "Enter".
Then you can try to access the SSD to see if the "SSD write-protected" issue is solved.
Method 2. Solve SSD write protected issue via Registry Editor.
Incorrect value number of Windows Registry Key is another reason why a SSD get write-protected. Follow these steps and try to reset the value data on Registry Editor to remove write protection.
Step 1. Press “Win +R” to start Run, and type “regedit” to open Registry Editor.
Step 2. Navigate to the following path on the left window:
Computer\HKEY_LOCAL_MACHINE\SYSTEM\CurrentControlSet\Control\StorageDevicePolicies.
Step 3. Double-click the "WriteProtect" and change the Value Data from “1” to “0”.
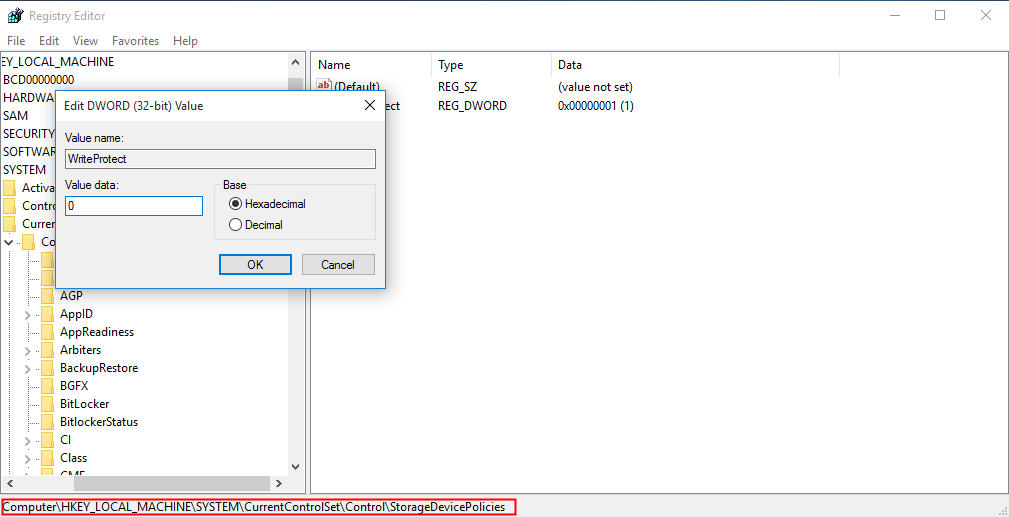
Then click “OK” to save. Reconnect your SSD to computer, your SSD should not be write protected any longer.
✍Note: If you can't find the StorageDevicePolicies under Control in step 2.
1. Right-click the “Control” and choose “New>Key” to create a new key, name it with StorageDvicePolicies.
2. Click the new key, and right-click on the blank space, choose “New”> “DWORD (32-bit) value” name it with "WriteProtect".
3. Right-click on Writeprotect, choose “Modify”, change the Value data to "0" in the prompt window.
If this method doesn’t help you out, go to the method 3.
Method 3. Check bad sectors on the SSD
Sectors are the smallest storage unit on a drive. If there are some bad sectors on an SSD, the read-only protection can be triggered. You can turn to a professional SSD repairing software-AOMEI Partition Assistant Standard. It is featured with "Check Partition" that scan through all sectors via CHKDSK checking program and repair the sectors aucomatically.
Install the tool, and follow the steps below.
Step 1. Open this AOMEI Partition Assistant, you will see all connected storage devices will be demontrated on the main interface. Right-click on the partition on the SSD, and choose "Advanced"> "Check Partition".

✍Note: If your SSD contains more than one partition, you can right-choose the whole drive and click "Surface Test".
Step 2. Tick "Check partition and fix errors in this partition by using chkdsk.exe", and hit "OK".

Step 3. The program will start scaning all sectors, you can see the progress on this window. When it is finished, click "OK" .

Method 4. Format write-protected SSD with AOMEI Partition Assistant.
File system corruption is another cause for it. If all the methods mentioned can’t solve the write protected issue, you may need to format the SSD to rebuild the file system. And AOMEI Partition Assistant can also help you to format a drive to NTFS, FAT32, Ext2, Ext3, Ext4 file systems.
✍Warning: Formatting will delete all your data on SSD drive. Before this operation, you should backup the SSD.
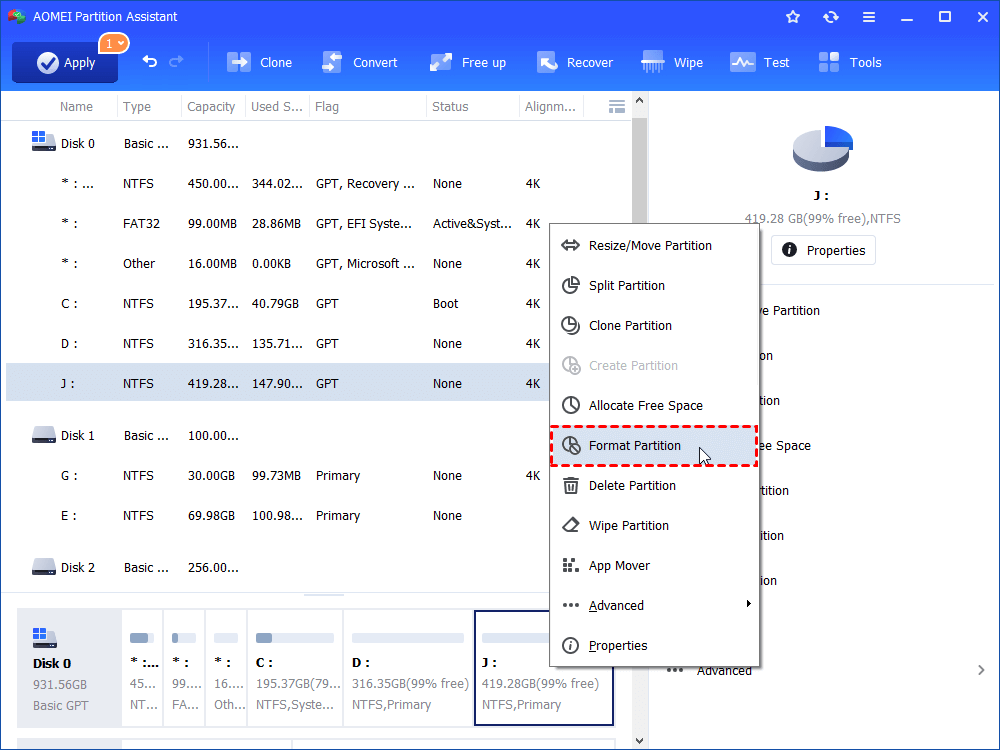
Step 1. Download AOMEI Partition Assistant, install and open it. Right-click the read only SSD partition and select “Format Partition”.
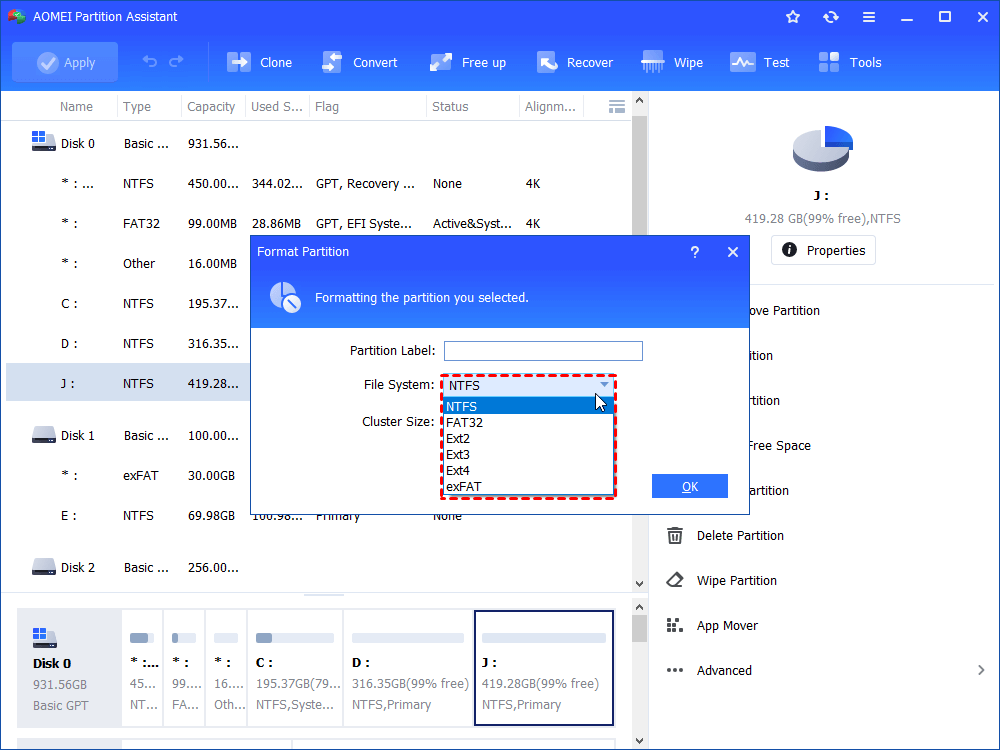
Step 2. Select a compatible file system on the prompt window, here we select NTFS. And click “OK”.
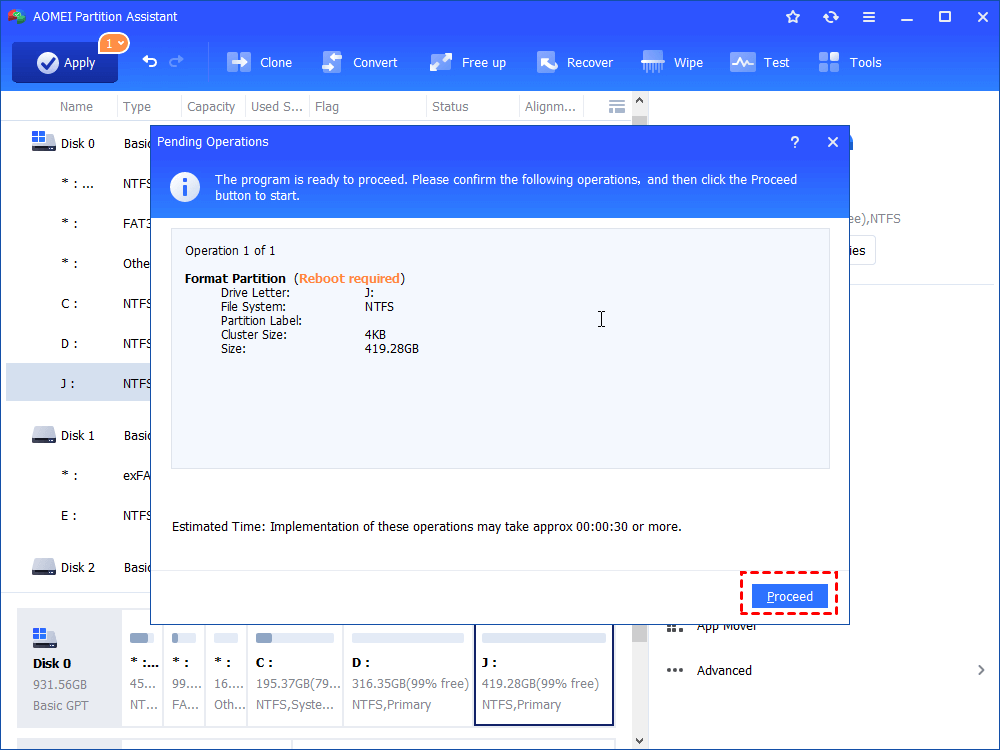
Step 3. In the main interface, click “Apply”> “Proceed” to execute the formatting operation.
Conclude
That’s about how to solve SSD write protected issue. The 4 methods can be also applied to Samsung, Sandisk, Intel, Kingston SSD, even assist you in removing write protection from USB or other devices, you can choose them according to specific conditions.
In addition, AOMEI Partition Assistant mentioned above is actually a powerful tool to to manage your disk and partition. besides removing write protection, it allows you to resize/move/delete/split/merge partitions and deal with basic partition problems. If you need more advanced features, such as SSD secure erase, wipe SSD with writing random data, you can upgrade to Professional.