SSD Slowing Down? 7 Quick Tricks to Make SSD Run Faster!
Have you ever found your SSD slowing down? Relax. Here we will share you with 7 quick tricks to help make your SSD drive run faster with improved writing or reading performance! Pick the best one now.
By Emily / Updated on July 9, 2024
SSD is slowing down, what should I do?
“My Solid-state drive (SanDisk Ultra 2 SSD) boot times are getting progressively longer, to the point now it's pretty much like an HDD. My loading for games are becoming slower and slower. Is the fix for this to reinstall the OS or is there something else I can do?”
Can SSD slow down over time? If you have used an SSD (solid-state drive) on your computer, you might experience similar issues as SanDisk or Samsung SSD slow especially when it is almost full. Then you will find it takes a longer time to open or load any apps/program. What's worse, sometimes it causes freezing problems. Now you might probably be asking: Isn’t SSD supposed to run faster? Is there any feasible solution to SSD slowing down in Windows computers? The answer is yes.
7 Quick tricks to make SSD run faster in Windows 11/10/8/7
No matter which solid-state drive, like Samsung, SanDisk, Kingston SSD or another famous one, you are using on Windows 7, 8, 8.1, 10, or 11 system-based computers, the below 7 tricks can help with SSD running slow problem. (We will take how to deal with this issue in Windows 10 as an example, and these methods also apply for Windows 7/8/8.1.)
▌Trick 1. Ensure your SATA controller runs in AHCI mode
Generally, before installing the operating system, you should enter BIOS and enable AHCI (Advanced Host Controller Interface) mode instead of IDE in the SATA controller’s configuration area. AHCI is much better for optimizing SSD performance while IDE is always the default option during installing an HDD. On the other hand, it is also possible to change your SATA mode from IDE to AHCI mode even after you have installed Windows.
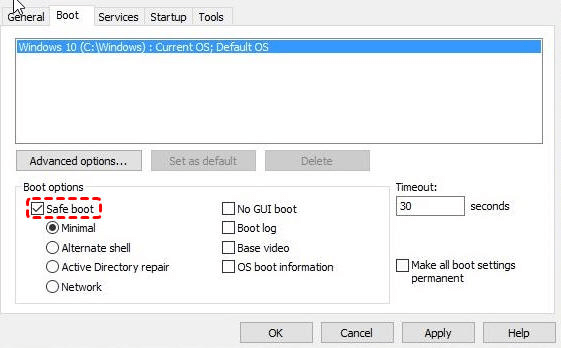
Step 1. Press "Win+R" at the same time and type "msconfig" and then press Enter.
Step 2. Under "Boot' tab, tick "Safe boot", save the changes and reboot.
Step 3. Constantly press a specific key (mostly F2, DEL) to boot into "BIOS" setting, and change SATA mode from "IDE" to "AHCI". Then save the changes and exit.
Step 4. Reboot your computer, and Windows will boot in safe mode this time. Run "msconfig" again, and untick "Safe Boot" and restart your computer. Now you are done and you can check whether the SSD is still running slow or not.
▌Trick 2. Make sure TRIM is running
It is well known that an SSD drive has to clean the data that is marked for deletion before you can add new data onto it, and the cleaning process will cost much time. Thus, the SSD speed will drop down when it is writing. The TRIM technology is introduced aiming to enable the OS to tell the SSD that data blocks are unnecessary and can be deleted, and then automatically wipe them so as to speed up data writing. To put it simply, an SSD drive will run rather slow if the Trim is not running. On the contrary, a great speed boost is possible. Follow the steps to make sure the TRIM is enabled.
Step 1. Type cmd in Windows search. Once the cmd program appears, right-click it and select Run as administrator.
Step 2. Then, in the Command Prompt window, type this command: fsutil behavior query disabledeletenotify.
Step 3. Press Enter, after a short while, Command Prompt will display one of the following two messages:
-
“NTFS DisableDeleteNotify = 0”: means the TRIM is enabled on your SSD.
-
“NTFS DisableDeleteNotify = 1”: means the TRIM is disabled on your SSD.
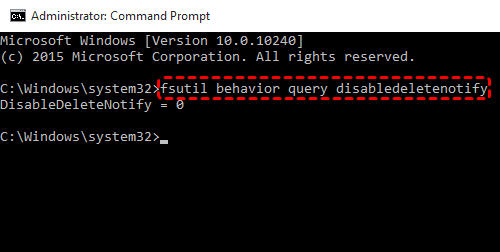
If you get the second message, you can input the command: fsutil behavior set disabledeletenotify 0, and press Enter on your keyboard to enable it.
▌Trick 3. Avoid Disk Defragmentation
Disk Defragmentation is quite useful for hard drives with moving parts since it can bring all the parts of a file together and reduce the file system fragmentation to improve the data retrieval efficiency.
However, this should never be used on an SSD because it does not have any moving parts, so whether the files are fragmented is not important. If you run defragmentation on SSD, it will add extra wear and tear by increasing the number of writing and reading, and finally lead to the SSD slowing down and even decrease its expected lifespan. It is wise to disable the disk defragmentation on SSD.
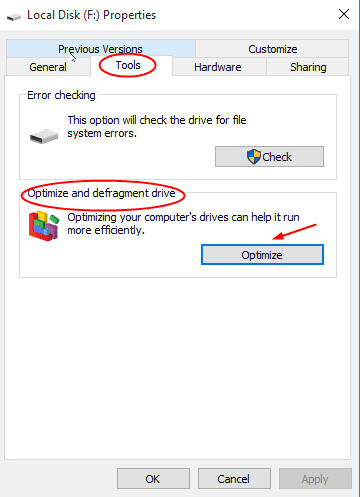
Step 1. Open "File Explorer". Right-click the SSD you need to optimize and select "Properties" from the context menu.
Step 2. Select the "Tools" tab, and then click the "Optimize" under the "Optimize and defragment" drive section.
Step 3. Click on the "Change settings" button. A mini window will pop out, then untick the "Run on a schedule" and click "OK".
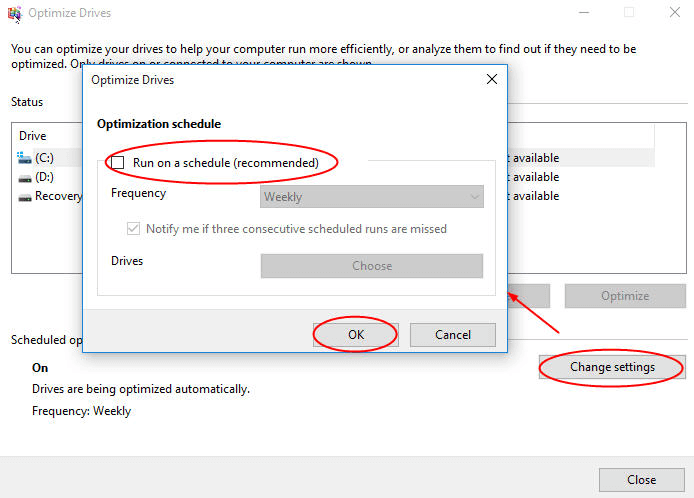
After disabling, you can optimize SSD performance on your PC.
▌Trick 4. Verify Hibernation is disabled
This is a trick I assume some SSD users are likely to ignore, but you should if you really want to get rid of SSD slowing down in Windows 11/10/8/7. Disabling the Hibernation could free up lots of disk space on your SSD since it always takes up about the same amount of capacity as RAM installed in the computer. Here is how to disable Hibernation:
Step 1. Click the "Search box" and input "cmd", right-click the command prompt icon and select "Run as administrator".
Step 2. In the command line window, type "powercfg -h off" and press Enter.
▌Trick 5. Enable Write Caching for SSD
Write caching can do a great job of boosting SSD speed and performance. So my recommendation is to turn it on. Basically, it is enabled by default, but just in case here is the instruction on how to enable it on your computer.
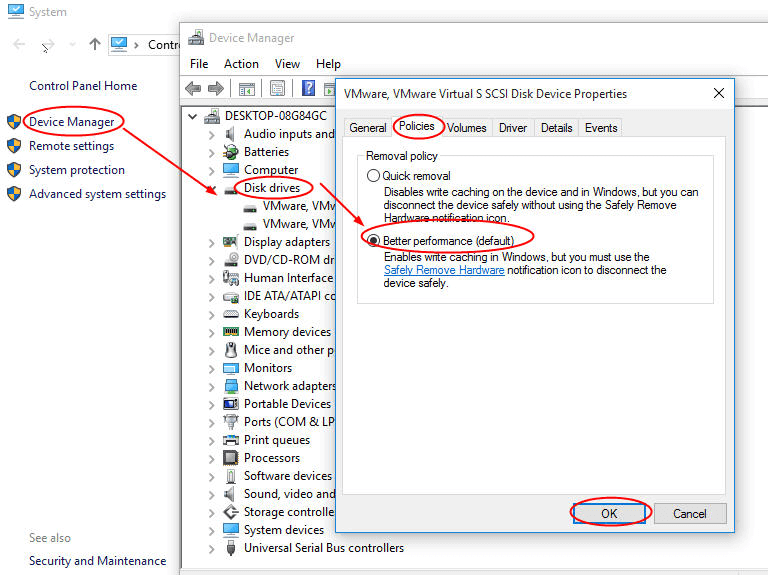
Step 1. Right-click "Computer" and hit "Properties".
Step 2. Click "Device manager" on the left, then expand "Disk drives".
Step 3. Find and right click your SSD, choose "Properties" and go to the "Policies" tab.
Step 4. Make sure "Enable write caching" on the device is ticked and click on "OK".
▌Trick 6. Make sure the SSD partition is aligned
Partition alignment is a new concept of SSD. It is of great importance for improving the SSD writing and reading data speed. So if the partitions are not aligned, there are chances that your SSD is running slow in performance. If you have never heard about this and have no idea how to align these partitions, luckily, here we will introduce a quick way to help check and realize SSD partitions alignment.
All you need is AOMEI Partition Assistant Professional, which is a very versatile SSD optimazition software, supporting Windows 11, Windows 10, Windows 8.1/8, Windows 7, Windows Vista and XP. It could not only allow you to check whether the partitions on SSD are aligned or not, but also empower you to align them in a few clicks. Below is the detailed guide.
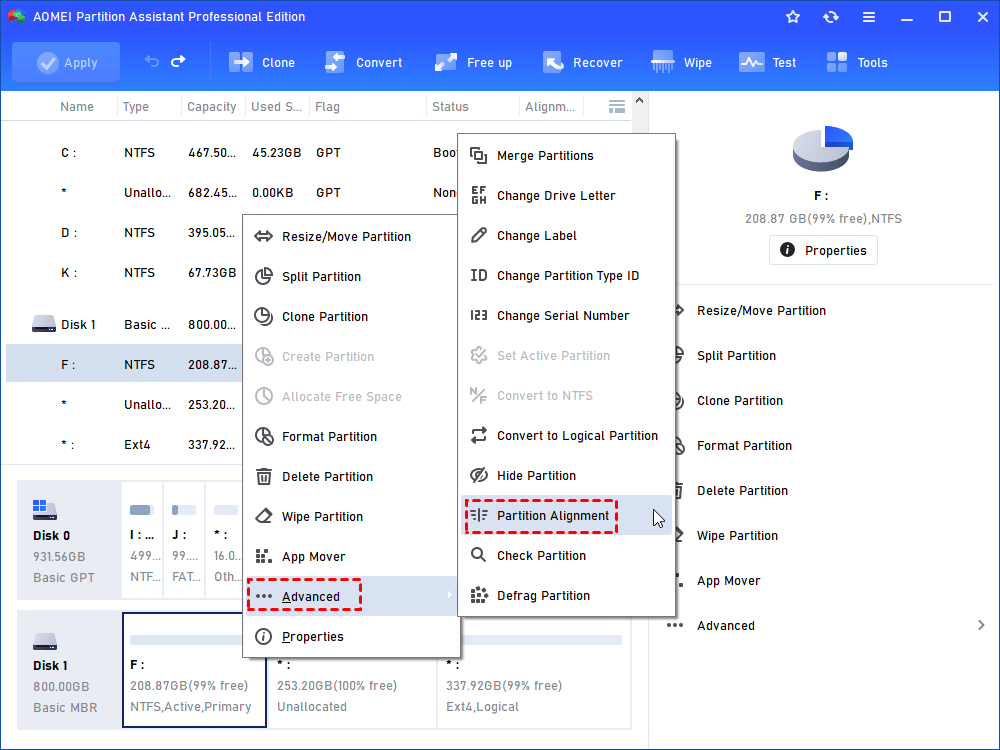
Step 1. Install and launch the AOMEI Partition Assistant Pro, find the SSD you want to optimize and right-click one of its partition, select Advanced -> Partition Alignment.
Step 2. In the mini window, you can set partition 4K alignment (4096 Sector). And click OK to continue.
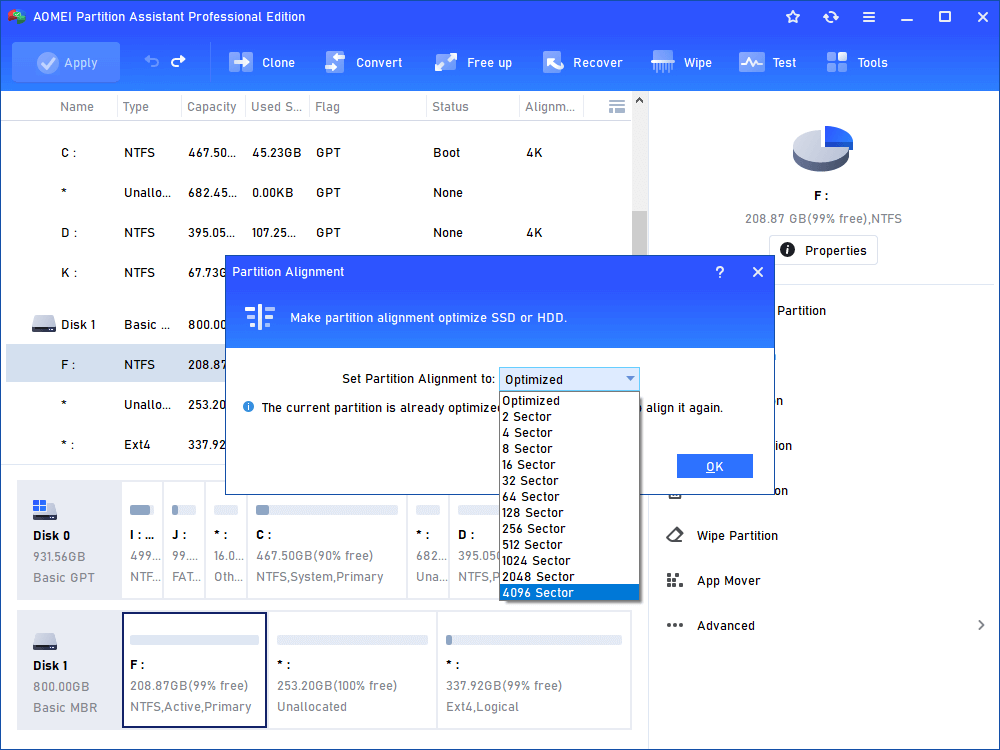
Note: If the program shows "The current partition is already optimized thus there’s no need to align it again", then it means the partition has been aligned. In such case, you can continue to check other partitions of this SSD.
Step 3. Finally, click Apply and Proceed to commit the pending operation.

▌Trick 7. Securely erase SSD
If your SSD drive slows down when full, you can transfer data from the SSD to another SSD or HDD as a backup, then securely erase it for reuse. For this task, AOMEI Partition Assistant Professional can also help you. It has a function named “SSD Secure Erase”, which can erase all data from the target SSD drive without hurting its lifespan and performance.
It is an effective way to reset the SSD performance to the original level. But this function can only work on Windows 7 computer, so you need to connect the SSD which is slowing down to a Windows 7 computer, then follow the steps to securely erase it.
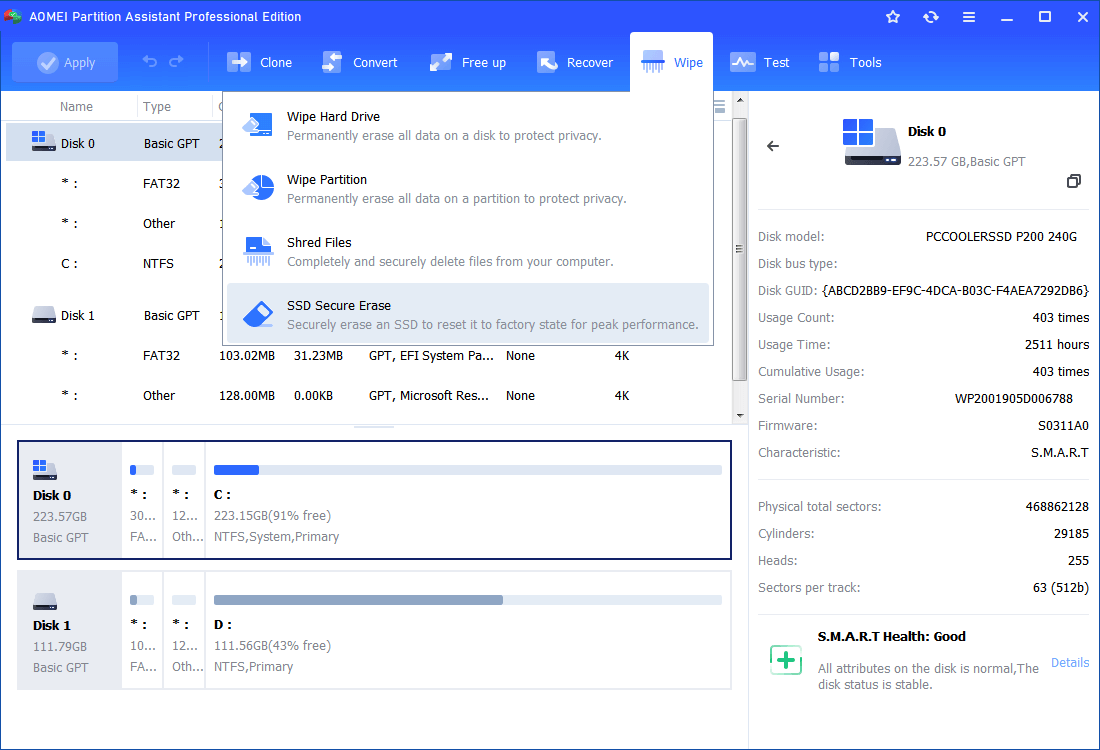
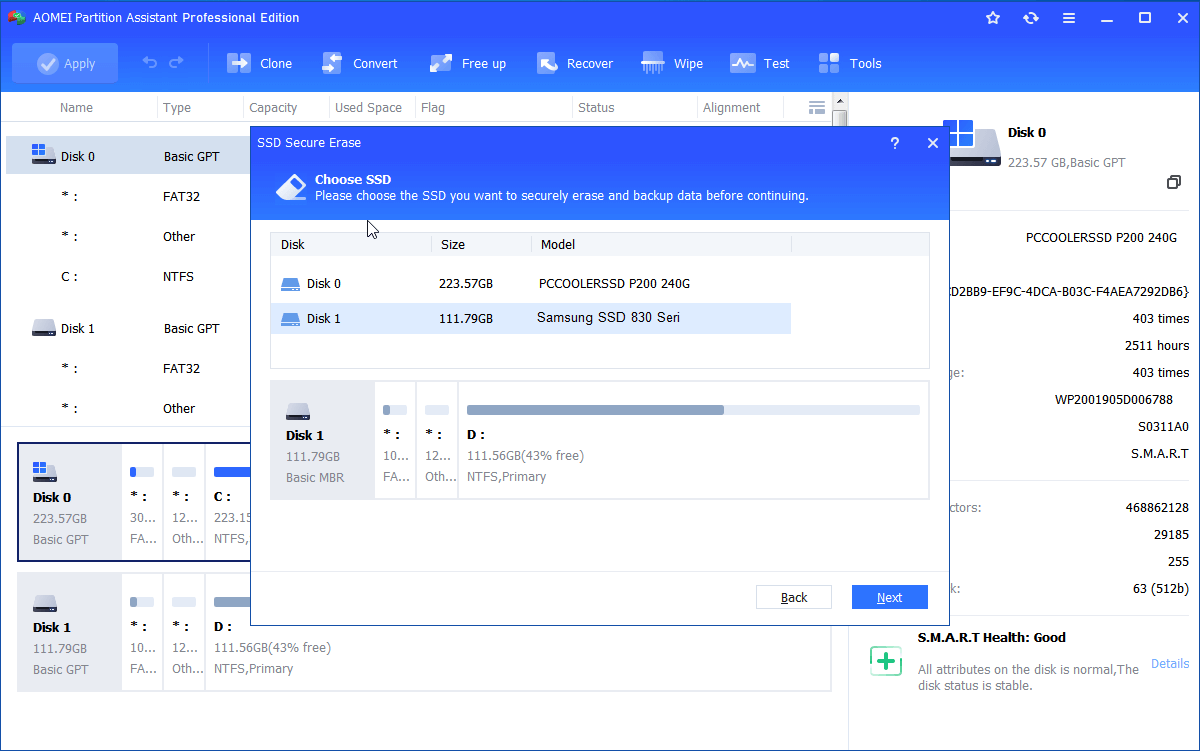
Step 1. Run AOMEI Partition Assistant Professional. Click “Wipe” on in the top toolbar, and choose “SSD Secure Erase”.
Step 2. Choose the target SSD from the given disk list and click “Next”.
Step 3. Here you can check the identification information of the selected SSD drive. Then click on “Next” to continue.
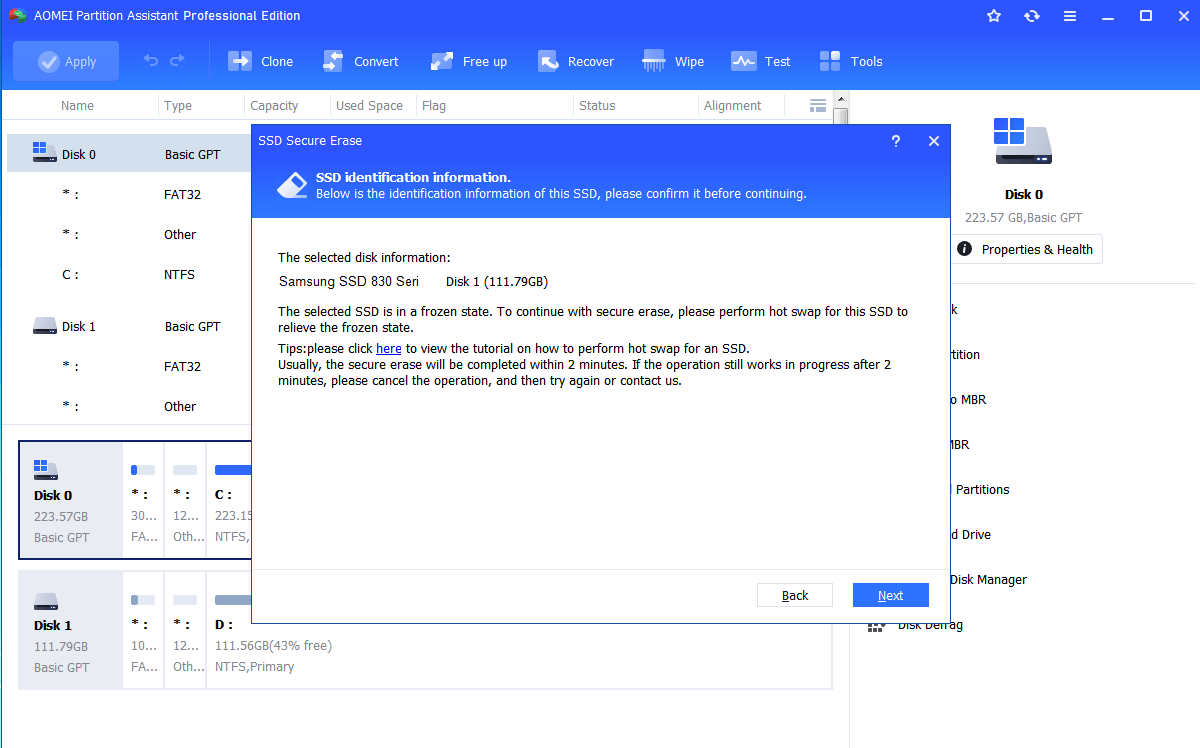
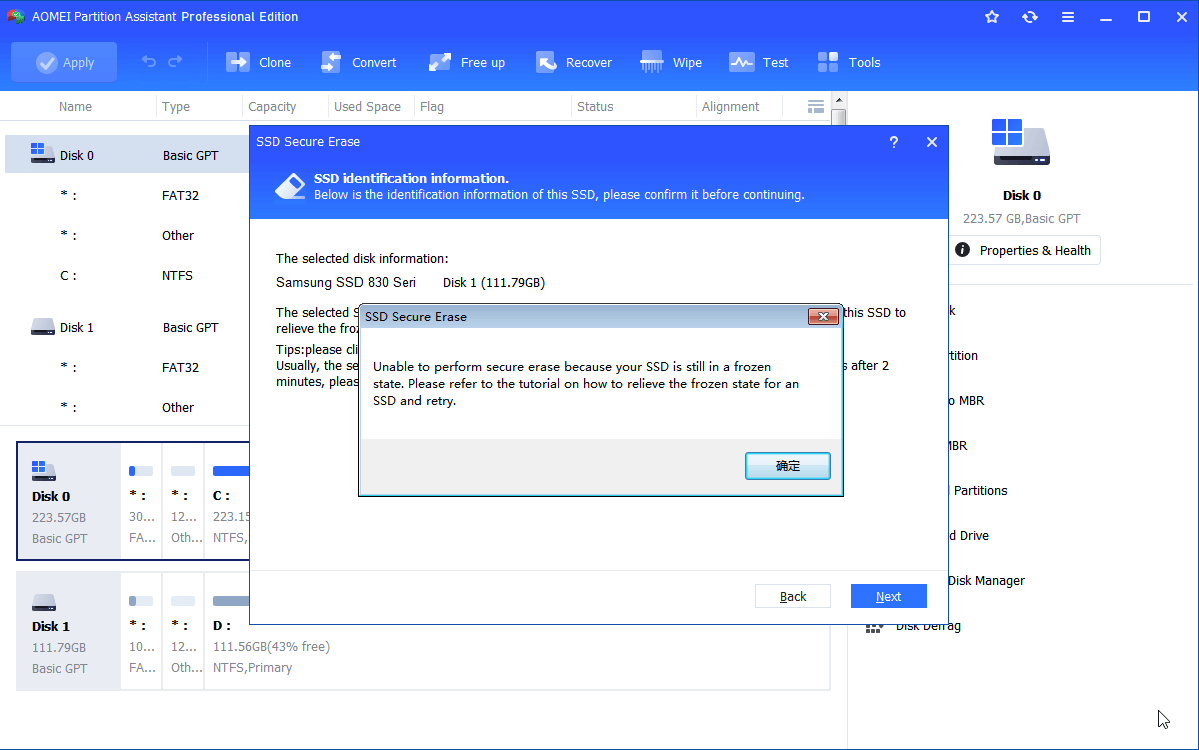
Step 4. If you receive the following message saying your SSD drive is in a frozen state and the process is halted, you can refer to the given tutorial to relieve the frozen state.
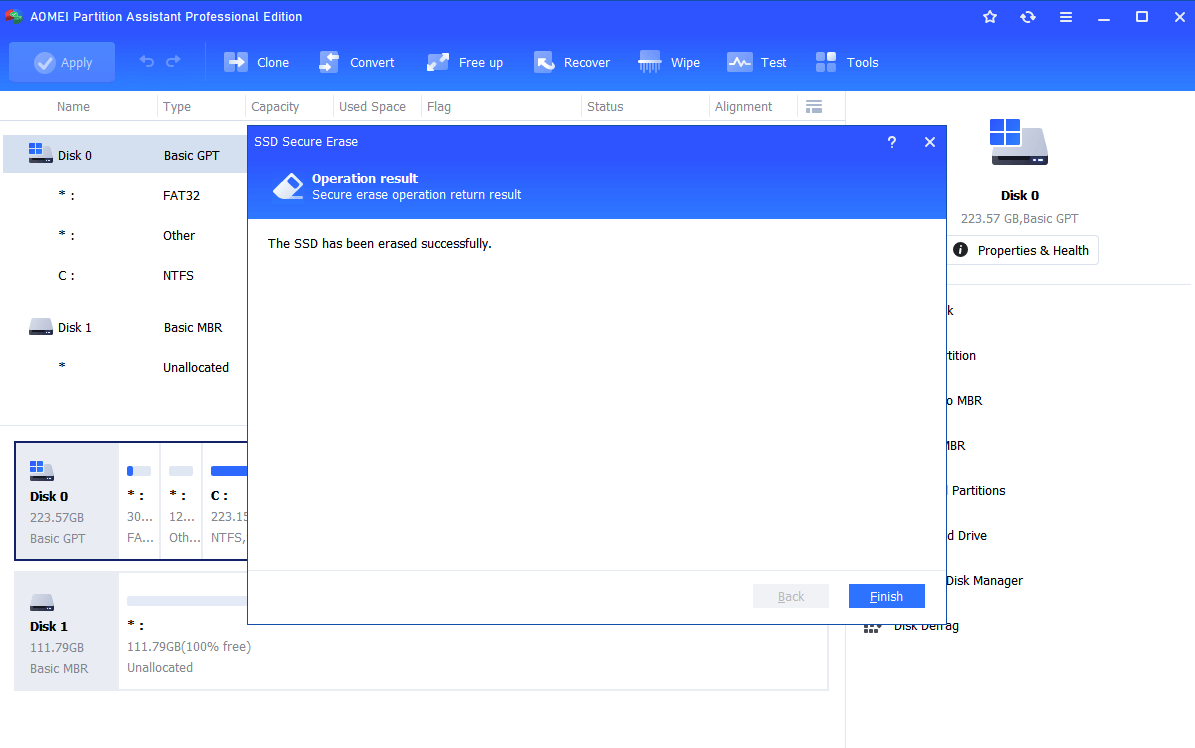
Step 5. After that, click “Next” again. And then simply wait the process to be completed.
Bottom Line
With the above seven quick and effective tricks, now you can easily tackle with SSD slowing down issue in Windows 11/10/8/7. I hope you can find the proper solutions for your situation. However, in order to avoid the SSD drive slowing down again in the future, it is not wise to fill the Solid State Drive to full capacity, or store large and infrequently accessed files on the SSD.
Worth mentioning, if you find your HDD is slowing down, you can make use of "Schedule Defrag" function to automatically defragment the HDD as scheduled and optimize the disk performance. If you are running Windows Server, please try AOMEI Partition Assistant Server.

