SSD Erase Tool: Securely Wipe SSD before Installing Windows
Want to secure wipe or erase an SSD before installing Windows? This article will show you how to securely wipe data on SSD with a professional SSD erase tool within four steps.
By Bryce / Updated on May 12, 2023
Navigation
✎ What is SSD Secure Erase?
✎ Securely wipe an SSD before Windows installation
✎ Choose a professional SSD Secure Erase tool
✎ Securely wipe or erase SSD within four steps
What is SSD Secure Erase?
It is necessary to realize what Secure Erase is prior to securely wiping an SSD before installing Windows. As the internal structure of SSD differs from HDD, it is non-viable to take the same way to wipe data on SSD as on HDD. Thus, Secure Erase, a function of SSD that allows you to delete all data on SSD permanently and restore SSD to its peak performance appears. With the help of ATA command lines, it is able to sanitize SSD by writing a binary one or zero to SSD. The whole data on SSD is cleared and the time of reading and writing will be less.
Securely wipe an SSD before Windows installation
When computer users encountered some problems with their existing Windows system, they usually intend to make fresh windows install on the SSD. In order to avoid trapping in the loop of reading – erasing – modifying –writing, you have to wipe all the data on the partition that the system will install on. Since it is not advised to partition SSD, in most cases, SSD owns one partition. That is to say, you have to delete the whole data of SSD if you want to do a clean install on it.
Generally speaking, what you need to do is simply format SSD or delete all partitions on SSD to erase all data during the installation. But if your SSD performance has been poor after used for a long time, it is highly recommended to securely wipe or erase SSD for a clean install. Thus, you can make the SSD at its sharp shape before Windows installation and get a great user experience when using the SSD as the system disk.
Choose a professional SSD Secure Erase tool
As what has described in format, the structure of SSD is different from HDD’s, those HDD erase tools such as CCleaner and DBAN are unsuitable for SSD. In such a case, how can you easily and securely erase SSD for clean install?
As for some brand SSDs, there are SSD Secure Erase tool offered by SSD manufactures. If your SSD belongs to Samsung, you can apply Samsung Magician to complete Samsung SSD Secure Erase. If the brand of your SSD is Intel, Intel Solid-State Tool can help you. In a word, you can employ corresponding software according to your SSD brand. As for those SSDs without specially provided Secure Erase software, you have to seek out third reliable and professional third party software to complete SSD Secure Erase in Windows.
Here you can try AOMEI Partition Assistant Professional. It is applied with ATA Secure Erase command line and able to irrevocably delete all the data of SSD. With a concise user interface and command-line operations hidden, it is easy to operate even for a novice. What’s more, with powerful compatibility, it can almost be used to securely wipe or erase all kinds of SSDs from various brands.
Securely wipe or erase SSD within four steps
To make SSD Secure Erase before Windows installation, you have to make preparation below:
▪ Connect your SSD to a computer running Windows 7 via SATA port and ensure that it can be detected by the Operating System.
▪ Backup your essential data on SSD to external device or network, so you can restore them after Windows installation.
Then, follow these few simple steps (take SanDisk SSD Secure Erase as an example):
► It's available to download the demo version of PA Pro to have a try!
Step 1. Install and fire up it. Then click on "Wipe"> “SSD Secure Erase” button in the main user interface.
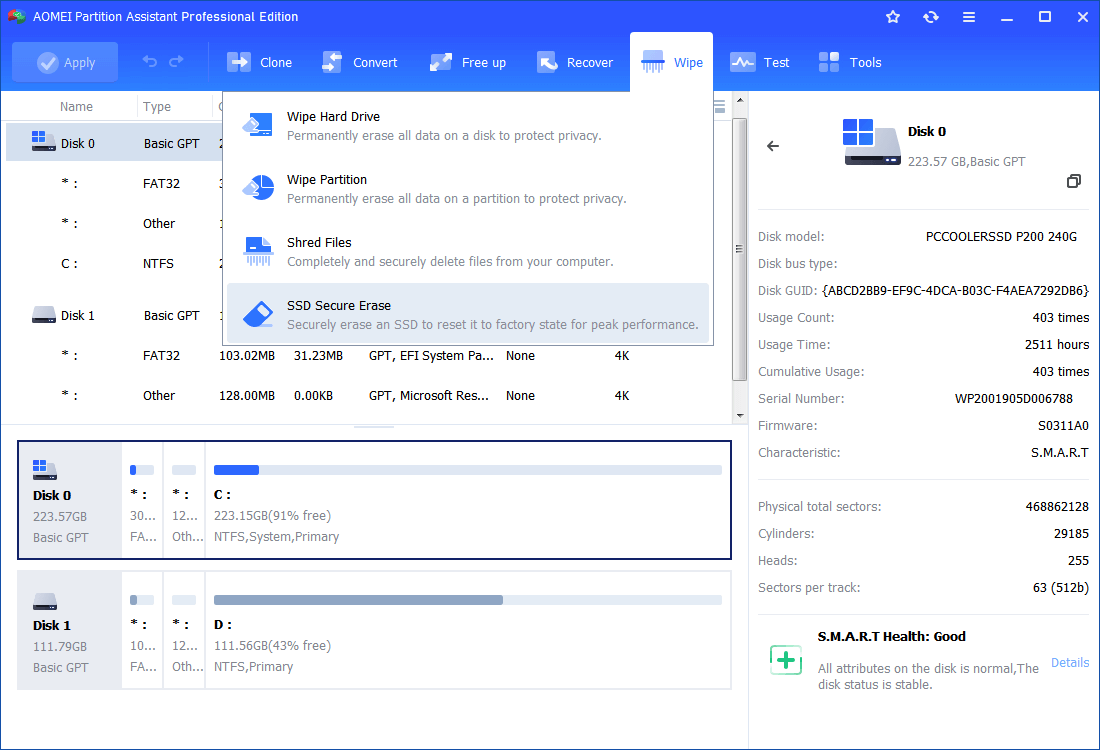
Step 2. choose the SSD that you want to securely erase and click “Next”.

Tips: If you are unable to figure out which SSD is the right one, you can double click the SSD to get detailed information about the selected SSD.
Step 3. It is likely to see that the selected SSD is under frozen state, you need to make hot swap to release it.

Hot Swap:
▪ Open case cover when your computer is desktop and open back cover or hard shell when it is a laptop.
▪ Find the location of the target SSD; then, unplug power cable and SATA cable in sequence.
▪ Plug SATA cable into the SATA or IDE port and power cable into the power port in order.
▪ Finally, close the cover.
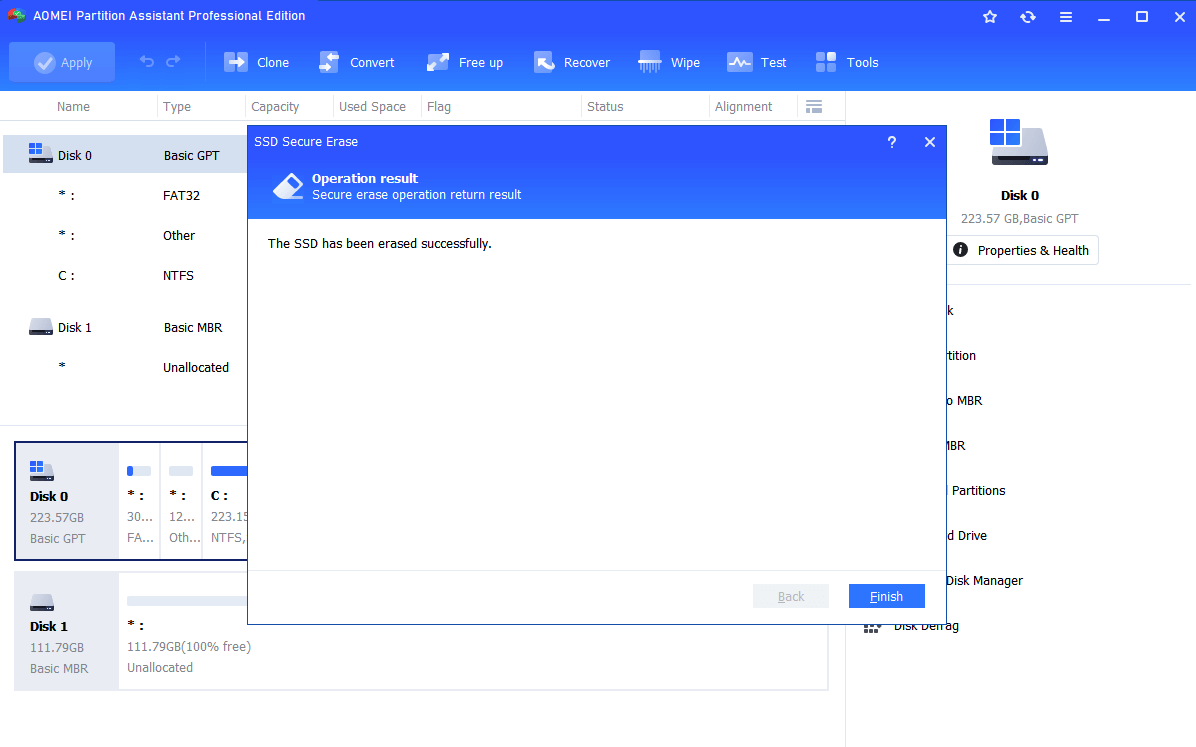
Step 4. Then, you can click "Next" to continue the SSD secure erase and the process will be finished in a very short time.
Notes:
▪ AOMEI Partition Assistant allows you to wipe HDD securely and effectively as well.
▪ It is available to upgrade your existing SSD with a larger one by cloning SSD to larger SSD.
To some degree, SSD Secure Erase will affect its lifespan, but the improved performance deserves the loss of lifespan. Thus, it is a wise option to securely wipe or erase SSD before installing Windows if the performance of SSD has dropped.