Two Methods to Securely Erase Data on SanDisk Extreme SSD
This article will show you two ways to securely erase data on SanDisk Extreme SSD. Secure Erase SSD will not only be able to wipe all the data on SSD, but also to recover SSD to its peak performance.
By Bryce / Updated on July 15, 2024
Can I restore my SanDisk Extrem SSD's performance?
“I have one 480 GB SanDisk Extreme SSD installed on a Dell desktop running Windows 7. It is fact that SSD owns better performance than HDD. But, recently, both the program loading speed and system booting speed are becoming lower and lower. It seems that the performance of SSD has gone down after being used for long time. I have formatted my SanDisk SSD, but there is much help. Should I purchase a new SSD to replace it or is there a way to recover my SanDisk Extreme SSD lost performance?”
You need to securely erase SanDisk Extreme SSD
There is no need to replace your existing SanDisk SSD with a new SSD. Have knowledge of the reason for SSD's lower performance and you will have an idea about what to do. Written cells on SSD have to be erased before new data is stored; therefore, if there are no new written cells to store new data and cells are be reused, the performance of SSD will degrade. That is to say, if you want to make SSD at original status, you need to totally erase the written cells, which is beyond the ability of format. In such a case, you can securely erase data on SanDisk Extreme SSD to reset it to factory value and restore its peak performance rather than just format SSD.
Securely erase SanDisk SSD via SanDisk SSD Dashboard
SanDisk Dashboard is a SanDisk SSD tool that can be installed on Windows Vista/7/8/8.1 (32bit or 64bit). This tool owns various functions such as “create bootable USB drive”, “Secure Erase” and “update firmware”. To make SanDisk Secure Erase, you have to download SanDisk Dashboard from official website. Then install and fire up it. When you run this application, it will automatically scan for SanDisk SSDs. Then you can do as follows:
1. Choose the corresponding SSD that you need to securely erase.
2. Choose “Secure Erase” on left panel under “Tools” menu.
3. Click “Erase Now”. Then SSD will be erased and present in the form of an unformatted space.
PS:
▪ If your SanDisk SSD is not showing up in the SanDisk SSD Dashboard, you can reconnect it and click on refresh.
▪ When your SanDisk is the boot drive, create a USB drive with SanDisk Dashboard. What I want to notice you is that the file system of USB must be FAT or FAT 32.
Simpler tool: securely erase SanDisk Extreme SSD
Apart from SanDisk Dashboard, you can try a simpler SSD Secure Erase utility - AOMEI Partition Assistant Professional to securely erase data on SanDisk Extreme SSD. This tool is featured with a simple and concise operation interface and comprehensive functions based on disk management. It permits you to securely erase SSD or wipe all the data on HDD.
What’s more, it allows you to clone a hard drive or partition to another one, make conversion between NTFS and FAT 32 without data loss, and change dynamic disk to basic. You can follow the instruction below to securely wipe or erase SanDisk SSD.
Things that you have to know:
SSD Secure Erase has to be performed under Windows 7 environment. Therefore, you should ensure that the computer operating system is Windows 7. If the system is not Windows 7, you can uninstall your SSD and connect it to a computer with Windows 7.
Note: You can free download the demo version of AOMEI Partition Assistant Professional to have a try!
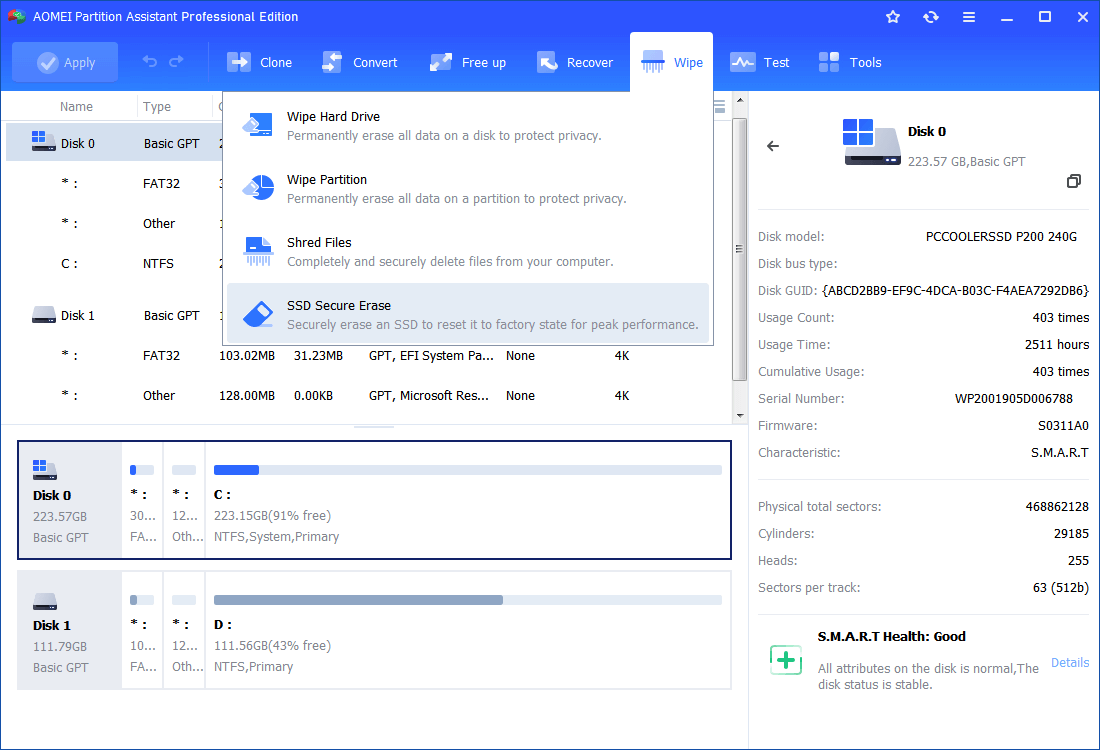
Step 1. Install and run the software, click the SSD that you need to securely erase and choose "Wipe"> "SSD Secure Erase". Click "Next".
Step 2. Choose the SSD that you want to erase and click "Next".

Step 3. You might see that the selected SSD is in a frozen state. Then, you can do a hot swap.

The steps to do hot swap are as follows:
▪ Open case cover of desktop or back cover or hard shell of laptop.
▪ Locate where the selected SSD is and unplug power cable and SATA cable.
▪ Connect SATA cable and power cable.
▪ Close the cover.
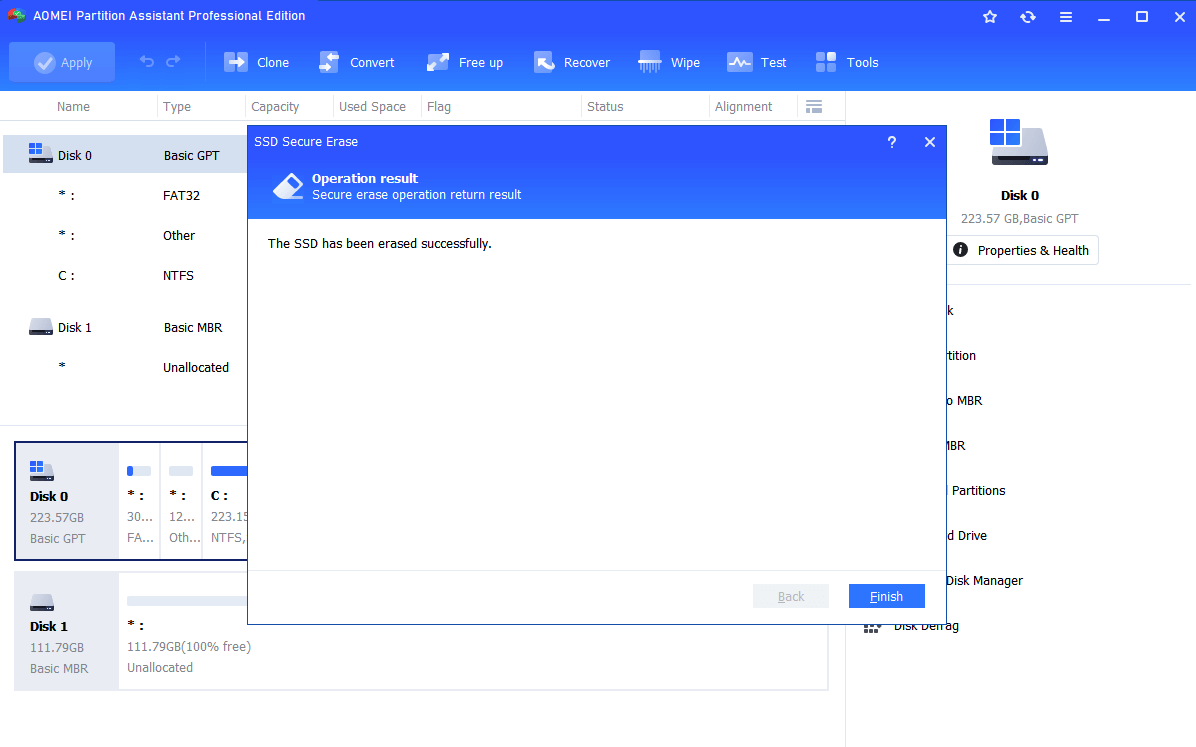
Step 4. After hot swap, you are able to securely erase the SanDisk SSD.
Notices:
▪ It is advised to backup important data before starting SSD Secure Erase
▪ When the SSD is the boot drive, you can create a bootable media via AOMEI Partition Assistant Professional. Then you can boot from the media to do SSD Secure Erase.
▪ Apart from SanDisk SSD, AOMEI Partition Assistant is compatible with various brands SSD such as Intel SSD, Kingston SSD, Samsung SSD, etc.
Conclusion
When your SanDisk Extreme SSD is under its performance, don’t hurry to abandon it before securely erasing data on it. After that, you can check whether if the performance of SSD is recovered. If so, you can make a clean install on it and put it into use. If not, you can throw up it as SSD secure Erase has deleted all the data on it permanently.